vue中$nextTick作用和实例
发布时间:2023年12月28日
为什么要使用nextTick?
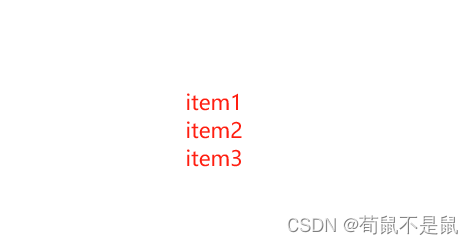
vue中DOM更新是异步执行,相当于我们在修改数据的时候,视图是不会立即更新的,会先把新的数据攒一赞,例如假如v-for更新这三个数据item1和item2和item3,按照vue的特性dom更新的特性会把item1、item2、item3全部更新后才会更新dom,这个时候如果还没有吧这三个数据更新完的时候想获取item1的话就会无法获得item1的值,正是为了应对这种情况才vue出现了一个api:nextTick
作用实例:
1、修改dom元素进行判断在修改样式:
如果不加nexttick的话点击事件触发的时候,字符串变红,然后dom元素更新,但是条件判断并不是更新后执行的,所以第一次点击时时不会付出判断条件后面的语句的
<template>
	<div>
		<div :id="myid" class="" ref="str">123456789</div>
		<button @click="changeColor()">修改dom元素</button>
	</div>
</template>
<script>
	import {
		nextTick
	} from "vue";
	export default {
		data() {
			return {
				myid: ''
			};
		},
		created() {
			this.$nextTick(() => {
				console.log('3222', this.$refs.str)
			})
		},
		methods: {
			changeColor() {
				this.myid = 'color'
				this.$nextTick(() => {
					if (this.$refs.str.id == 'color') {
						this.$refs.str.className = 'background'
					}
				})
				// if (this.$refs.str.id == 'color') {
				//     this.$refs.str.className = 'background'
				// }
			}
		}
	}
</script>
<style scoped>
	#color {
		color: red;
	}

	.background {
		background: khaki;
	}
</style>
运行效果:

2、在生命周期函数created中操作
因为生命周期created函数是在dom还没有渲染前使用的函数,如果在creted函数中使用dom肯定会报错,所以在函数中可以用nextTick来获取dom如图所示
如果想在created之前更新dom元素就需要要用$nextTick
<template>
    <div><input ref="obj" type="text" :value="string"></div>
</template>
<script>
  export default {
    data() {
      return {
        string:'samsung',
      };
    },
    created() {
      this.$nextTick(()=>{
        this.$refs.obj.value = 'apple'
        }
      )
    },
	mounted(){
	   console.log(this.$refs.obj.value);
	}
  }
</script>
运行效果:

当dom元素更新后控制台打印samsung,最后在执行this.$nextTick中的内容
文章来源:https://blog.csdn.net/m0_65069237/article/details/135251611
本文来自互联网用户投稿,该文观点仅代表作者本人,不代表本站立场。本站仅提供信息存储空间服务,不拥有所有权,不承担相关法律责任。 如若内容造成侵权/违法违规/事实不符,请联系我的编程经验分享网邮箱:chenni525@qq.com进行投诉反馈,一经查实,立即删除!
本文来自互联网用户投稿,该文观点仅代表作者本人,不代表本站立场。本站仅提供信息存储空间服务,不拥有所有权,不承担相关法律责任。 如若内容造成侵权/违法违规/事实不符,请联系我的编程经验分享网邮箱:chenni525@qq.com进行投诉反馈,一经查实,立即删除!
最新文章
- Python教程
- 深入理解 MySQL 中的 HAVING 关键字和聚合函数
- Qt之QChar编码(1)
- MyBatis入门基础篇
- 用Python脚本实现FFmpeg批量转换
- shp与数据库(插入数据)
- 三分钟学完科研论文常用统计图
- DAY4 --English learning
- 详解Vue3中的插槽(slot)
- springboot 注解+AOP实现接口方法出入参打印
- 《吐血整理》进阶系列教程-拿捏Fiddler抓包教程(8)-Fiddler如何设置捕获会话
- 浅谈园区建设“一站式企业服务平台”的必要性!
- 【ZooKeeper高手实战】ZooKeeper 集群读写性能及生产环境参数配置
- Golang 项目如何生成 swagger 文档
- PaddleOCR离线环境搭建