RocketMQ系统性学习-RocketMQ原理分析之源码启动、Broker启动流程分析
RocketMQ 原理分析
启动 RocketMQ 源码
分析 RocketMQ 之前,先确保可以成功启动起来
NameServer 启动
在 Idea 中配置 ROCKETMQ_HOME 环境变量为自己安装 RocketMQ 的位置即可
ROCKETMQ_HOME=D:\Project\IDEA\Rocket-MQ\rocketmq-all-5.1.4-source-release

Broker 启动
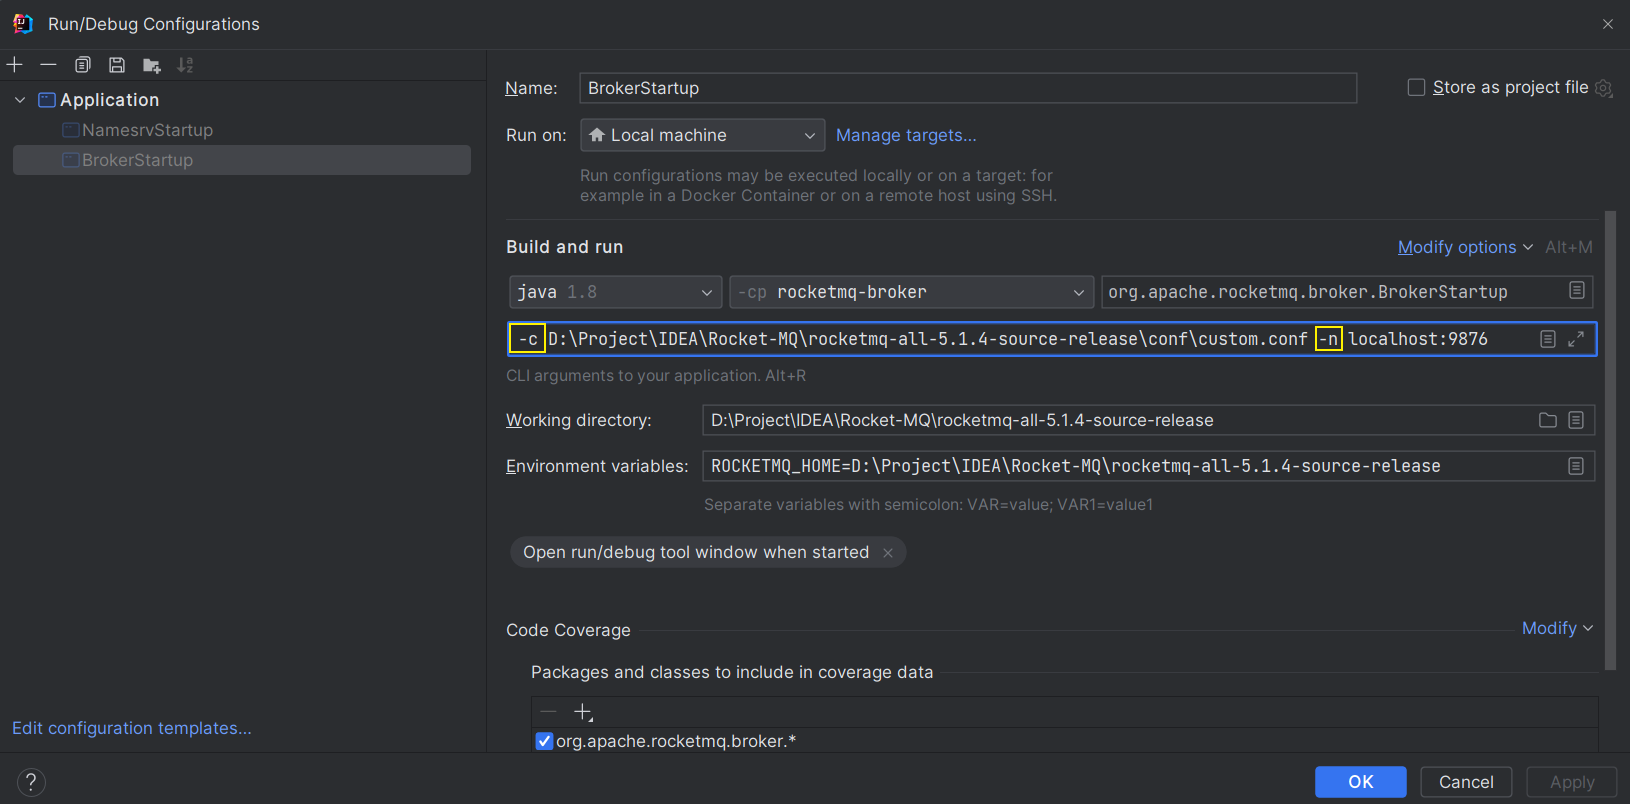
启动 Broker 指定 NameServer 地址以及配置文件地址,以及 ROCKETMQ_HOME 变量即可

上边的 custom.conf 配置文件就是 broker.conf 多加了 3 行配置,如下:

Broker 启动流程分析
既然需要分析 Broker 启动流程,先下载 RocketMQ 源码
https://rocketmq.apache.org/download
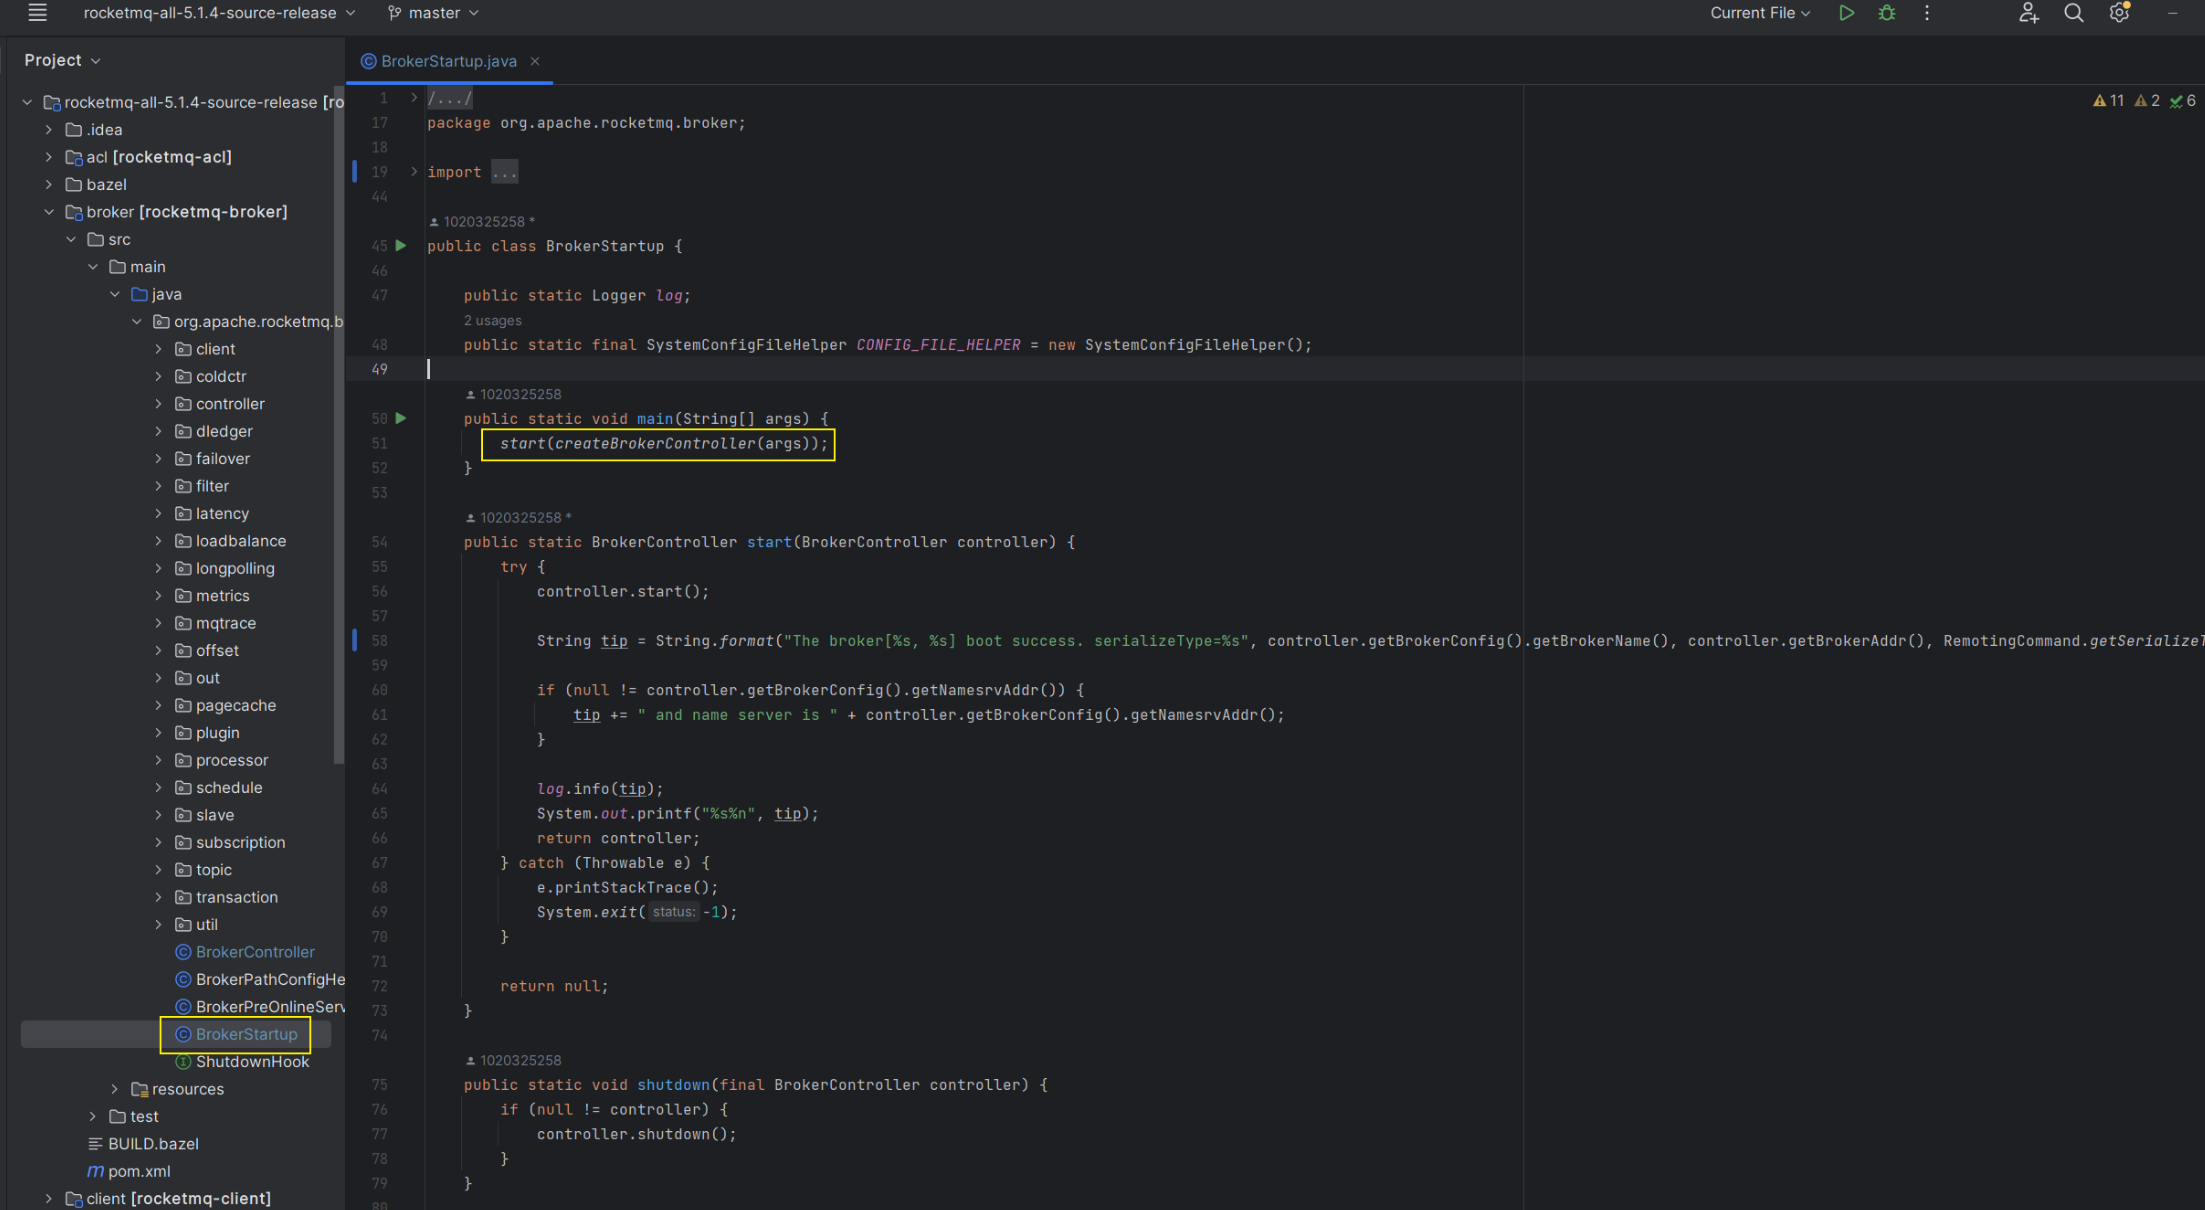
Broker 启动的入口为 broker 模块的 BrokerStartup 启动类:

Broker 启动有两个方法:
-
createBrokerController(args):先创建 BrokerController 控制器,BrokerController 控制器对象包含了各种 Config 配置对象以及 Manager 管理对象在该方法中,主要通过
buildBrokerController()方法来创建 BrokerController 控制器-
创建
四大配置类:- BrokerConfig:Broker 服务自己本身的配置
- NettyServerConfig:Broker 作为服务端,开启端口接收消息的 Netty 服务端配置
- NettyClientConfig:Broker 作为客户端,连接 NameServert 的 Netty 客户端配置
- MessageStoreConfig:消息存储相关的配置
-
解析
命令行参数:/** * 这里解析命令行或 Idea Arguments 的参数 * 如果自己开发插件需要接收命令启动参数的话,可以参考 * Broker 启动命令为:./mqbroker -n localhost:9876 -c D:/RocketMQ/conf/custom.conf autoCreateTopicEnable=true */ Options options = ServerUtil.buildCommandlineOptions(new Options()); CommandLine commandLine = ServerUtil.parseCmdLine("mqbroker", args, buildCommandlineOptions(options), new DefaultParser()); -
将四大配置类装入 BrokerController:
/**
 * 将 4 大配置,装进 BrokerController 中
 * 在 BrokerController 构造方法还创建了:
 * 1. 各种 Manager 管理对象
 * 2. 各种 Processor 处理对象
 * 3. 各种 Queue 队列对象
 */
final BrokerController controller = new BrokerController(brokerConfig, nettyServerConfig, nettyClientConfig, messageStoreConfig);
创建完 BrokerController 控制器之后,还会判断是否创建成功,以及注册钩子
-
判断是否创建成功,如果创建失败,就尝试关闭
BrokerControllerboolean initResult = controller.initialize(); if (!initResult) { controller.shutdown(); System.exit(-3); } -
注册 JVM 进程关闭的钩子,在进程关闭时,回收一些资源
// 添加 JVM 钩子,在 JVM 关闭时,会触发钩子,做一些回收动作
Runtime.getRuntime().addShutdownHook(new Thread(buildShutdownHook(controller)));
-
-
start(brokerController):创建完 BrokerController 后,启动 BrokerController在该方法中,通过
controller.start();来启动 BrokerController-
调用 NameServer 的通信组件启动
// 调用 NameServer 的通信组件启动 if (this.brokerOuterAPI != null) { this.brokerOuterAPI.start(); } -
向所有的 NameServer 注册 Broker 自己
BrokerController.this.registerBrokerAll(true, false, brokerConfig.isForceRegister()); -
发送心跳
if (this.brokerConfig.isEnableControllerMode()) {
    scheduleSendHeartbeat();
}
-
本文来自互联网用户投稿,该文观点仅代表作者本人,不代表本站立场。本站仅提供信息存储空间服务,不拥有所有权,不承担相关法律责任。 如若内容造成侵权/违法违规/事实不符,请联系我的编程经验分享网邮箱:chenni525@qq.com进行投诉反馈,一经查实,立即删除!
- Python教程
- 深入理解 MySQL 中的 HAVING 关键字和聚合函数
- Qt之QChar编码(1)
- MyBatis入门基础篇
- 用Python脚本实现FFmpeg批量转换
- Shell三剑客:awk(内部变量)
- AI数字人短视频矩阵怎么做?
- hb_zhyu编程的一路
- 骑砍战团MOD开发(21)-module_mission_templates预制常量
- C++ 继承
- css 实现 Popover 弹出框样式
- 实用VBA:16.一键批量删除工作表
- 软件测试/测试开发|pytest用例执行顺序,这篇文章就够了
- Python学习(5)|字符串_unicode 字符集_三种创建字符串的方式 _len()函数
- 04 思维导图的方式回顾ospf