从零实现一套低代码(保姆级教程) --- 【11】实现Card卡片组件及属性样式配置
摘要
我们通过十个篇章,把组件列表,画布区,属性面板,样式面板,容器组件这五个主要模块实现出来了。
如果想继续添加组件,就按照之前的方式添加即可。对于数据录入这样的组件,或者一个按钮一个标签组件,这种很简单。对于容器组件,我会用简单的篇幅来说一下,比如本篇文章,主要就是讲解一下Card组件是如何实现的。
但是如果你上一篇对Form表单的实现已经掌握了的话,这一篇其实自己也能完成的。
如果你是第一次看到这一篇文章, 建议先看一下第一节内容:
从零实现一套低代码(保姆级教程) — 【1】初始化项目,实现左侧组件列表
OK,那我们就开始实现Card卡片组件了。

1.实现左侧卡片组件
我们只需要模仿Form表单组件的实现,先在component下新建一个card文件夹,实现card组件,先只写一段文本:
export default function Card() {
  return (
    <div>Card</div>
  )
}
在iconList中配置好图标名称后,在index.ts中导出。
同时在leftPart的index.tsx下,把容器组件的数组中新添一个:
  const collapseItems: CollapseProps['items'] = [
    {
      key: 'containerCom',
      label: '容器组件',
      // 新增一个card组件
      children: renderComponent(['Form', 'Card'])
    }
  ];
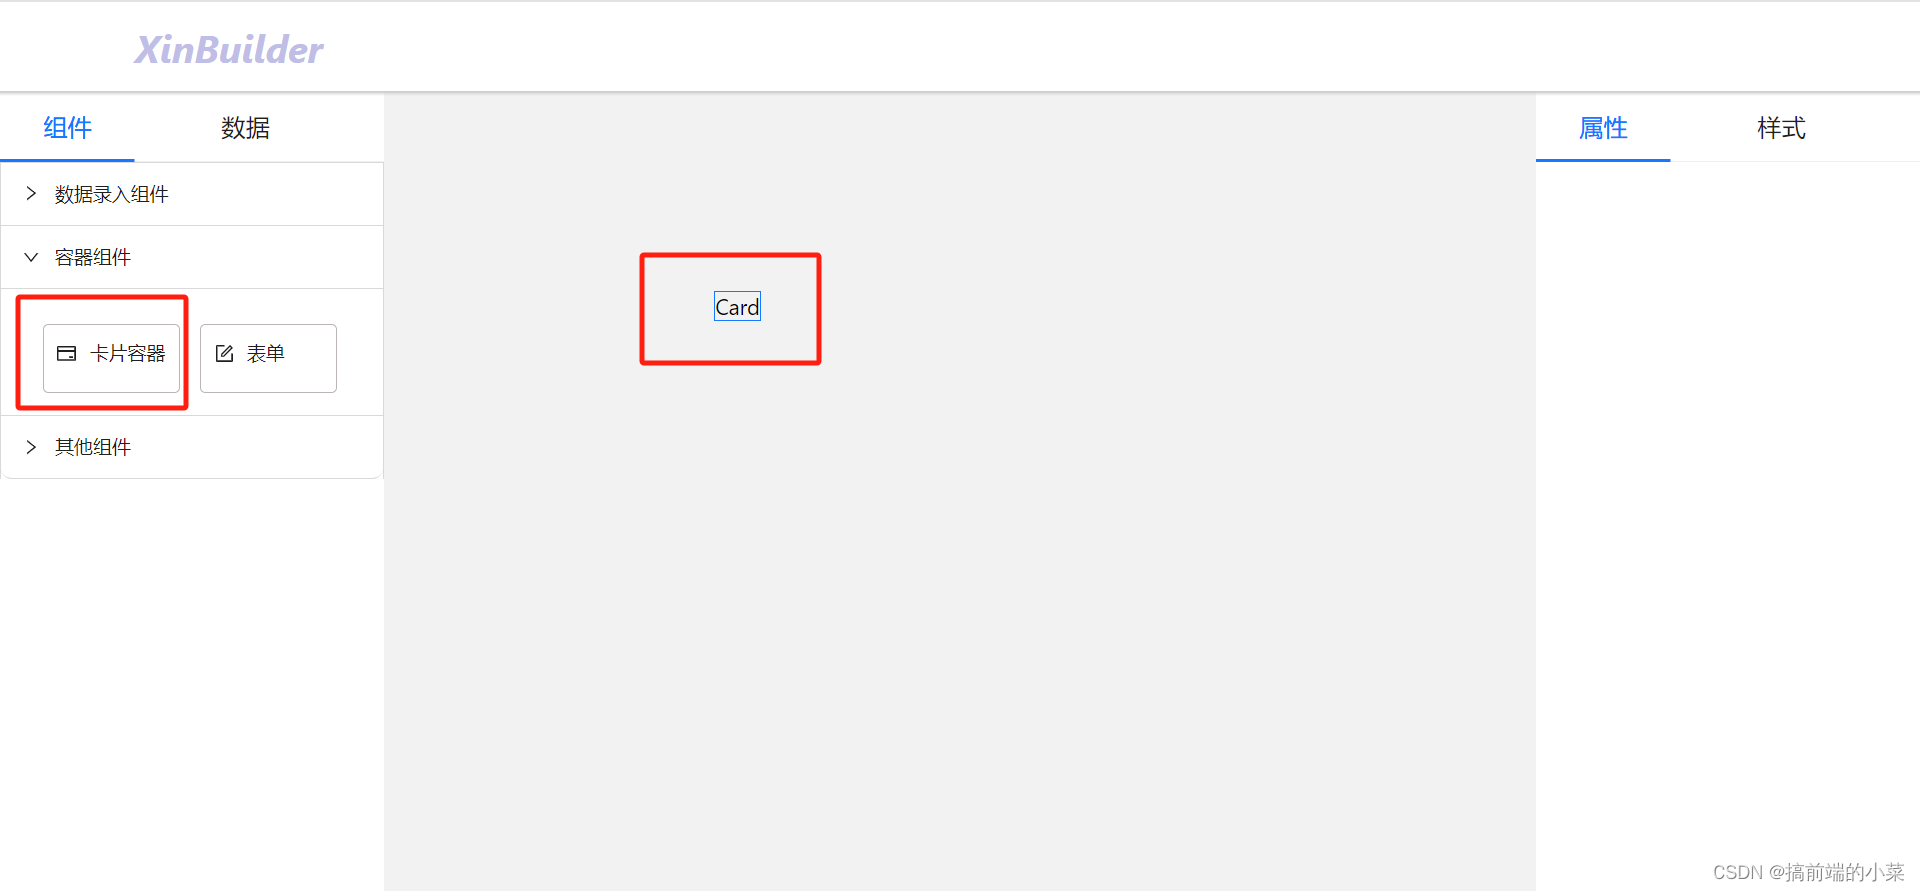
这样我们就可以在左侧组件列表中看到Card组件了(后面如果再说容器组件的实现就不会重复这些了)。
2.实现卡片组件
OK,现在我们实现卡片组件。作为容器组件,依旧要从children里面拿到子元素并且展示,这一点和Form表单组件是一样的,甚至更加简单。
这里我们给Card组件一个默认的样式和标题。
import { Card as AntCard } from "antd"

export default function Card(props: any) {
  const { children } = props
  return (
    <div>
      <AntCard title="默认标题" style={{width: '300px', height:'300px'}}>
        {
          children && children.map((item: any) => {
            return item
          })
        }
      </AntCard>
    </div>
  )
}

如果Card组件可以接受children子节点,那么在mainPart中,我们就要修改一下onDropContainer方法了。
因为之前我们只考虑了Form表单的情况,现在我们要把Card组件也加进来。
  const onDropContainer = (com: ComJson) => {
    return (e: any) => {
      const dragCom = getComById(dragComId, comList)
      // 把Card组件的情况加进来
      if(['Form', 'Card'].includes(com.comType)) {
      // 其他代码
  }
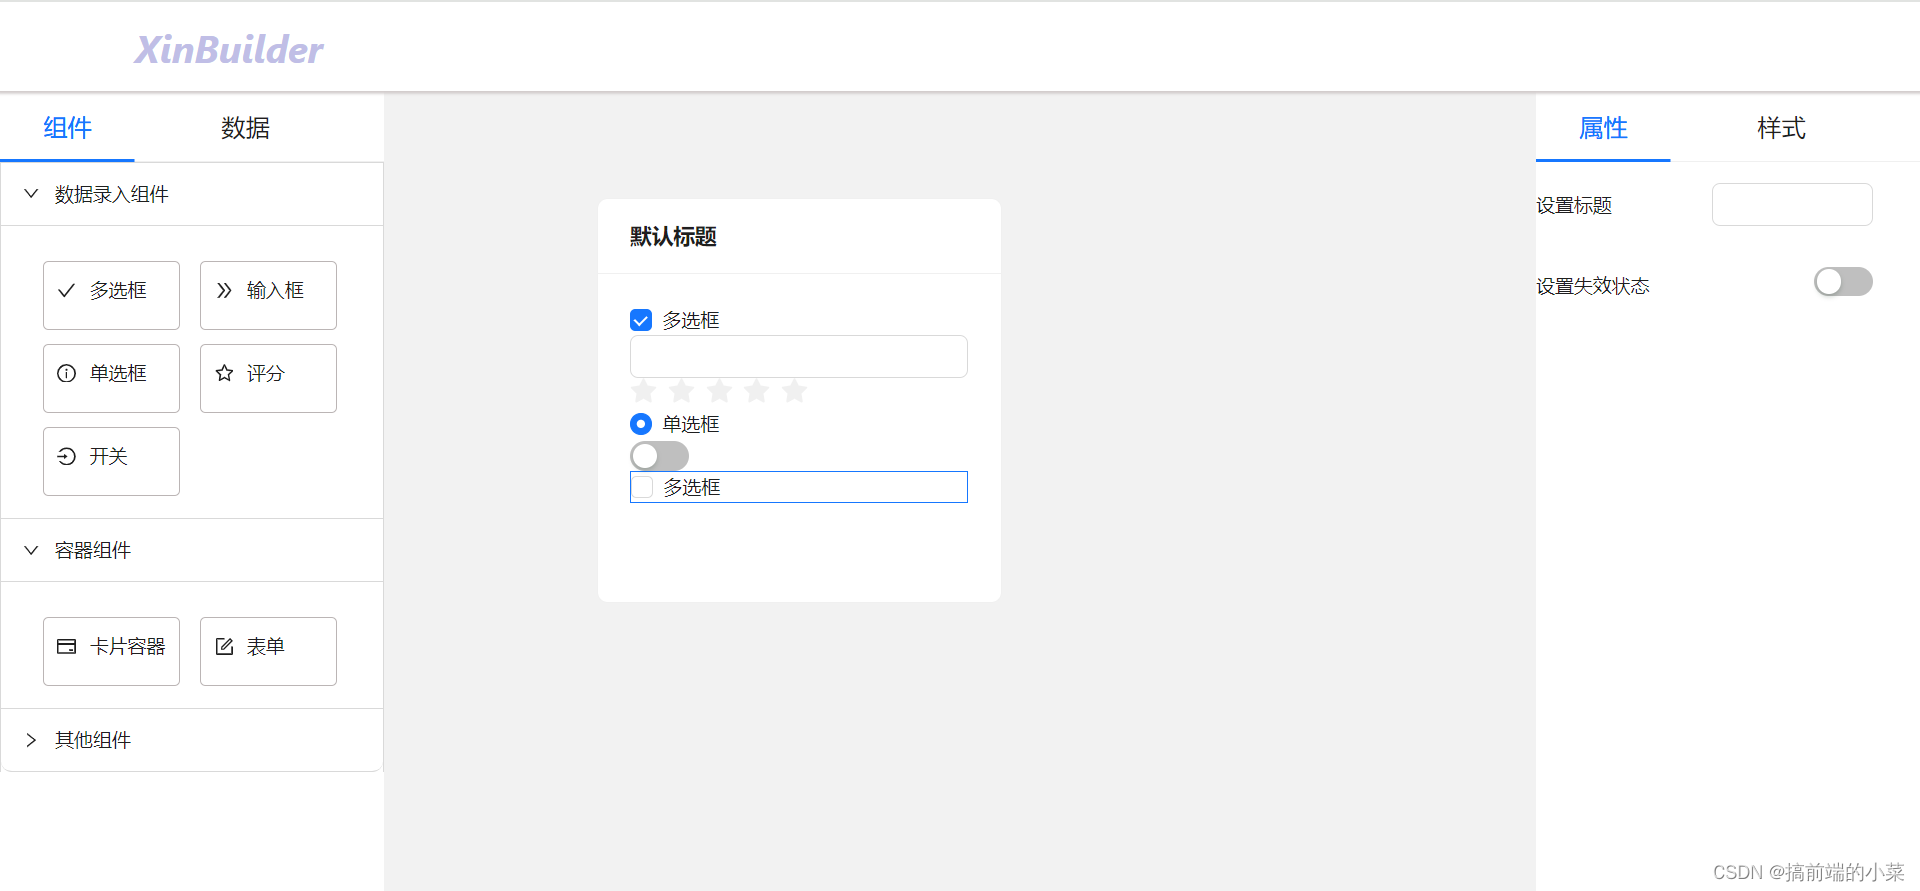
这个时候,我们就可以朝Card组件中拖拽其他组件了。
3.实现Card组件的属性列表
首先我们来到antD的官网,看一下Card组件都具有什么属性。
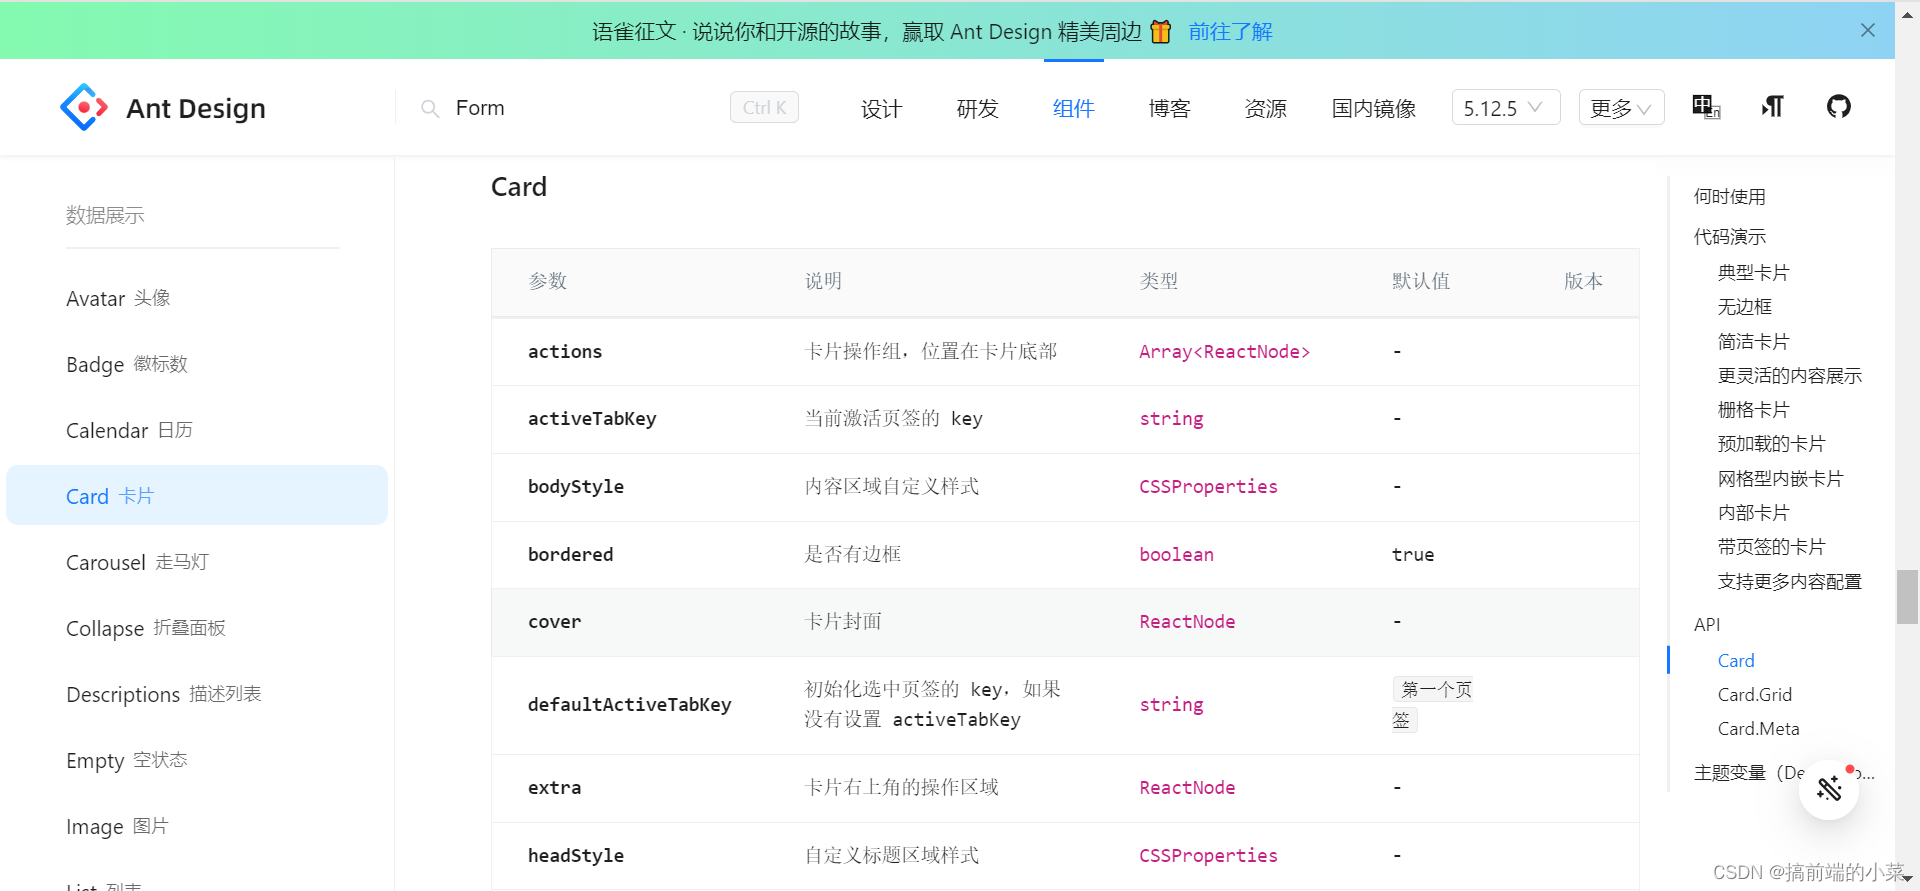
然后我们选择一些,加入到我们的属性列表中。
在comAttribute文件夹下,新增一个cardAttribute文件,然后在attributeMap.ts进行引入。
import { ComAttribute } from "../attributeMap"
const cardAttribute: ComAttribute[] = [
  {
    label: '设置标题',
    value: 'caption',
    type: 'input'
  },
  {
    label: '鼠标移过时可浮起',
    value: 'hoverable',
    type: 'switch'
  },
  {
    label: '设置组件大小',
    value: 'size',
    type: 'select',
    options: [
      {
        value: 'default'
      },
      {
        value: 'small'
      }
    ],
    defaultValue: 'middle'
  }
]

export {
  cardAttribute
}
同时修改我们的组件,对属性进行接收:
import { Card as AntCard } from "antd"

export default function Card(props: any) {
  const { children, caption, hoverable, size } = props
  return (
    <div>
      <AntCard size={size} hoverable={hoverable} title= {caption || "默认标题"} style={{width: '300px', height:'300px'}}>
        {
          children && children.map((item: any) => {
            return item
          })
        }
      </AntCard>
    </div>
  )
}
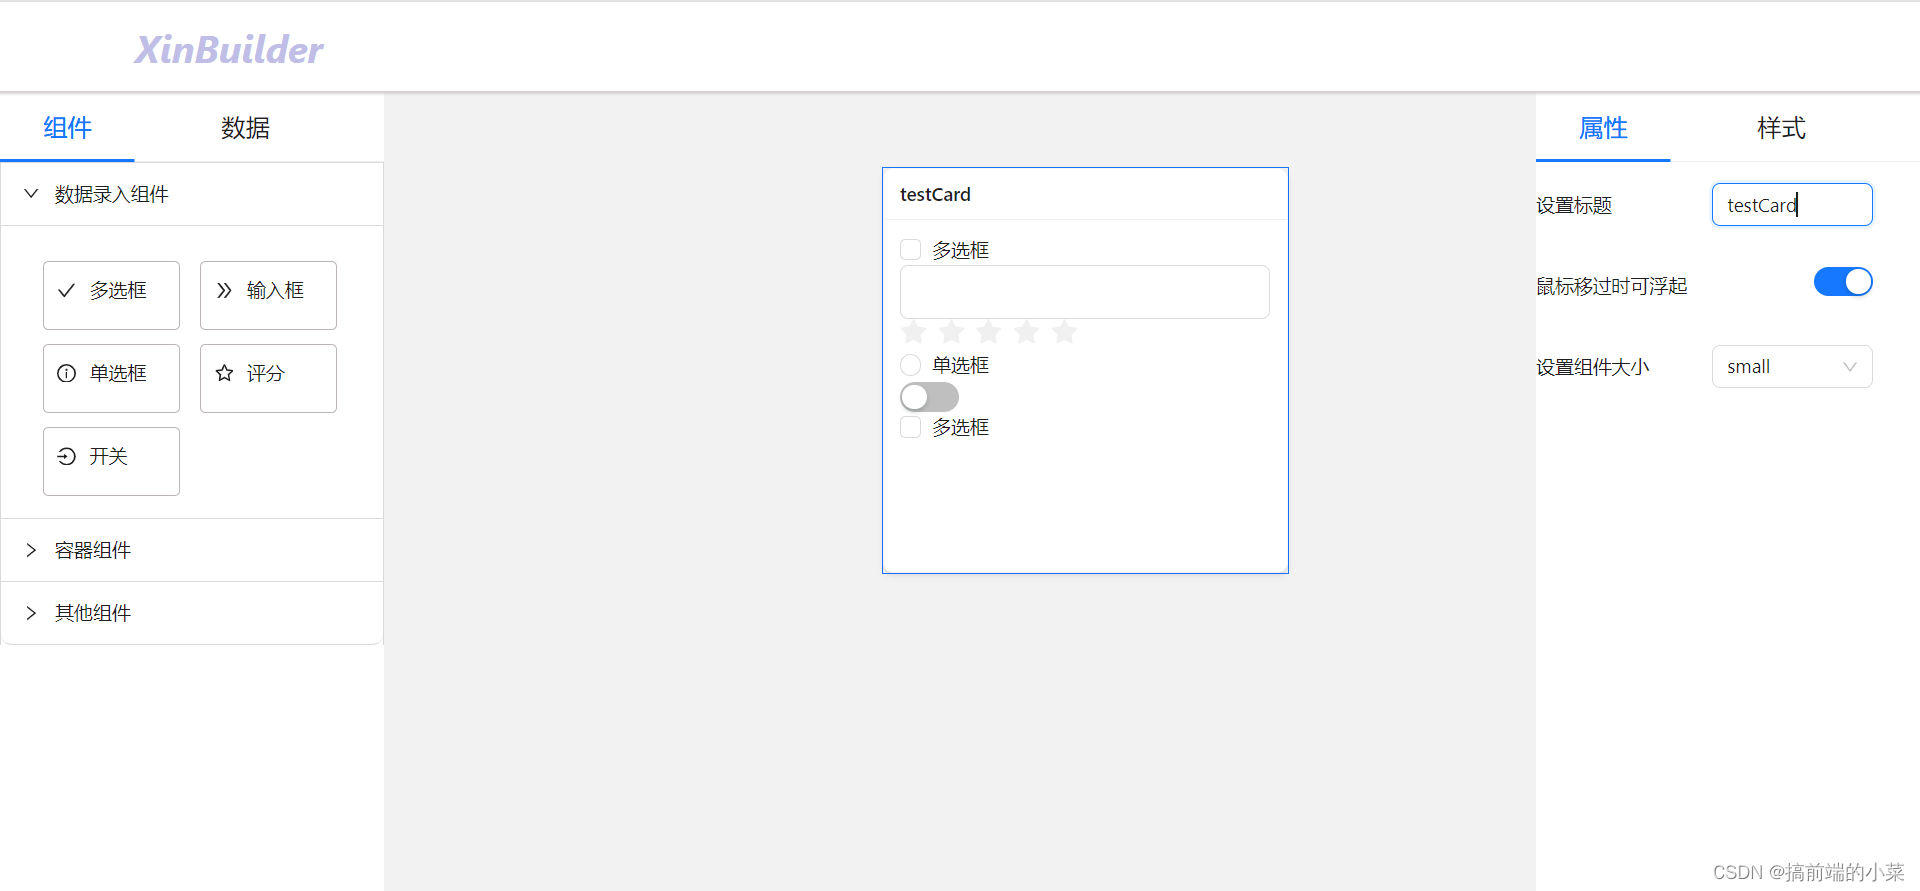
这个时候,我们的Card组件就可以进行属性配置了。
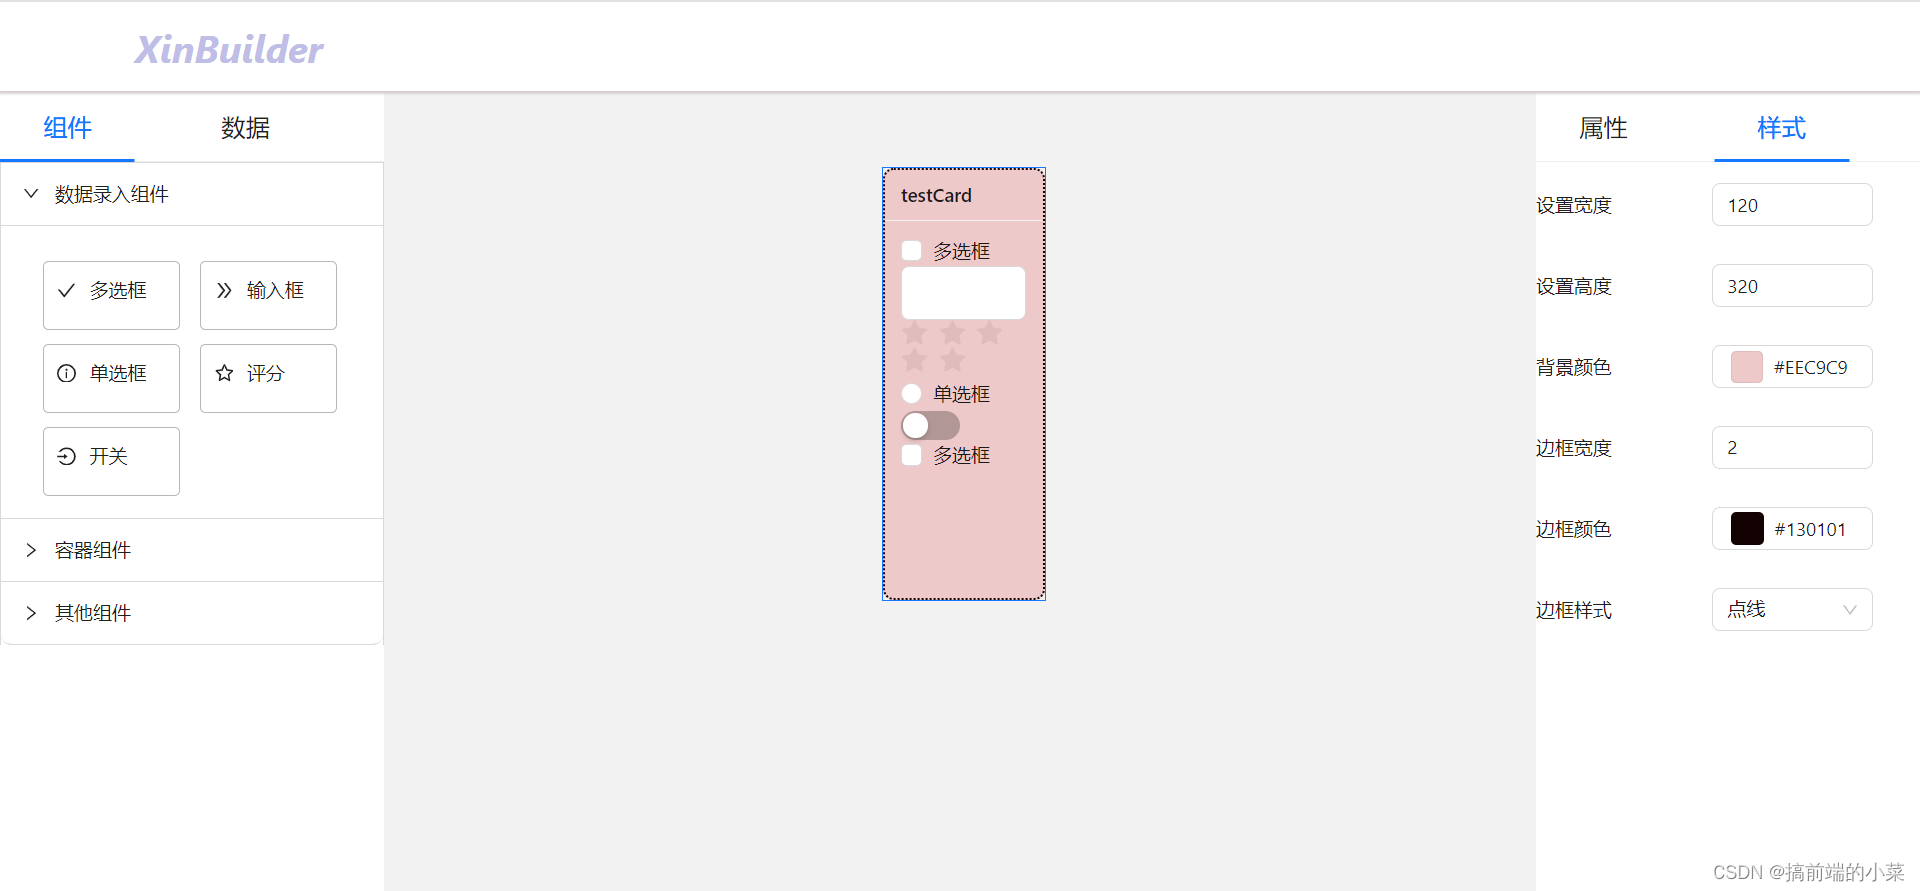
4.实现Card组件的样式列表
同理,我们新增一个cardStyle.ts在comStyle文件夹下,同时在styleMap中引入:
import { Style } from "../styleMap"
const cardStyle: Style[] = [
  {
    label: '设置宽度',
    value: 'width',
    type: 'number'
  },
  {
    label: '设置高度',
    value: 'height',
    type: 'number'
  },
  {
    label: '背景颜色',
    value: 'backgroundColor',
    type: 'color'
  },
  {
    label: '边框宽度',
    value: 'borderWidth',
    type: 'number'
  },
  {
    label: '边框颜色',
    value: 'borderColor',
    type: 'color'
  },
  {
    label: '边框样式',
    value: 'borderStyle',
    type: 'select',
    options: [
      {
        value: 'solid',
        label: '实线'
      },
      {
        value: 'dotted',
        label: '点线'
      },
      {
        value: 'dashed',
        label: '虚线'
      }
    ],
    defaultValue: 'solid'
  }
]

export {
  cardStyle
}
在组件中接受一下即可:
import { Card as AntCard } from "antd"

export default function Card(props: any) {
  const { children, caption, hoverable, size, comStyle } = props
  return (
    <div>
      <AntCard
        size={size}
        hoverable={hoverable}
        title= {caption || "默认标题"}
        style={{width: '300px', height:'300px', ...comStyle}}
      >
        {
          children && children.map((item: any) => {
            return item
          })
        }
      </AntCard>
    </div>
  )
}
现在,样式面板就已经完成了。
博主补充
对于容器类型组件,按照这个步骤去添加就行。基本所有的都一样,有特别的地方我会单独用一个篇章来说,例如表格容器,列表容器。
整体来说,这一篇主要是来演示如何再添加一个容器类型的组件,后面如果读者感兴趣,可以自己尝试去添加antD中的容器组件。
相关的代码提交在github上:
https://github.com/TeacherXin/XinBuilder2
commit: 第十一节: 实现Card卡片组件及属性样式配置
本文来自互联网用户投稿,该文观点仅代表作者本人,不代表本站立场。本站仅提供信息存储空间服务,不拥有所有权,不承担相关法律责任。 如若内容造成侵权/违法违规/事实不符,请联系我的编程经验分享网邮箱:chenni525@qq.com进行投诉反馈,一经查实,立即删除!
- Python教程
- 深入理解 MySQL 中的 HAVING 关键字和聚合函数
- Qt之QChar编码(1)
- MyBatis入门基础篇
- 用Python脚本实现FFmpeg批量转换
- 14.9-时序和组合的混合逻辑——使用非阻塞赋值
- QGIS添加分隔文本图层乱码问题解决方法
- 【论文笔记】3D Gaussian Splatting for Real-Time Radiance Field Rendering
- Linux系统中一些重要目录
- Linux与安全
- OpenAPI自助诊断-阿里云超好用的一个东西
- 青少年软件编程(C/C++)等级考试试卷(二级)2023年12月
- 如何确保对称密钥管理的存储安全?
- Android 根据包名从一个app打开另一个app的页面,以及踩坑经历
- 2024年【建筑电工(建筑特殊工种)】考试报名及建筑电工(建筑特殊工种)免费试题