[Angular] 笔记 3:ngIf
发布时间:2023年12月20日
ngIf 是 Angular 的行为指令。
基本写法:<div *ngIf="hero" class="name">{{ hero.name }} </div>
当 ngIf 表达式求值为 truthy 时,Angular会渲染在then子句中提供的模板;当为falsy 时,Angular会渲染在可选的else子句中提供的模板。
<div *ngIf="condition; then thenBlock else elseBlock"></div>
<ng-template #thenBlock>Content to render when condition is true.</ng-template>
<ng-template #elseBlock>Content to render when condition is false.</ng-template>
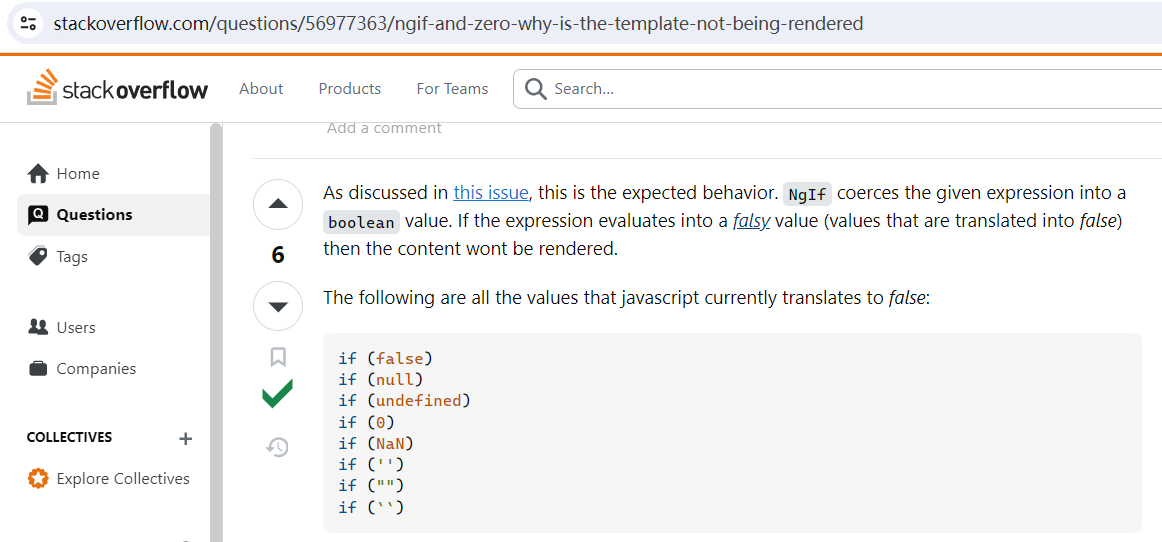
以下是JavaScript 中为 falsy 的值, 其余为 truthy:

用法举例:
app.components.ts:
export class AppComponent {
  pokemonName: string = '';

  constructor() {}

  handleChange(event: any) {
    this.pokemonName = event.target.value;
  }
}
app.component.html:
<input> 元素使用了属性绑定和事件绑定。
属性绑定语法:[],属性绑定是单向数据流,将数据放到web页面上。
事件绑定语法:(),事件向上传递,数据向下流动。
<input type="text" [value]="pokemonName" (input)="handleChange($event)" />
<p>{{ pokemonName }}</p>

<!-- 1. basic usage -->
<!-- <div *ngIf="!pokemonName">No search results found...</div> -->

<!-- 2.more robust version then above -->
<ng-container *ngIf="pokemonName.length; then pokemonList; else noPokemon">
</ng-container>

<ng-template #pokemonList>
  <h1>All pokemon available</h1>
  ...
</ng-template>

<ng-template #noPokemon>
  <h1>No pokemon available</h1>
</ng-template>
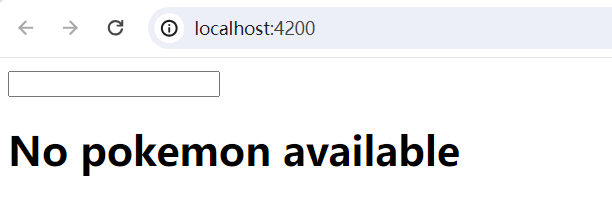
初始界面:

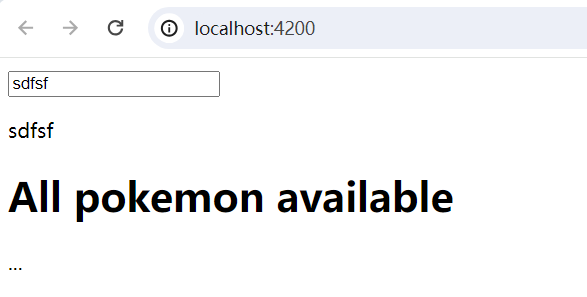
input 任意输入:

文章来源:https://blog.csdn.net/ftell/article/details/135118771
本文来自互联网用户投稿,该文观点仅代表作者本人,不代表本站立场。本站仅提供信息存储空间服务,不拥有所有权,不承担相关法律责任。 如若内容造成侵权/违法违规/事实不符,请联系我的编程经验分享网邮箱:chenni525@qq.com进行投诉反馈,一经查实,立即删除!
本文来自互联网用户投稿,该文观点仅代表作者本人,不代表本站立场。本站仅提供信息存储空间服务,不拥有所有权,不承担相关法律责任。 如若内容造成侵权/违法违规/事实不符,请联系我的编程经验分享网邮箱:chenni525@qq.com进行投诉反馈,一经查实,立即删除!
最新文章
- Python教程
- 深入理解 MySQL 中的 HAVING 关键字和聚合函数
- Qt之QChar编码(1)
- MyBatis入门基础篇
- 用Python脚本实现FFmpeg批量转换
- Android12-RK3588_s-开机动画
- SpringFramework实战指南(一)
- Hotspot源码解析-第二十章-基础类型的数组类型对象的创建与分配
- Lua 元表,元方法
- 【设计模式】策略模式
- 体验全新升级的ON1 Photo RAW 2024,释放你的摄影潜能!
- 10|记忆:通过Memory记住客户上次买花时的对话细节
- 【VTKExamples::PolyData】第十四期 FieldData
- opencv#30 线性滤波
- Navicat迁移局域网内其他PC机的MySQL数据库