【fly-iot飞凡物联】(16):开源IOT物联网项目,成接入Emqx的MQTT服务,并且配置MySQL数据库鉴权, 还是非常方便的,可以使用websocker连接测试
发布时间:2024年01月07日
前言
fly-iot飞凡物联专栏:
https://blog.csdn.net/freewebsys/category_12219758.html
1,视频演示地址
https://www.bilibili.com/video/BV1JG411B7ty/
【fly-iot】(5):开源IOT物联网项目,成接入Emqx的MQTT服务,并且配置MySQL数据库鉴权,还是非常方便的,可以使用websocker连接测试

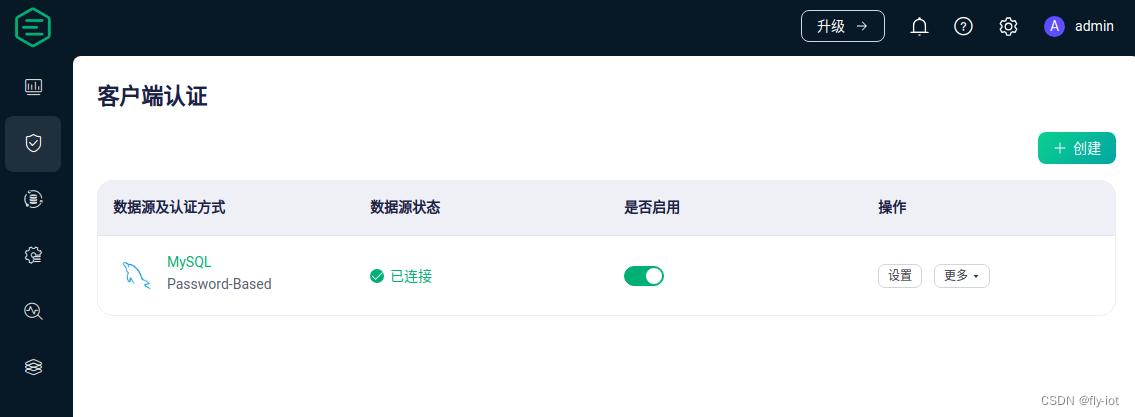
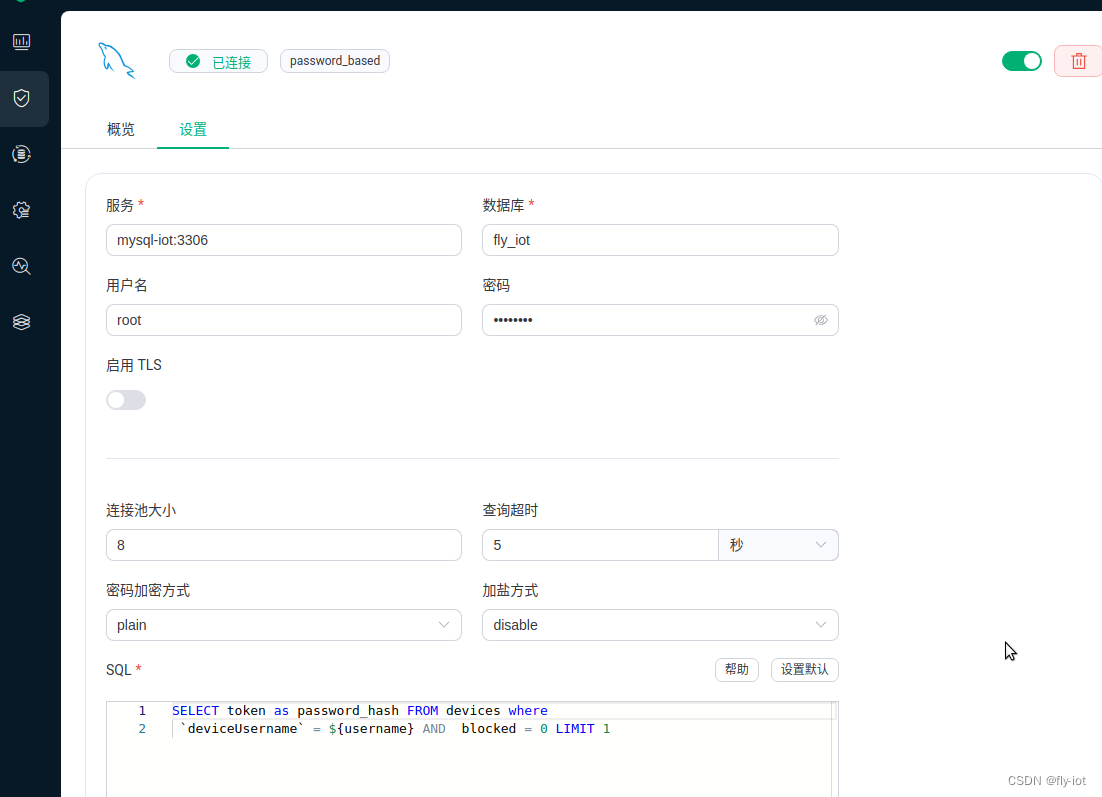
2,先配置数据库连接方式鉴权
已连接,表示数据库密码都配置正确。


最重要的是这个鉴权的查询SQL:对于MySQL的查询如下:
SELECT token as password_hash FROM devices where
 `deviceUsername` = ${username} AND  blocked = 0 LIMIT 1
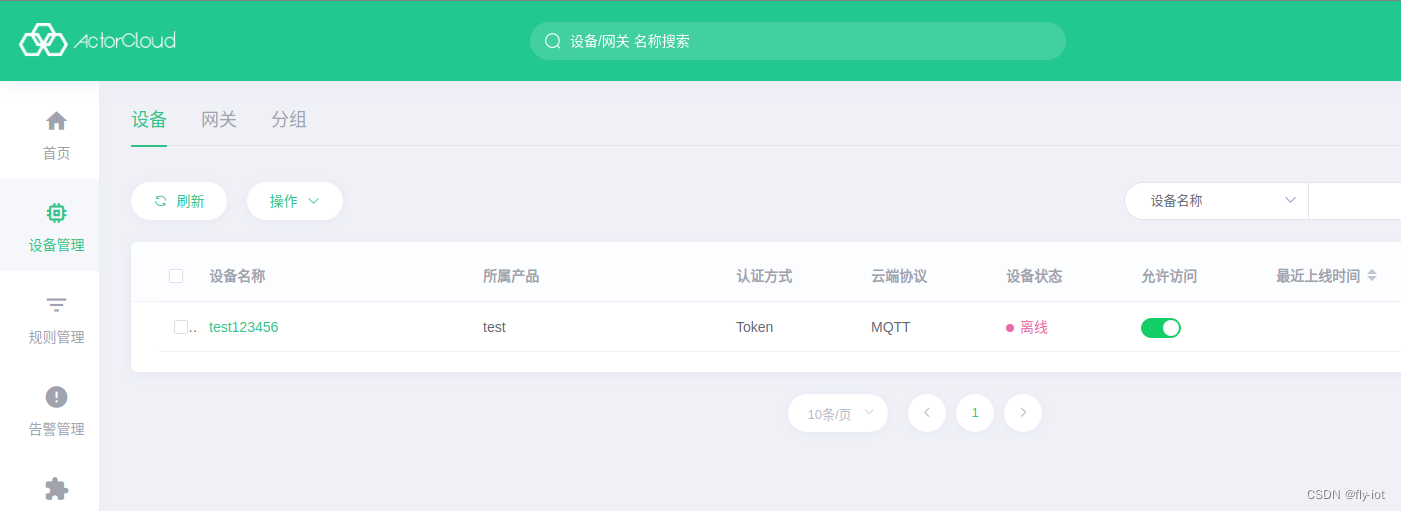
3,在IOT平台创建设备

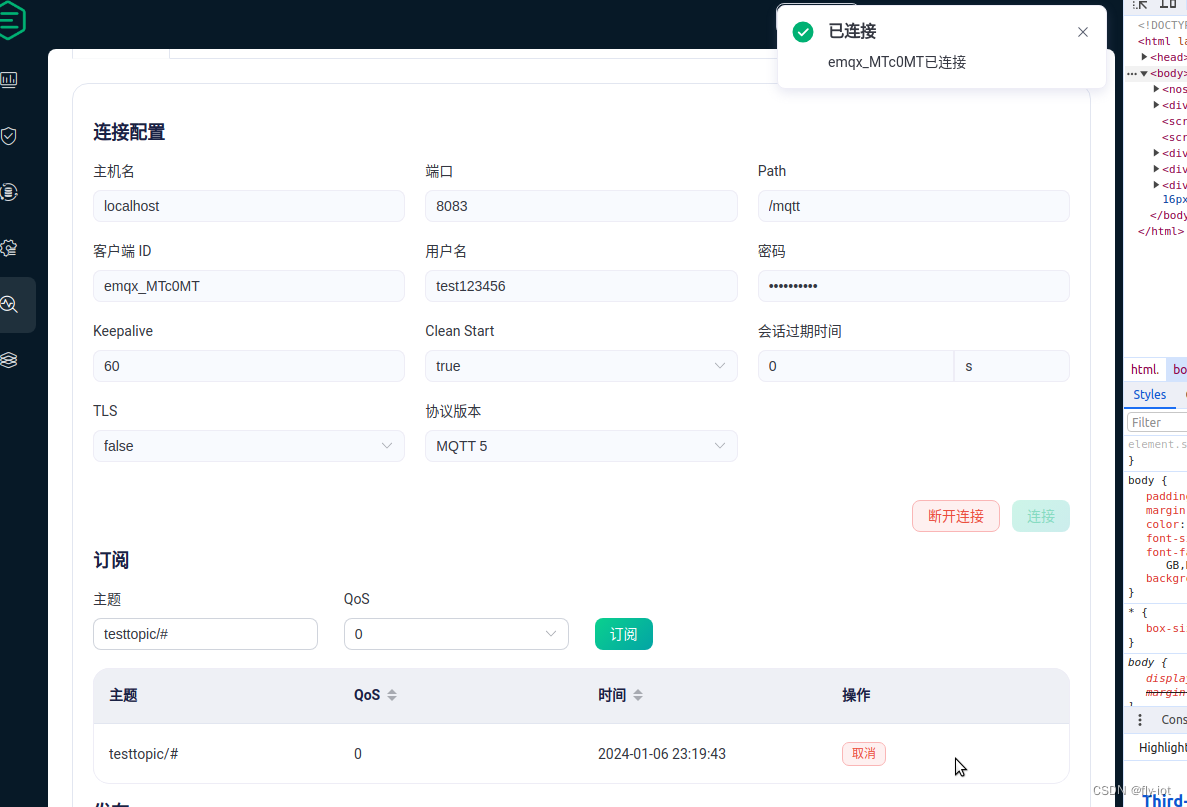
然后就可以在工具中进行测试了:

可以连接成功。然后测试订阅和消息发送了。
4, 在docker-compose的配置
整个的docker-compose代码:
https://gitee.com/fly-iot/docker-compose
...
################## emqx latest 版本 ##################
  emqx:
    image: emqx/emqx:latest
    container_name: emqx
    environment:
    - "EMQX_NODE_NAME=emqx@node.emqx.io"
    - "EMQX_CLUSTER__DISCOVERY_STRATEGY=static"
    - "EMQX_CLUSTER__STATIC__SEEDS=[emqx@node.emqx.io]"
    healthcheck:
      test: ["CMD", "/opt/emqx/bin/emqx ctl", "status"]
      interval: 5s
      timeout: 25s
      retries: 5
    ports:
      - 1883:1883
      - 8083:8083
      - 8084:8084
      - 8883:8883
      - 18083:18083
    volumes:
       - ./emqx/cluster.hocon:/opt/emqx/data/configs/cluster.hocon
    depends_on:
      - mysql-iot
可以使用配置的方式进行,这样就不用登陆到界面中进行配置。
后续可以把管理后台关闭。直接使用配置文件更加安全。
cluster.hocon 的配置文件
authentication = [
  {
    backend = mysql
    database = fly_iot
    enable = true
    mechanism = password_based
    password = mysqliot
    password_hash_algorithm {name = plain, salt_position = disable}
    pool_size = 8
    query = "SELECT token as password_hash FROM devices where \n `deviceUsername` = ${username} AND  blocked = 0 LIMIT 1"
    query_timeout = 5s
    server = "mysql-iot:3306"
    ssl {
      ciphers = []
      depth = 10
      enable = false
      hibernate_after = 5s
      log_level = notice
      reuse_sessions = true
      secure_renegotiate = true
      verify = verify_peer
      versions = [tlsv1.3, tlsv1.2]
    }
    username = root
  }
]
有配置文件就可以了。
5,总结
使用 emqx 做 mqtt 服务还是非常的方便的。
鉴权是直接查询数据库。所以后台系统是 python 还是 golang 问题不大。
压力都在 emqx 的服务器和 mysql 的数据库上。
文章来源:https://blog.csdn.net/freewebsys/article/details/135433773
本文来自互联网用户投稿,该文观点仅代表作者本人,不代表本站立场。本站仅提供信息存储空间服务,不拥有所有权,不承担相关法律责任。 如若内容造成侵权/违法违规/事实不符,请联系我的编程经验分享网邮箱:chenni525@qq.com进行投诉反馈,一经查实,立即删除!
本文来自互联网用户投稿,该文观点仅代表作者本人,不代表本站立场。本站仅提供信息存储空间服务,不拥有所有权,不承担相关法律责任。 如若内容造成侵权/违法违规/事实不符,请联系我的编程经验分享网邮箱:chenni525@qq.com进行投诉反馈,一经查实,立即删除!
最新文章
- Python教程
- 深入理解 MySQL 中的 HAVING 关键字和聚合函数
- Qt之QChar编码(1)
- MyBatis入门基础篇
- 用Python脚本实现FFmpeg批量转换
- docker+jmeter实现windows作为主控机,linux作为负载机的分布式压测环境搭建
- BPE(Byte-Pair Encoding )代码实现
- Java实现医院门诊预约挂号系统 JAVA+Vue+SpringBoot+MySQL
- 软件产品为什么要测试才能上线?测试可以发现所有bug吗?
- C#中类型的转换
- 自定义通用物联网网关的MIB结构的参考
- python入门_基础函数
- 【数据库】
- Java毕业设计基于springboot的癌症患者交流平台
- 从零到一的方法:学习视频剪辑与嵌套合并技巧