基于vite 初始化vue3项目并引入Vue Router和Ant Design Vue
发布时间:2023年12月20日
基于vite 初始化vue3项目并引入常用的功能、组件。
- Vue Router
- Ant Design Vue
系列文章指路👉
系列文章-基于Vue3创建前端项目并引入、配置常用的库和工具类
文章目录
创建Vite+Vue项目
使用之前需要升级node到18+
创建并运行
npm create vite@latest vue-test -- --template vuecd vue-testnpm installnpm run dev

WebStorm无法识别@,需要在vite.config.js中定义alias
import { defineConfig } from 'vite'
import vue from '@vitejs/plugin-vue'
import {resolve} from 'path'

// https://vitejs.dev/config/
export default defineConfig({
  plugins: [vue()],
  resolve: {
    extensions: ['.js', '.vue', '.json'],
    alias: {
      "@": resolve(__dirname, "src"),
    }
  },
})
引入Vue Router
1. 安装依赖
npm install vue-router@4
2. 初始化index.js
引用官方文档的例子,区别不同的是:路由模式使用的history。
import * as VueRouter from 'vue-router' // 这行一定要加,不然程序会报错

// 1. 定义路由组件
const testA = import('@/view/test/testA.vue')
const testB = import('@/view/test/testB.vue')

// 2. 定义一些路由
const routes = [
    { path: '/testa', component: testA },
    { path: '/testb', component: testB },
]

// 3. 创建路由实例并传递 `routes` 配置
const router = VueRouter.createRouter({
    // 4. 使用 history 模式的实现。
    history: VueRouter.createWebHistory(),
    routes: routes,
})

export default router
3. main.js中挂在到app上
import { createApp } from 'vue'
import './style.css'
import App from './App.vue'
import router from "@/router/index.js";

createApp(App)
    .use(router)
    .mount('#app')
4. App.vue
<template>
  <router-link to="/testa">Go to A</router-link>
  <router-link to="/testb">Go to B</router-link>
  <router-view></router-view>
</template>
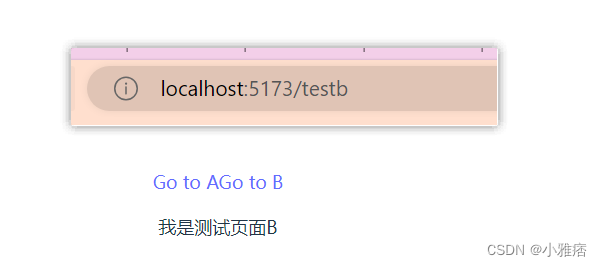
只是个测试页面,在A和B之间反复横跳

引入Ant Design Vue
安装依赖
npm install ant-design-vue@4.x --save
使用自动按需引入
npm install unplugin-vue-components -D
尝试一下

<template>
  <h1>
     Ant Design Vue Test
  </h1>
  <div>
    <a-space>
      <a-input-search
          v-model:value="value"
          placeholder="input search text"
          style="width: 250px"
          @search="onSearch"
      />
      <a-button type="primary">Button</a-button>
    </a-space>
  </div>
</template>

<script setup>
import { ref } from 'vue';
const value = ref('');
const onSearch = searchValue => {
  console.log('use value', searchValue);
  console.log('or use this.value', value.value);
};
</script>

<style scoped>

</style>
文章来源:https://blog.csdn.net/shijizhe1/article/details/135078219
本文来自互联网用户投稿,该文观点仅代表作者本人,不代表本站立场。本站仅提供信息存储空间服务,不拥有所有权,不承担相关法律责任。 如若内容造成侵权/违法违规/事实不符,请联系我的编程经验分享网邮箱:chenni525@qq.com进行投诉反馈,一经查实,立即删除!
本文来自互联网用户投稿,该文观点仅代表作者本人,不代表本站立场。本站仅提供信息存储空间服务,不拥有所有权,不承担相关法律责任。 如若内容造成侵权/违法违规/事实不符,请联系我的编程经验分享网邮箱:chenni525@qq.com进行投诉反馈,一经查实,立即删除!
最新文章
- Python教程
- 深入理解 MySQL 中的 HAVING 关键字和聚合函数
- Qt之QChar编码(1)
- MyBatis入门基础篇
- 用Python脚本实现FFmpeg批量转换
- 堡垒机和数据库防水坝的区别一二
- MSBUILD : error MSB3428: 未能加载 Visual C++ 组件“VCBuild.exe”
- 10.python读取终端的rknn模型
- openGauss学习笔记-190 openGauss 数据库运维-常见故障定位案例-服务启动失败
- css flx最后一个元素不用空,flex不自动变长压缩
- Fiddler抓包工具不会用?点这里手把手超详细教学!
- 项目总结-自主HTTP实现
- HackTheBox - Medium - Windows - Aero
- RT-Thread: 控制台调试串口波特率更改
- 海外问卷使用动态ip和静态ip有哪些优缺点?