虚拟机安装centos7系统步骤
发布时间:2023年12月25日
1、下载系统镜像文件
? ? ? ? 下载地址:https://mirrors.aliyun.com/centos/7.9.2009/isos/x86_64/CentOS-7-x86_64-DVD-2207-02.iso
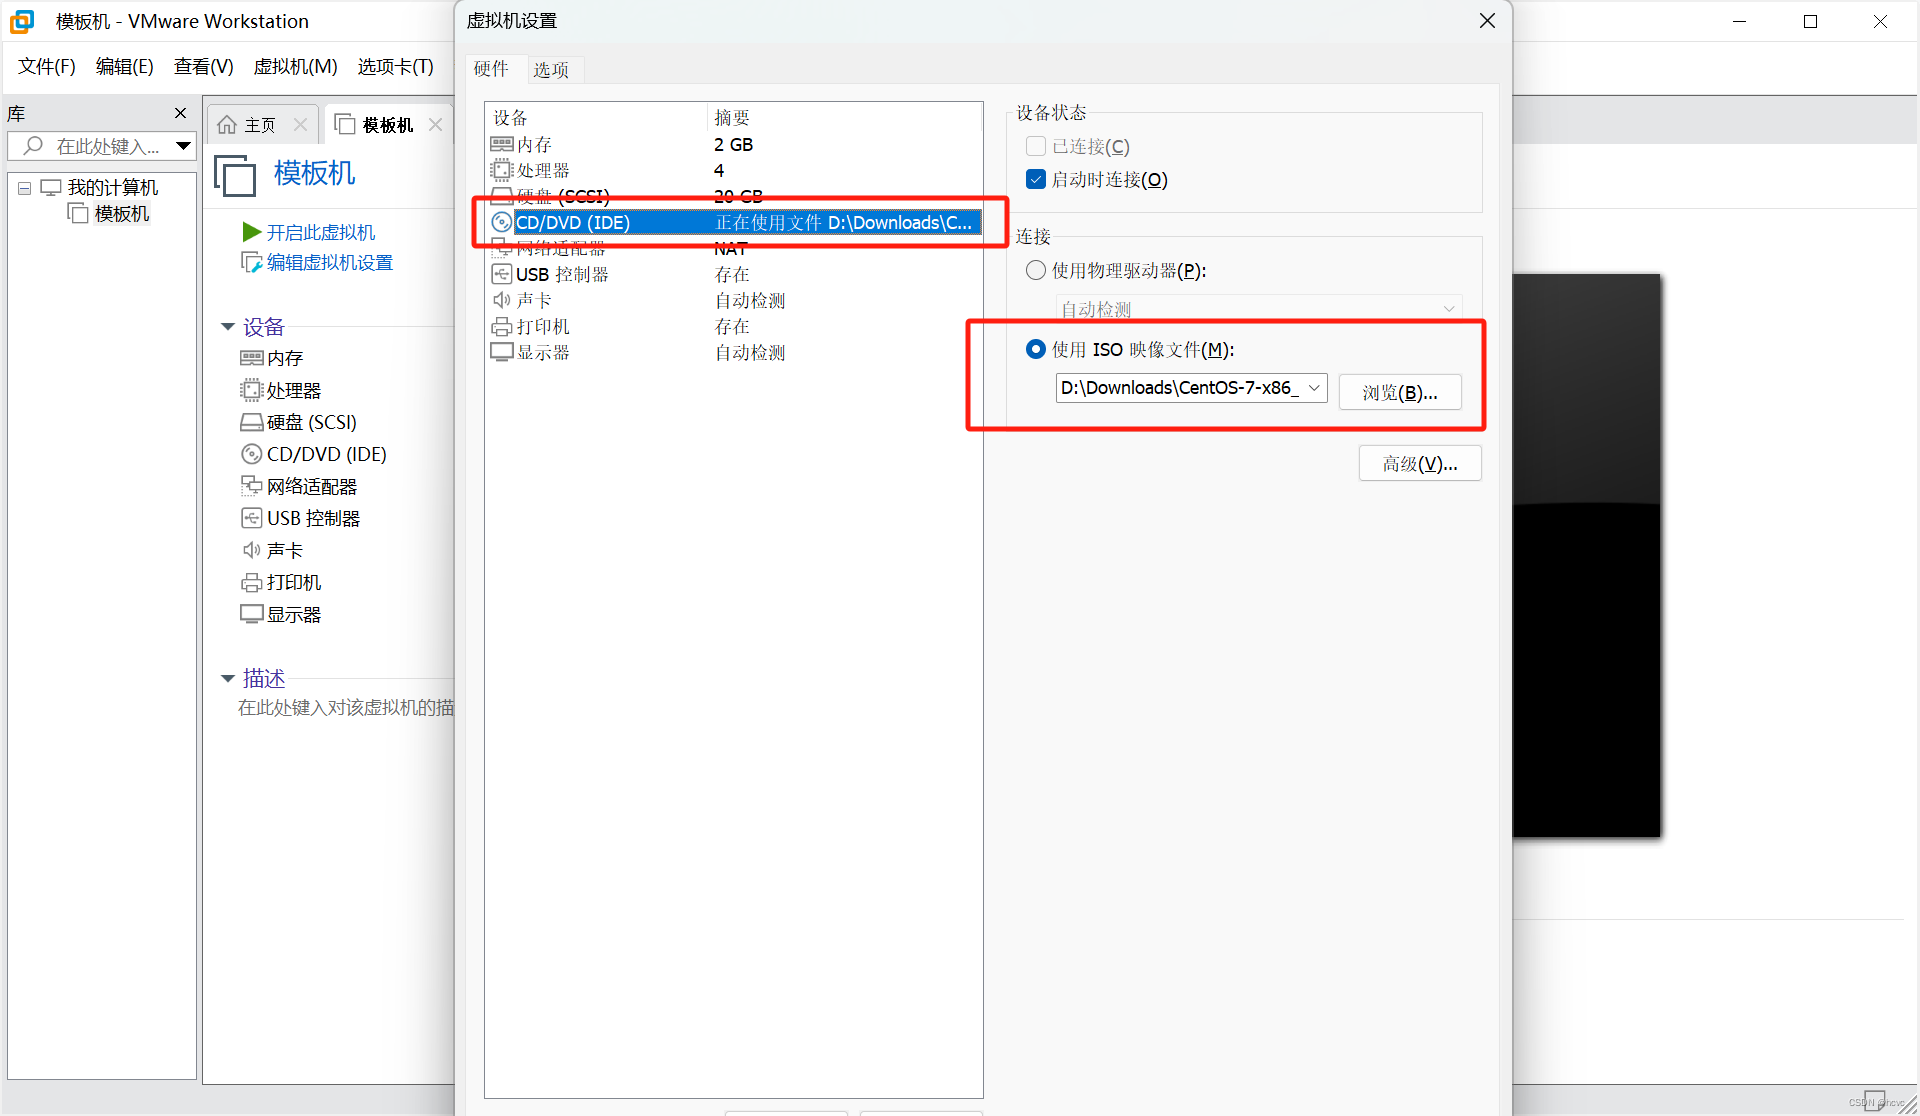
2、鼠标右键点击虚拟机-->设置-->CD/DVDD-->使用ISO映像文件-->点击浏览,选择文件,而后保存设置
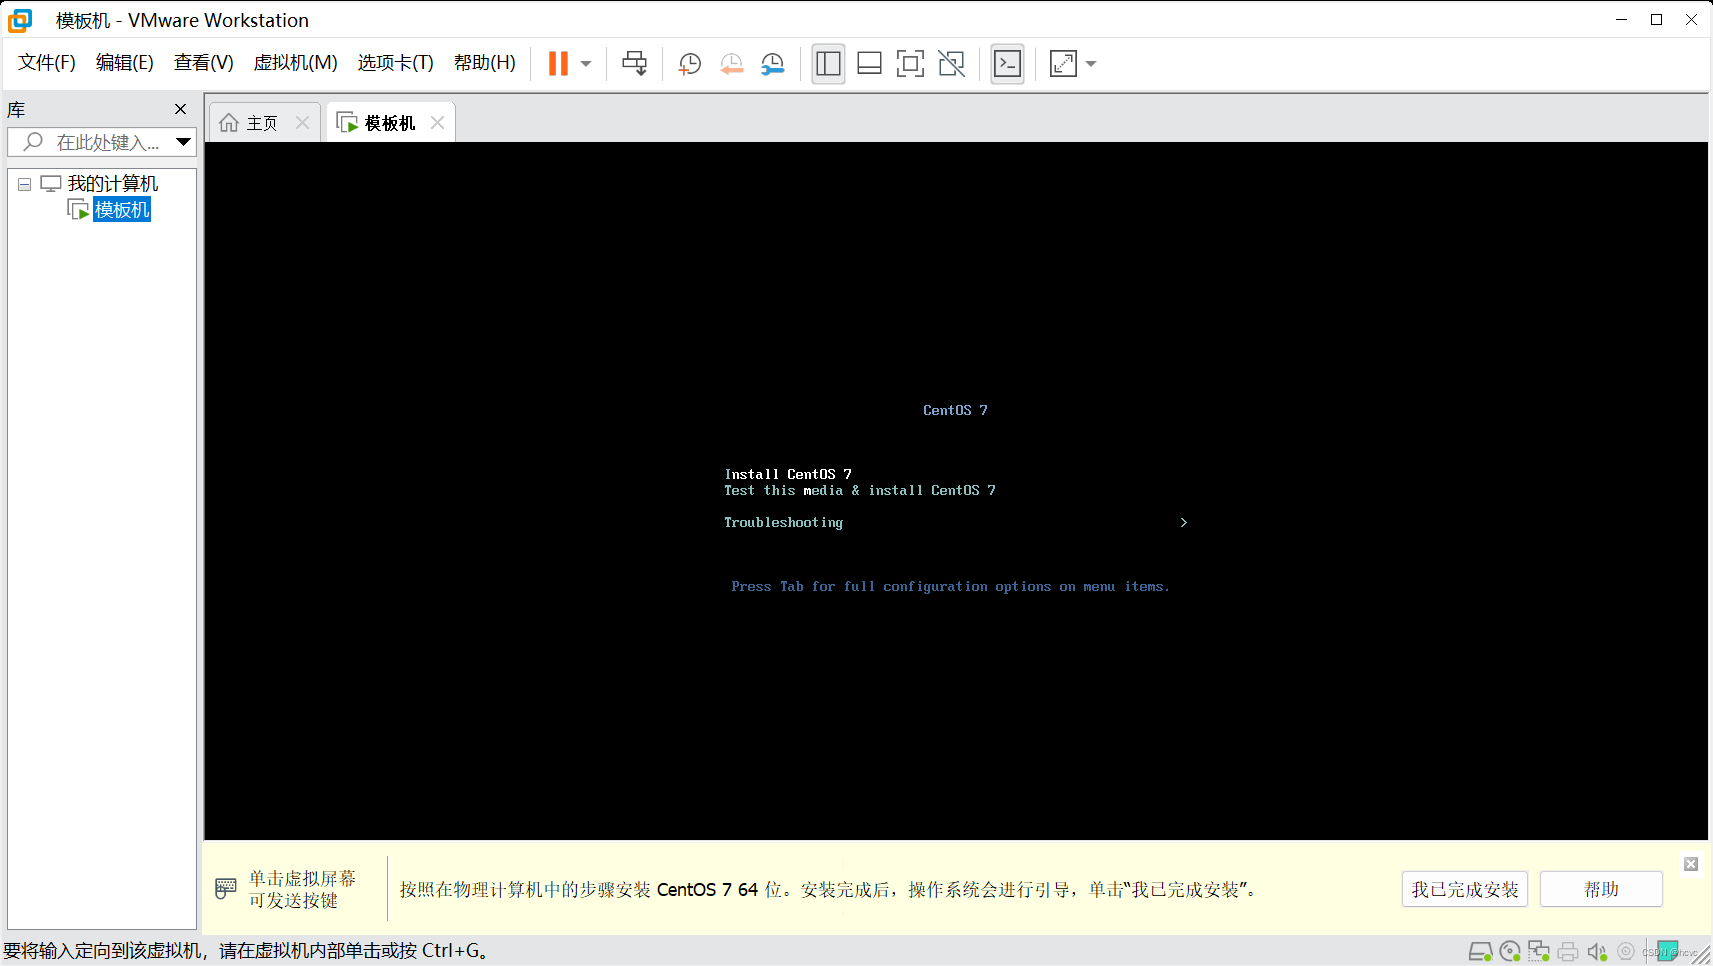
3、点击开启虚拟机,按tab键,输入字符 net.ifnames=0 biosdevname=0,将网卡名称更改为eth0,而后回车,进入系统
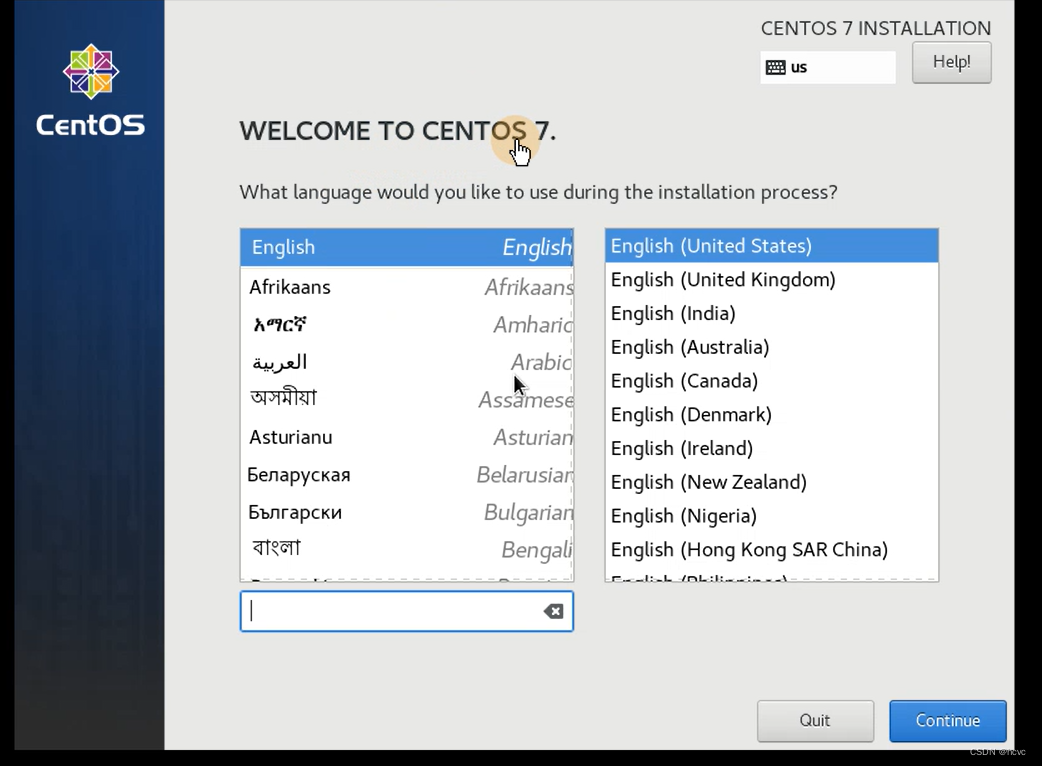
4、进入系统后,选择语言
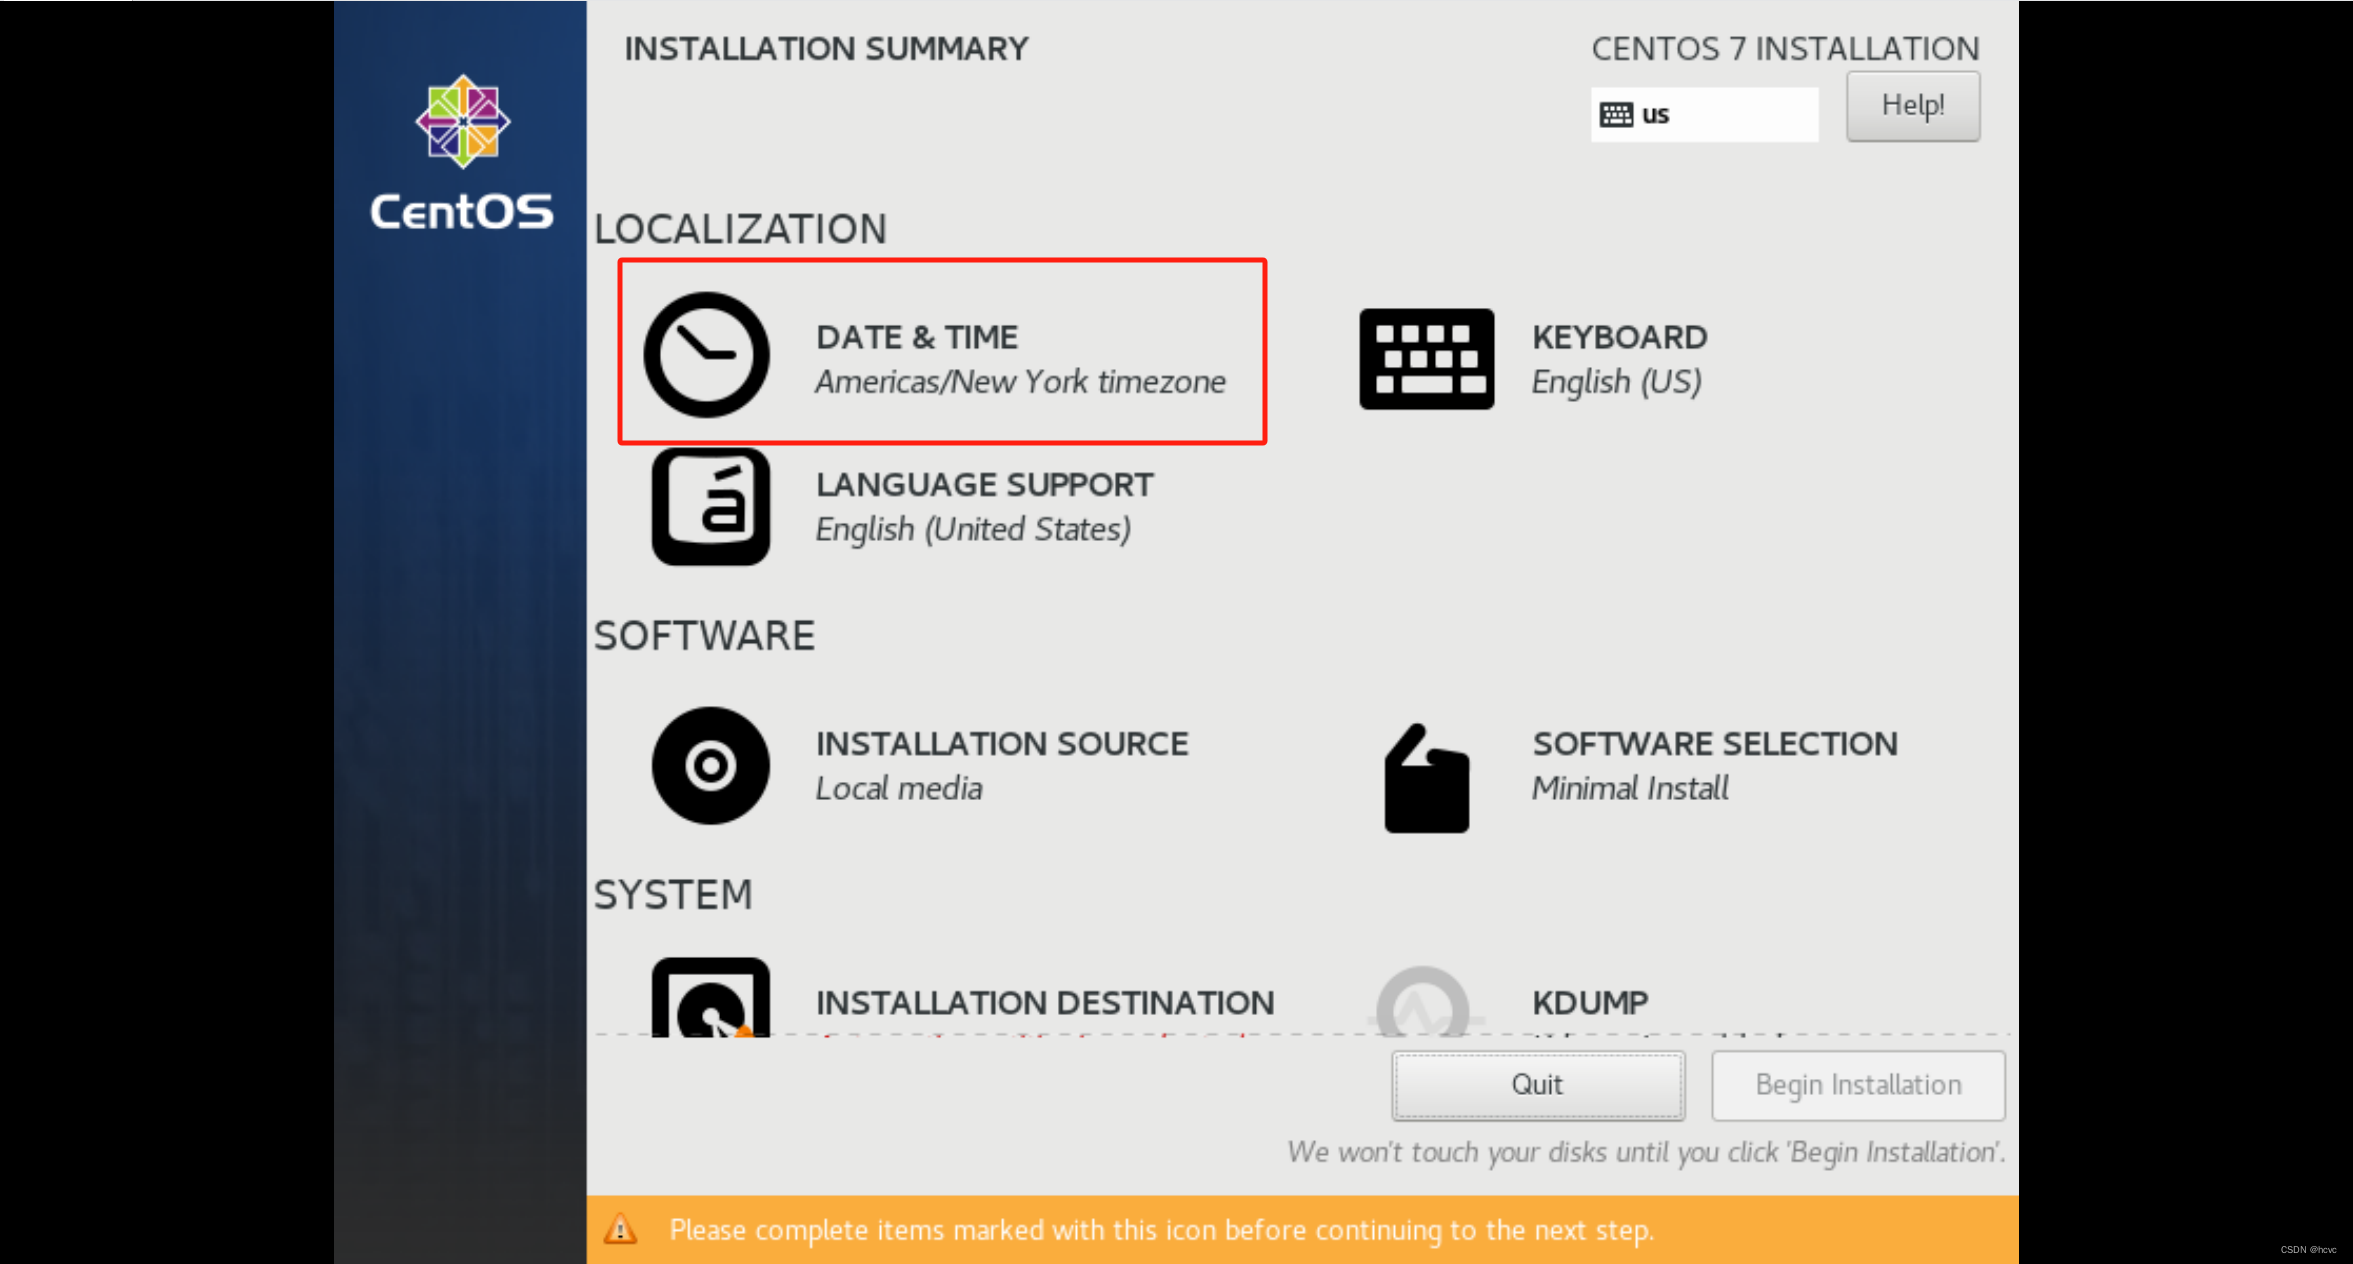
5、点击date设置时区
选择Asia,Shanghai,然后点击左上角Done返回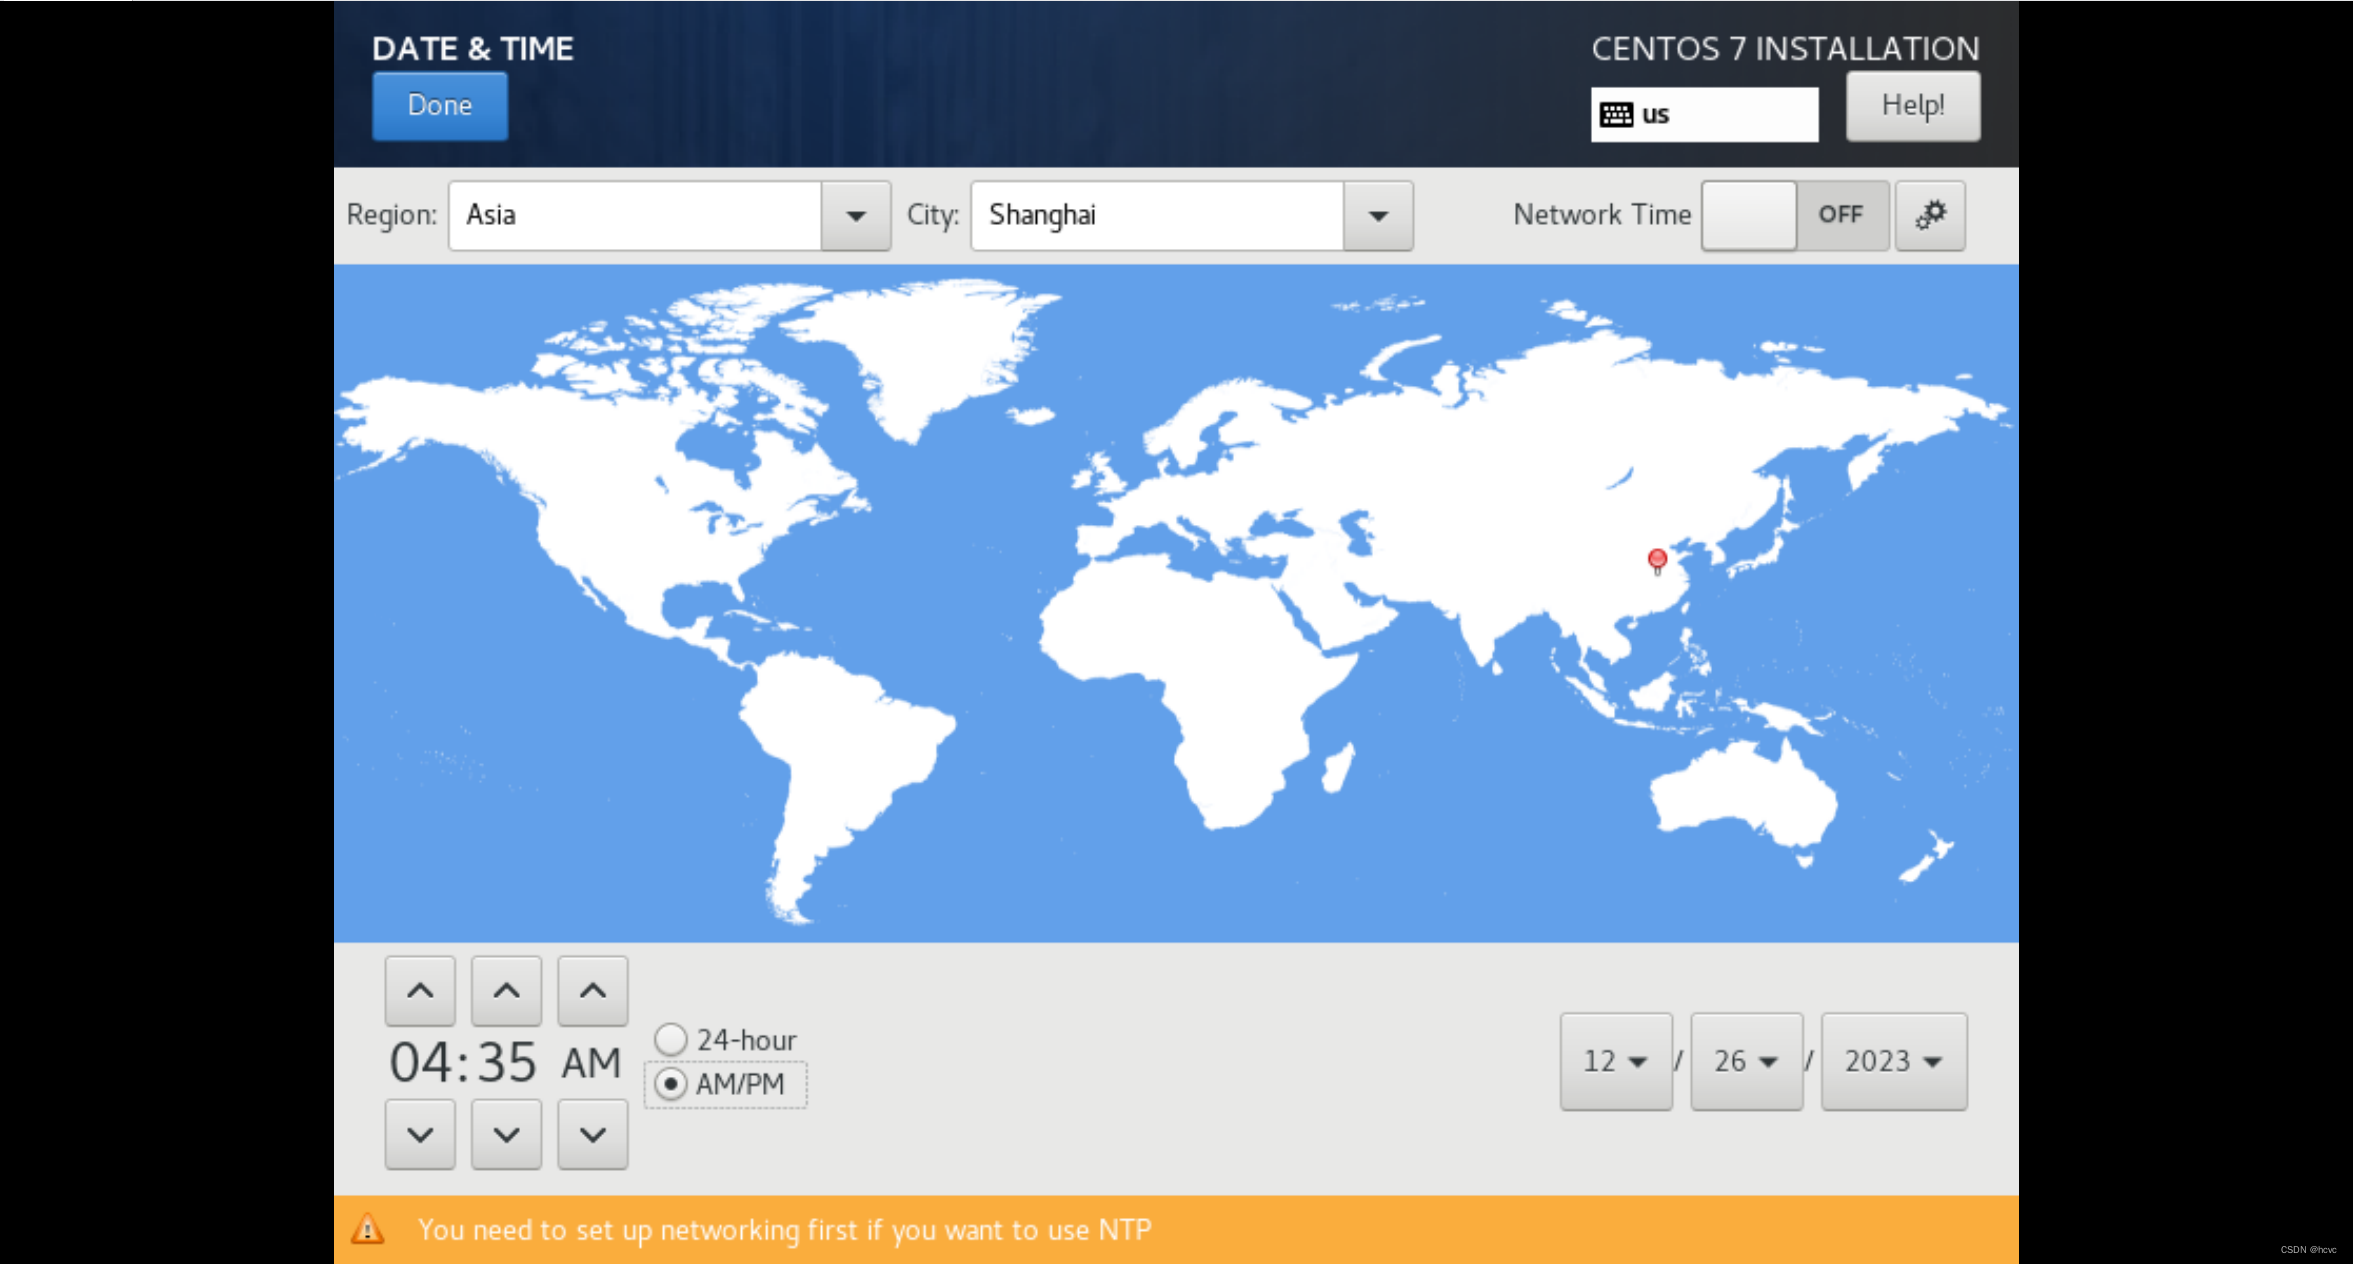
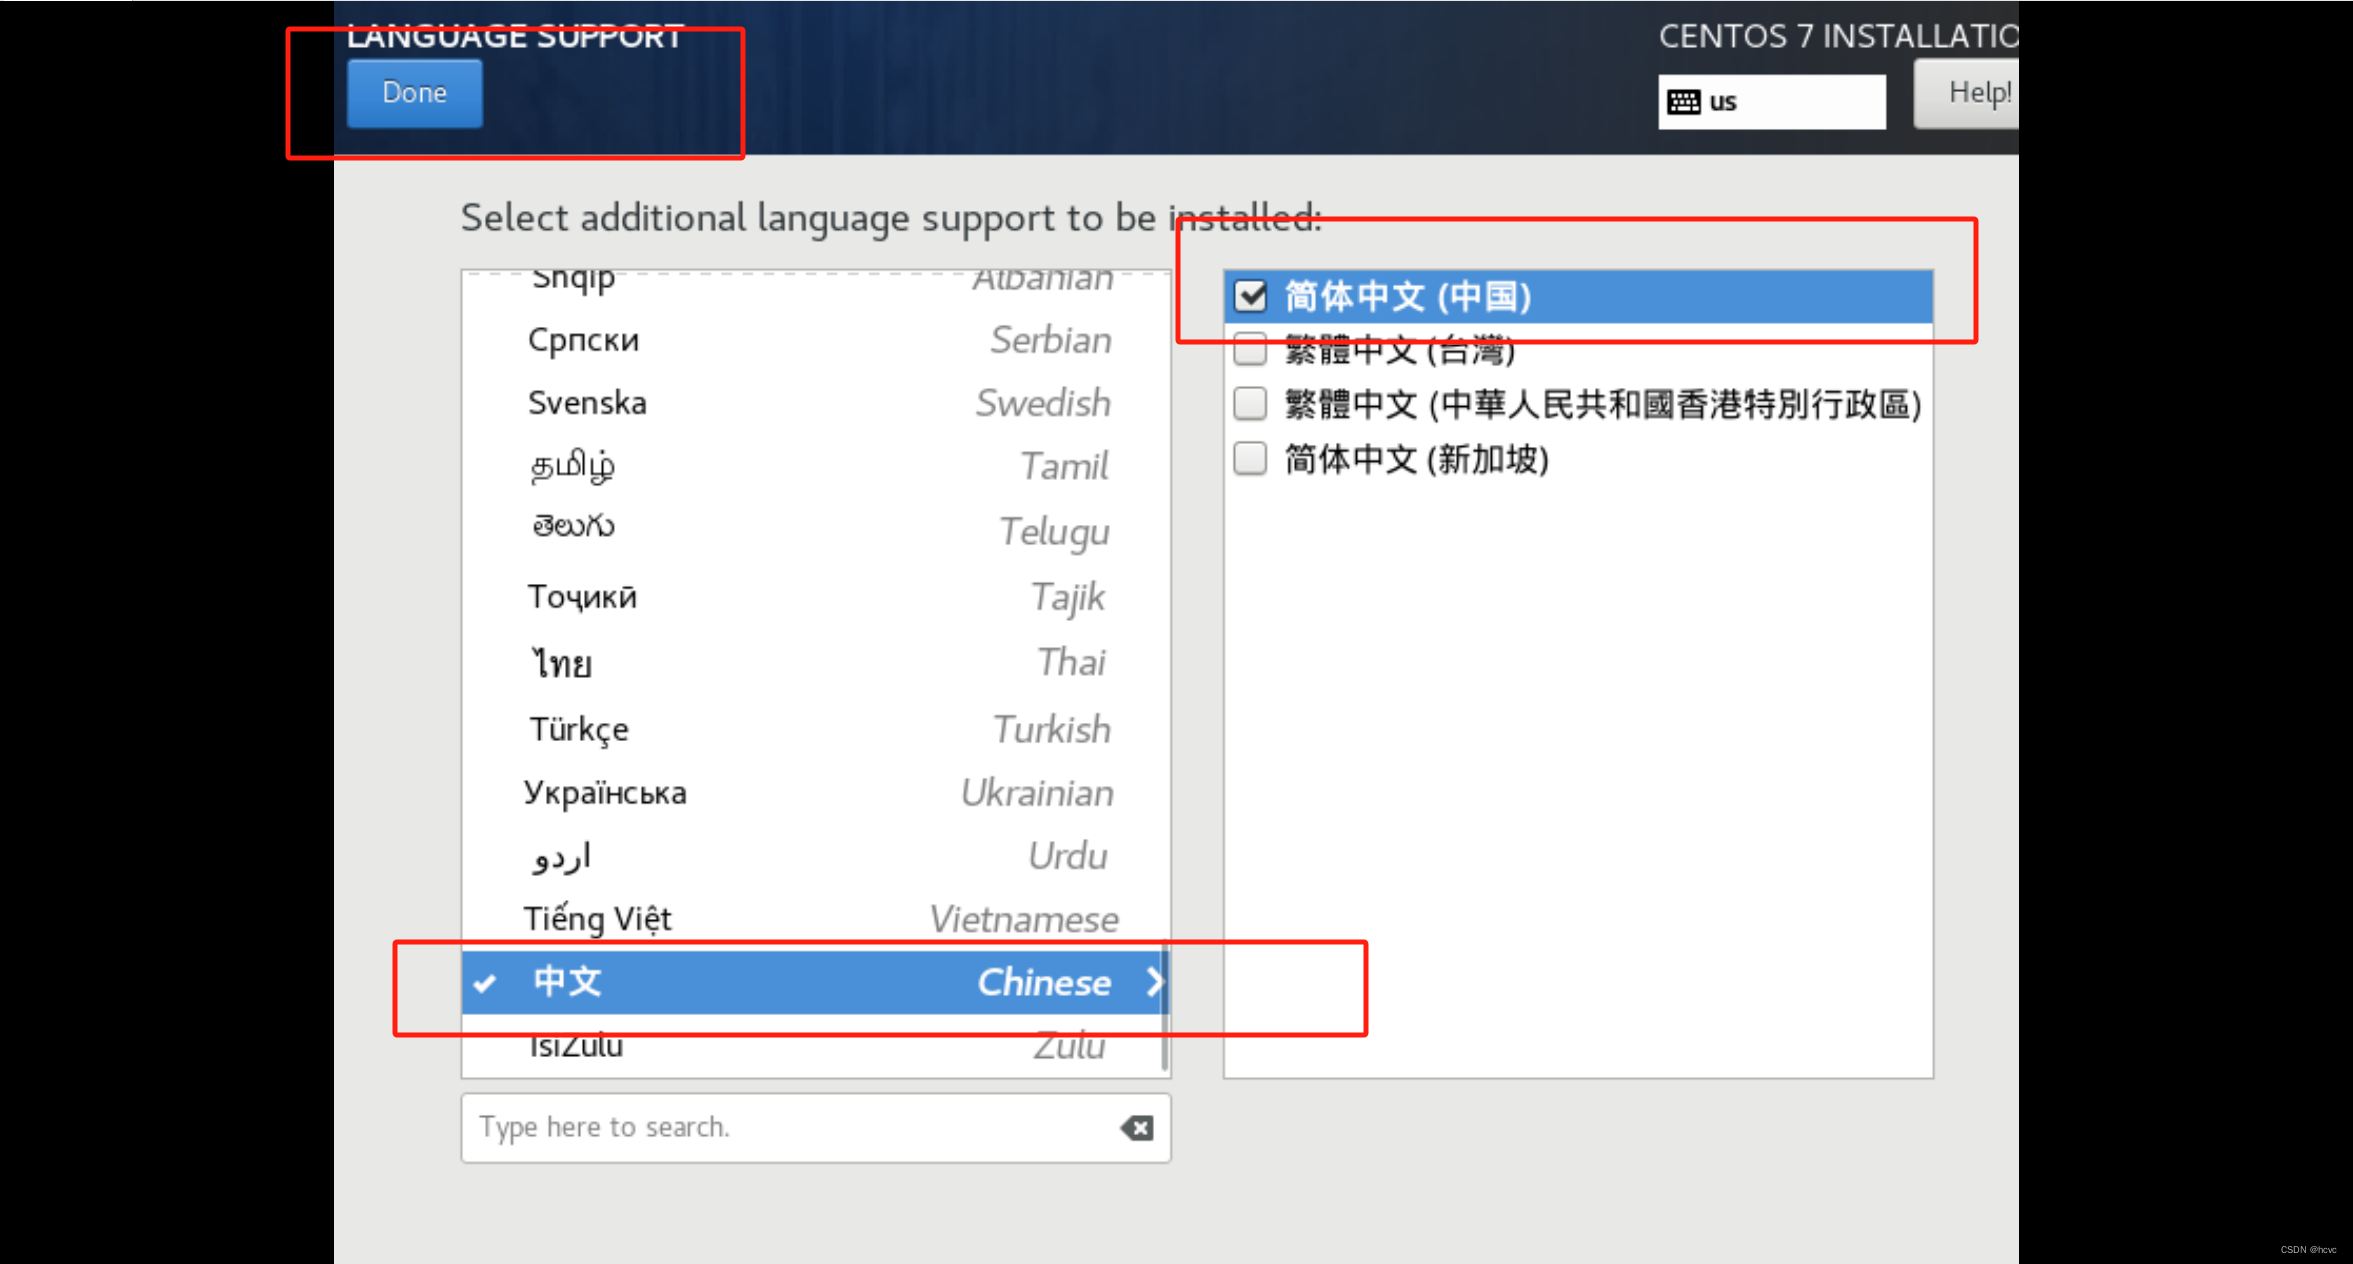
6、选择系统支持的语言,把中文选上,然后点击done返回
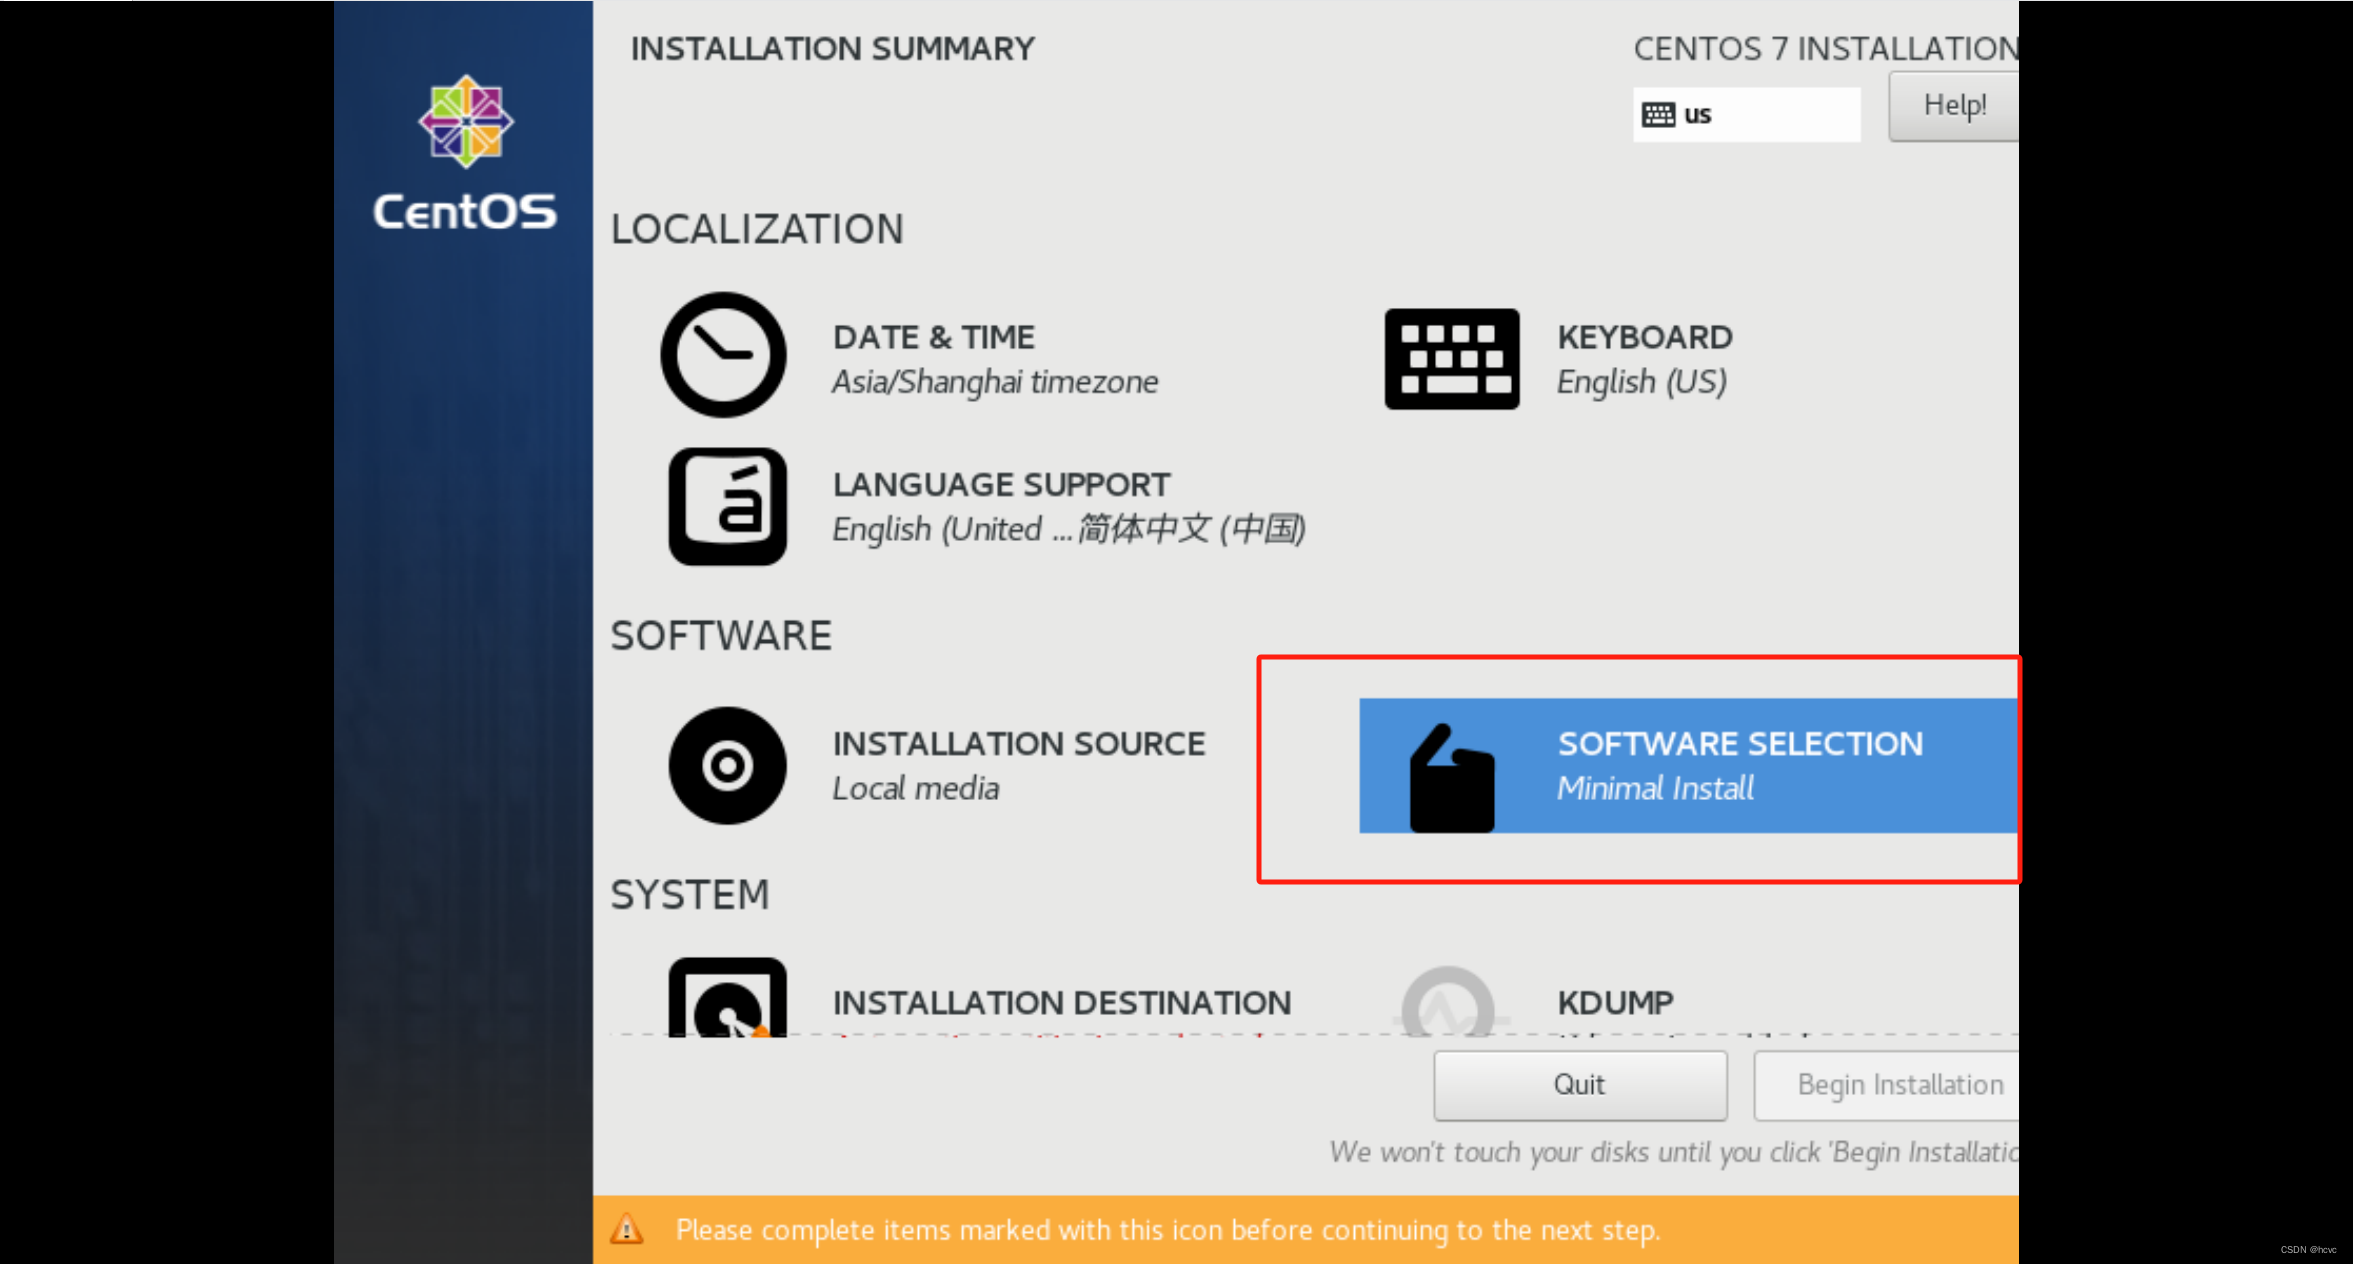
7、点击工具选择SOFTWARE SELECTION
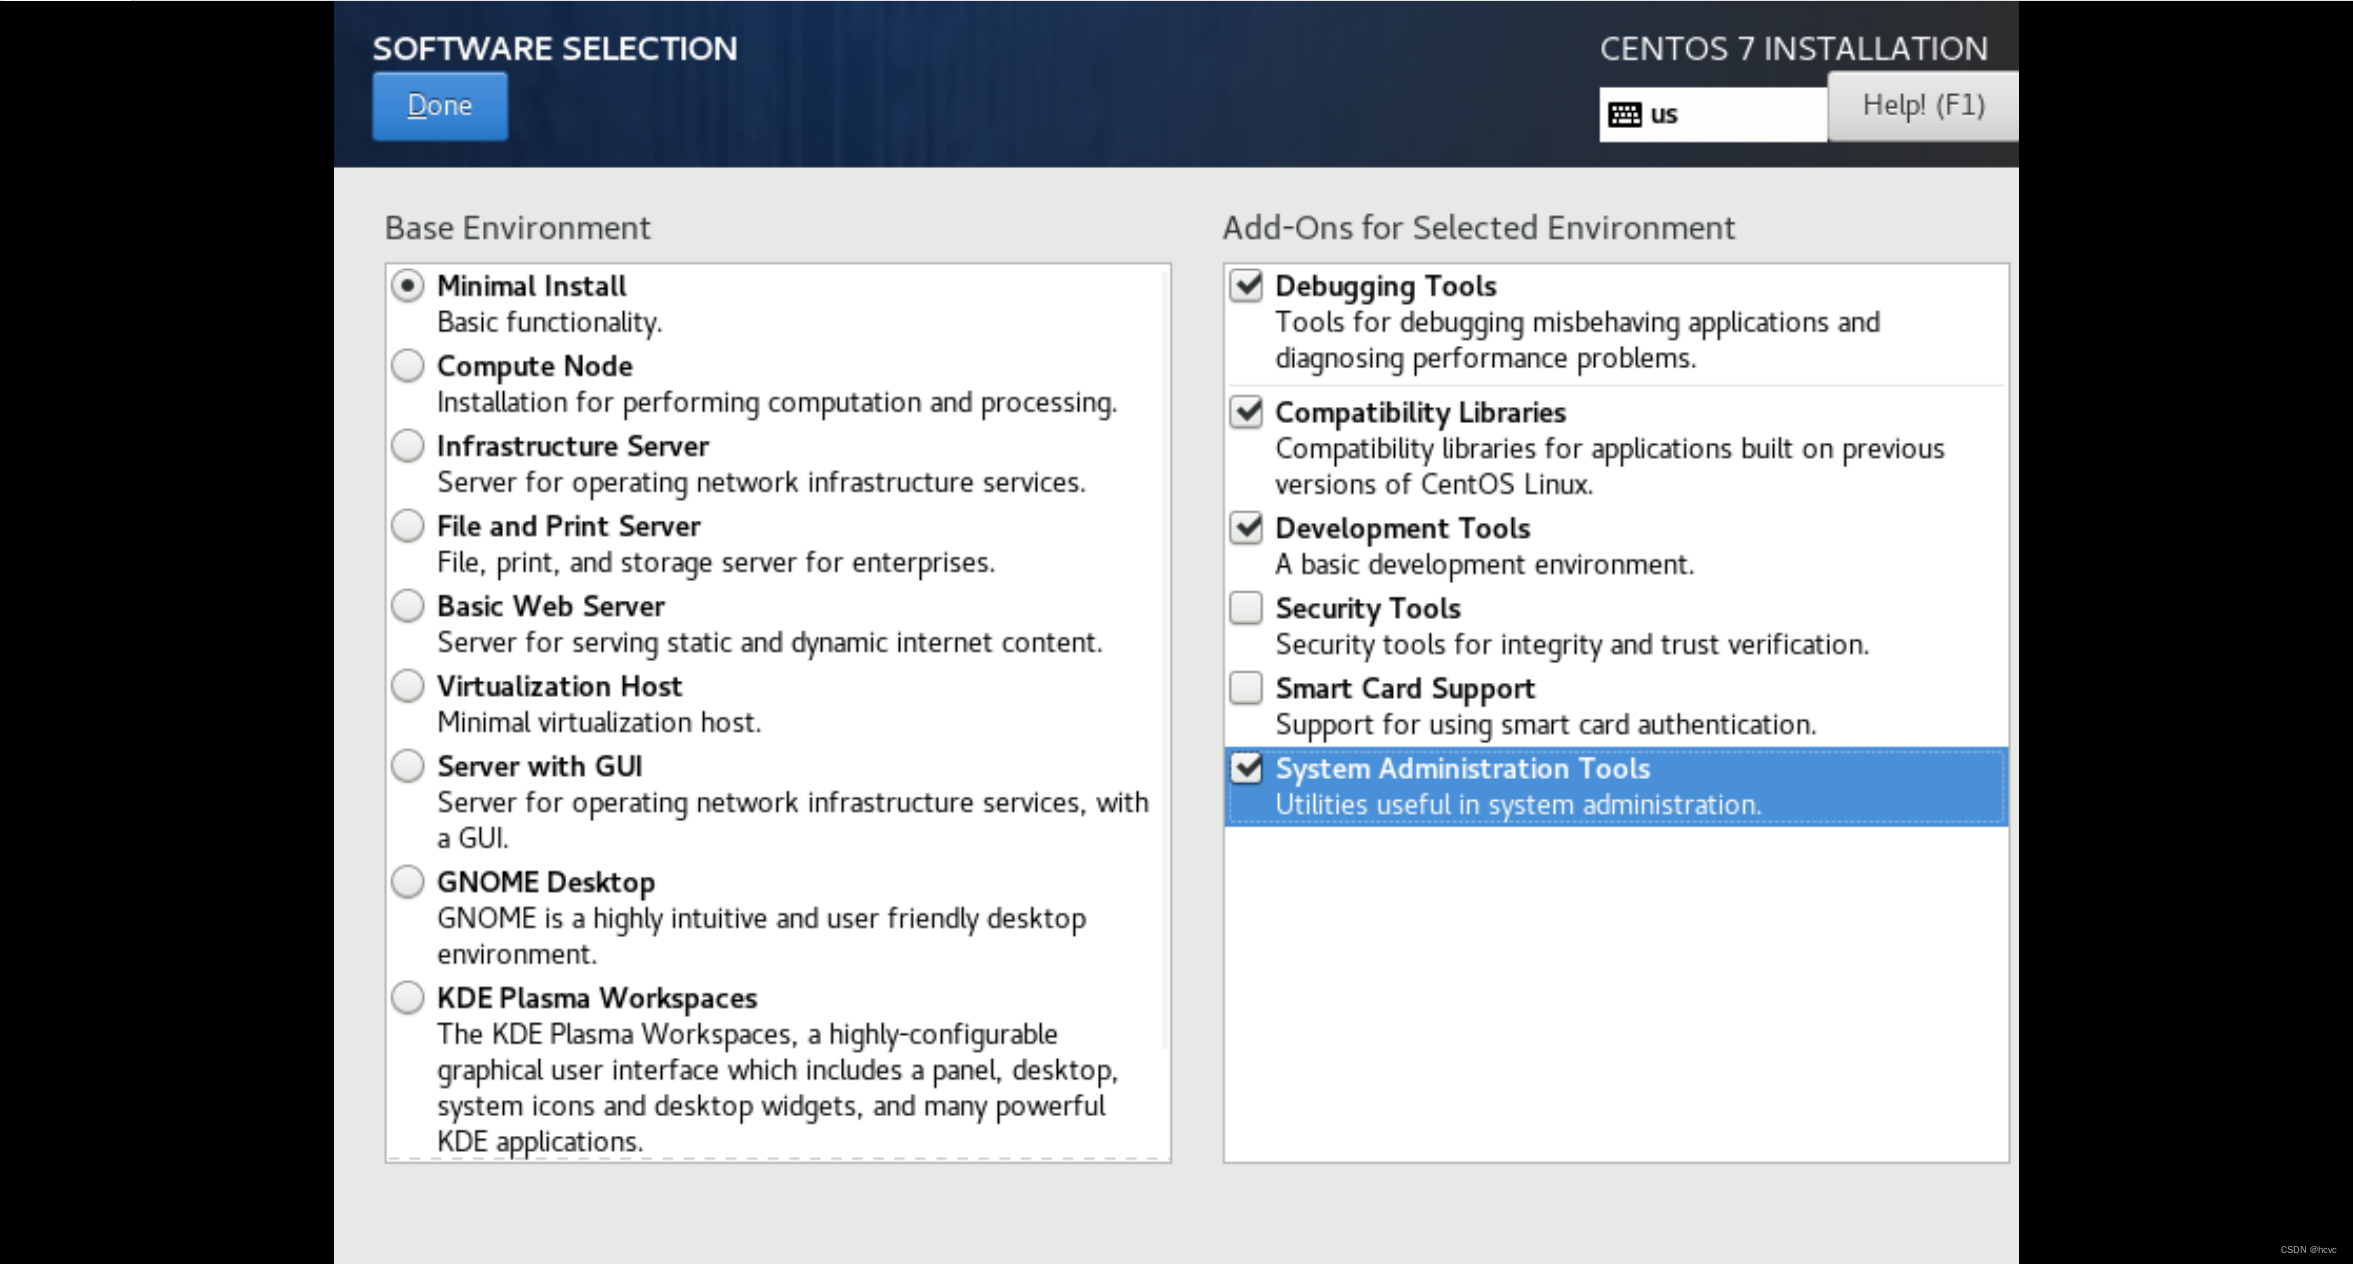
左侧选择minimal install(最小化安装),右侧选择第1、2、3、6(debug工具、lib库、开发者工具、管理员gong)
8、点击安装INSTALL DESTINATION划分磁盘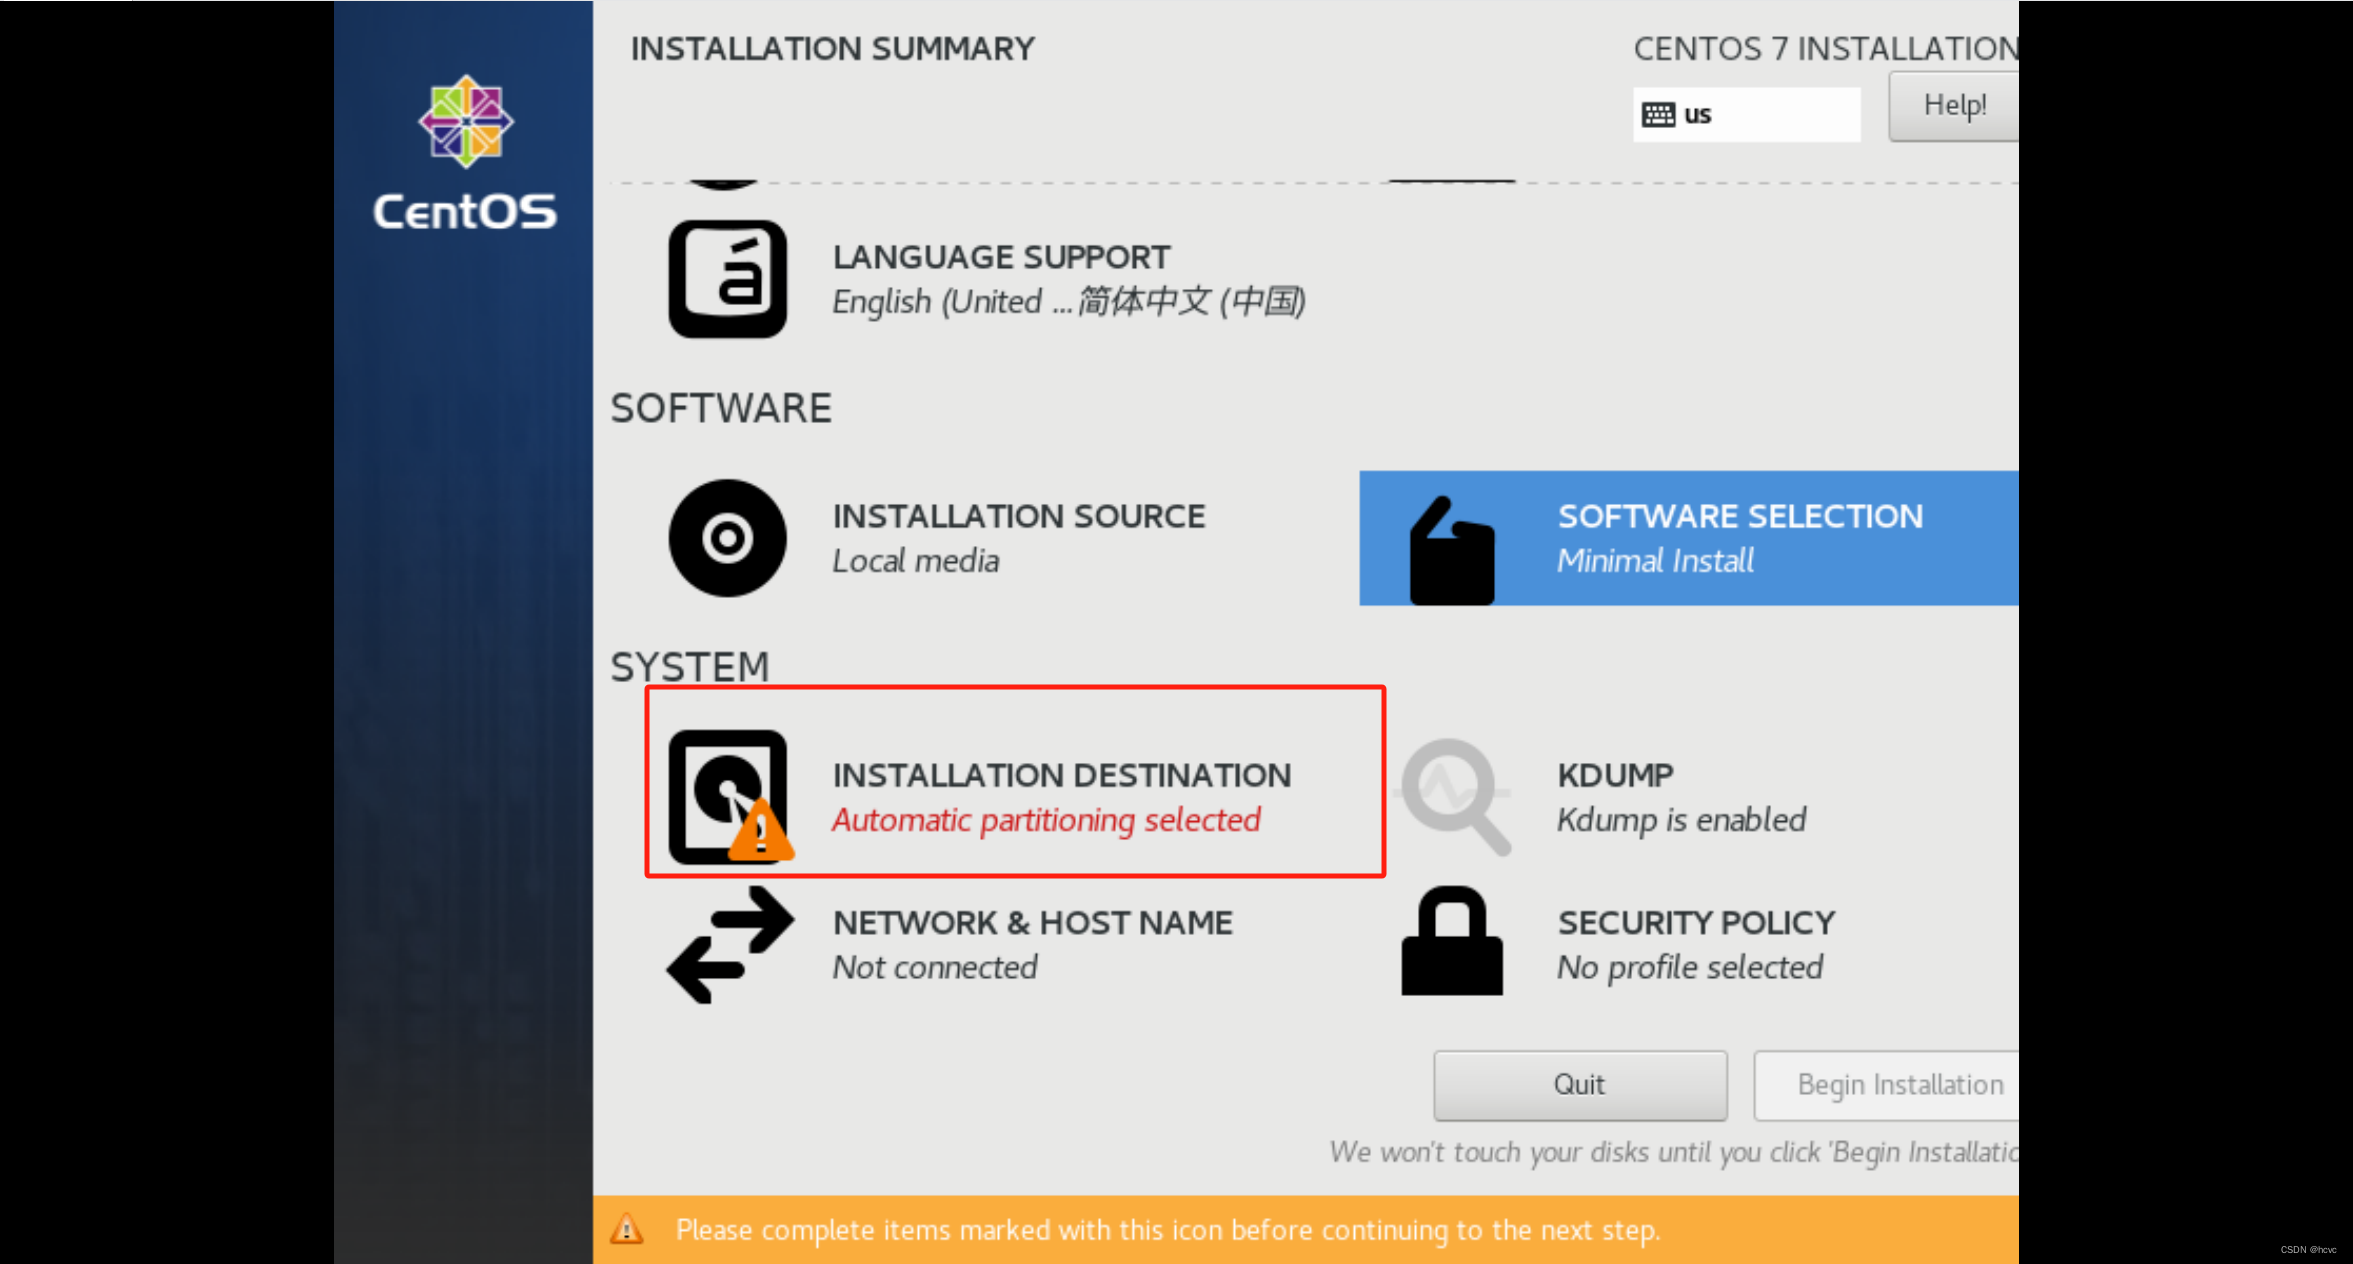
点击手动配置磁盘,然后点击done下一步

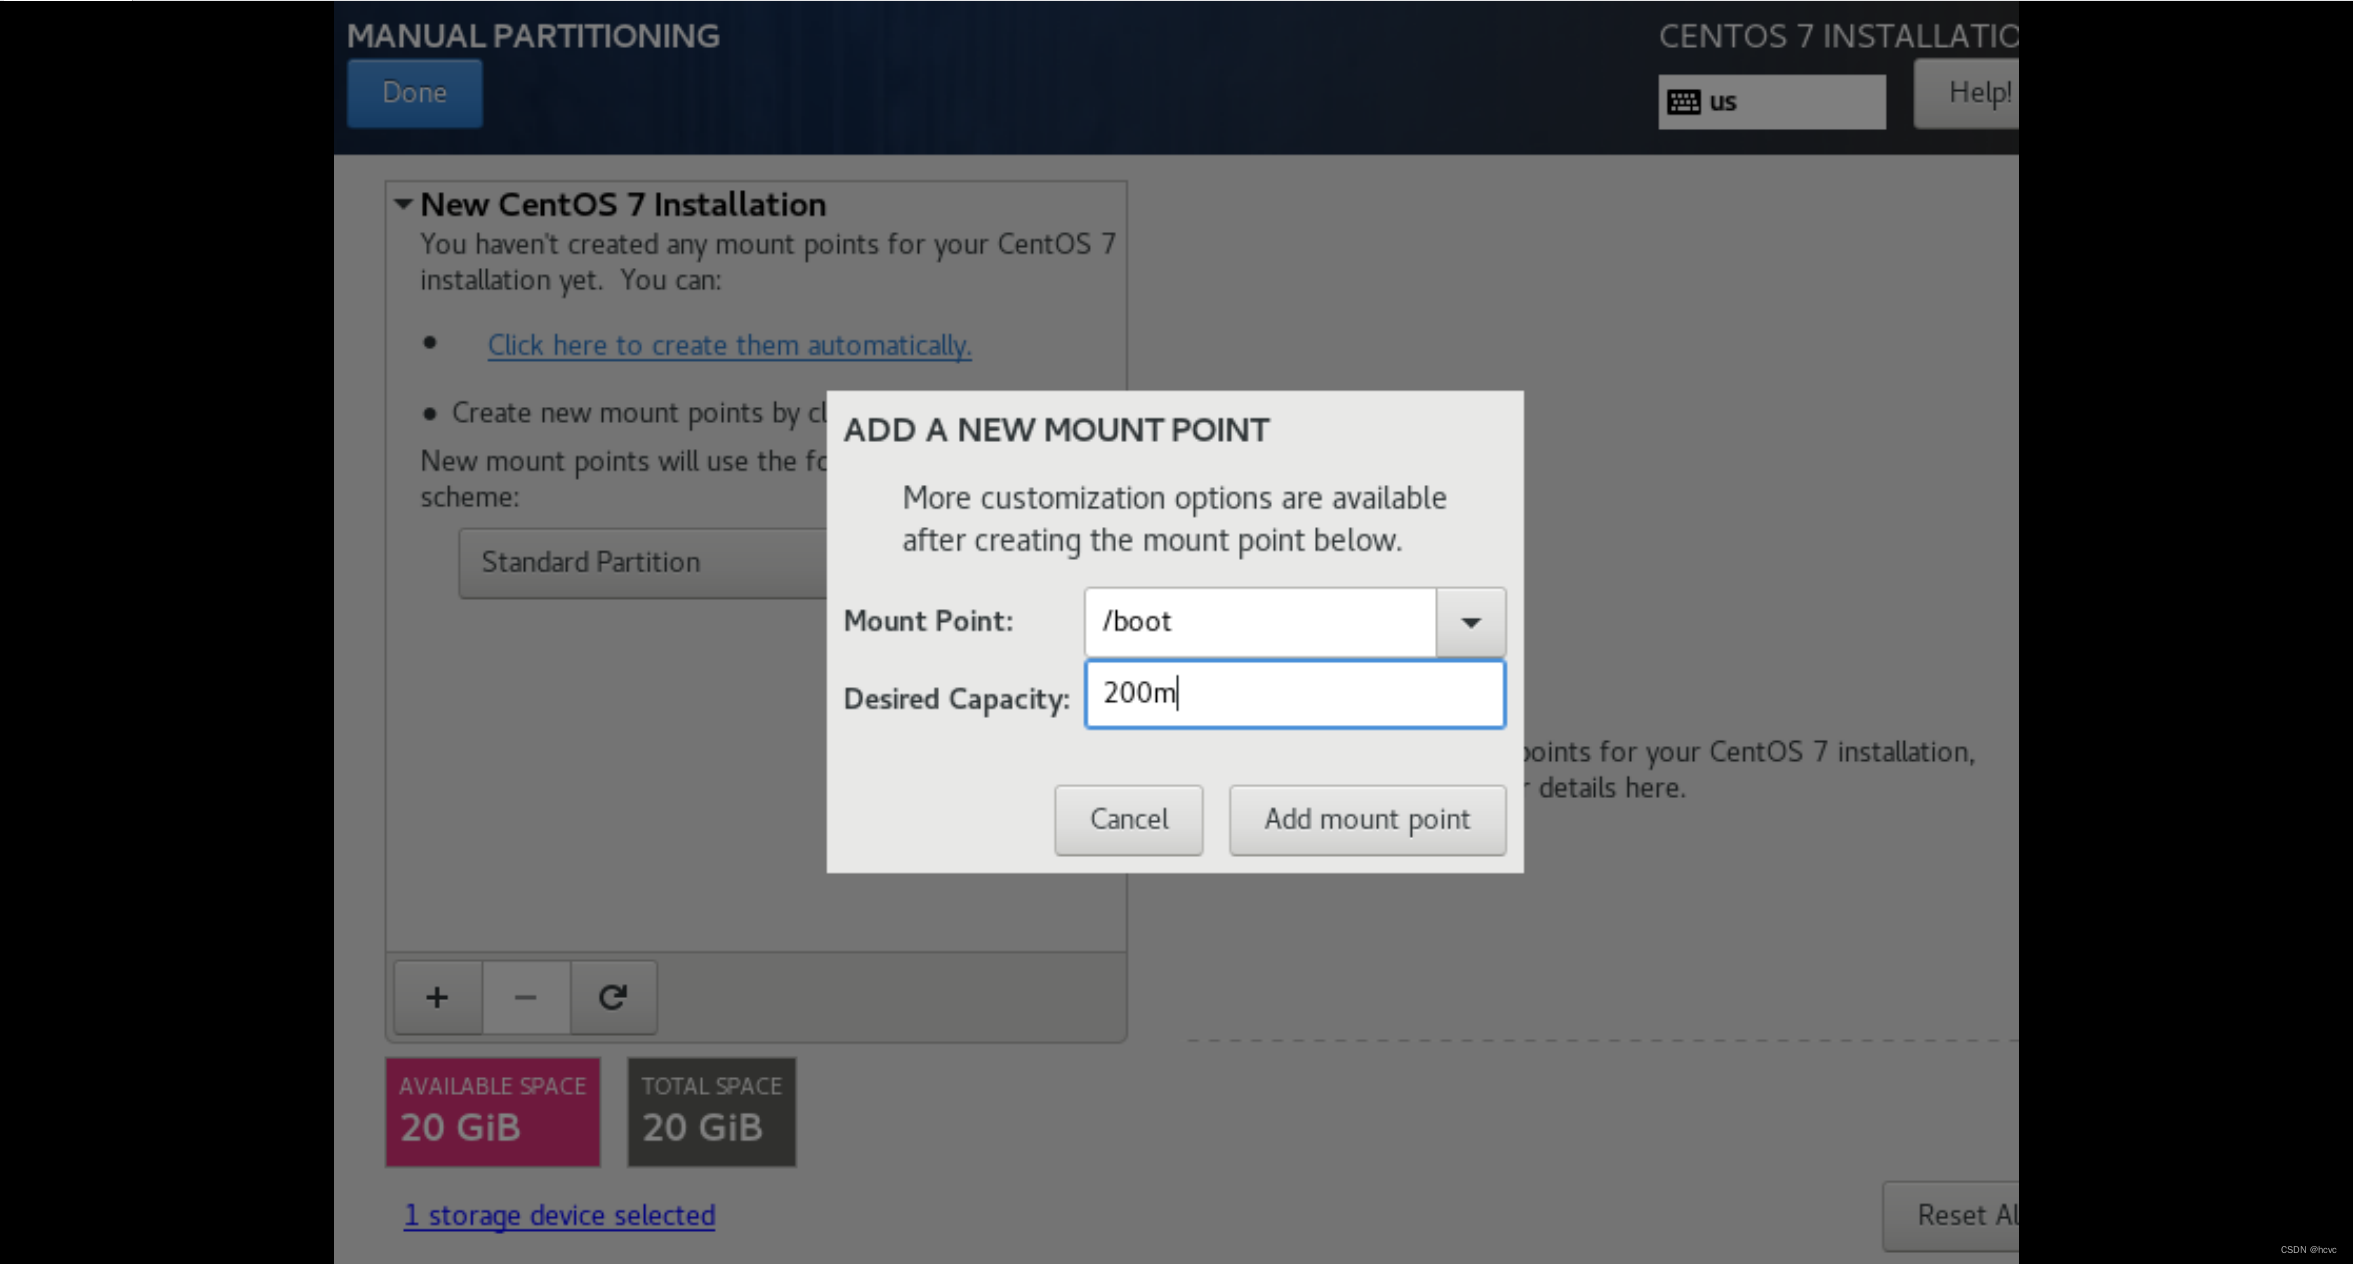
点击下拉框,选择标准分区,然后点击+号,添加分区

选择boot分区,用于存放系统内核,并分配200m空间(相当于windows的c盘)
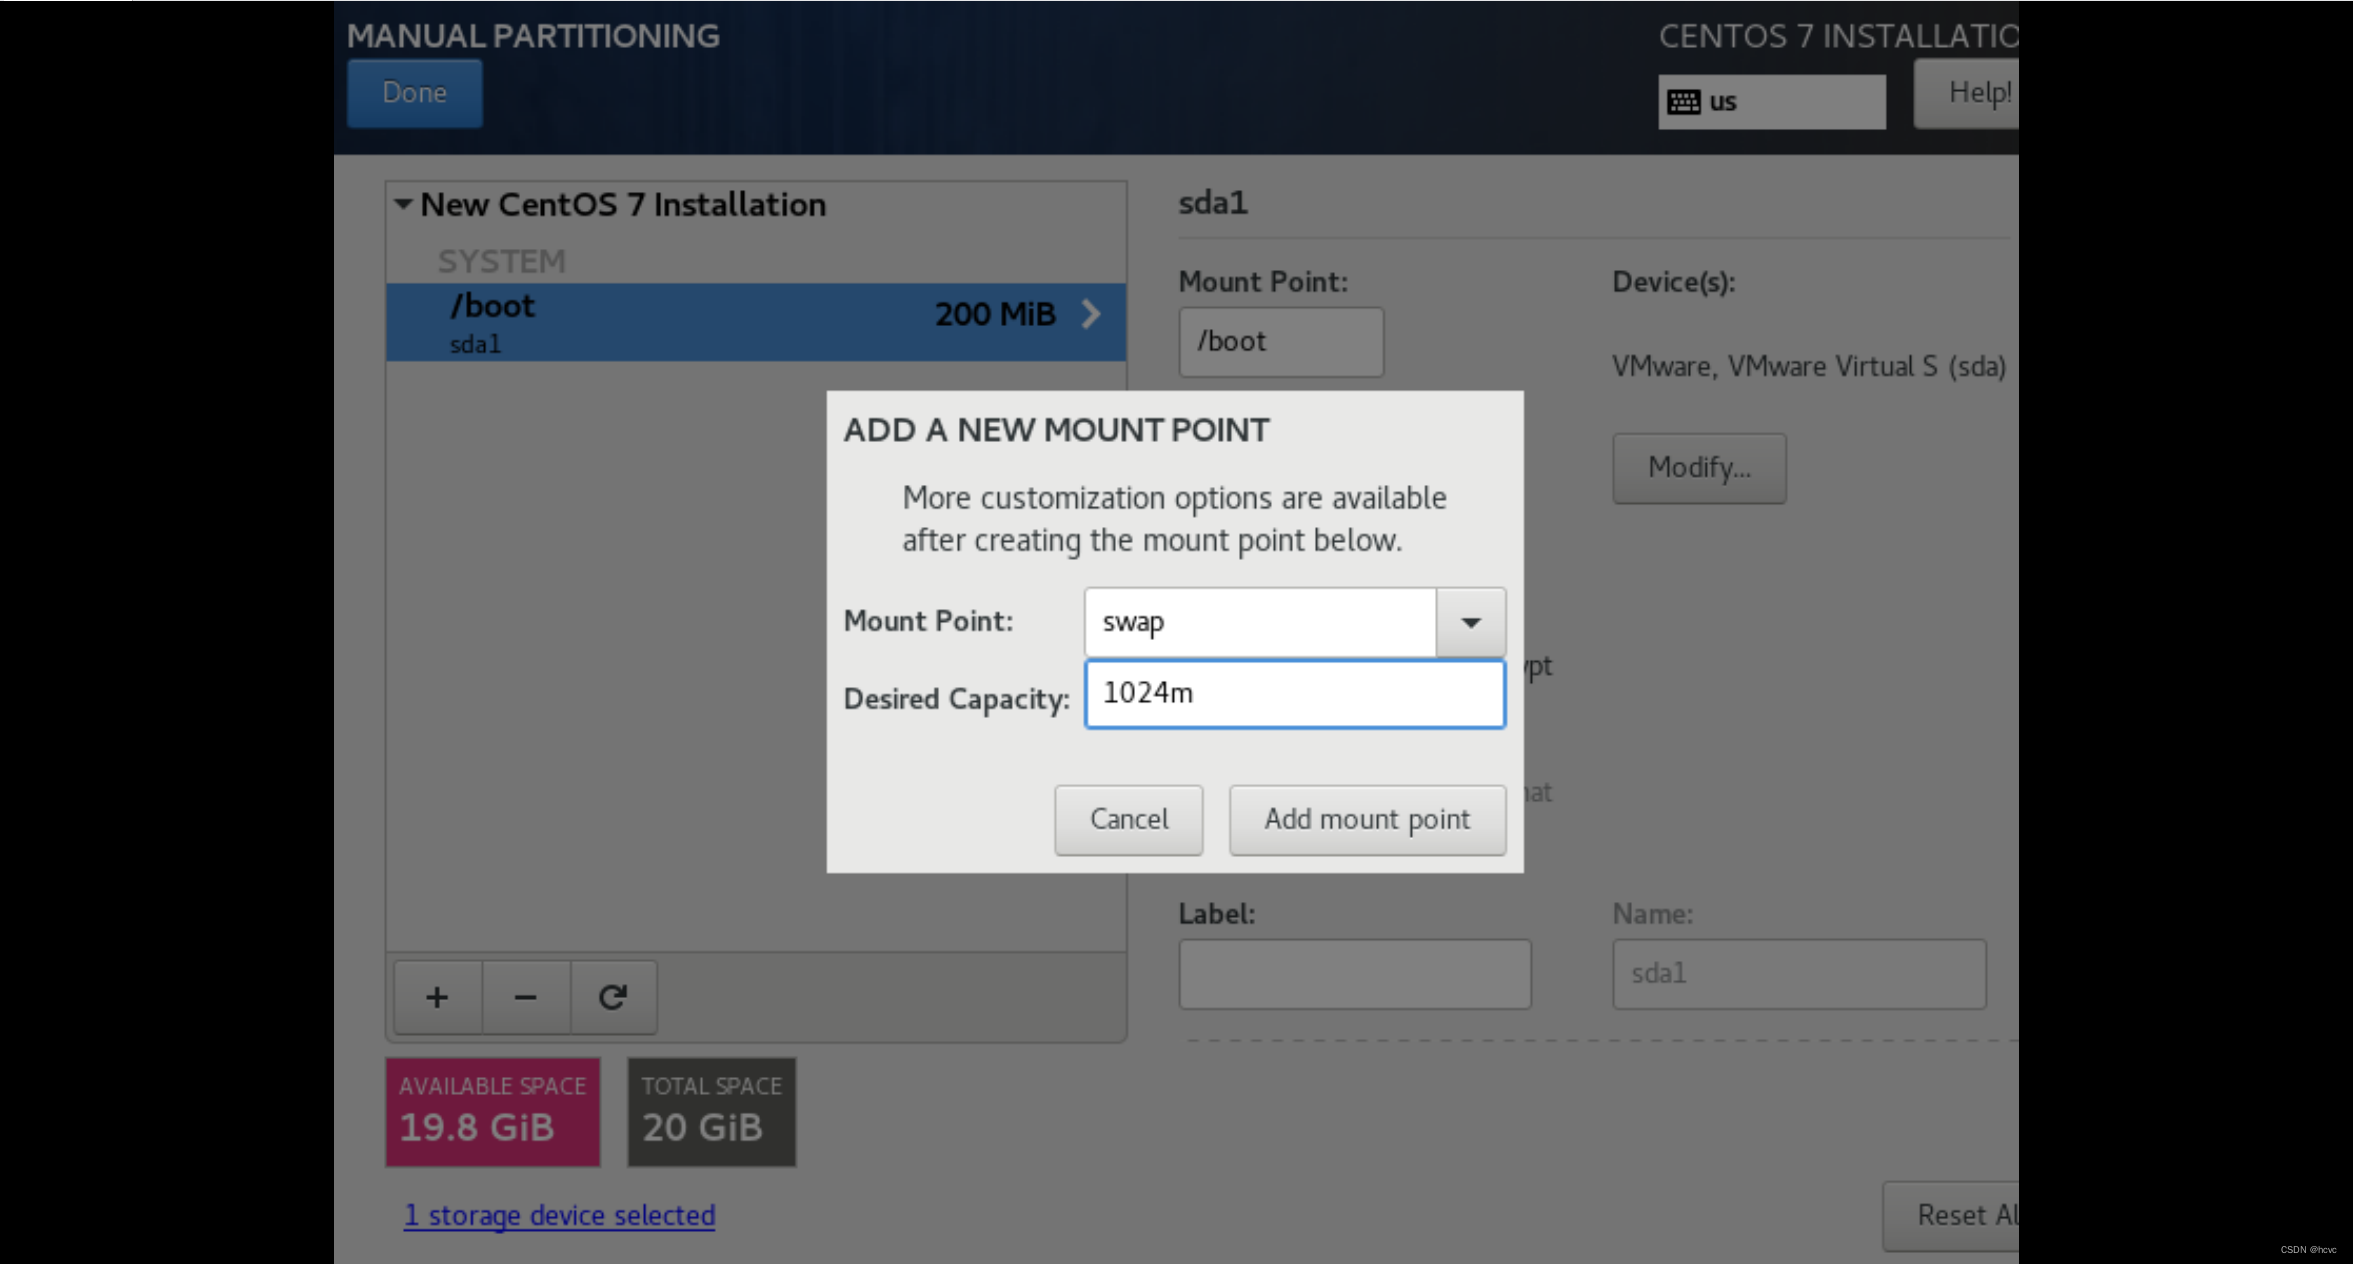
继续添加分区,添加swap分区,分出1024m空间
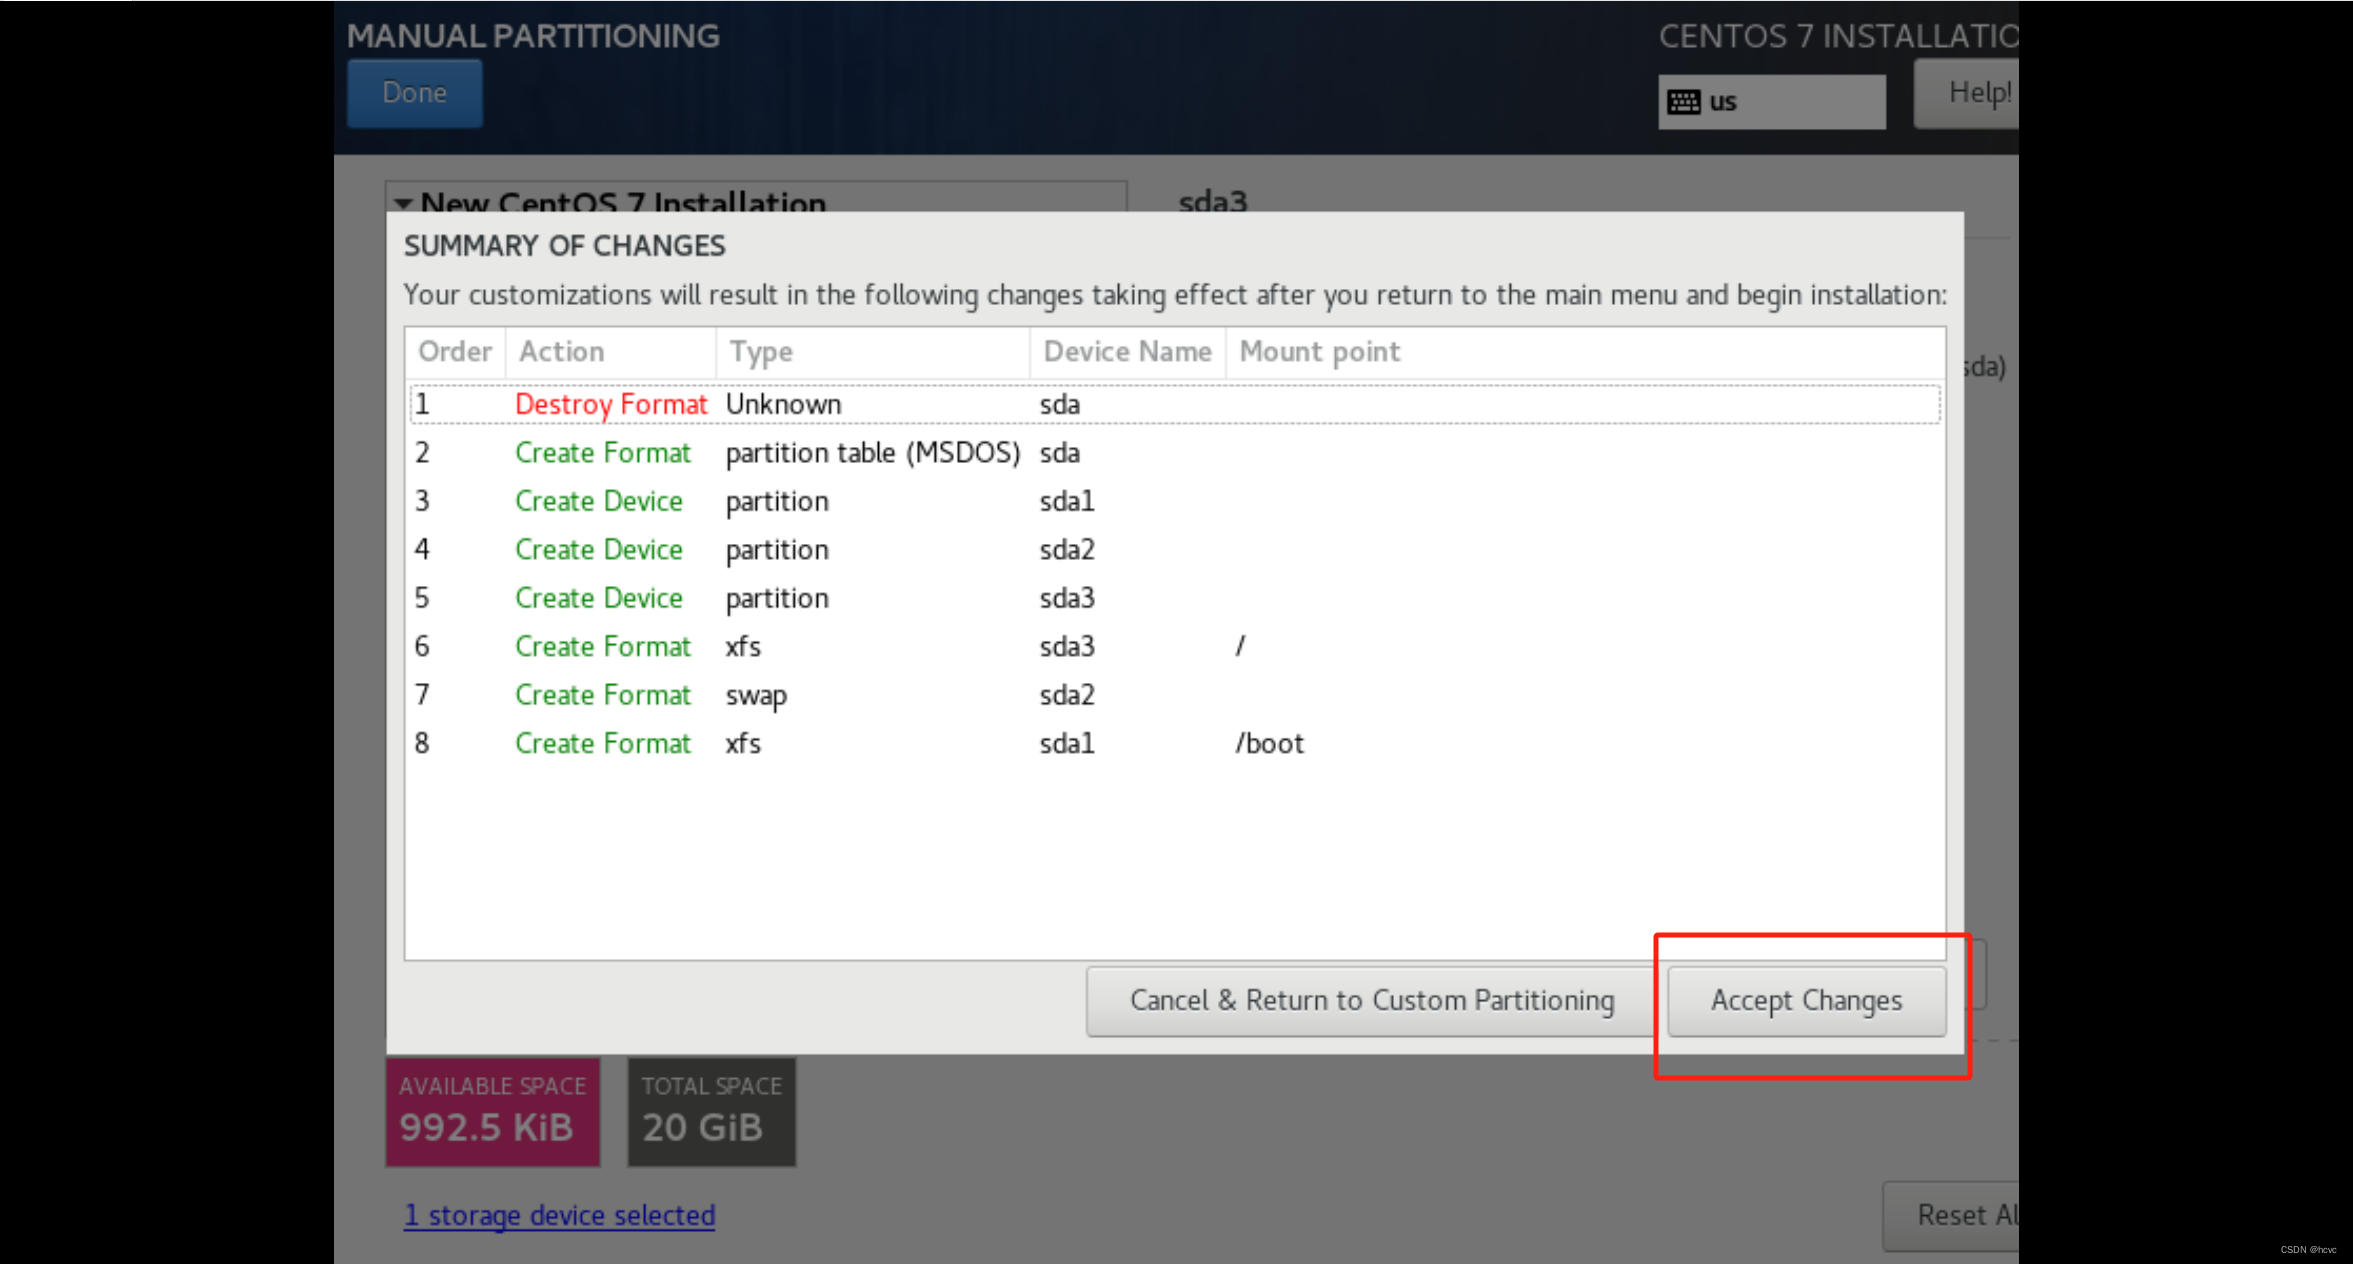
继续添加,选择 / ,不需要输入空间,默认占用剩余全部空间
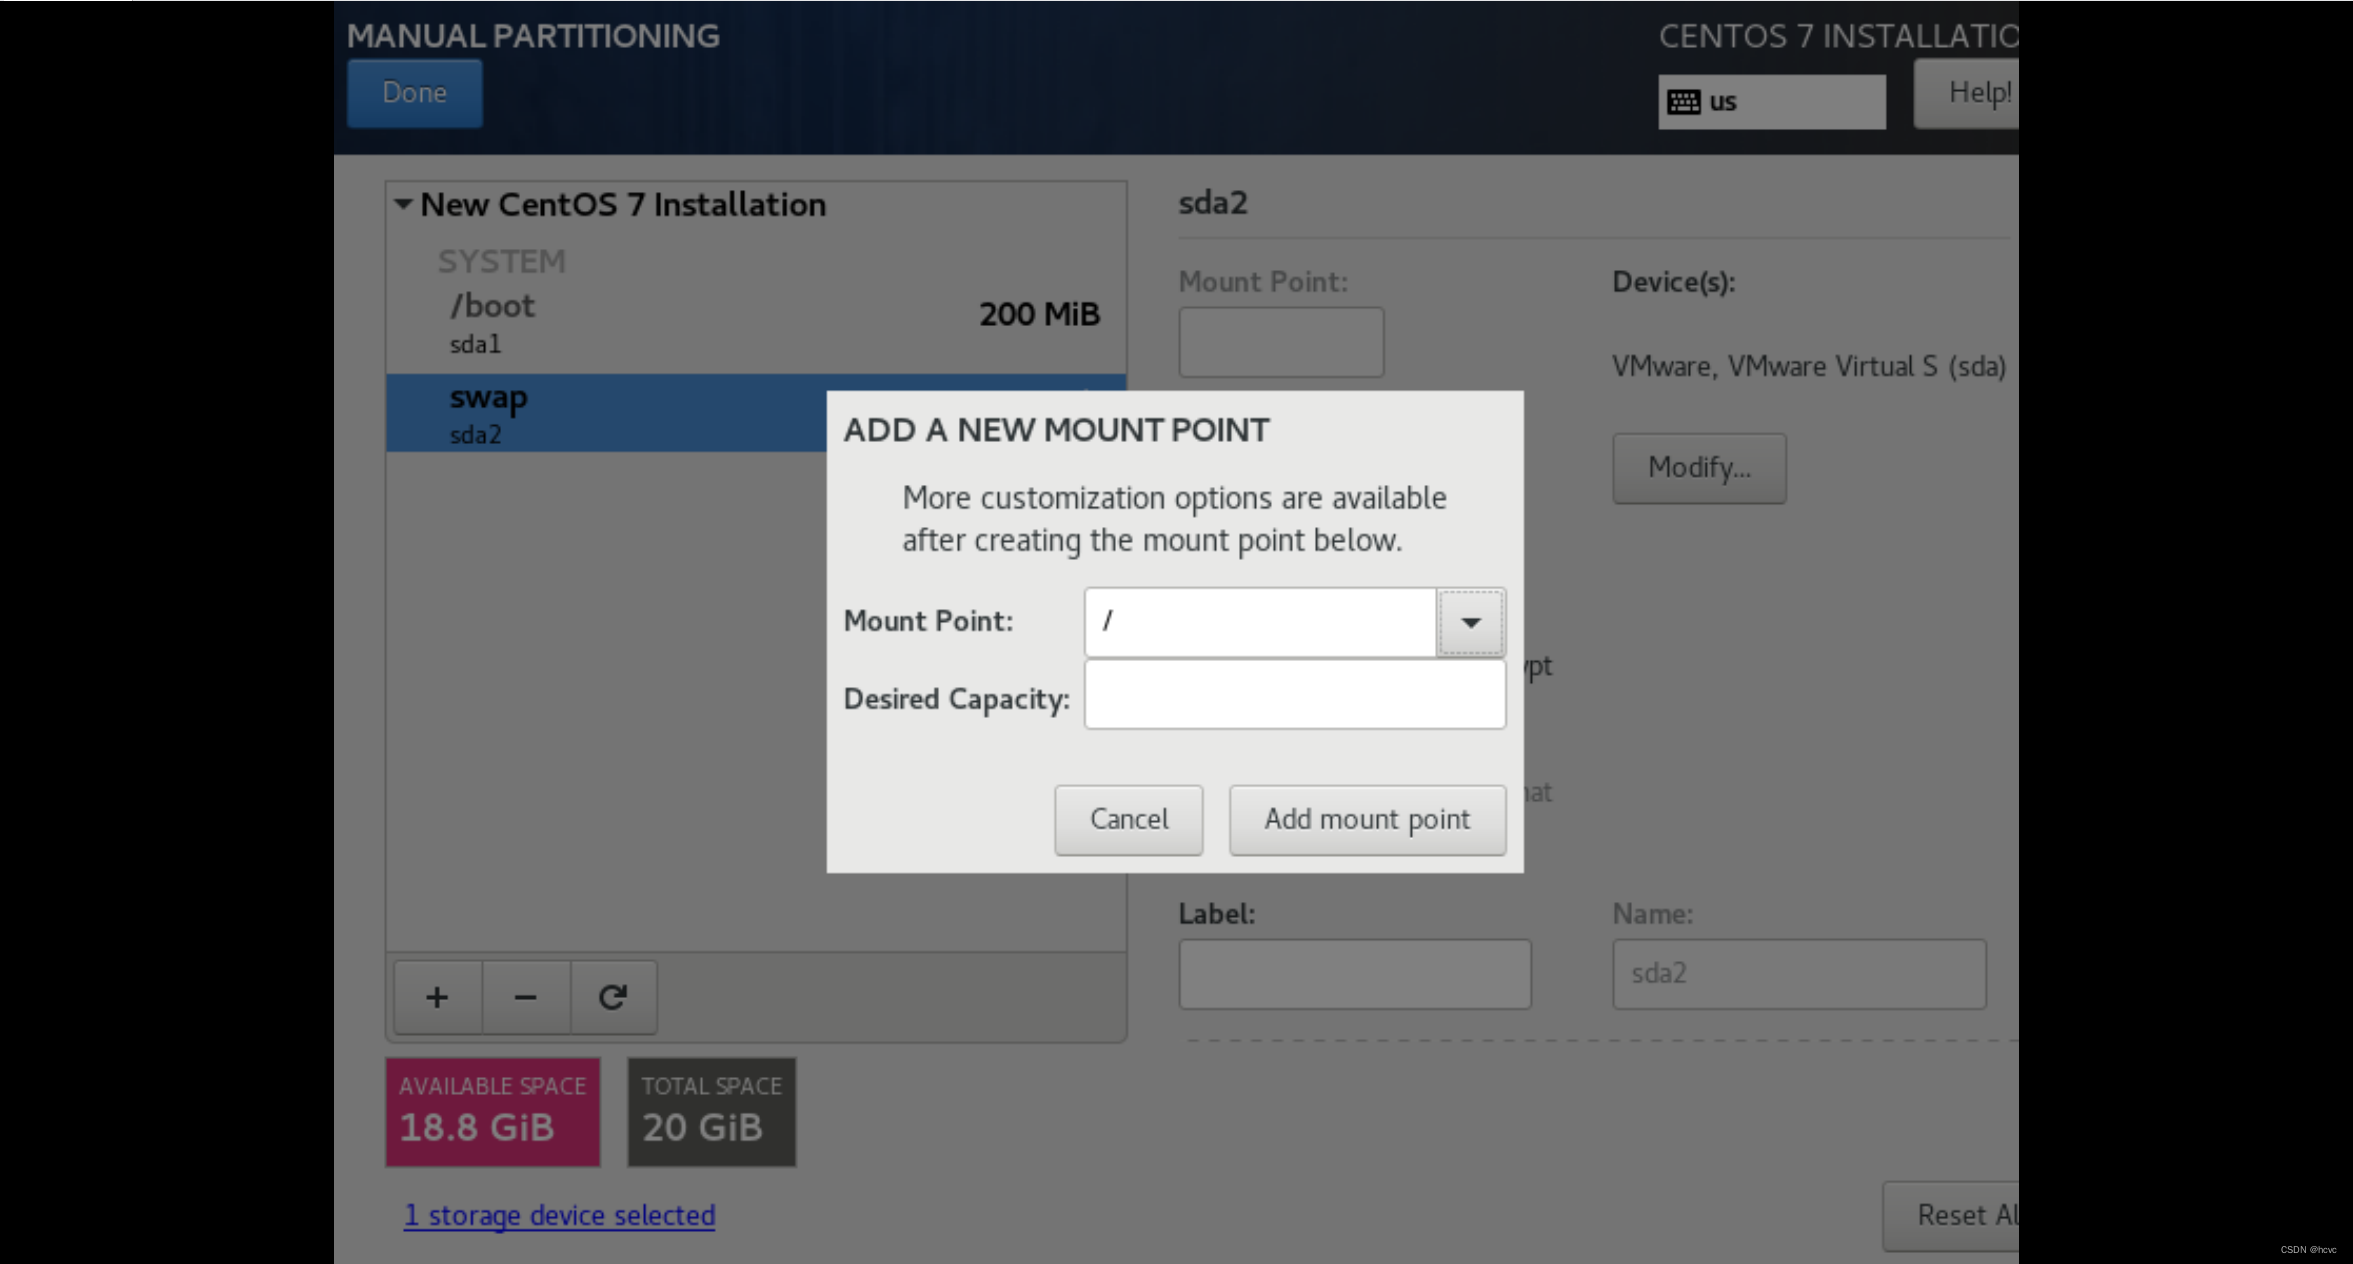
然后点done返回,并同意改变
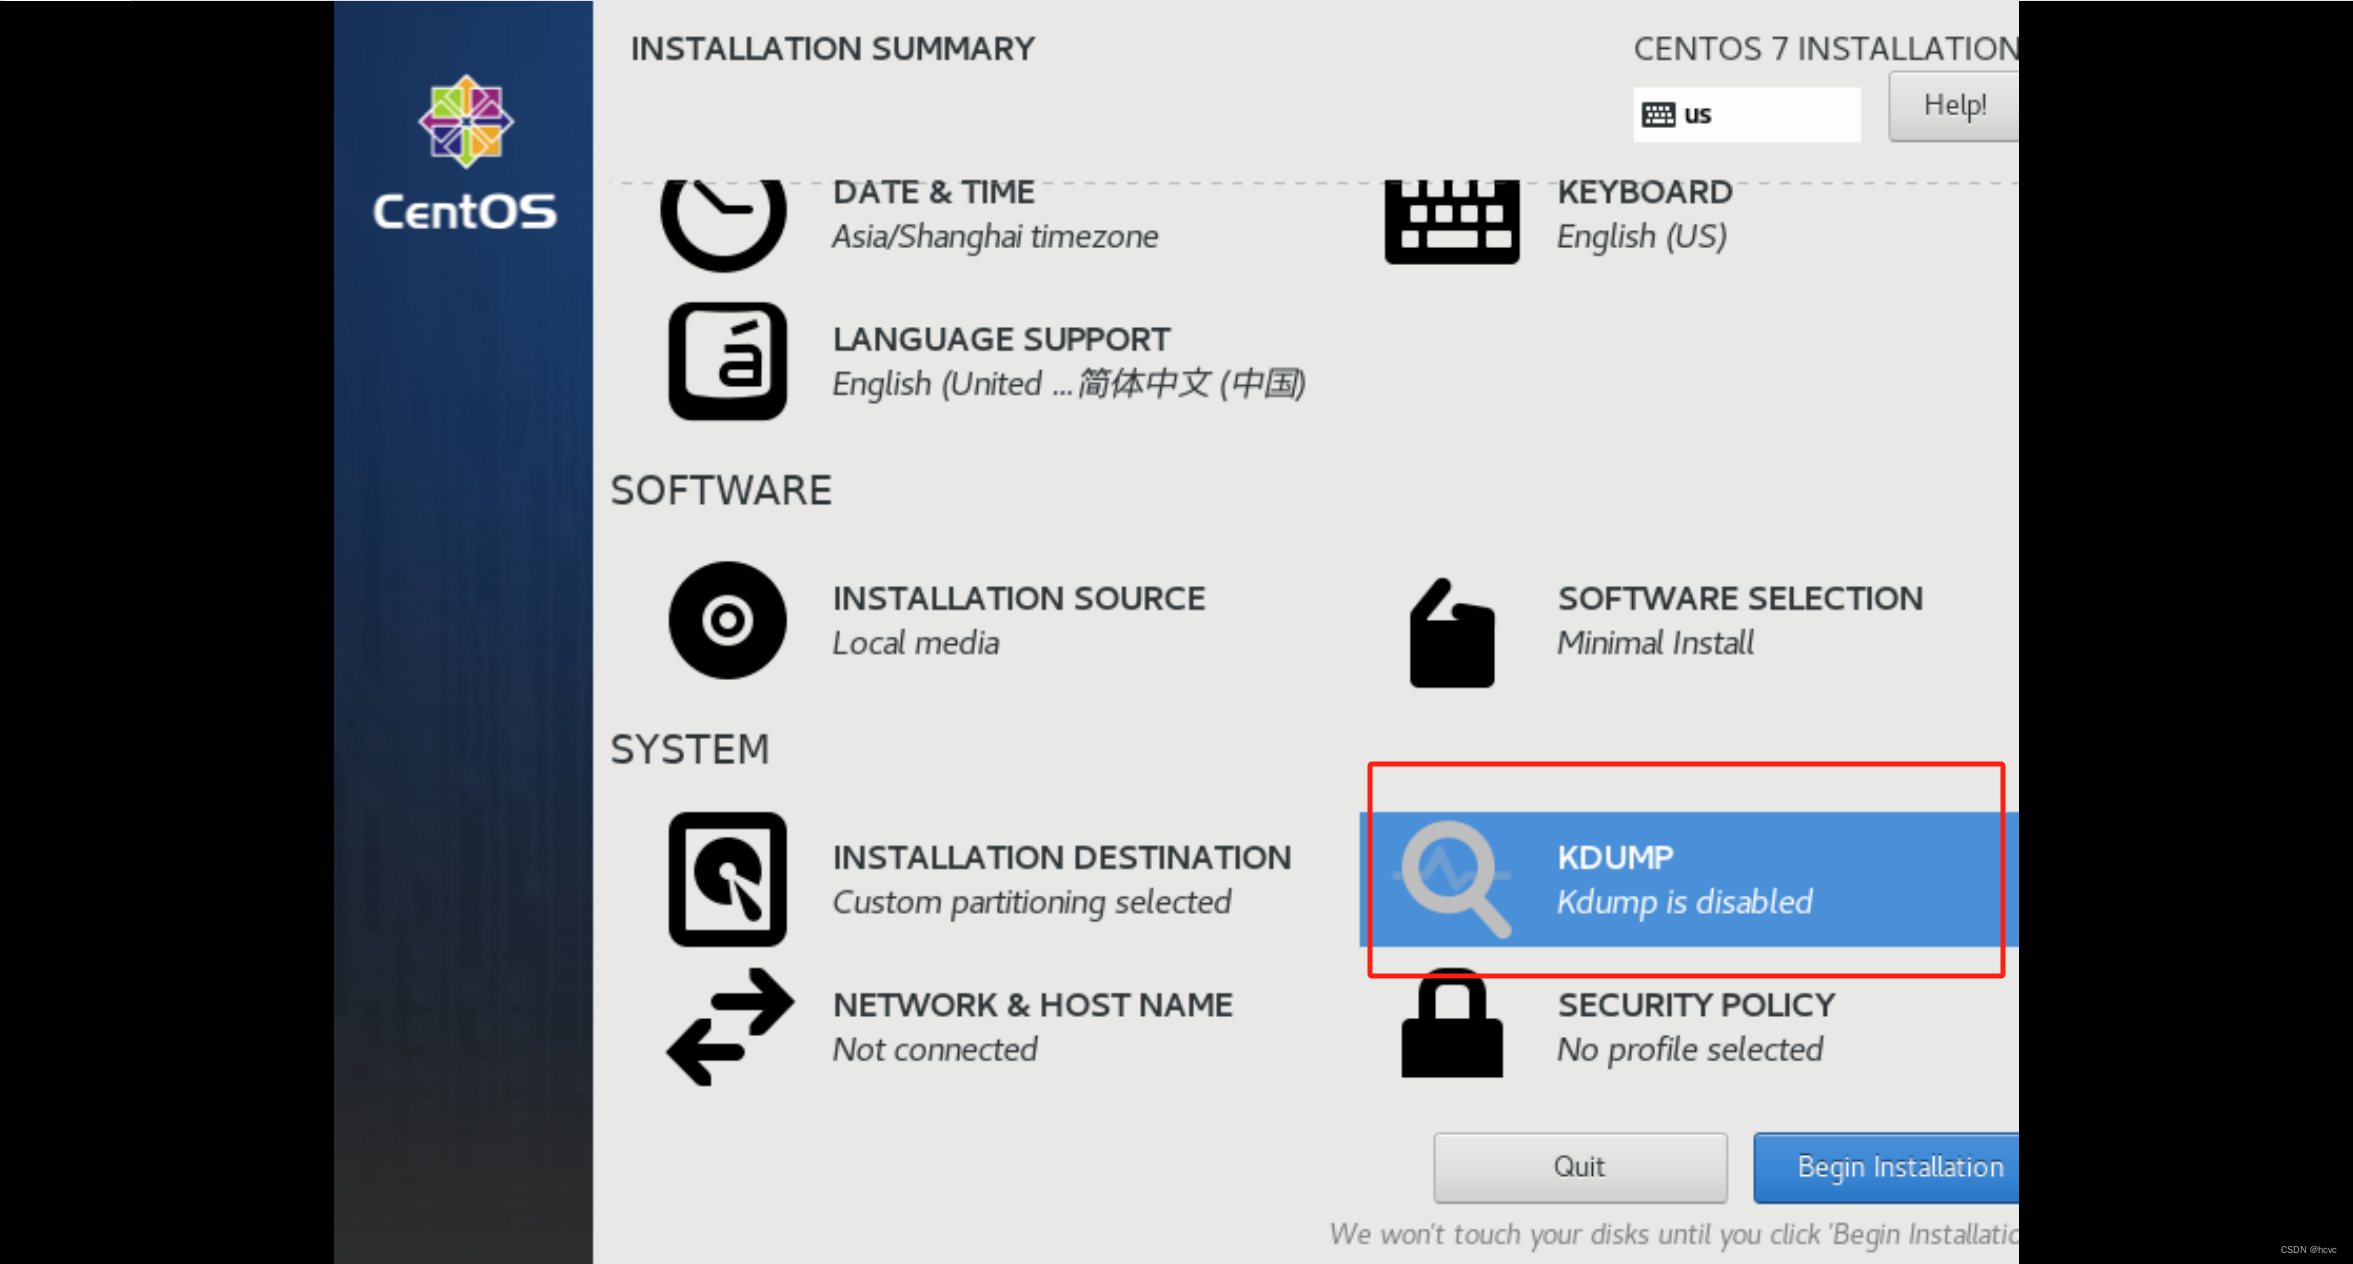
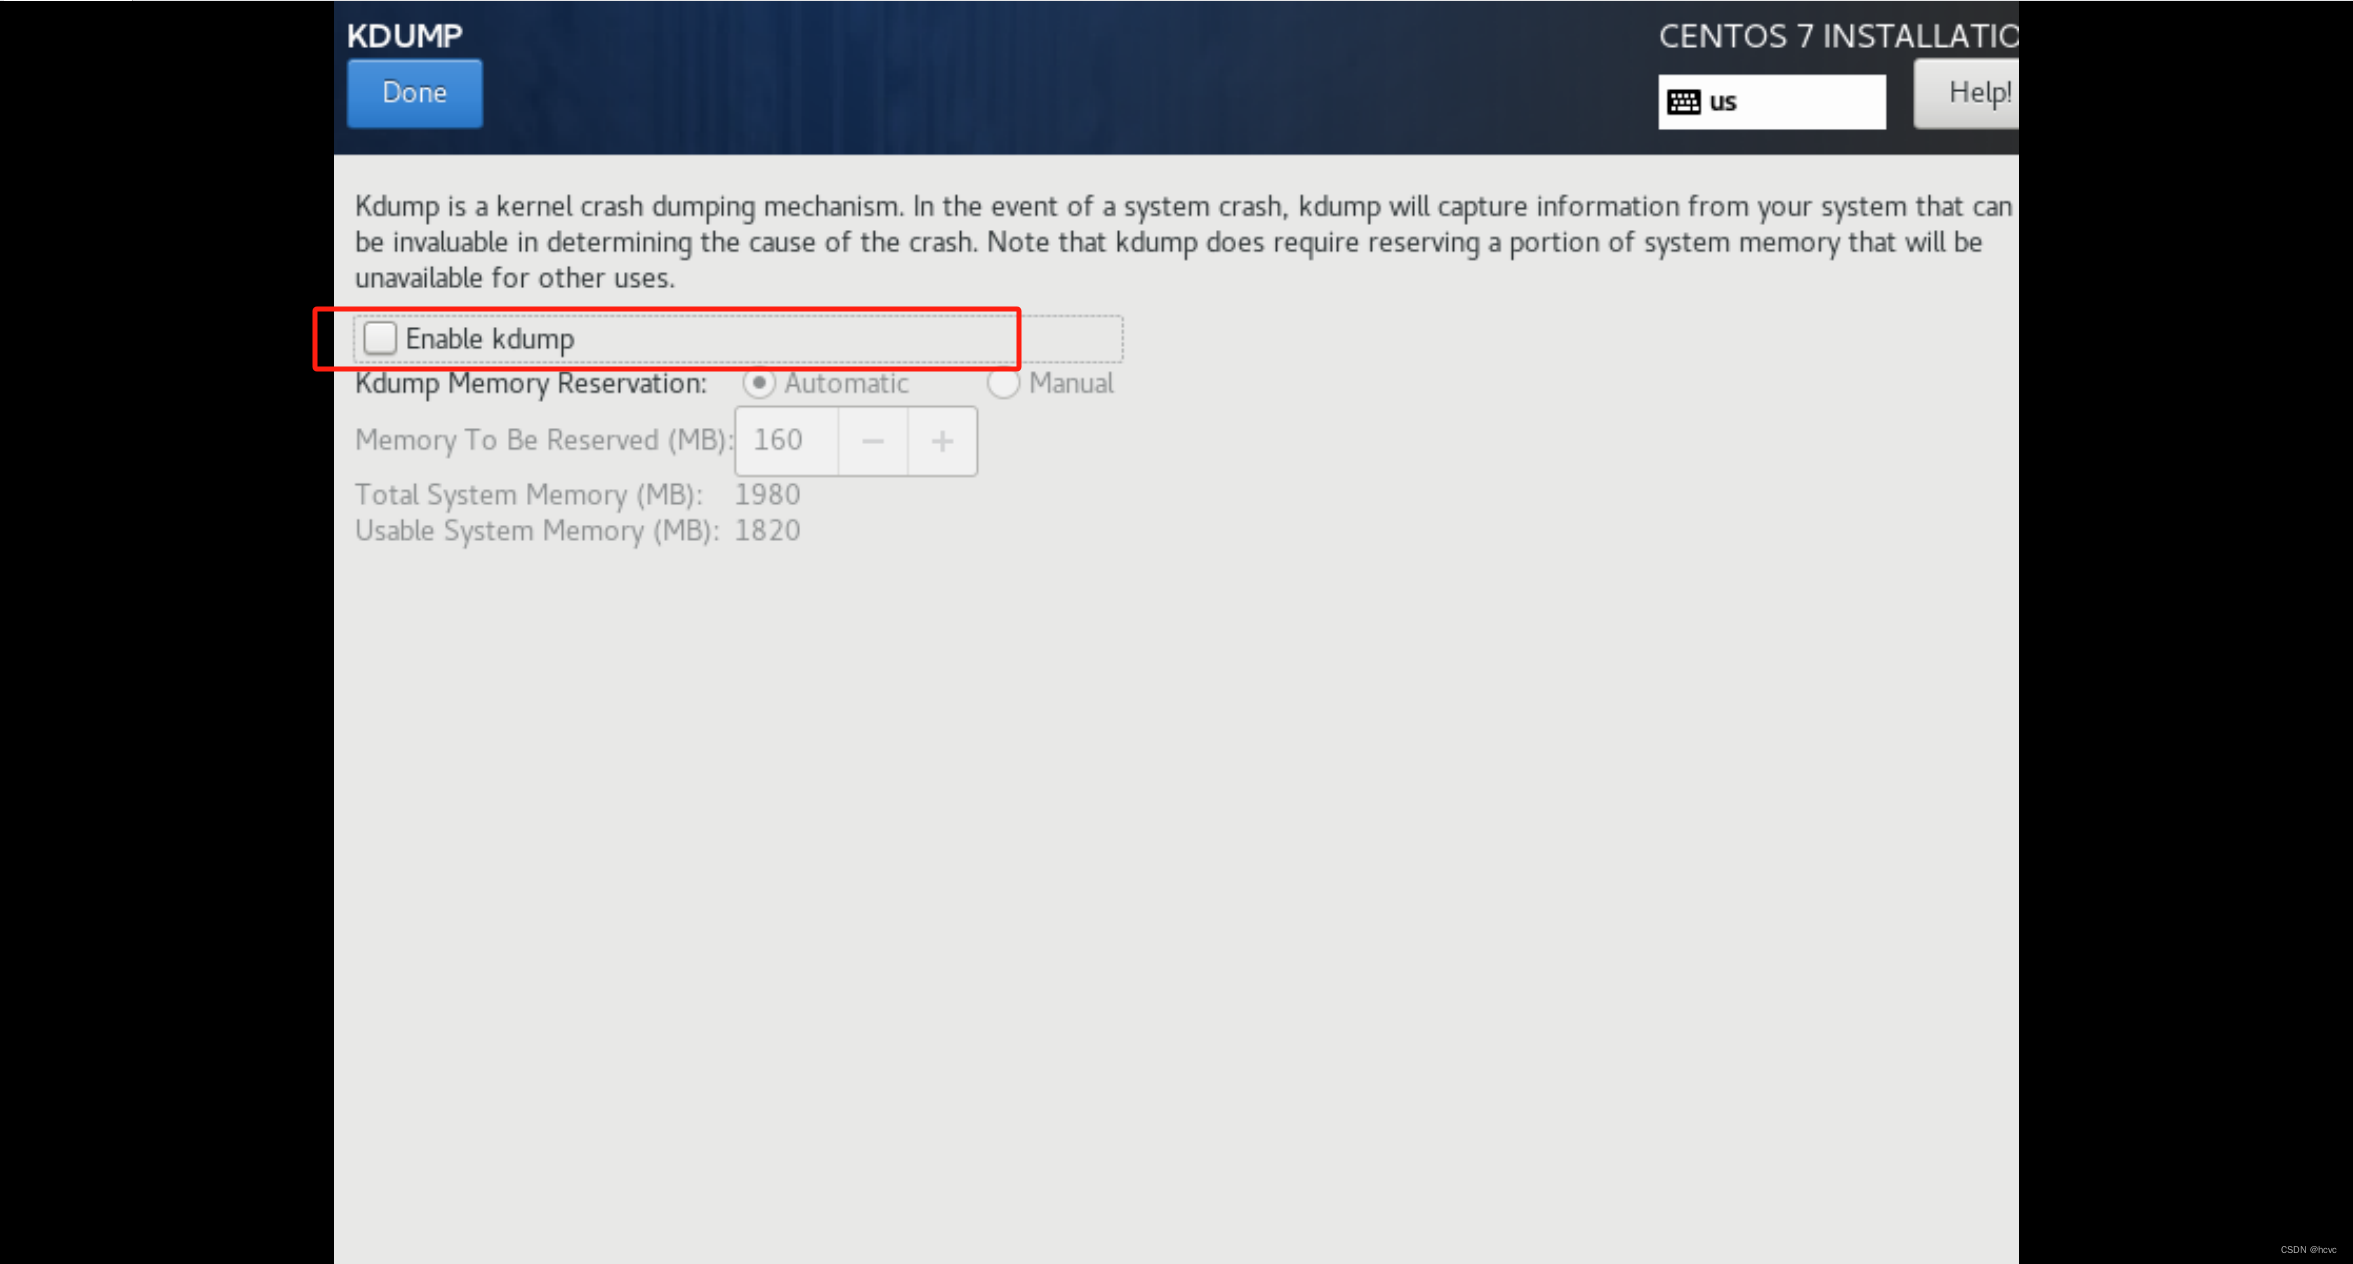
9、关闭kdump(该功能主要作用是在内核出现问题后进行记录,一般不用开启)
10、设置网络和主机名
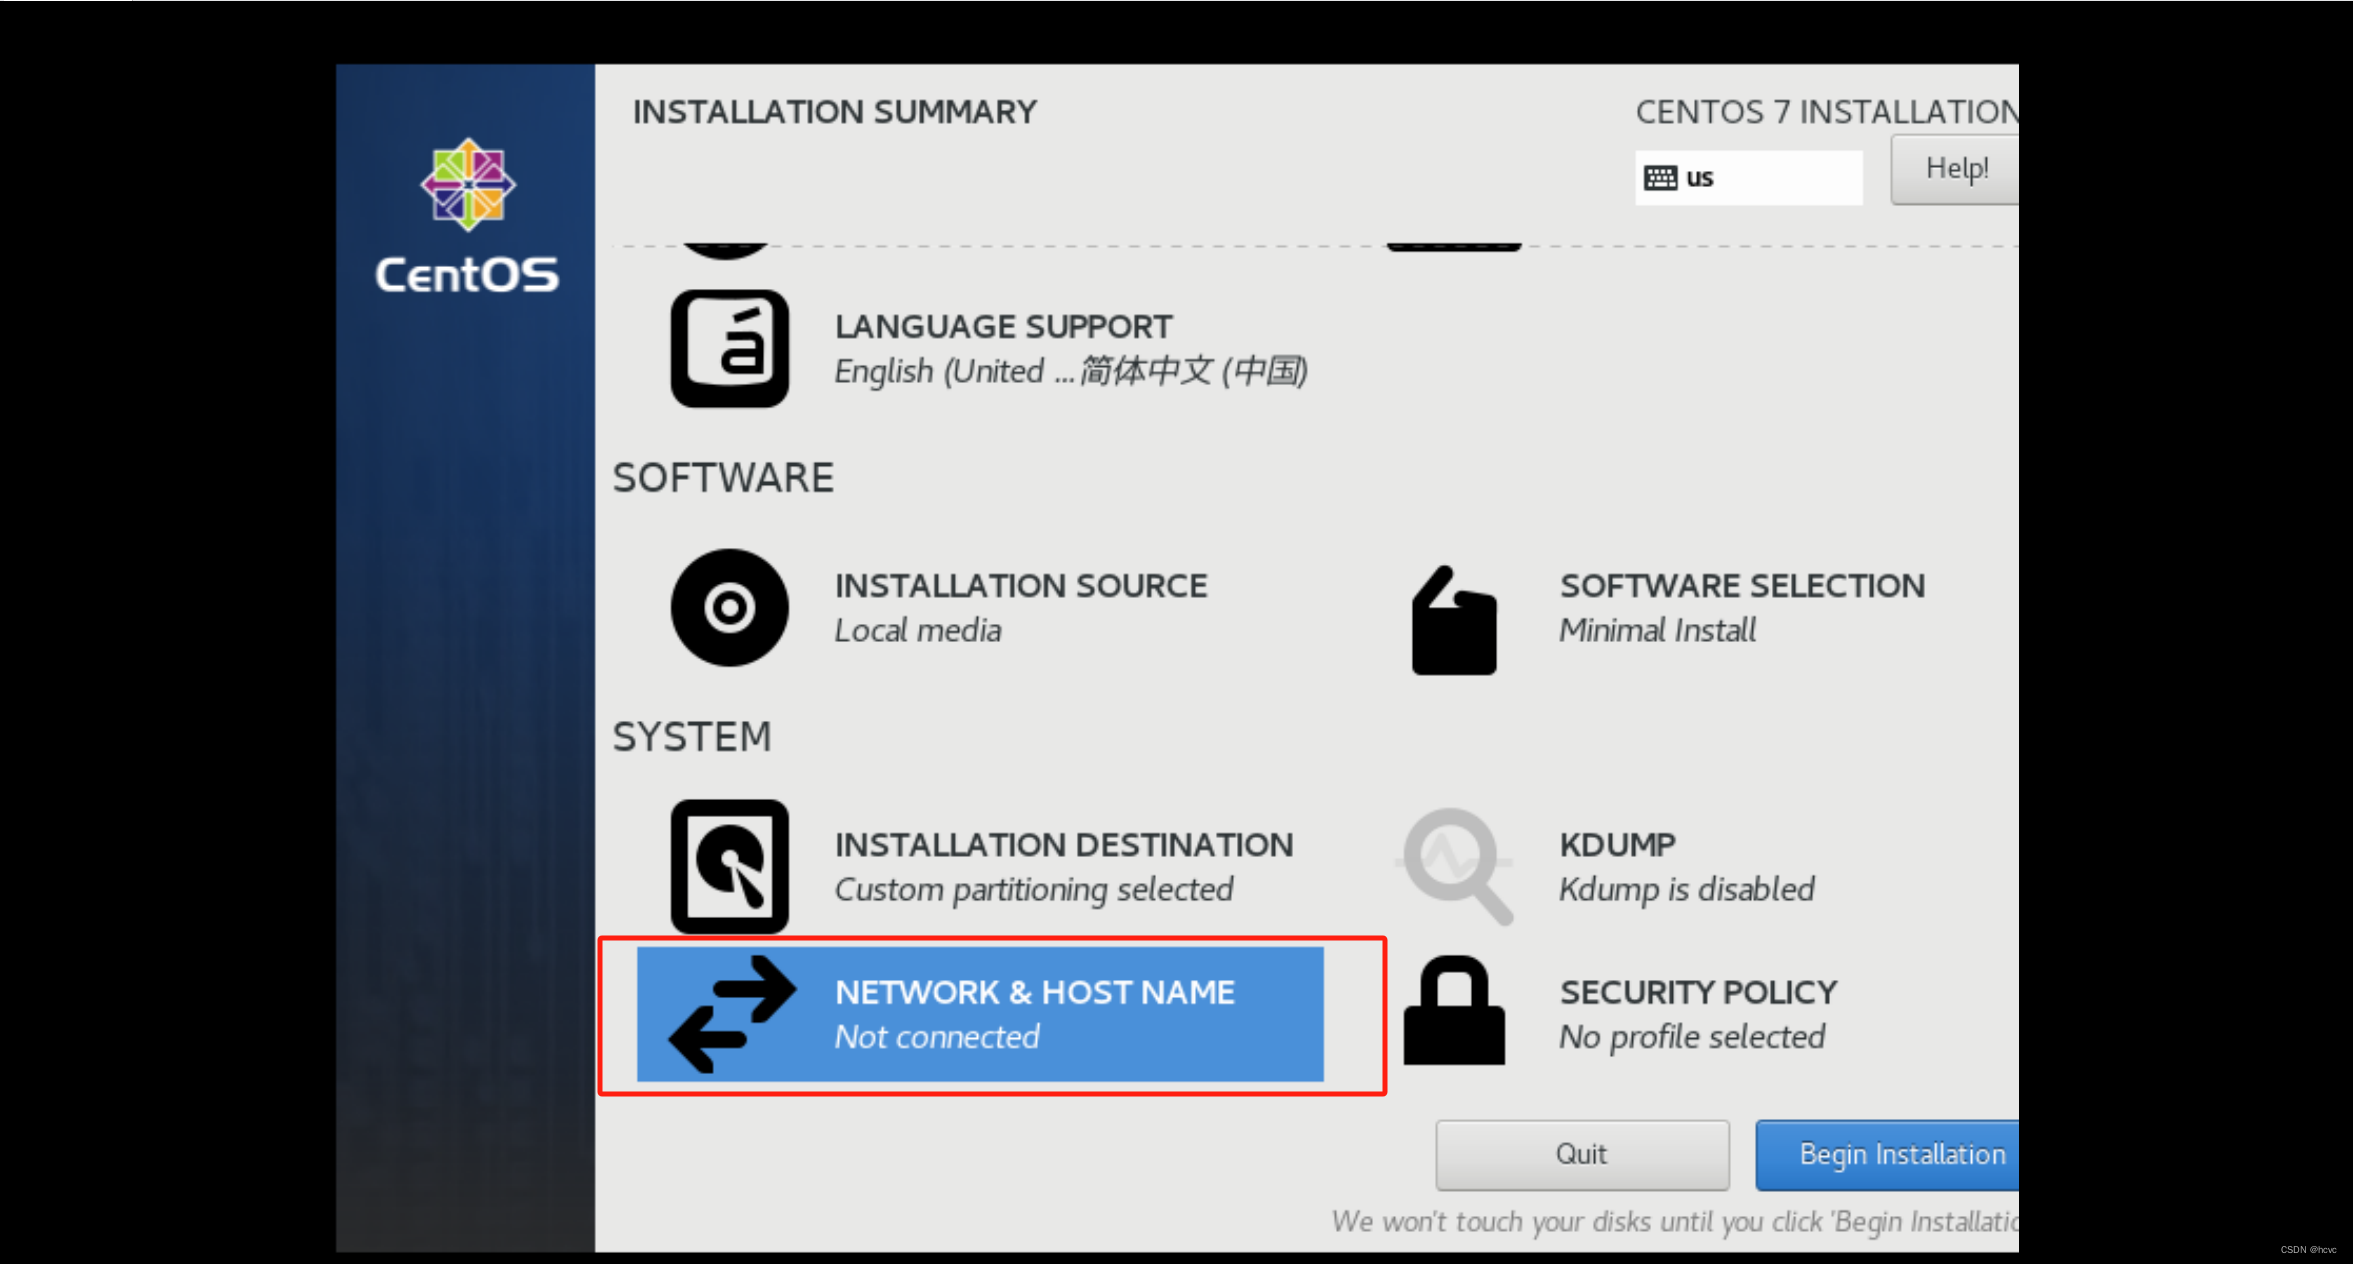
设置主机名
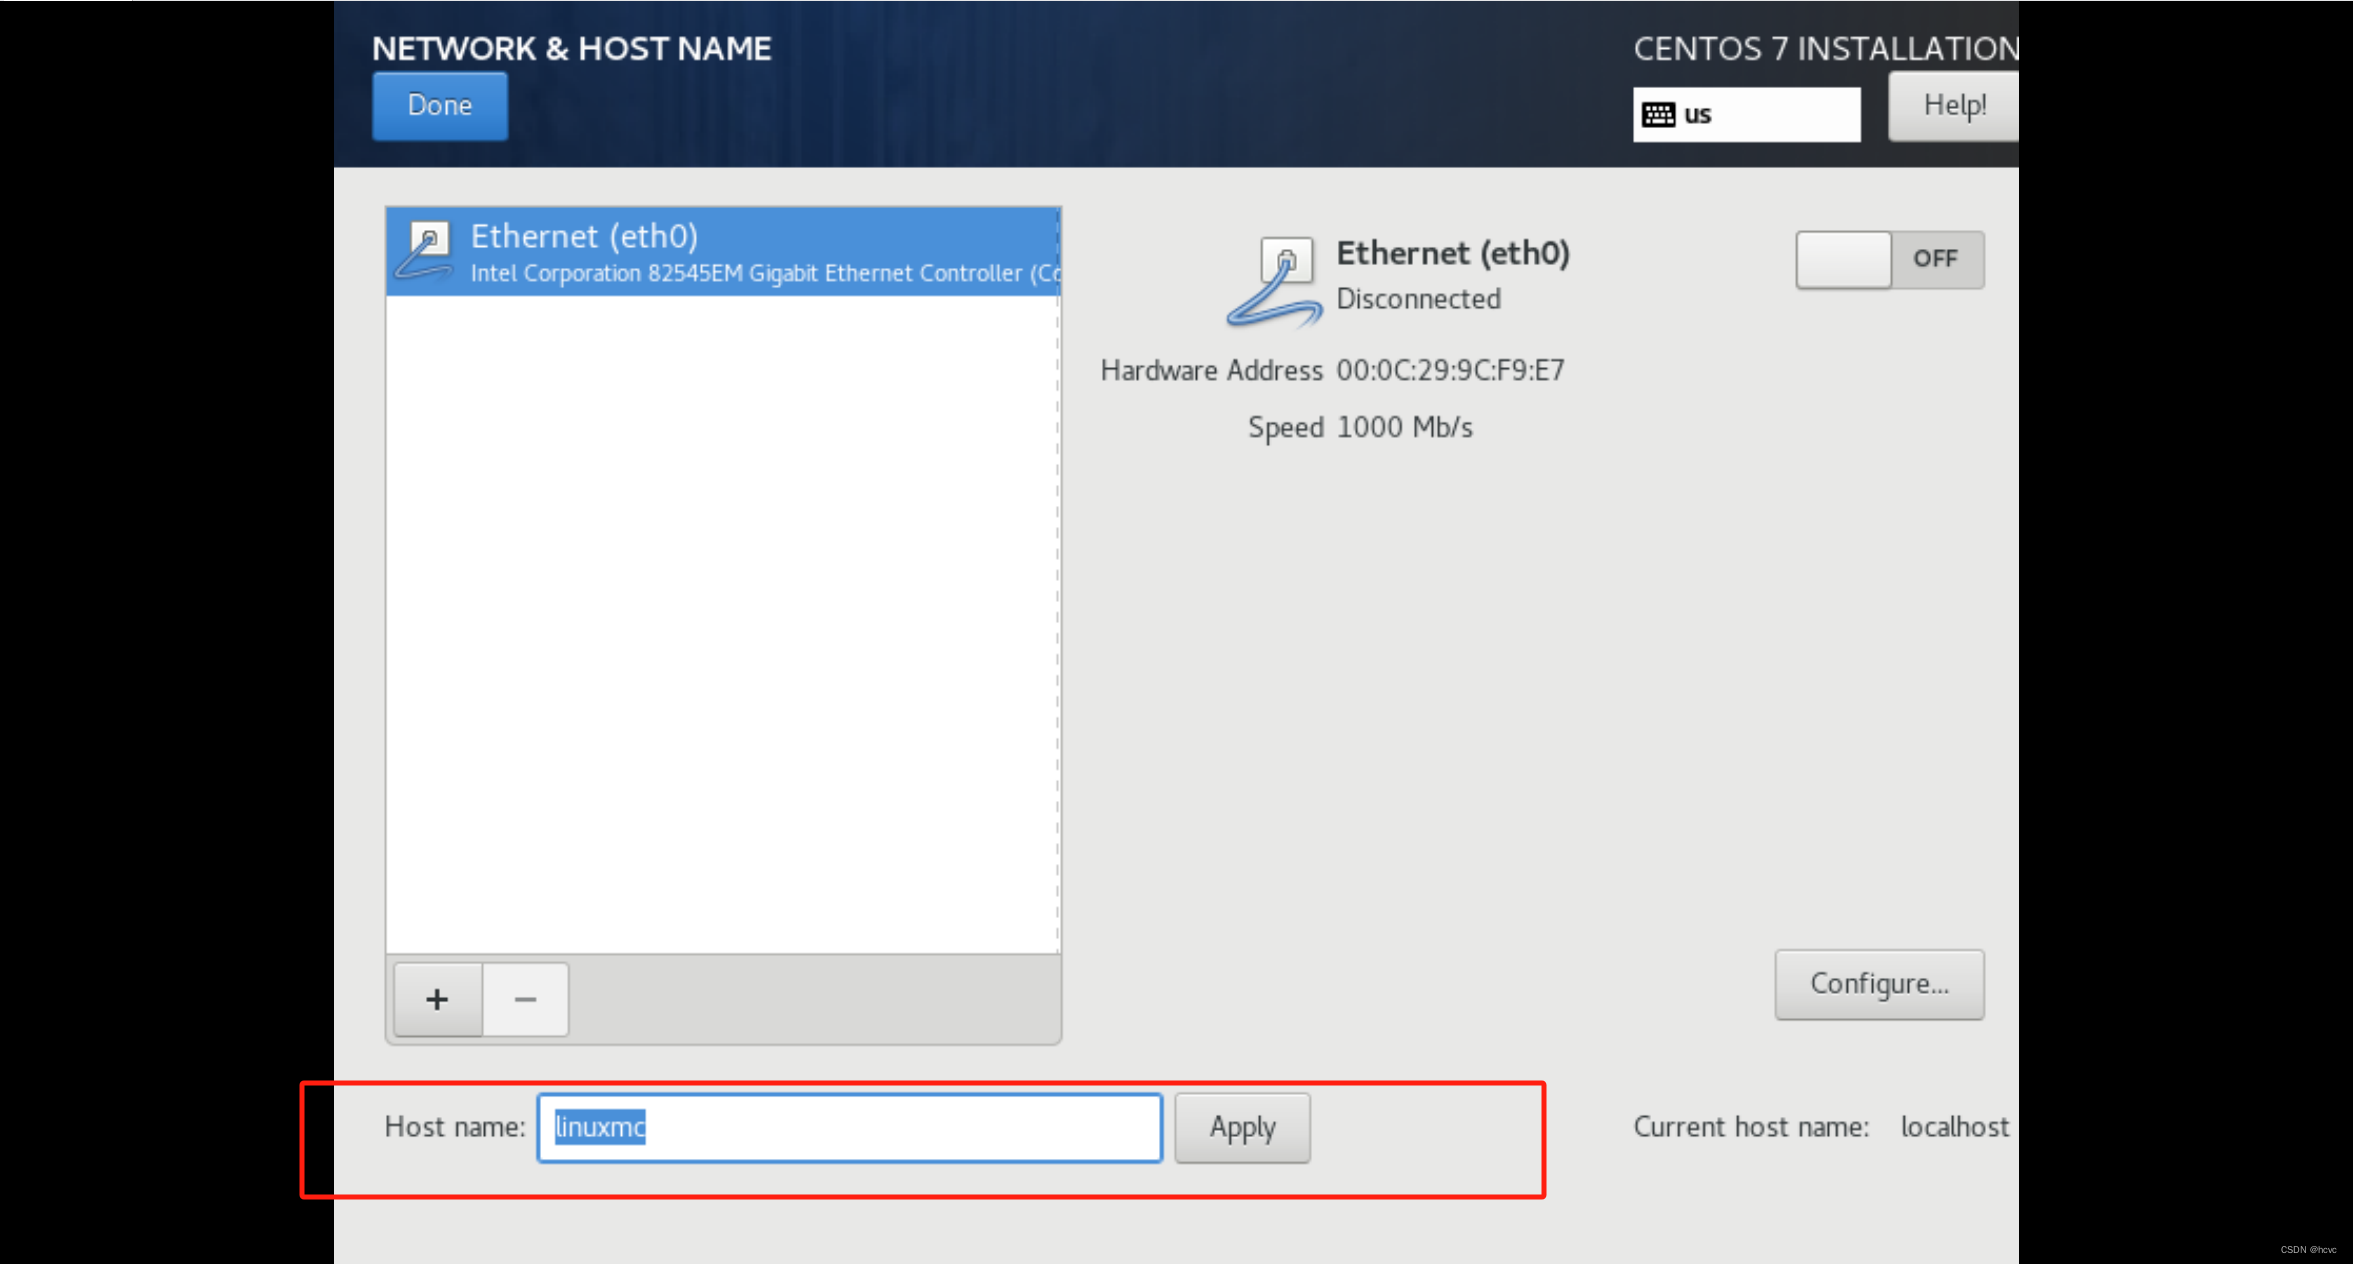
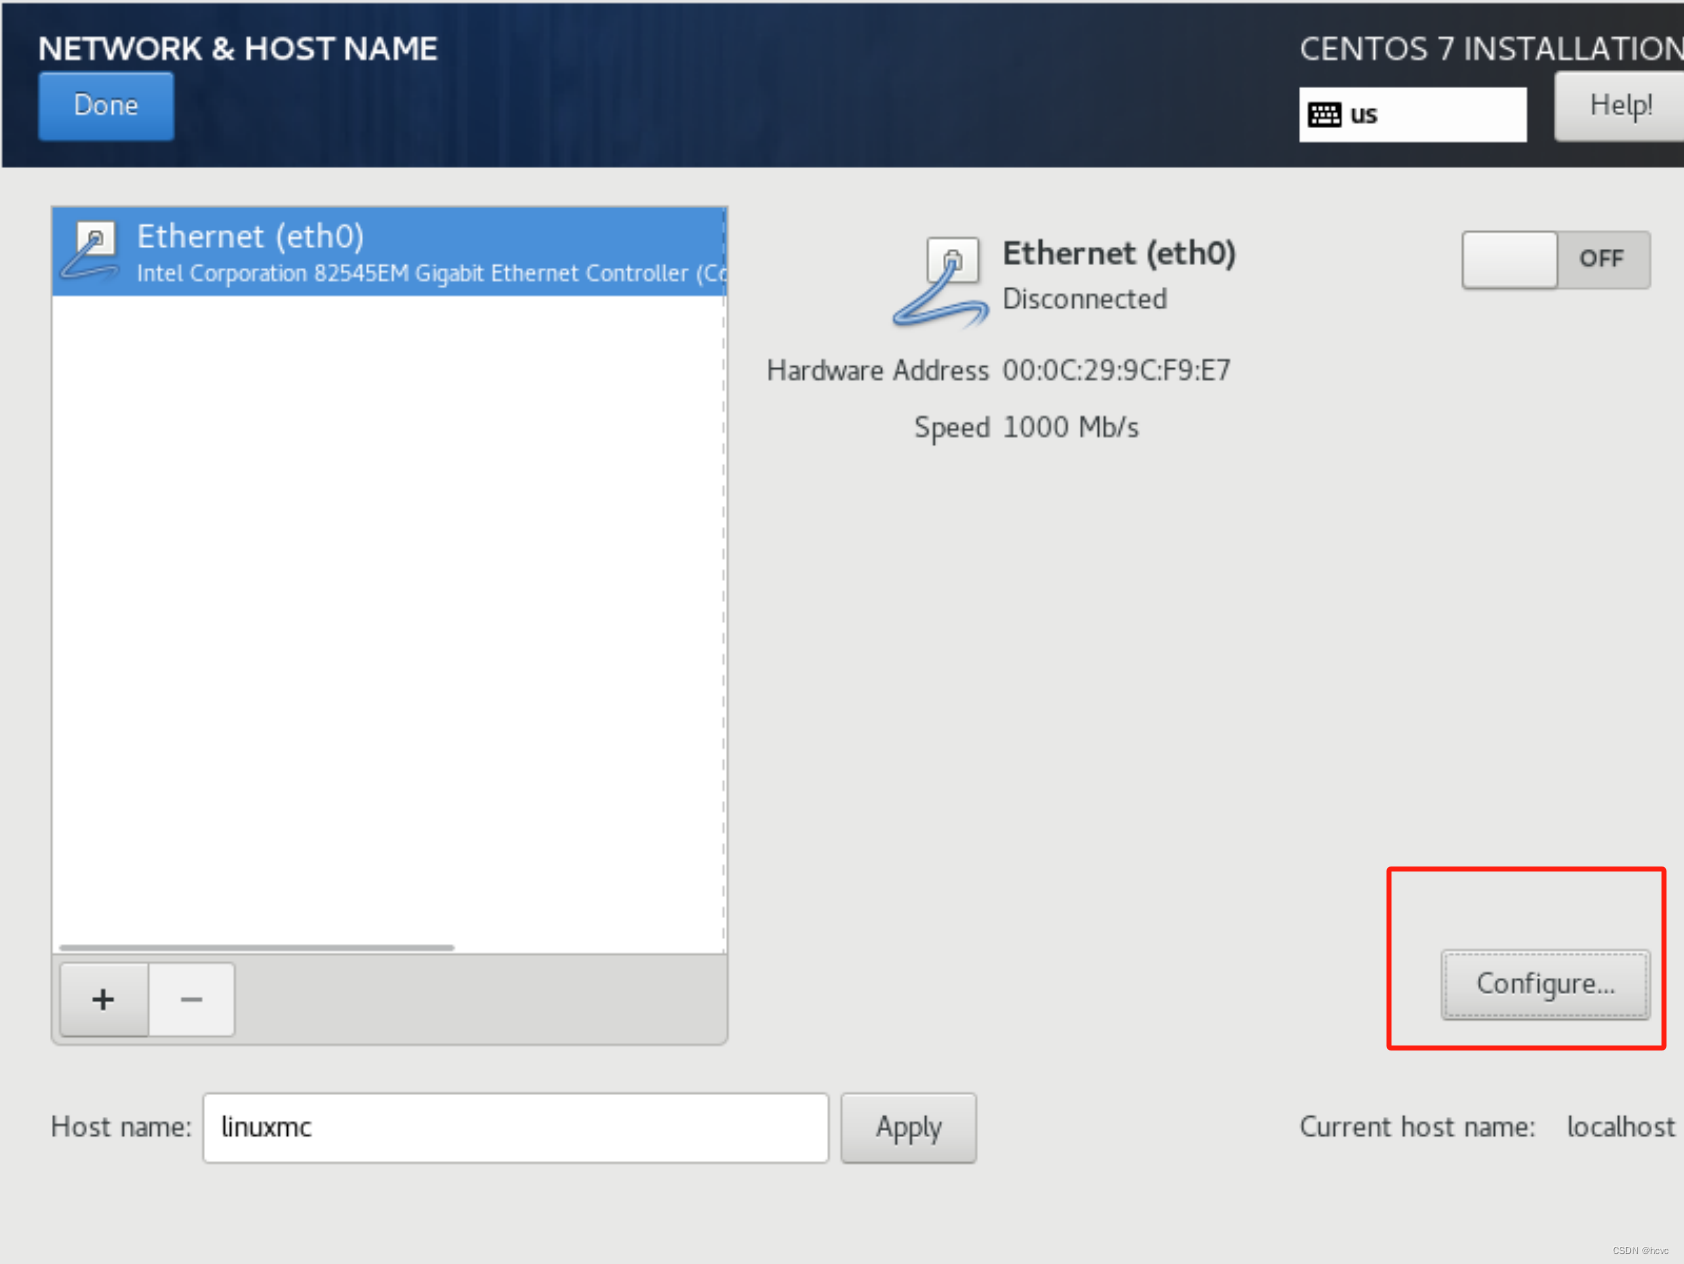
配置网络信息
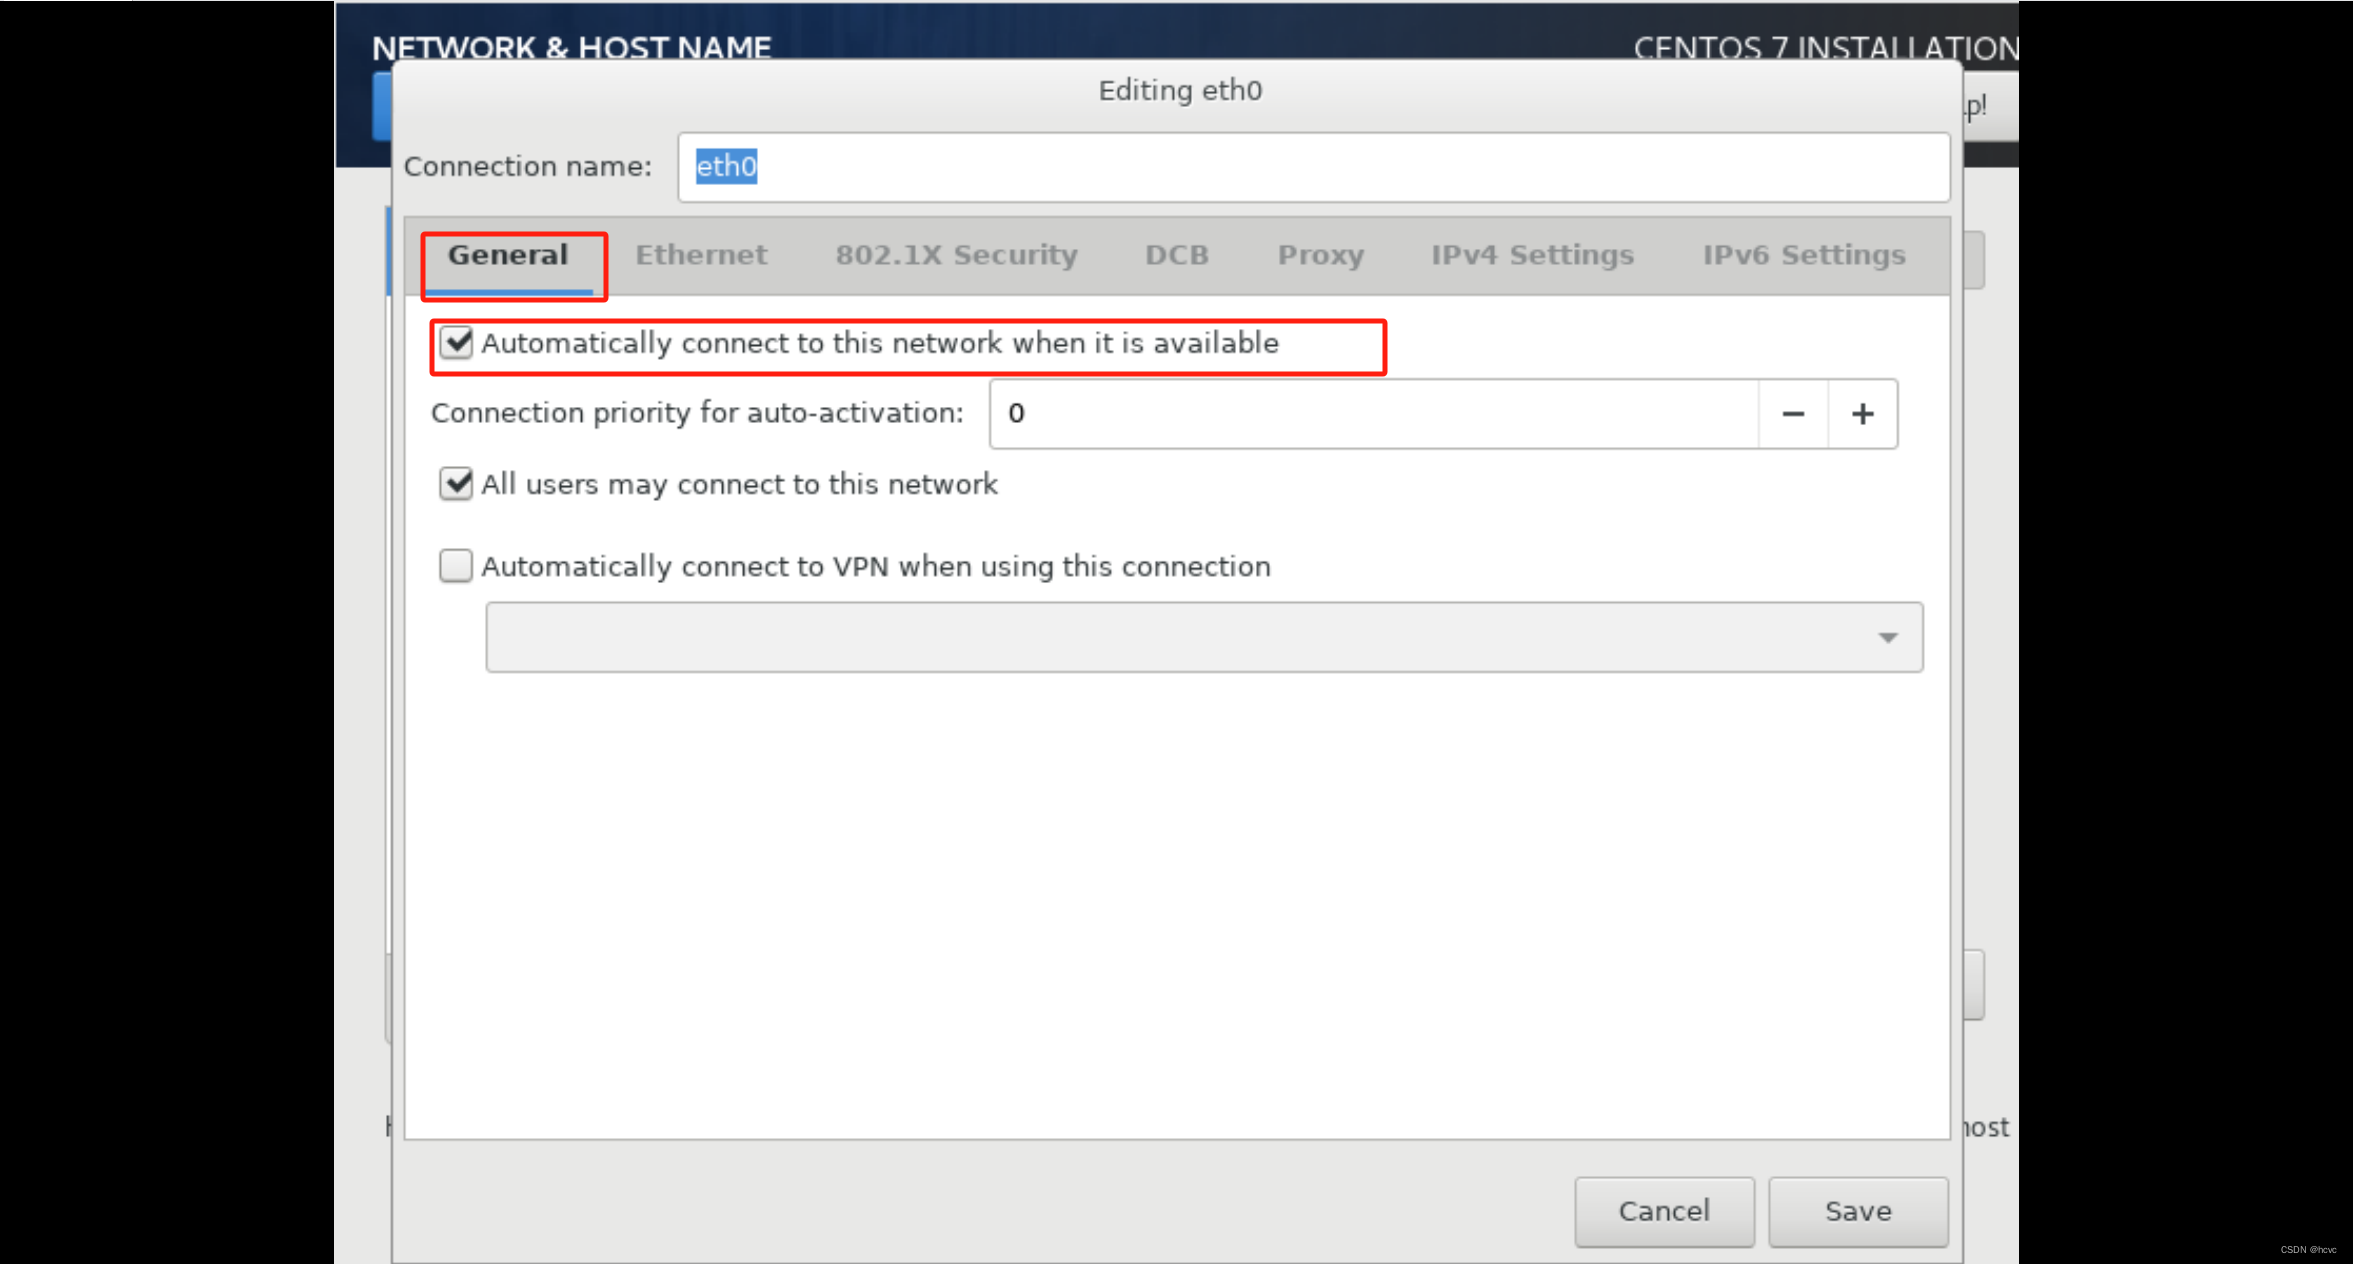
勾选此选项,在网络可用时自动连接
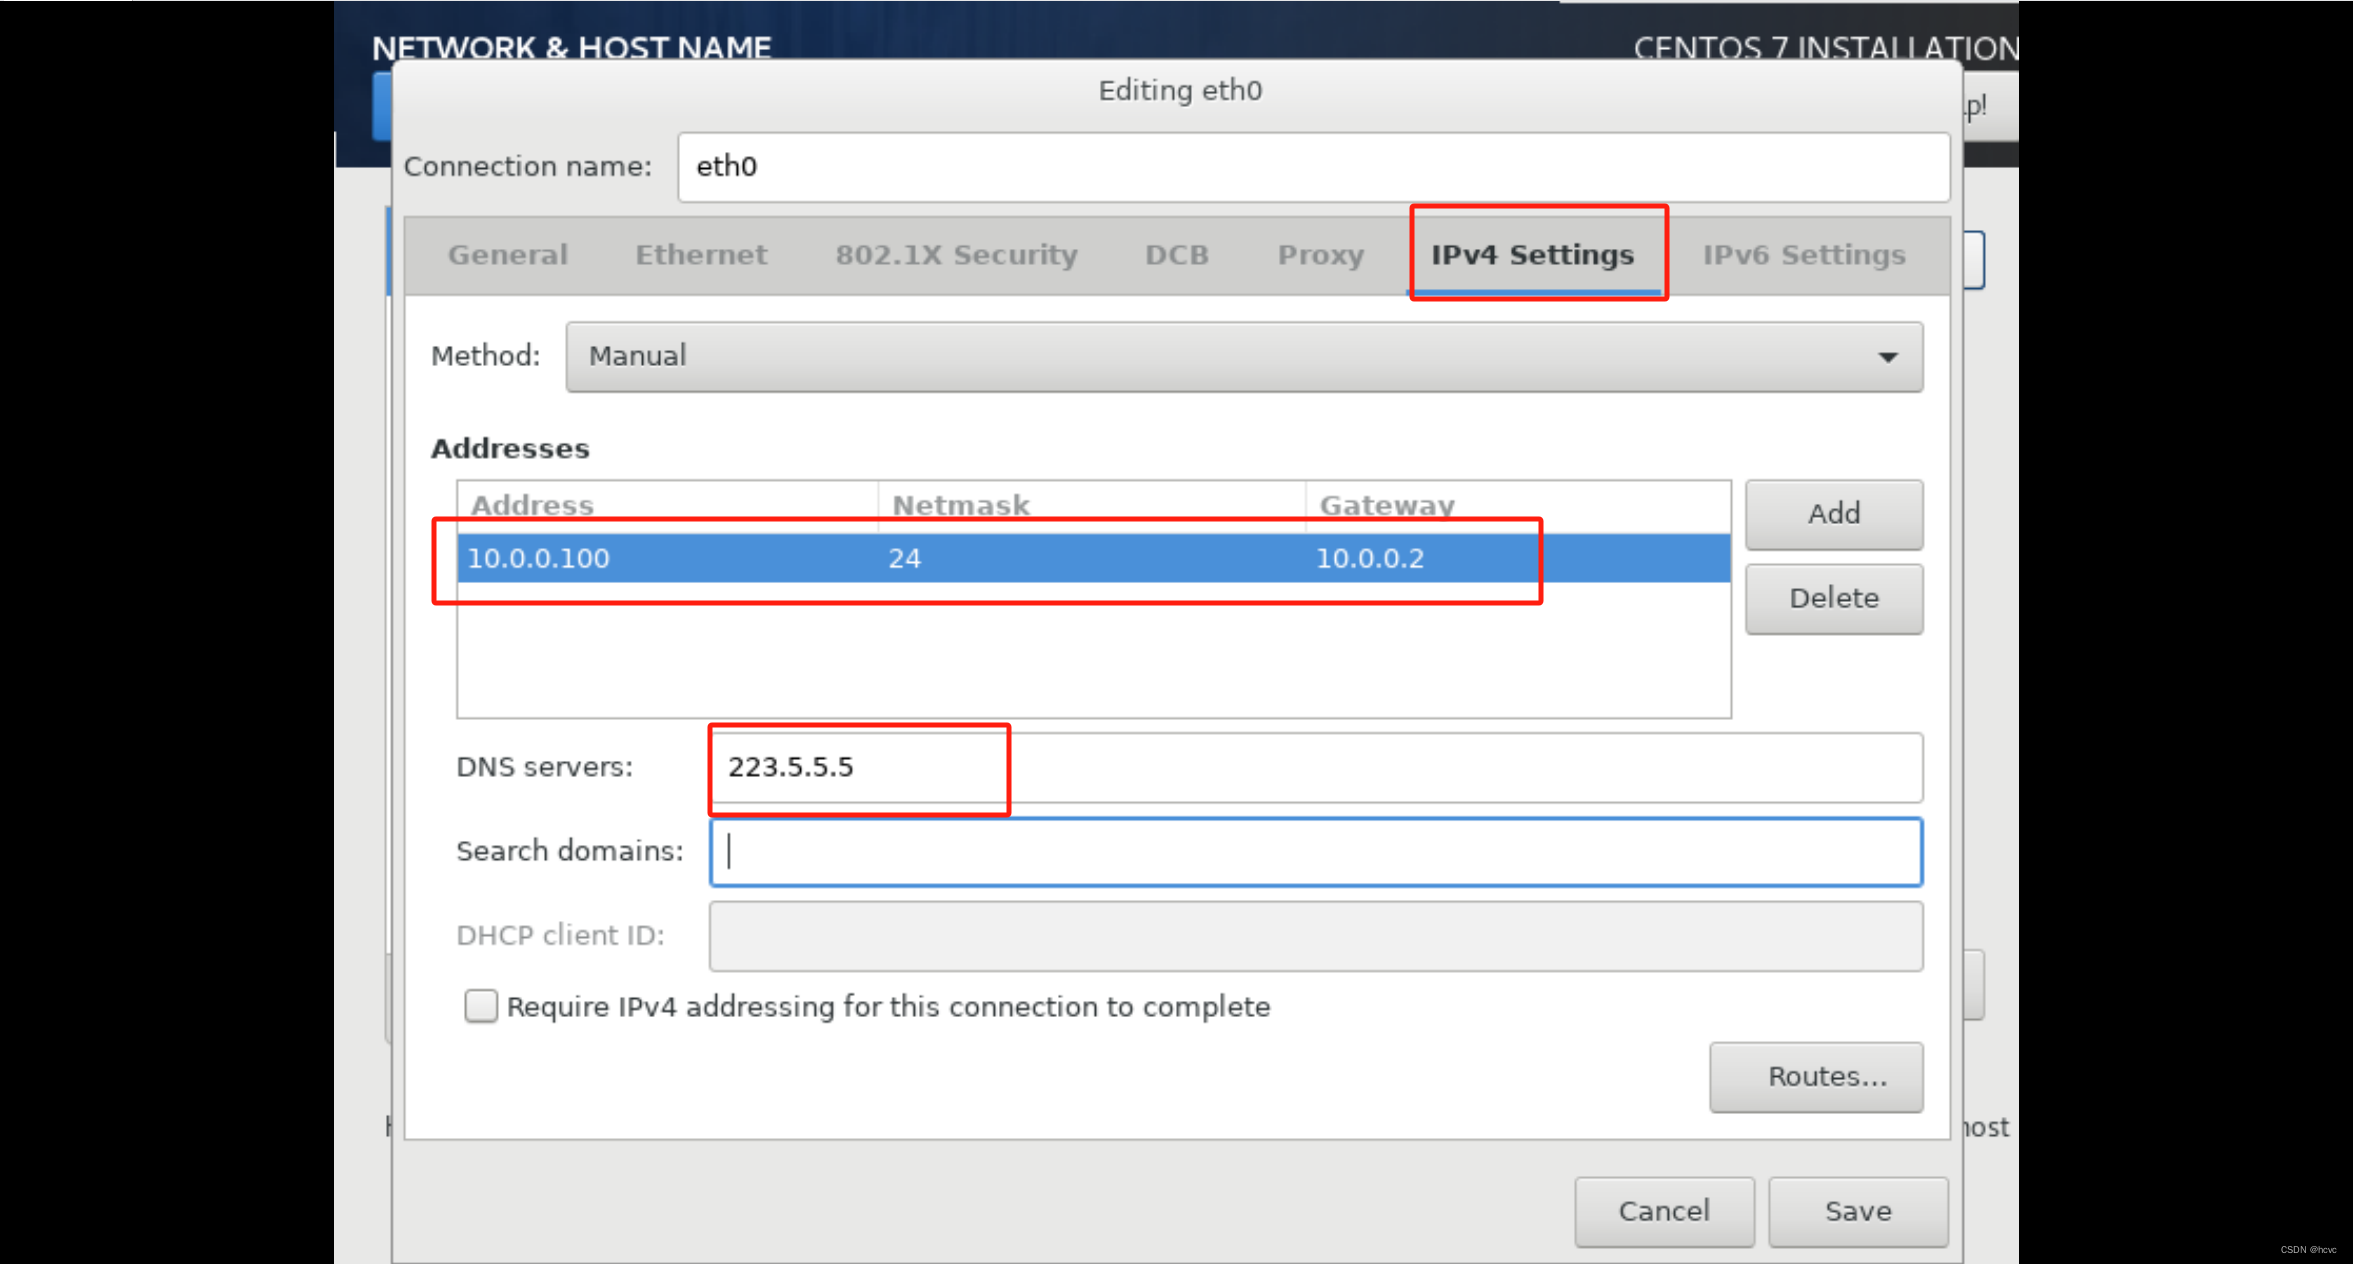
随后点击ipv4设置
ip地址、子网掩码、网关、dns地址,随后保存
完成界面,随后点击done保存

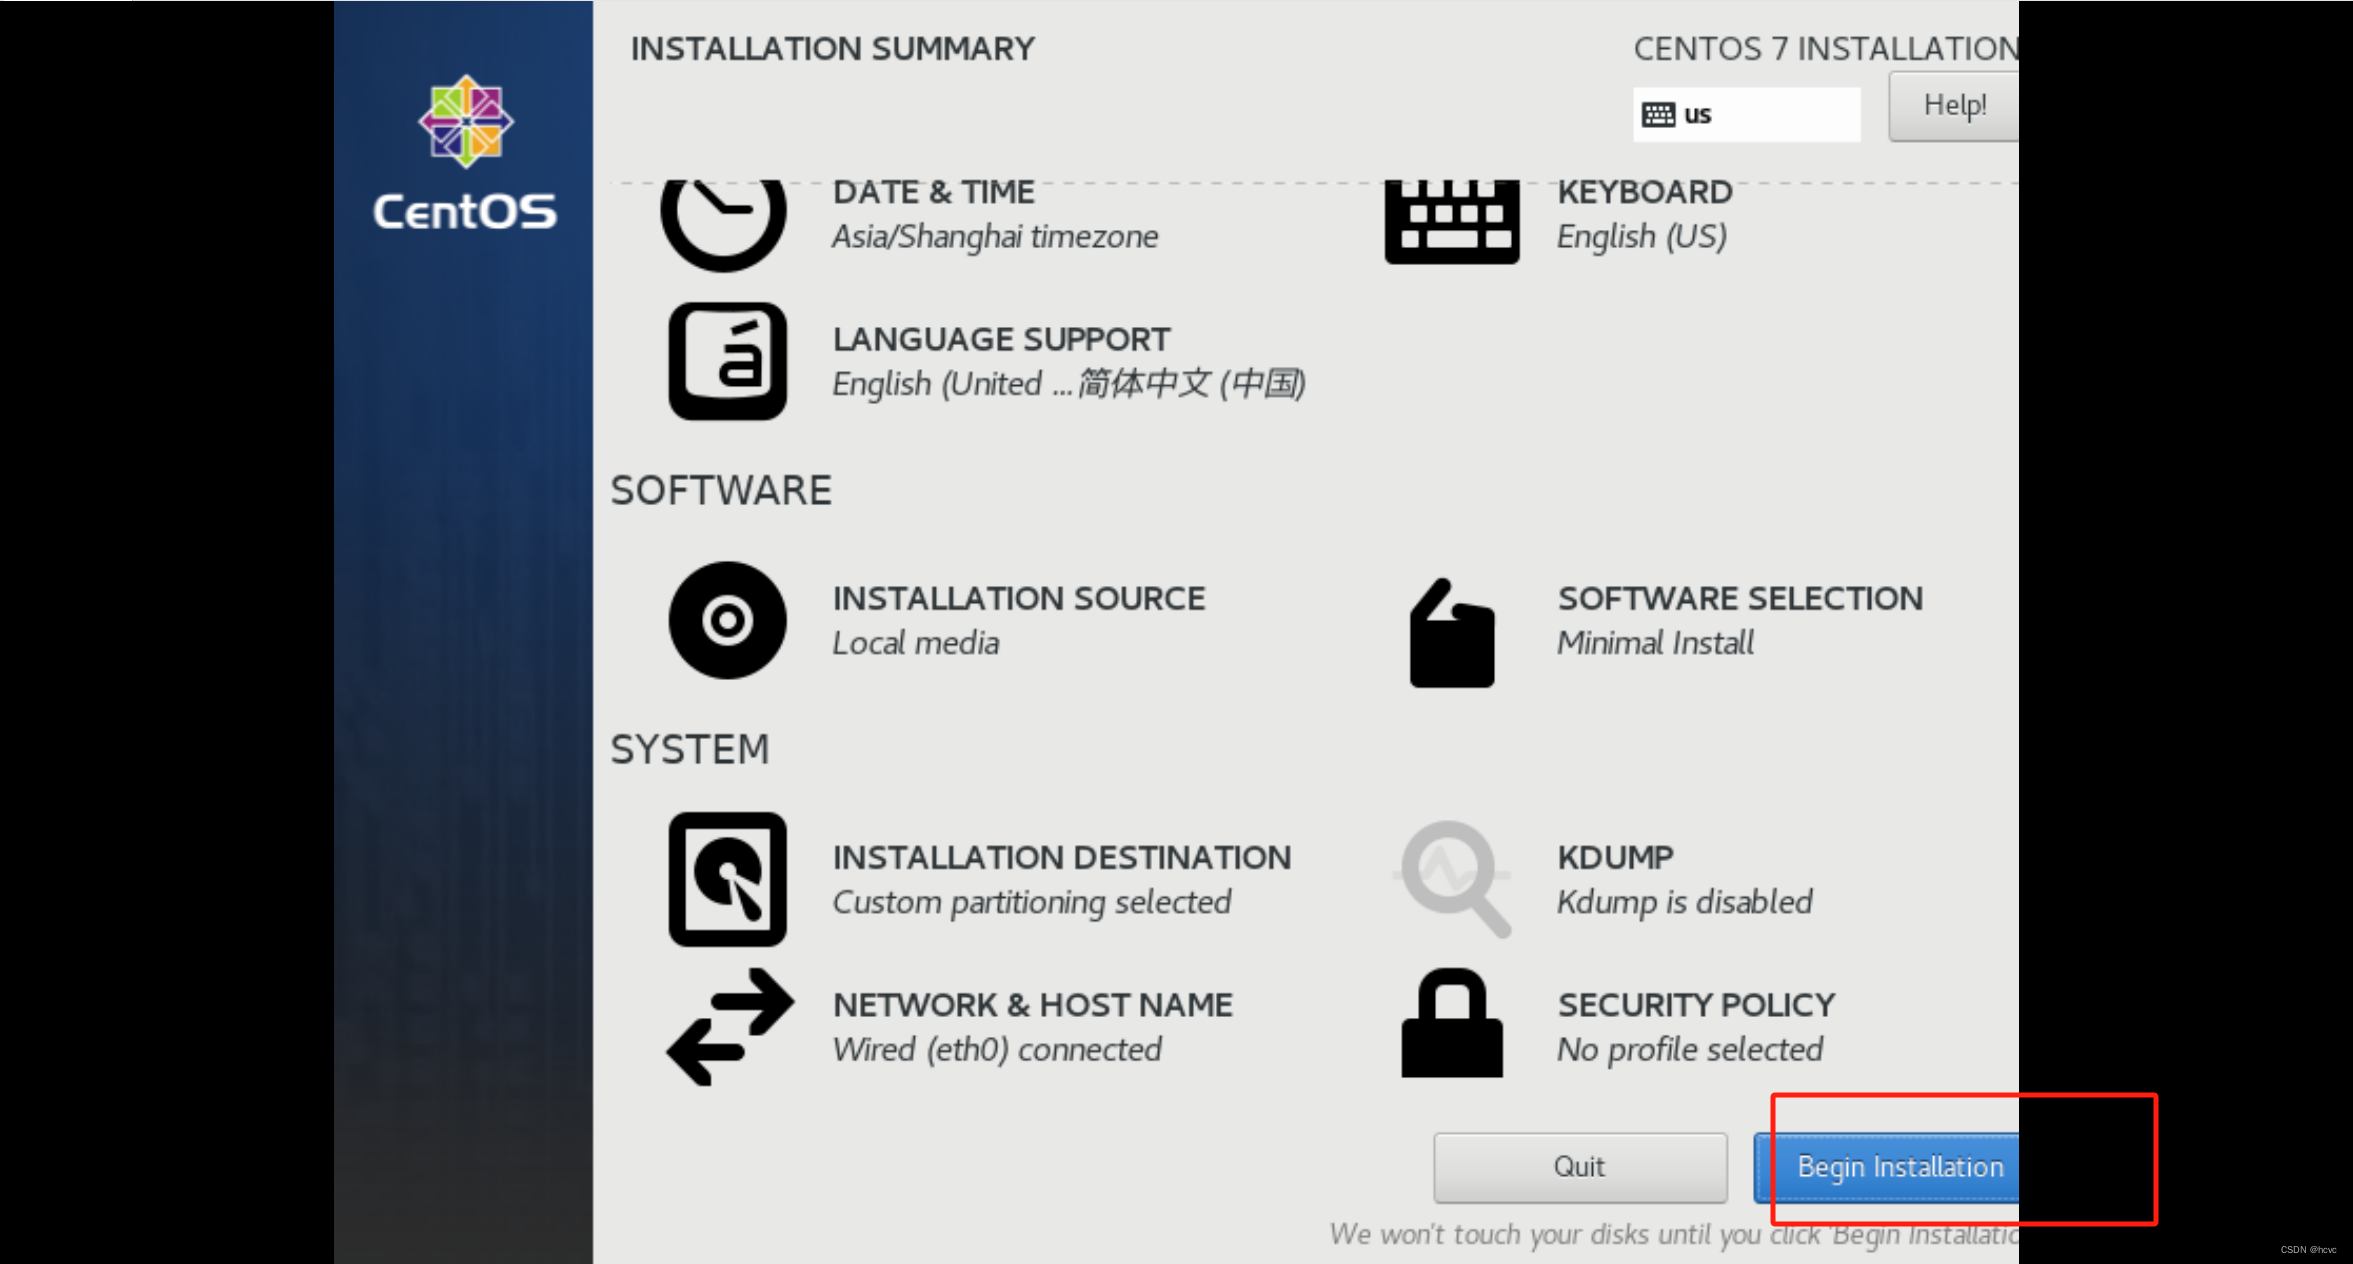
11、开始安装
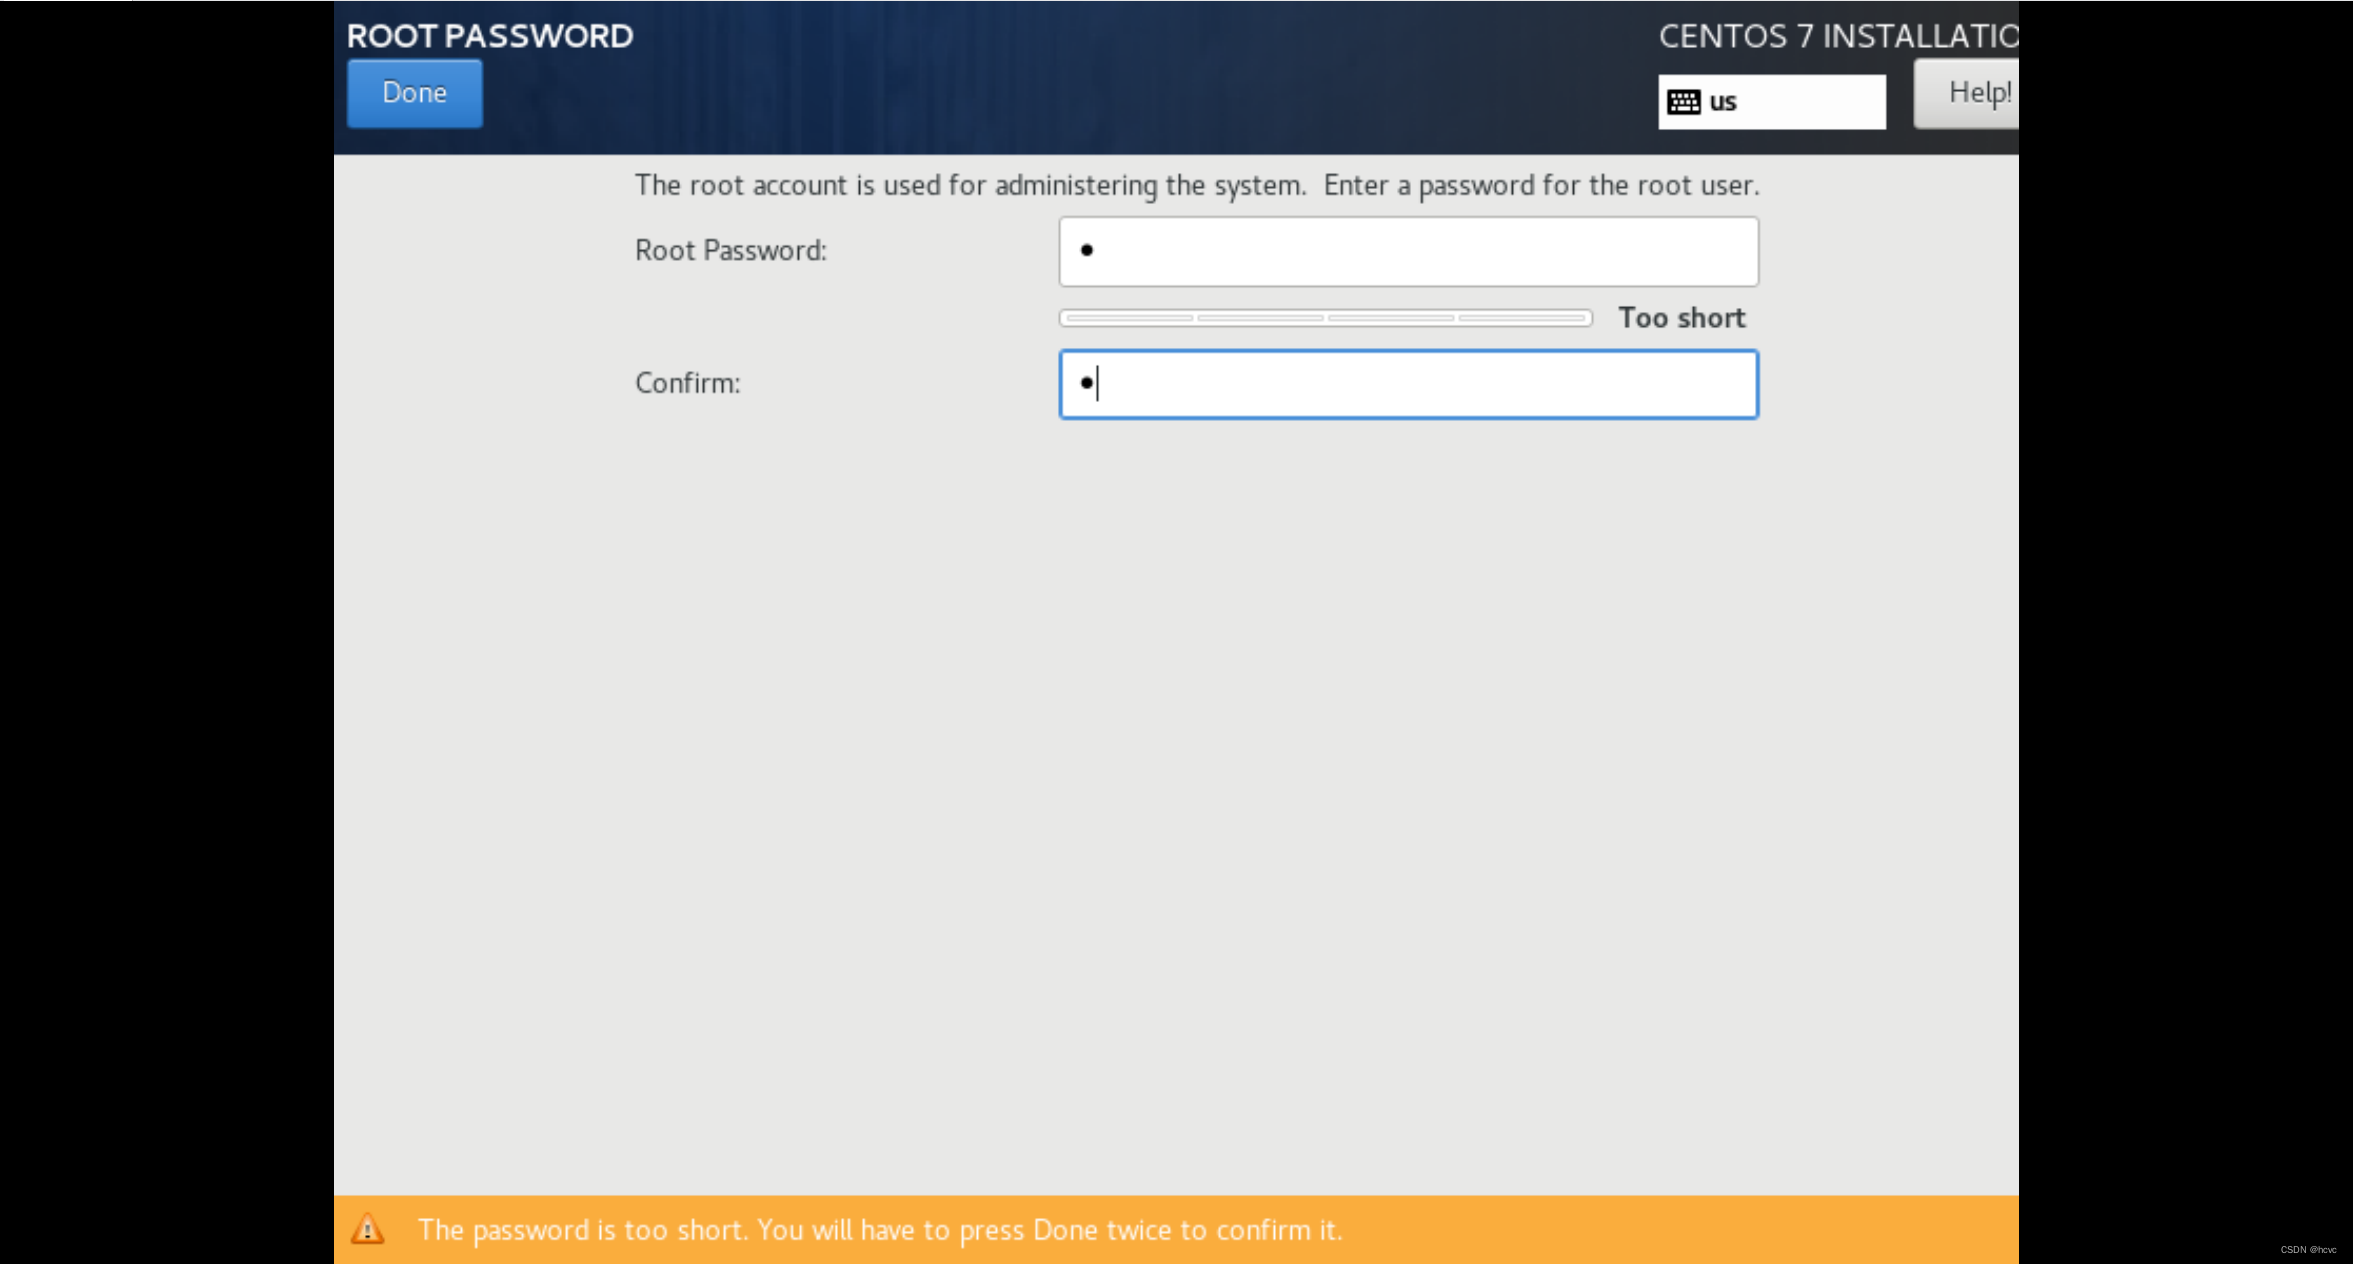
随后设置密码

等待安装完成即可
完成后点击rebooot重启服务器
文章来源:https://blog.csdn.net/LoveYourelf/article/details/135208444
本文来自互联网用户投稿,该文观点仅代表作者本人,不代表本站立场。本站仅提供信息存储空间服务,不拥有所有权,不承担相关法律责任。 如若内容造成侵权/违法违规/事实不符,请联系我的编程经验分享网邮箱:chenni525@qq.com进行投诉反馈,一经查实,立即删除!
本文来自互联网用户投稿,该文观点仅代表作者本人,不代表本站立场。本站仅提供信息存储空间服务,不拥有所有权,不承担相关法律责任。 如若内容造成侵权/违法违规/事实不符,请联系我的编程经验分享网邮箱:chenni525@qq.com进行投诉反馈,一经查实,立即删除!
最新文章
- Python教程
- 深入理解 MySQL 中的 HAVING 关键字和聚合函数
- Qt之QChar编码(1)
- MyBatis入门基础篇
- 用Python脚本实现FFmpeg批量转换
- Java 中的 Switch 是如何支持 String 的?为什么不支持 long?
- K8S容器编排高级应用
- 如何将一个JSON字符串解析为JavaScript对象或值
- uniapp使用u-search以及相关api
- CF1446B Catching Cheaters 题解 DP
- SpringSecurity入门demo(一)集成与默认认证
- 为什么要用雪花算法?
- Hotspot源码解析-第十九章-ClassLoaderData、符号表、字符串表的初始化
- python解决从有序数组中寻找中位数
- 通过与 Team Finance 整合,Casper Network 让 Token 的创建、部署更加高效