逐步分解,一文教会你如何用 jenkins+docker 实现主从模式
jenkins 主从模式想必大家都不陌生,大家在学习过程中为了学习方便都在自己本地搭建了 jenkins 环境,然后通过 javaweb 方式实现,对于 docker 下实现主从模式大家好像兴趣挺大。
今天就通过这篇文章给大家讲讲怎么玩,希望对大家有帮助。
一、环境准备
- 准备一台 Linux 服务器(云服务器、自建 Linux 服务器都可以)
- 在 Linux 服务器上安装 docker
- 拉个 jenkins 镜像下来,再启动一个 jenkins 容器
- docker 中把这个镜像 jenkins/ssh-slave 拉下来(jenkins 提供的专门用来做主从的镜像)
- OK 准备工作就做完了
二、准备开工
第一步:docker 开启远程访问,需要开启 2375 端口,这个端口慎重开启(我用的是 centos)
- 打开 docker.service 文件
VIM /usr/lib/systemd/system/docker.service - 在 docker.service 文件的[Service]下添加如下内容
[Service]
ExecStart=
ExecStart=/usr/bin/dockerd -H tcp://0.0.0.0:2375 -H unix://var/run/docker.sock - 重新启动 docker 服务,让 docker 重新读取配置文件
systemctl daemon-reload
systemctl restart docker - 验证,查看 docker 进程,如果 docker 守护进程在已经监听 2375 的 tcp 端口,就算成功开启了 2375 端口
- 进一步验证,通过其他机子访问 docker 宿主机
sudo docker -H tcp://139.129.130.123:2375 images
上面这个命令相当于直接在 docker 宿主机上执行 docker images 命令,能正确返回就表示没问题
第二步:下载官网镜像(顺便再提一下,不要忘记了)
- docker pull jenkins/ssh-slave
第三步:以 jenkins/ssh-slave 为基础打一个有 python3 环境的新镜像
- 创建一个 dockerfile 目录
- 将项目执行依赖的 python 包文件放到 dockerfile 目录下(怎么生成依赖文件不写了,默认你们是高手都会)
requests==2.24.0
openpyxl
ddt
pytest
selenium
pymysql
pyyaml==5.3.1
faker
jsonpath
BeautifulReport
unittestreport
rsa
pytest-html
Appium-Python-Client
创建一个名为 sources.list 的文件(名字不能改必须是这个名字),加入如下内容
在 jenkins/ssh-slave 镜像/etc/apt/目录下
deb http://mirrors.163.com/debian/ buster main non-free contrib
deb http://mirrors.163.com/debian/ buster-updates main non-free contrib
deb http://mirrors.163.com/debian/ buster-backports main non-free contrib
deb-src http://mirrors.163.com/debian/ buster main non-free contrib
deb-src http://mirrors.163.com/debian/ buster-updates main non-free contrib
deb-src http://mirrors.163.com/debian/ buster-backports main non-free contrib
deb http://mirrors.163.com/debian-security/ buster/updates main non-free contrib
deb-src http://mirrors.163.com/debian-security/ buster/updates main non-free contrib
sources.list
作用说明:官方提供的 jenkins/ssh-slave 并没有 python,需要安装 python 就要去更新他的安装包,此时如果使用他默认的镜像源会非常慢,因此我们换一个更快的源,将它原来的文件覆盖掉就行了,这里要根据自己的版本号进行修改,我的是 buster 版本,当然你下载后也应该是和我的一样。
写 Dockerfile
- FROM jenkins/ssh-slave:latest
USER root
WORKDIR /app
ADD requirements.txt /app
ADD sources.list /etc/apt/
RUN echo export JAVA_TOOL_OPTIONS="-Dfile.encoding=UTF-8" >> /etc/profile
RUN apt-get -y update && apt-get -y install python3 && apt-get -y install python3-pip && pip3 install -r requirements.txt -i https://pypi.douban.com/simple
- 执行镜像构建命令
docker build -t jenkins/ssh-slave:v2.0 .
第四步:配置 jenkins 从节点
进到节点配置页面
manage jenkins---> Slave Node(节点管理)--->ConfigureClouds

你将看到如下页面

点 Add a new cloud 下拉选择 docker,点完来到如下页面
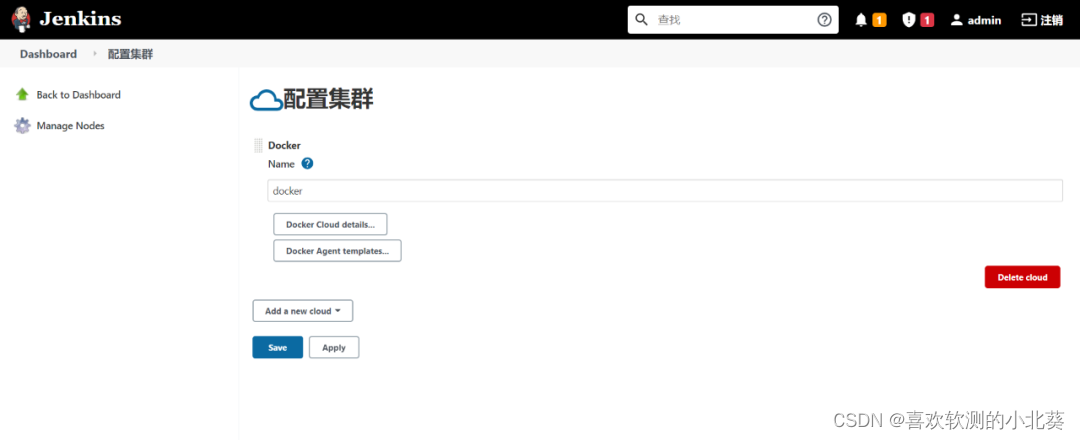
点开 Docker Cloud details 进行配置,点开后页面如下

点开 Docker Agent templates,你将看到如下页面

点开下图的高级选项

高级选项具体配置如下图


配置完成后记得保存,最好是边配置边保存,养成好习惯。
第五步:将 docker slave 绑定到你的 jenkins 任务
新建任务,选择自由风格项目
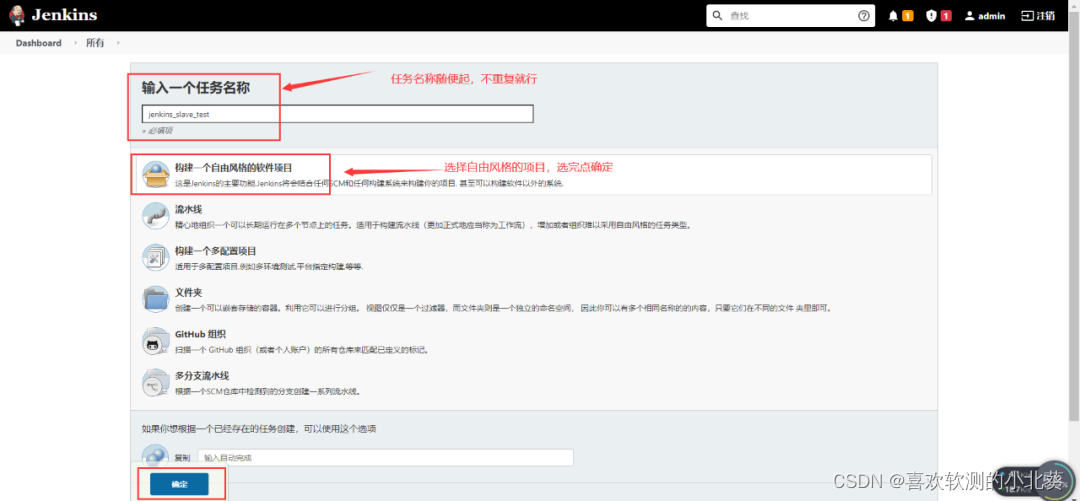
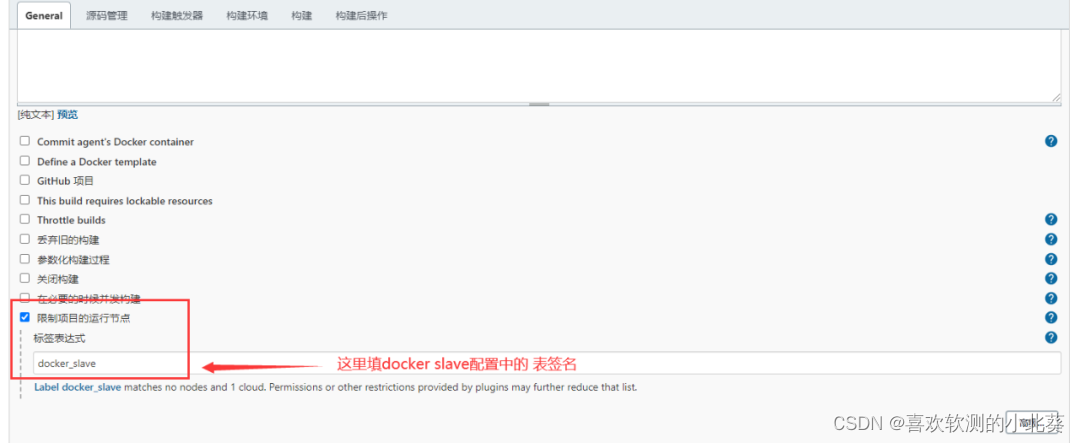
限制项目运行节点,选择新建的节点(Labels)
配置 Git

配置 shell 命令

配置测试报告

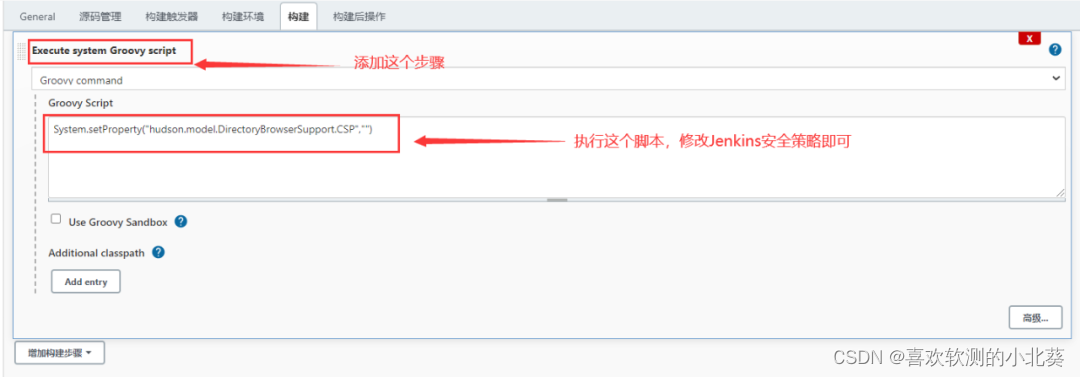
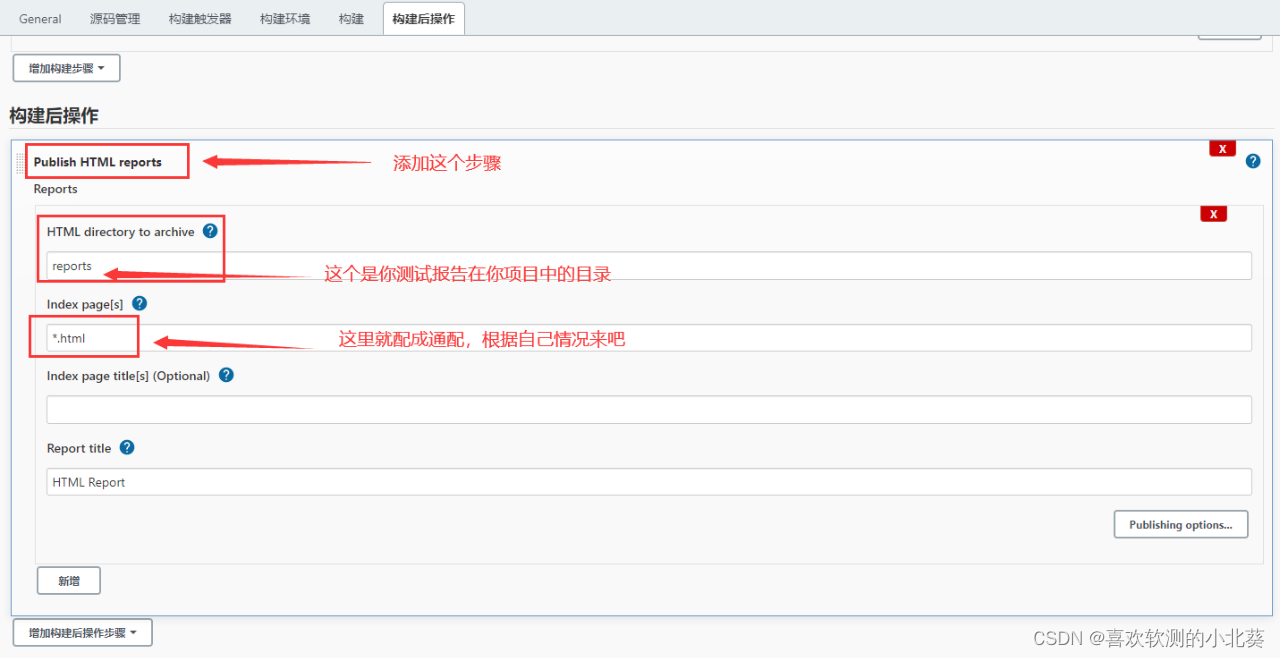
第六步:构建你的项目
- 开始构建后在你的构建队列那会看到如下图所示

2. 构建完成之后,点你的项目,来到这里会有构建记录,点进去可以看构建日志

3. 查看测试报告
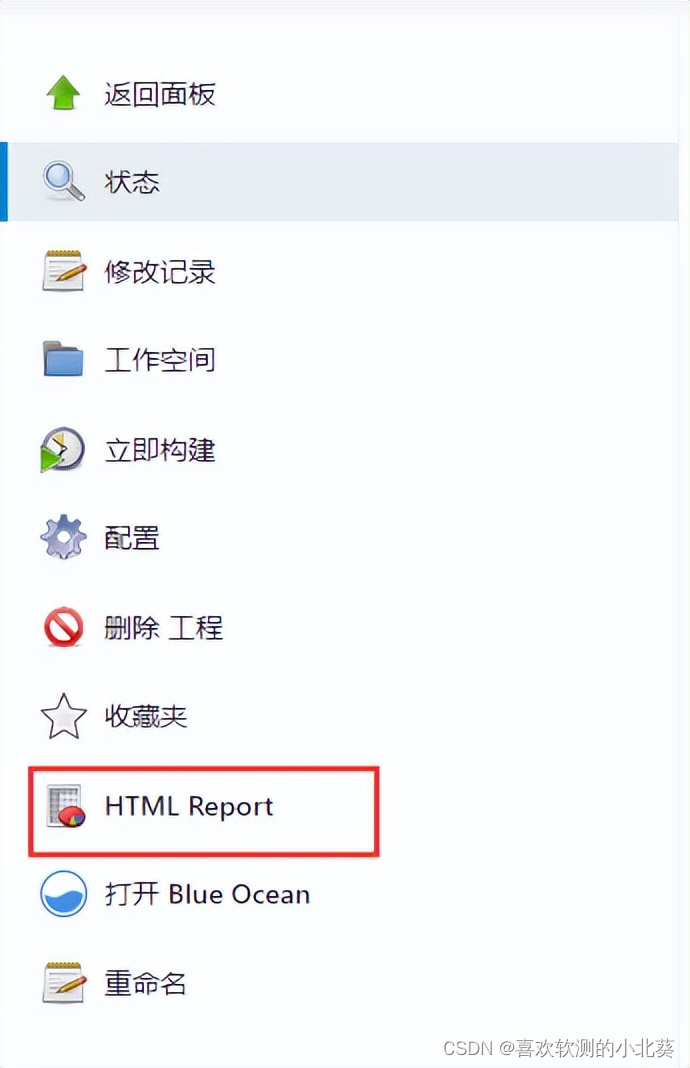
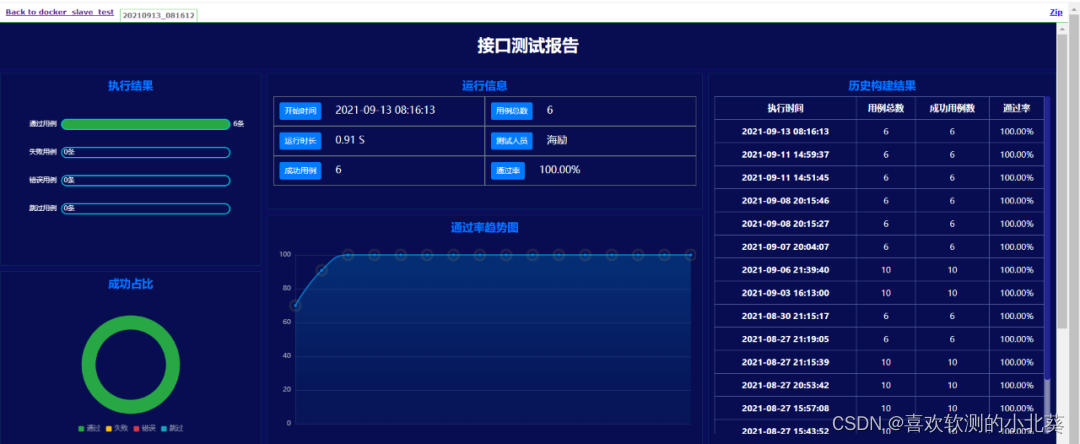
4. 测试报告如下
本文来自互联网用户投稿,该文观点仅代表作者本人,不代表本站立场。本站仅提供信息存储空间服务,不拥有所有权,不承担相关法律责任。 如若内容造成侵权/违法违规/事实不符,请联系我的编程经验分享网邮箱:chenni525@qq.com进行投诉反馈,一经查实,立即删除!
- Python教程
- 深入理解 MySQL 中的 HAVING 关键字和聚合函数
- Qt之QChar编码(1)
- MyBatis入门基础篇
- 用Python脚本实现FFmpeg批量转换
- vue 里 props 类型为 Object 时设置 default: () => {} 返回的是 undefined 而不是 {}?
- 基于springboot+html的汽车销售管理系统设计与实现
- SpringBoot+Elasticsearch使用resthighlevelclient对象查询条件为“且+或”
- 个人网站也需要申请SSL证书吗?个人网站适合什么SSL证书?
- Docker无法启动Postgresql容器
- 从windows10切换到ubuntu22.04使用心得以及常用软件
- 适用于生物行业的生信云平台
- 基于easyexcel实现导出excel,包括导出图片以及导出下拉框
- Function
- selenium的进阶--pyppeteer的独家使用技巧