three.js聚光源SpotLight例子
发布时间:2023年12月18日
效果:
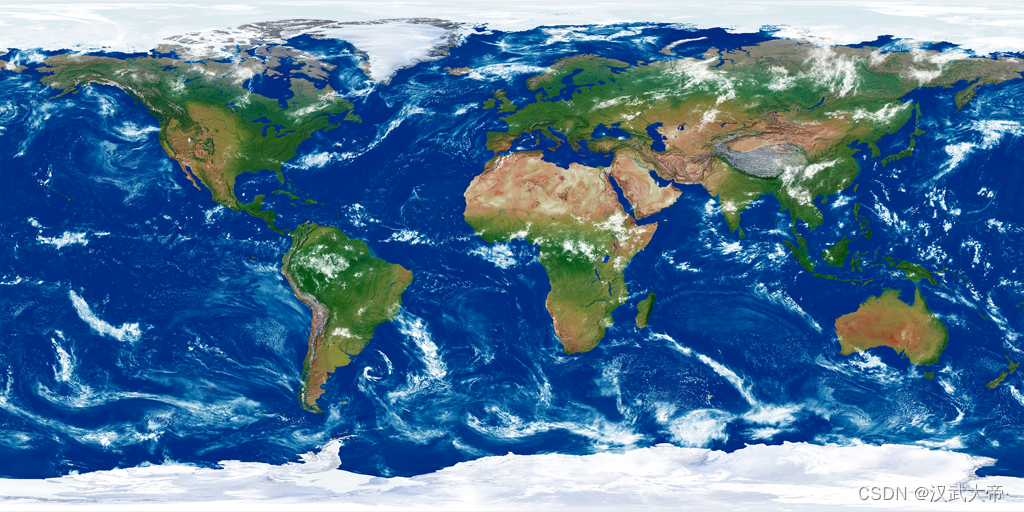
?说明:这里创建了SphereGeometry 球缓冲几何体,使用的材质是兰伯特网格材质MeshLambertMaterial,并对球缓冲几何体使用了纹理贴图效果,添加了聚光源,全部代码如下:
<template>
  <div>
    <el-container>
      <el-main>
        <div class="box-card-left">
          <div id="threejs" style="border: 1px solid red"></div>
          <div class="box-right">
          </div>
        </div>
      </el-main>
    </el-container>
  </div>
</template>
<script>
// 引入轨道控制器扩展库OrbitControls.js
import { OrbitControls } from "three/examples/jsm/controls/OrbitControls.js";
import { GLTFLoader } from "three/examples/jsm/loaders/GLTFLoader.js";
export default {
  data() {
    return {
      name: "",
      scene: null,
      camera: null,
      renderer: null,
      mesh: null,
      geometry: null,
      group: null,
      material: null,
      texture: null,
    };
  },
  created() {},
  mounted() {
    this.name = this.$route.query.name;
    this.init();
  },
  methods: {
    goBack() {
      this.$router.go(-1);
    },
    init() {
      /**
       * 光源分类:
       * 平行光 DirectionalLight,
       * DirectionalLight( color : Color, intensity : Float )
          color -(可选)一个表示颜色的 Color 的实例、字符串或数字,默认为一个白色(0xffffff)的 Color 对象。
          intensity -(可选)光照的强度。默认值为 1。
       * 点光源 PointLight,
        PointLight( color : Color, intensity : Float, distance : Number, decay : Float )
            color -(可选)一个表示颜色的 Color 的实例、字符串或数字,默认为一个白色(0xffffff)的 Color 对象。
            intensity -(可选)光照强度。默认值为 1。
            distance - 光源照射的最大距离。默认值为 0(无限远)。
            decay - 沿着光照距离的衰退量。默认值为 2。
       * 环境光 AmbientLight ,
        AmbientLight( color : Color, intensity : Float )
            color -(可选)一个表示颜色的 Color 的实例、字符串或数字,默认为一个白色(0xffffff)的 Color 对象。
            intensity -(可选)光照的强度。默认值为 1。
       * 聚光源 SpotLight
          SpotLight( color : Color, intensity : Float, distance : Float, angle : Radians, penumbra : Float, decay : Float )
            color -(可选)一个表示颜色的 Color 的实例、字符串或数字,默认为一个白色(0xffffff)的 Color 对象。
            intensity -(可选)光照强度。默认值为 1。
            distance - 光源照射的最大距离。默认值为 0(无限远)。
            angle - 光线照射范围的角度。默认值为 Math.PI/3。
            penumbra - 聚光锥的半影衰减百分比。默认值为 0。
            decay - 沿着光照距离的衰减量。默认值为 2。
       *  */

      // 1,创建场景对象
      this.scene = new this.$three.Scene();
      // 2,创建球缓冲几何体对象
      this.geometry = new this.$three.SphereGeometry(40,32,16);


      // 5,创建辅助坐标轴对象
      const axesHelper = new this.$three.AxesHelper(100);
      this.scene.add(axesHelper);
      // 创建纹理贴图加载器对象
      const textureLoader = new this.$three.TextureLoader();
      textureLoader.load(require("../../assets/earth.png"), e => {
          // 3,创建网格材质对象
        this.material = new this.$three.MeshLambertMaterial({
          // color: 0xfff000,
          map: e
        });
        // 4,创建网格对象
        this.mesh = new this.$three.Mesh(this.geometry, this.material);
        this.scene.add(this.mesh);
         // 创建聚光源对象
        const spotLight = new this.$three.SpotLight(0xffffff, 1);
        // 设置聚光源位置
        spotLight.position.set(100, 80, 20);
        // 设置聚光源指向的目标位置
        spotLight.target = this.mesh;
        this.scene.add(spotLight);
        // 创建聚光源辅助对象
        const spotLightHelper = new this.$three.SpotLightHelper(spotLight,0xffffff);
        this.scene.add(spotLightHelper);
        // 6,创建透视投影相机对象
        this.camera = new this.$three.PerspectiveCamera(60, 1, 0.01,1000);
        this.camera.position.set(200,150,200);
        // 相机看向的是模型的位置
        this.camera.lookAt(this.mesh.position);
        // 7,创建渲染器对象
        this.renderer = new this.$three.WebGLRenderer();
        this.renderer.setSize(1200,1000);
        this.renderer.render(this.scene, this.camera);
        document.getElementById("threejs").appendChild(this.renderer.domElement);
        this.renderFun();
        // 创建相机空间轨道控制器对象
        const controls = new OrbitControls(this.camera, this.renderer.domElement);
        controls.addEventListener("change", () => {
          this.renderer.render(this.scene, this.camera);
        })
      })
    },
    renderFun() {
      this.mesh.rotateY(0.01);
      this.renderer.render(this.scene, this.camera);
      window.requestAnimationFrame(this.renderFun);
    }
  },
};
</script>
//
<style lang="less" scoped>
.msg {
  padding: 20px;
  text-align: left;
  display: flex;
  justify-content: flex-start;
  flex-wrap: wrap;
  .span {
    margin: 0 30px 30px 0;
    // white-space: nowrap;
  }
  .p {
    text-align: left;
  }
}
.box-card-left {
  display: flex;
  align-items: flex-start;
  flex-direction: row;

  width: 100%;
  .box-right {
    text-align: left;
    padding: 10px;
    .xyz {
      width: 100px;
      margin-left: 20px;
    }
    .box-btn {
      margin-left: 20px;
    }
  }
}
</style>

对于:this.$three 是这样配置的;
// 1,npm安装threejs插件:
npm install three --save

// 2,在main.js文件中加入:
// 引入 three.js
import * as THREE from 'three';
Vue.prototype.$three = THREE;
文章来源:https://blog.csdn.net/yinge0508/article/details/134974199
本文来自互联网用户投稿,该文观点仅代表作者本人,不代表本站立场。本站仅提供信息存储空间服务,不拥有所有权,不承担相关法律责任。 如若内容造成侵权/违法违规/事实不符,请联系我的编程经验分享网邮箱:chenni525@qq.com进行投诉反馈,一经查实,立即删除!
本文来自互联网用户投稿,该文观点仅代表作者本人,不代表本站立场。本站仅提供信息存储空间服务,不拥有所有权,不承担相关法律责任。 如若内容造成侵权/违法违规/事实不符,请联系我的编程经验分享网邮箱:chenni525@qq.com进行投诉反馈,一经查实,立即删除!
最新文章
- Python教程
- 深入理解 MySQL 中的 HAVING 关键字和聚合函数
- Qt之QChar编码(1)
- MyBatis入门基础篇
- 用Python脚本实现FFmpeg批量转换
- 以太网交换基础
- GaussDB技术解读系列:高安全之密态等值
- gin中使用swagger生成接口文档
- 中霖教育:专业不对口,能考会计师吗?
- Windows Server 2019 OVF, updated Dec 2023 (sysin) - VMware 虚拟机模板
- 安卓开发学习---kotlin版---笔记(二)
- 某电影院购票网站(JSP+java+springmvc+mysql+MyBatis)
- MyBatis Plus轻松实现数据读写分离
- 【学术精选】NLP可投的顶会信息(近期截稿)
- Listener监听器----HttpSession对象的生命周期监听器
