清华大模型Chatglm2-6B的微调方法和微调模型使用方式(非常仔细,值得借鉴)
一、下载chatglm2-6b的项目代码和模型
1、下载chatglm2-6b的项目
方法一、chatglm2-6b的项目下载地址:
https://github.com/THUDM/ChatGLM2-6B
方法二、百度网盘提取chatglm2-6b的项目:
链接:https://pan.baidu.com/s/1BEwUhiIJlB4SJrGw7NLL7Q 提取码:vxyr
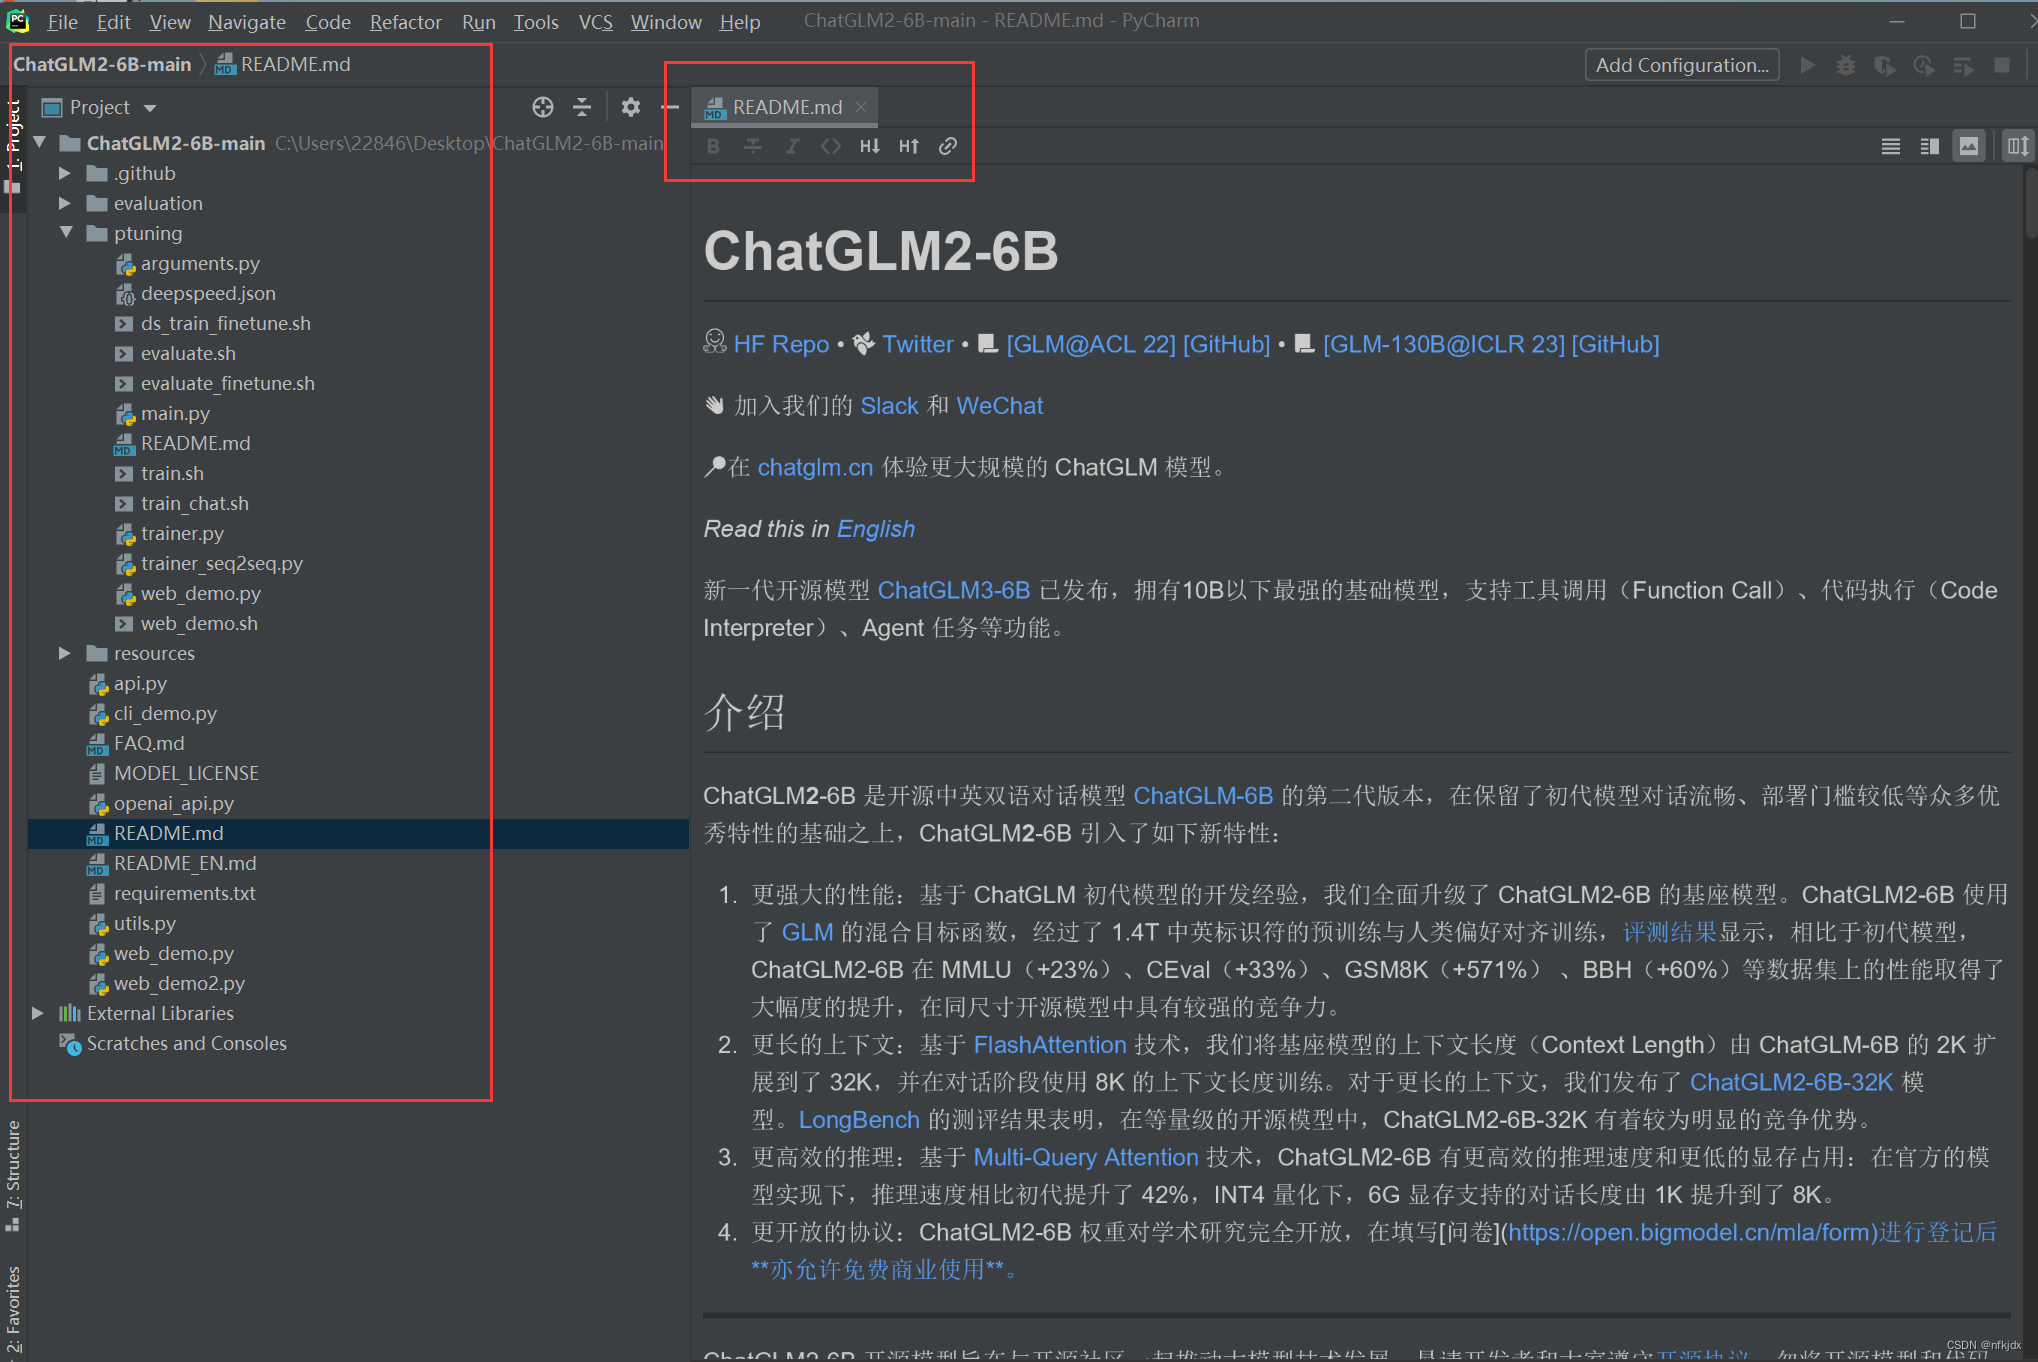
2、使用pycharm打开项目:左边是项目文件目录,右边是chatglm2-6b的一个介绍
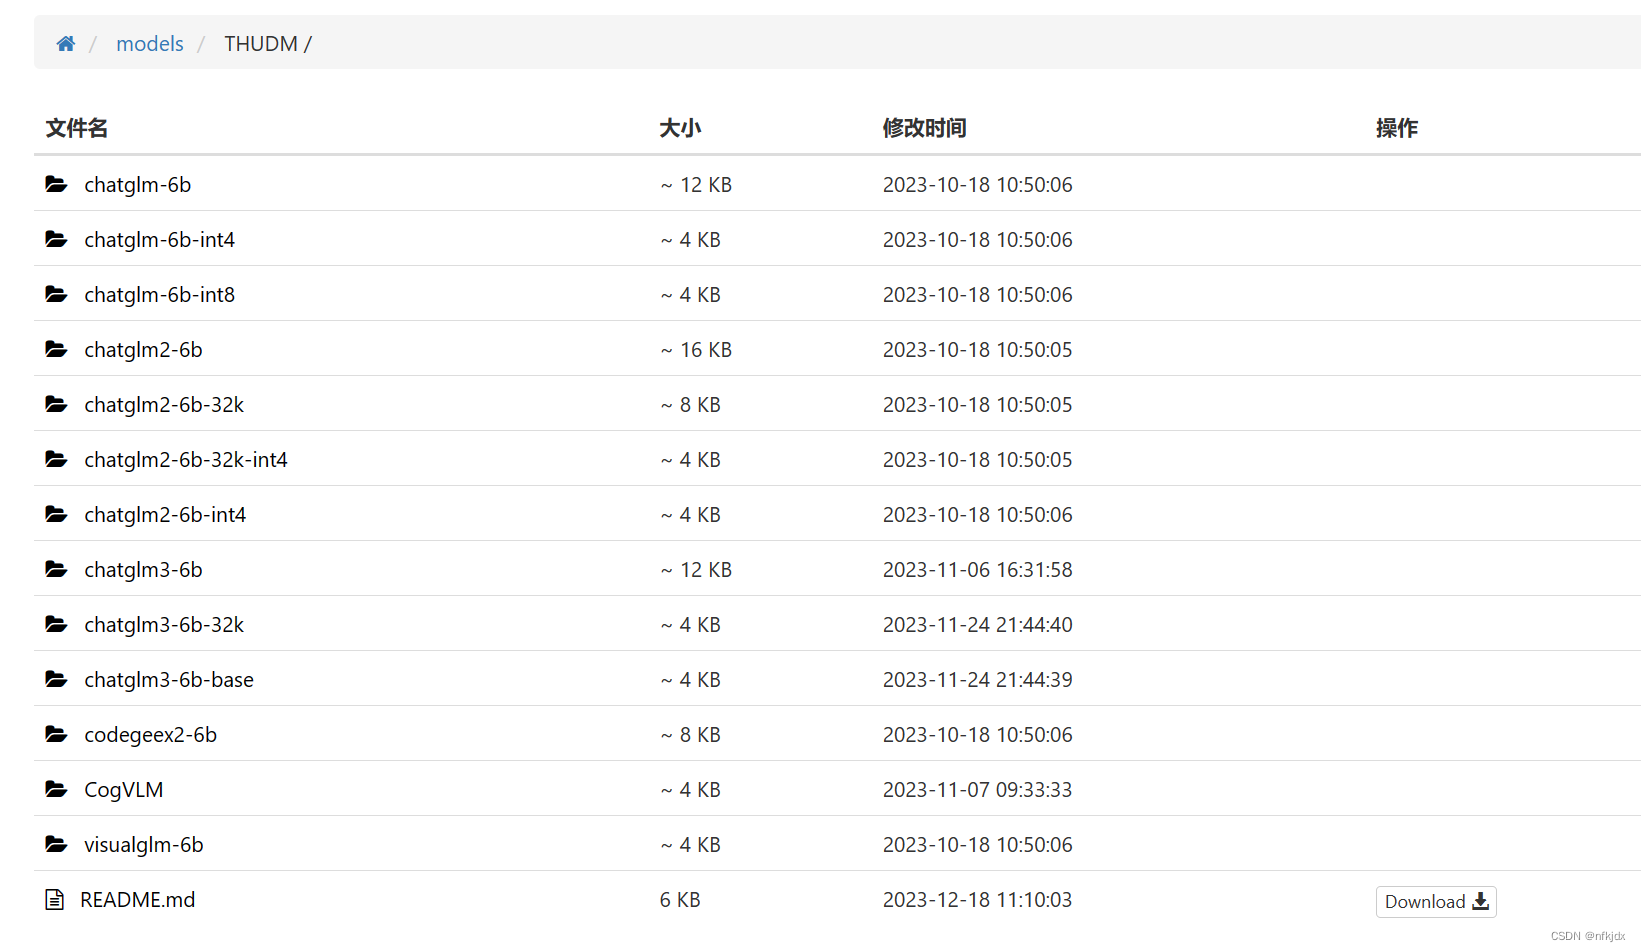
3、下载chatglm2-6b的模型
chatglm2-6b的模型下载地址:这里面很多模型,选择自己需要的下载就可以了
https://aifasthub.com/models/THUDM
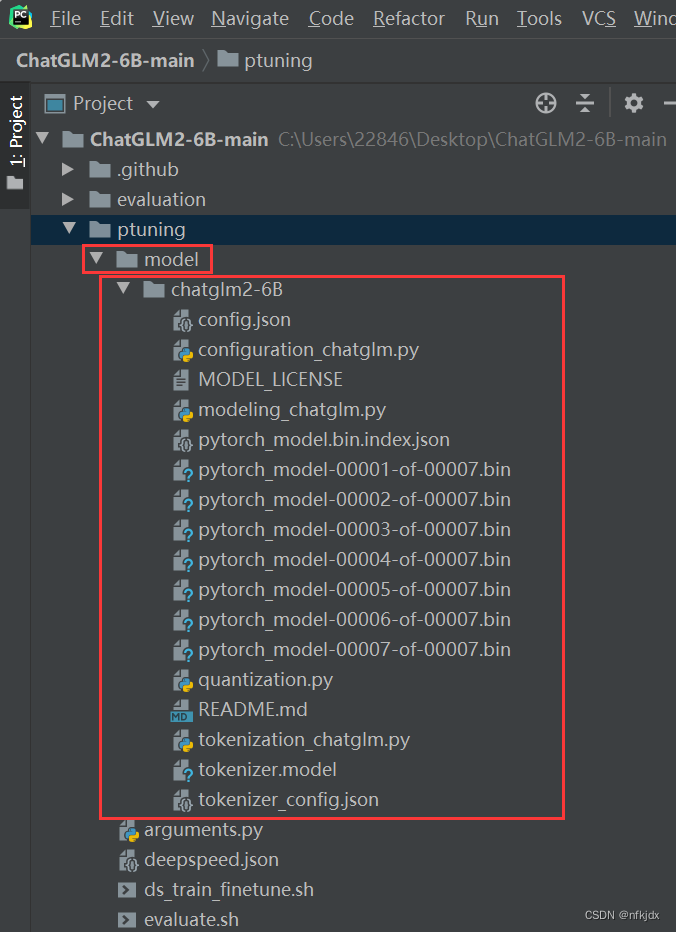
4、将下载的模型放入项目中:
首先在项目的ptuning文件夹下面新建model文件夹,再将下载的模型放入model文件夹里面(因为ptuning文件夹里面存放的就是微调文件和代码,我将模型放入在该文件下是为了便于操作,其实也可以放在其它地方,看大家自己怎么操作)
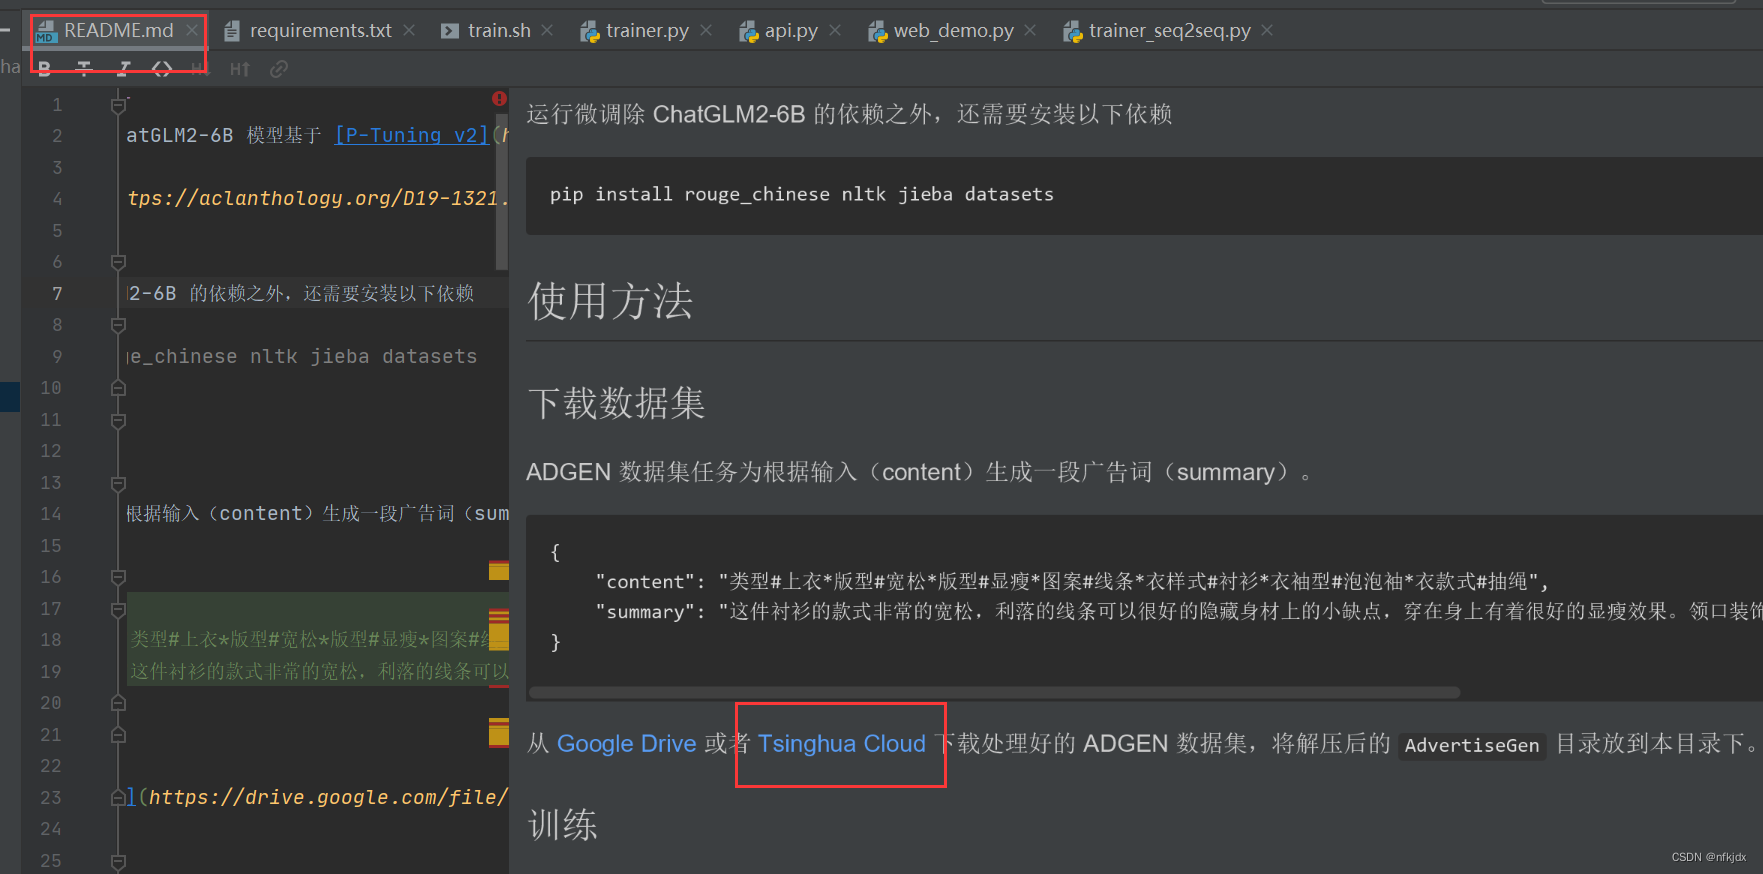
二、打开ptuning文件下的README.md文件,里面是微调的简单说明,如下图所示:这里简单介绍接下来的操作步骤,不需要进行实际操作
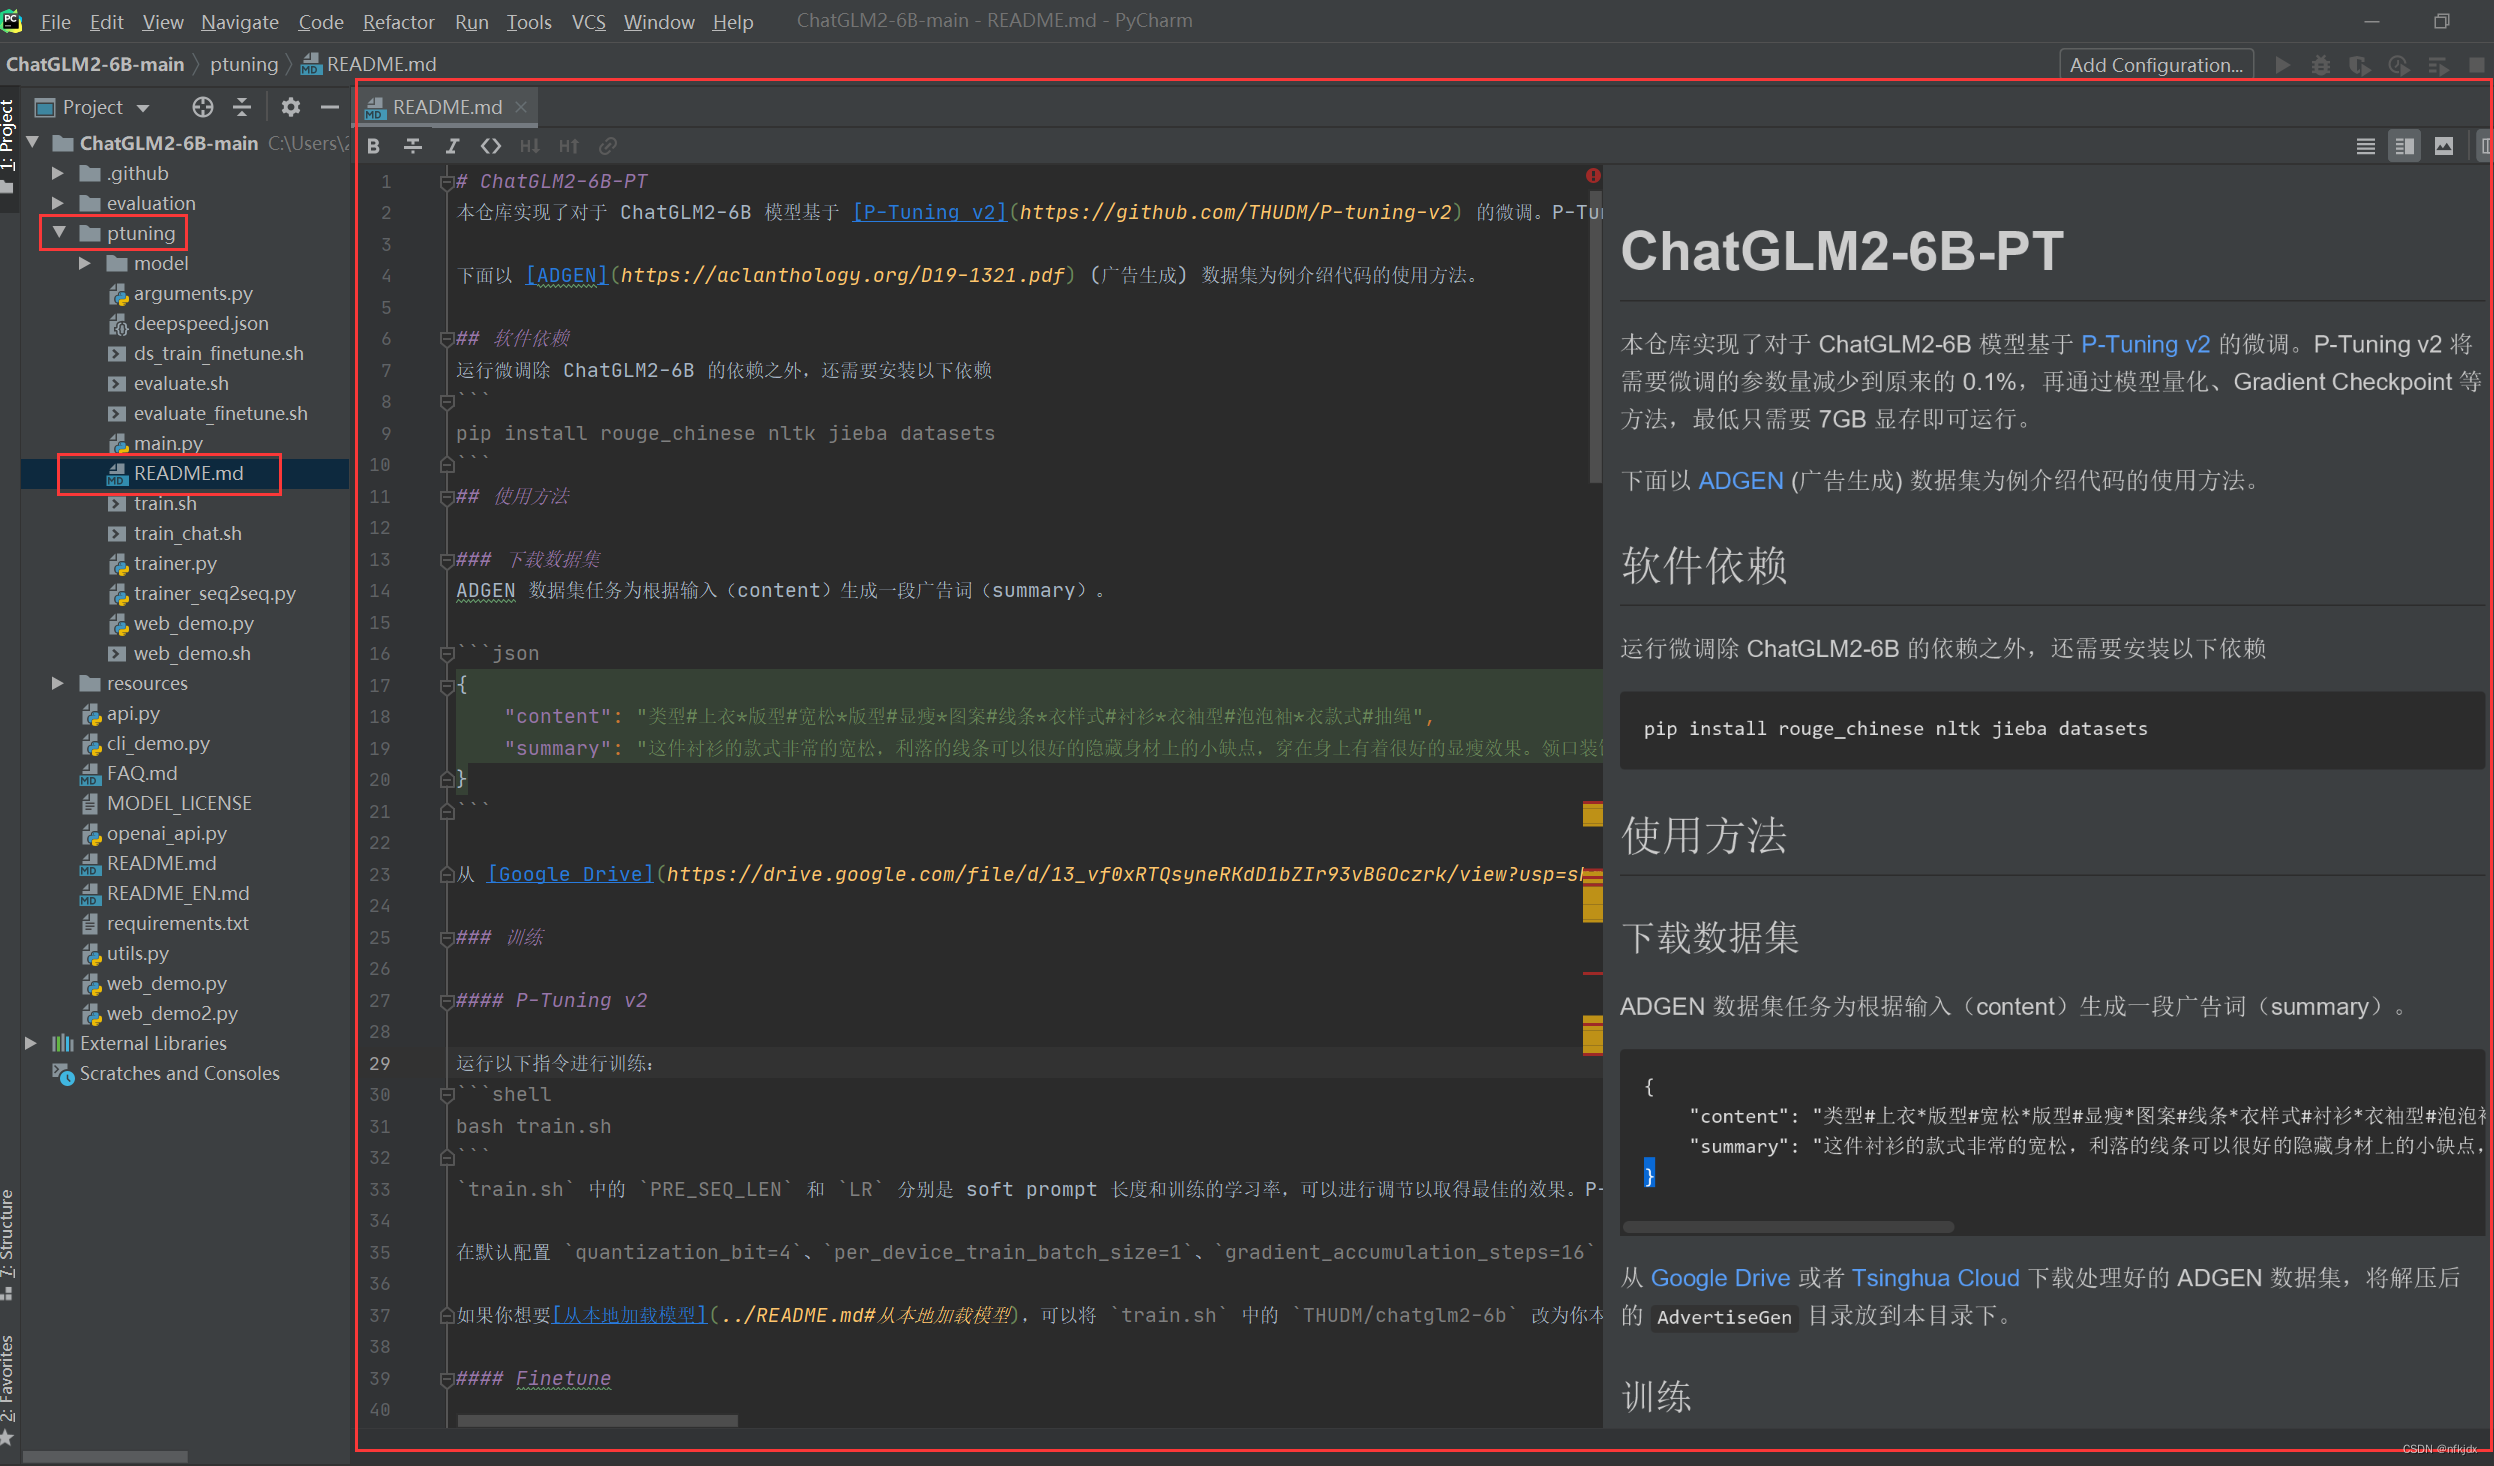
我们可以选择跟着里面的部分步骤操作,主要是以下步骤:
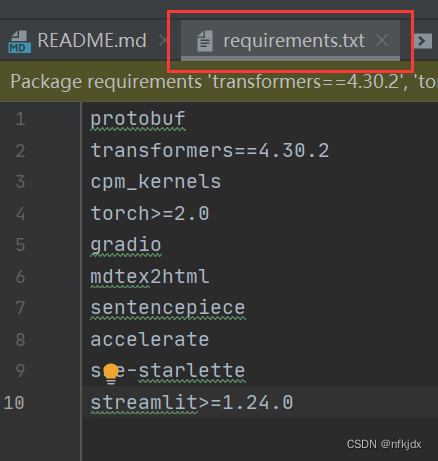
1、安装所需要的库等环境,如下图所示的两个地方的依赖
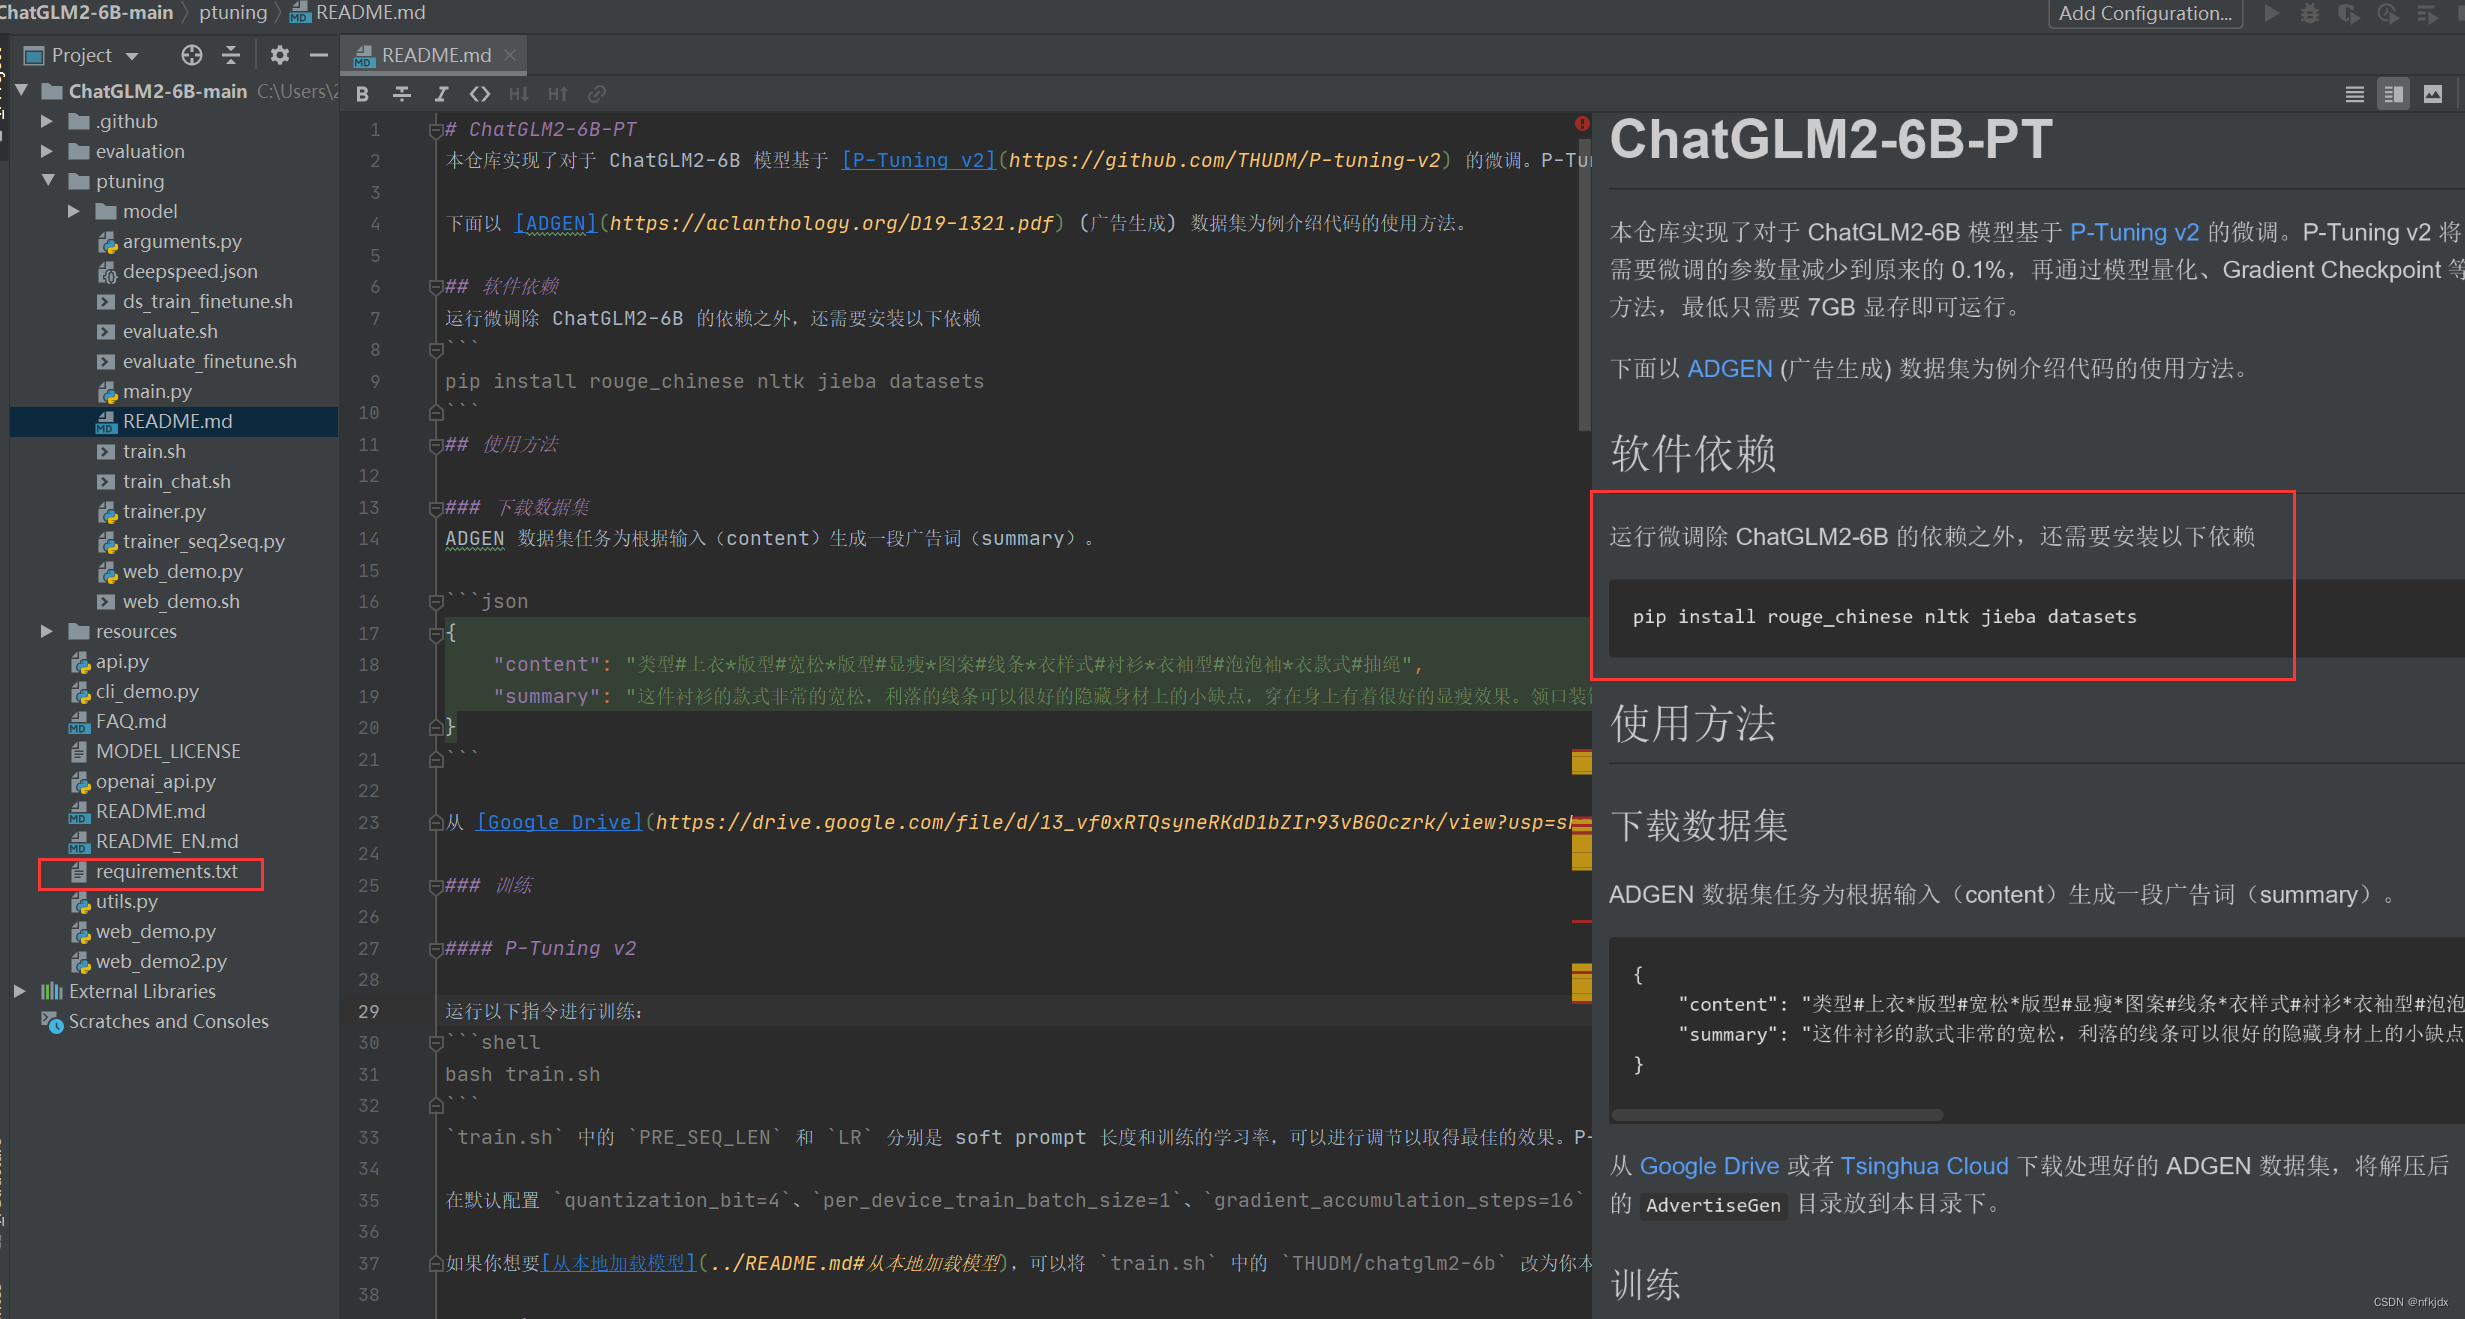
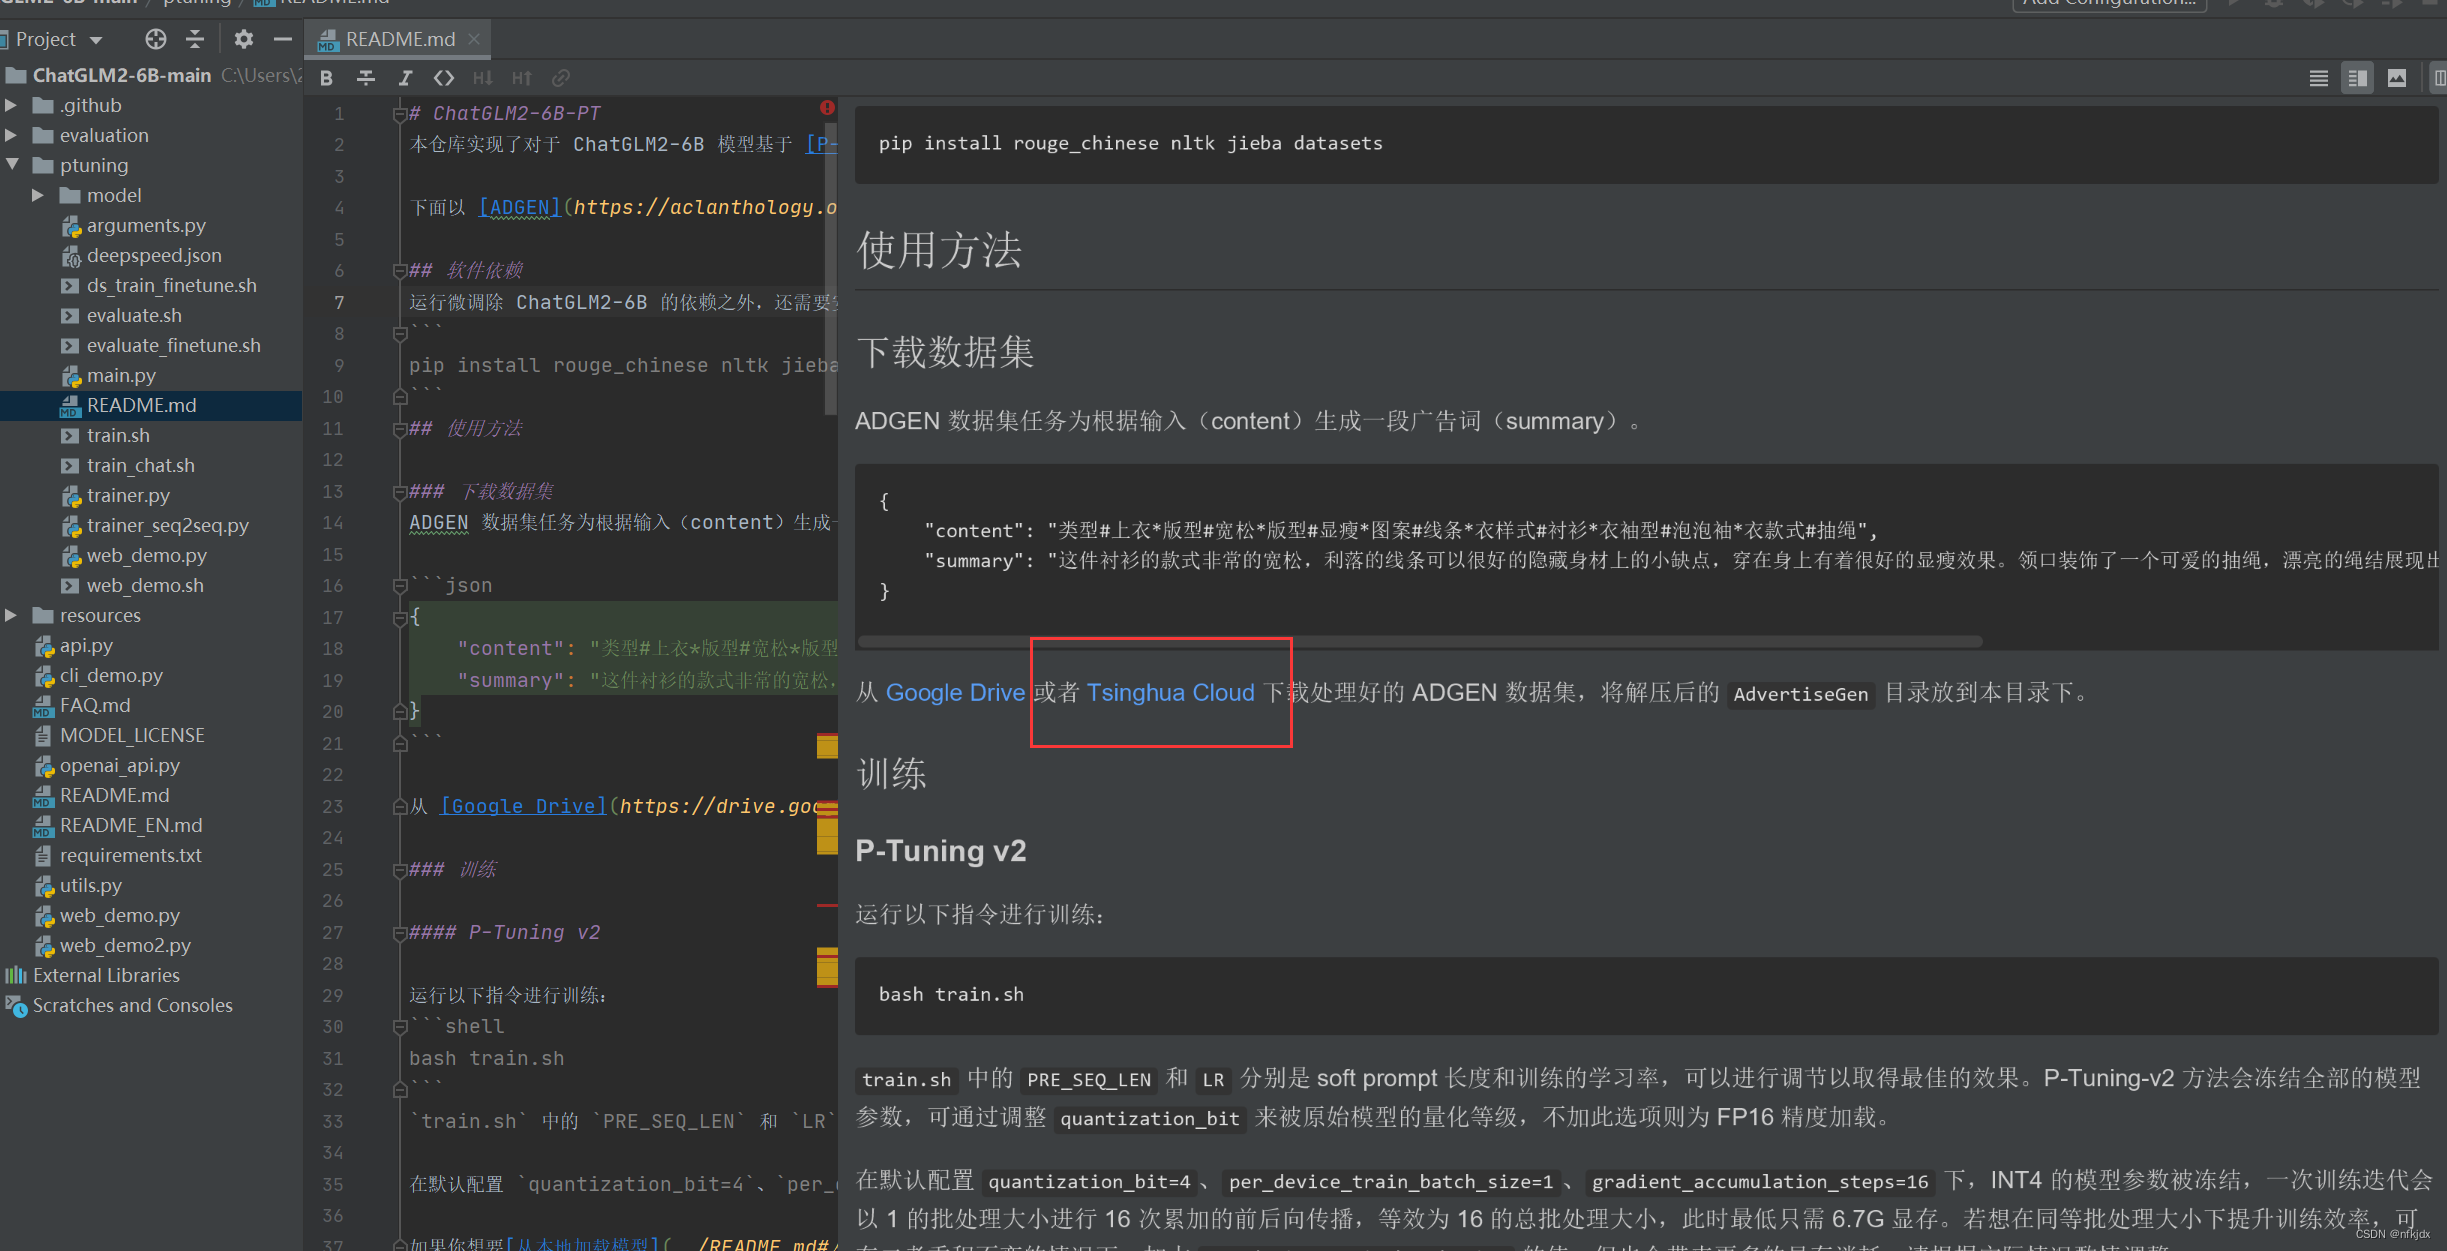
2、下载官方所示的微调数据集(你也可以自己按照训练数据的输入格式,创建数据集)【json的数据集】

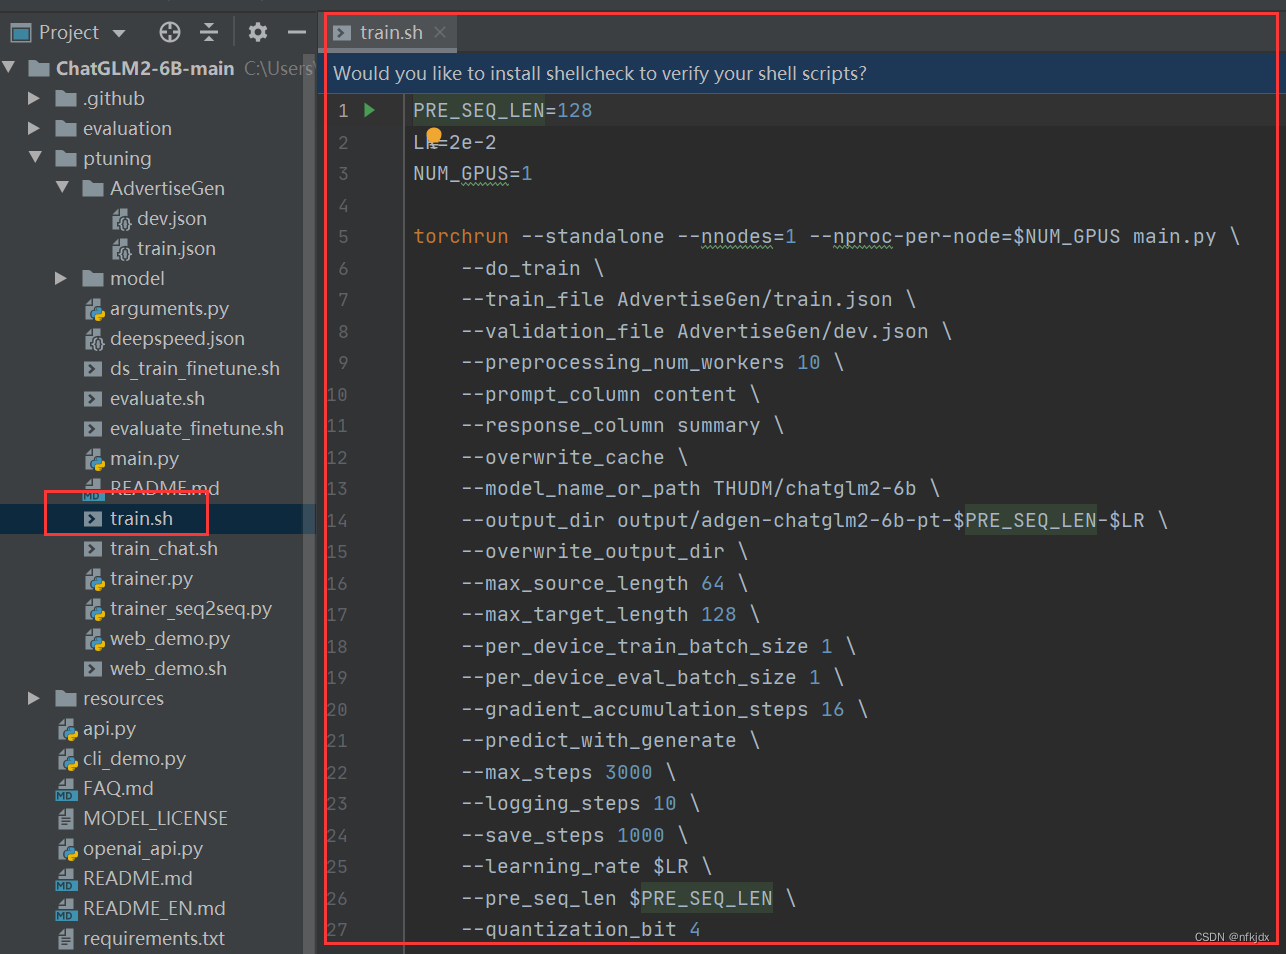
3、因为微调训练的文件为sh格式,因此需要Linux环境的操作命令。这里有两种方法解决在window环境下运行sh文件:
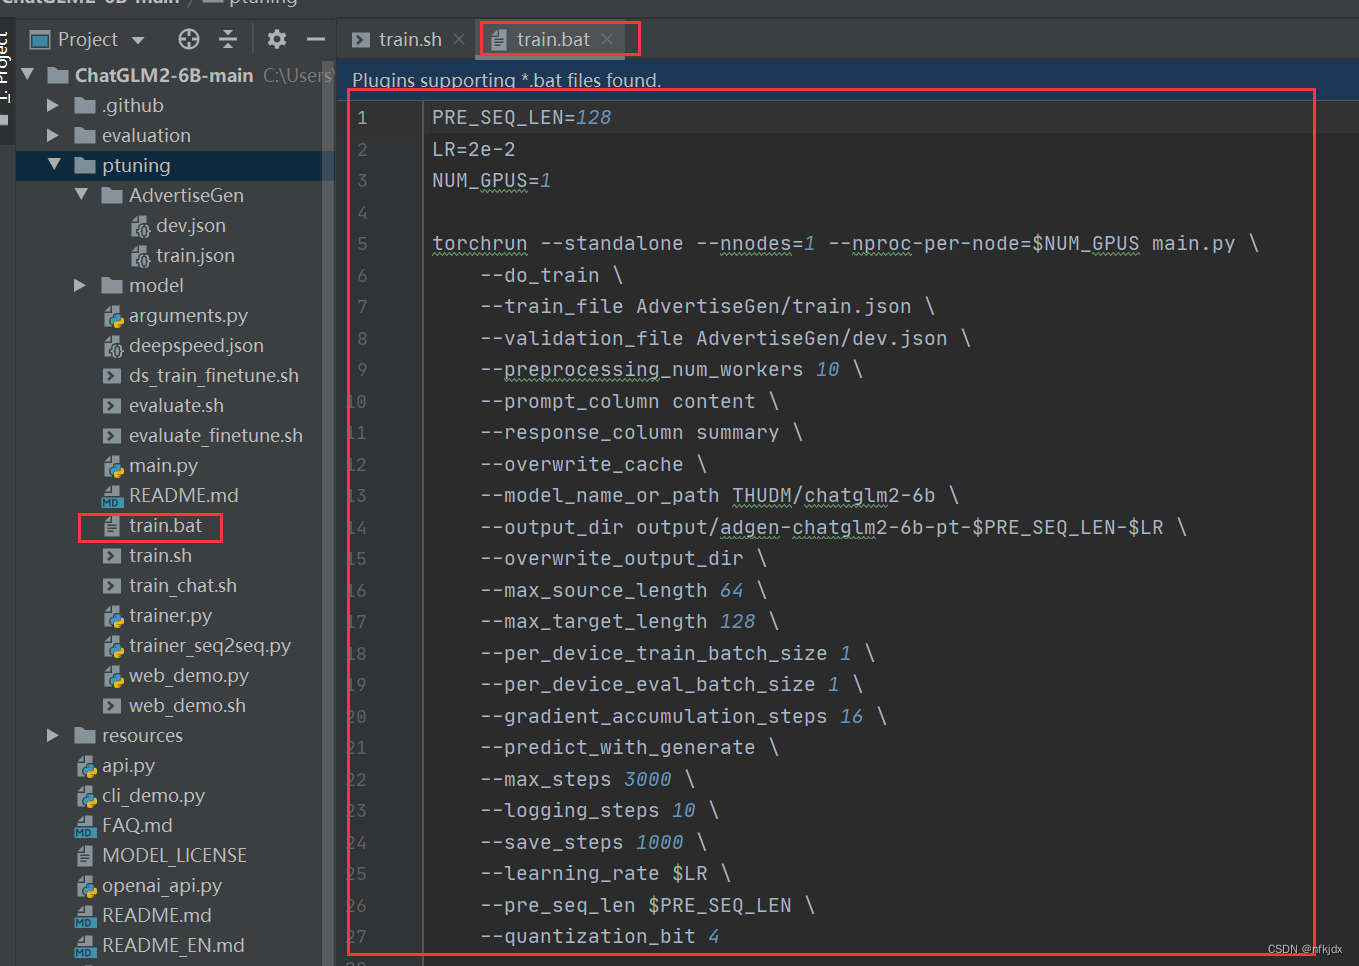
方法一:安装git bash; 方法二:将sh文件转化为bat文件格式,再运行训练。
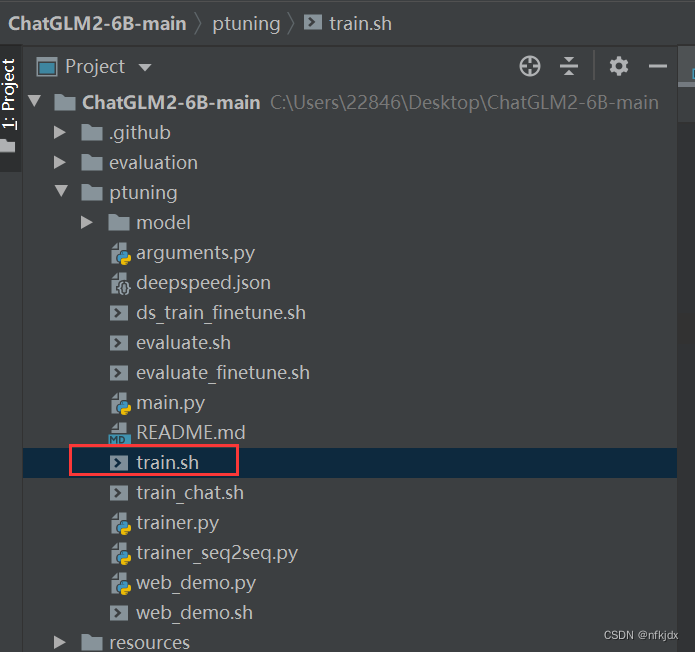
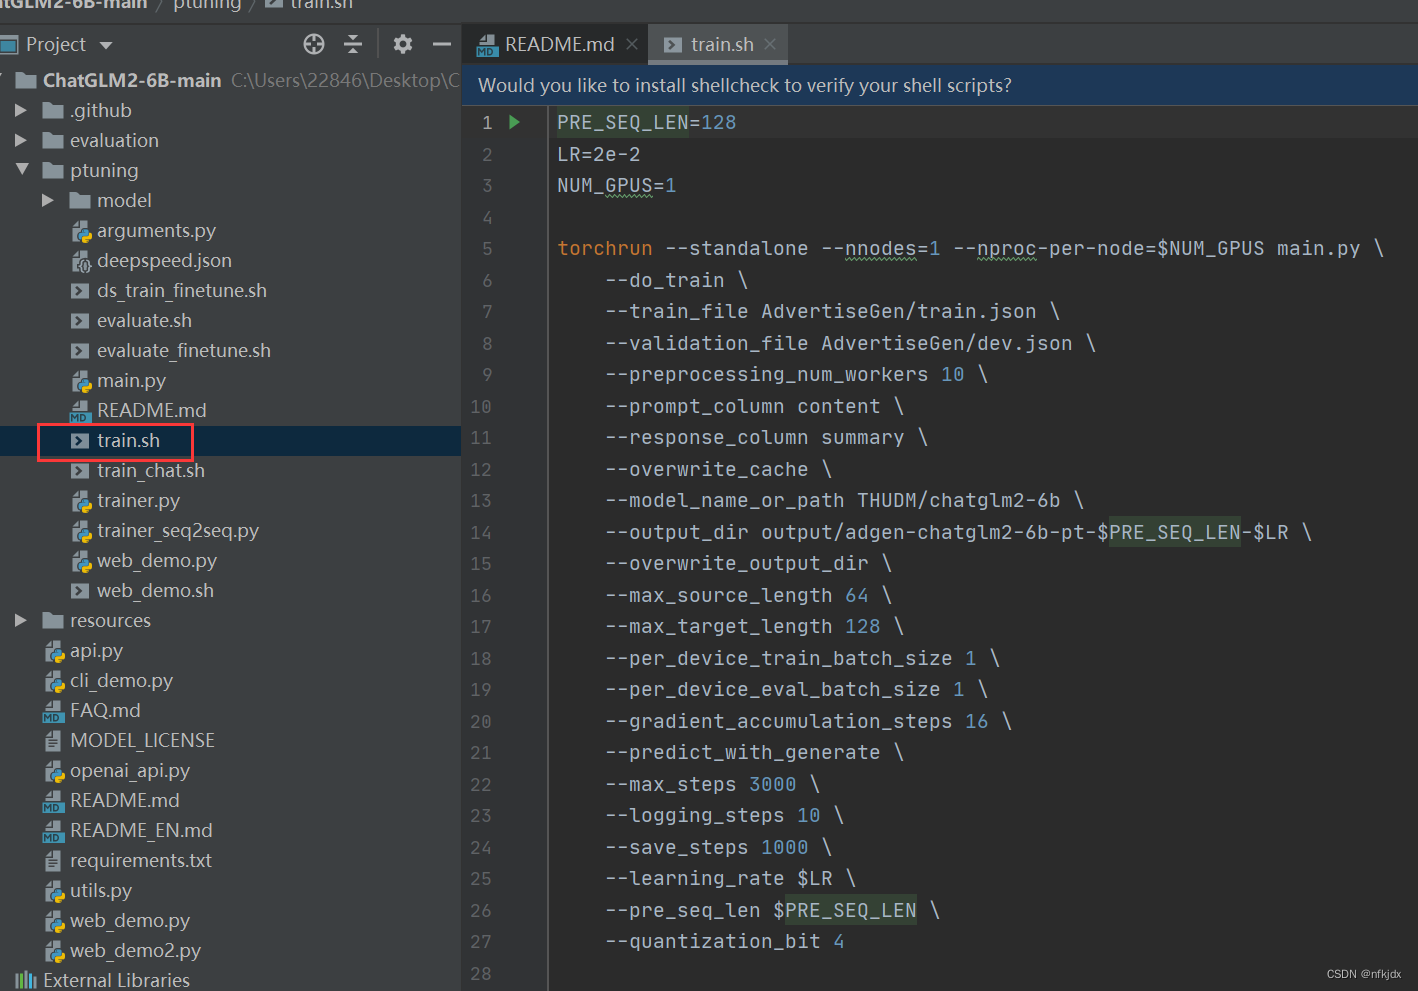
4、对train.sh文件内的配置进行调整修改,再训练。
5、对微调训练生成的模型进行验证。
接下来就对以上五个小步骤进行具体完善。
三、创建chatglm2-6b的虚拟环境
1、打开cmd或者Anaconda Prompt(install)创建虚拟环境
方法一:默认情况下虚拟环境创建在Anaconda安装目录下的envs文件夹中
conda create --name chatglm2 #chatglm2是虚拟环境名称(自定义)
方法二:如果想将虚拟环境创建在指定位置,使用–prefix参数即可:
conda create --prefix E:\TrainChatglm2\chatglm2 python==3.9 #chatglm2是虚拟环境名称(自定义)
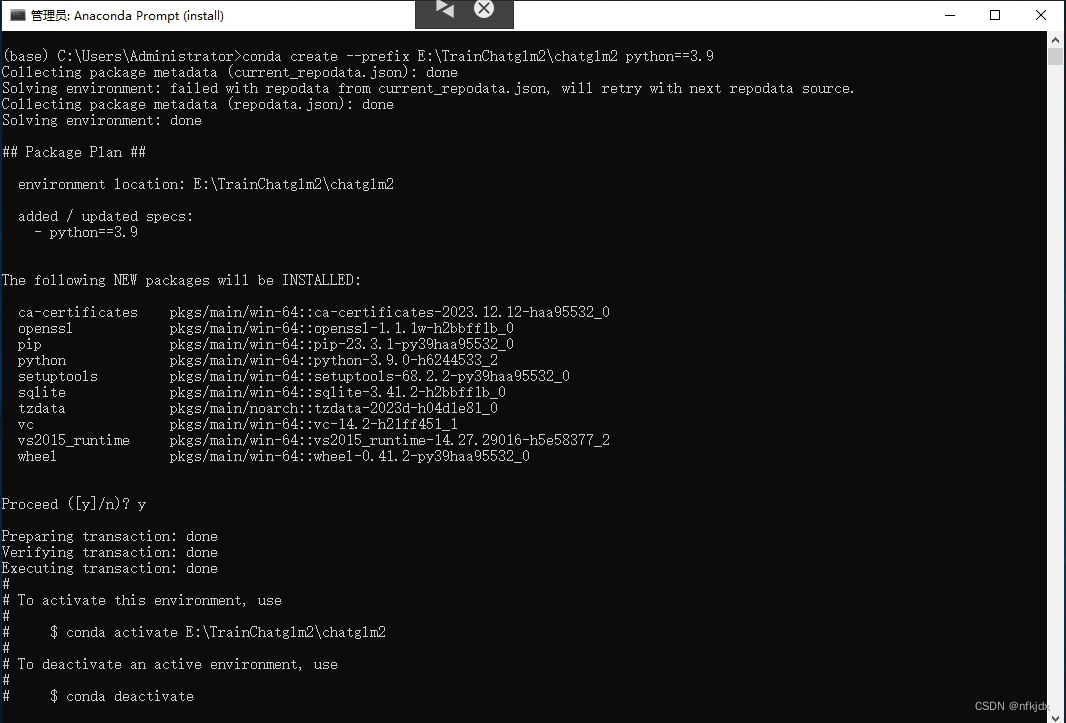
2、查看刚刚创建的chatglm2虚拟环境
方法一:通过命令查看
conda env list
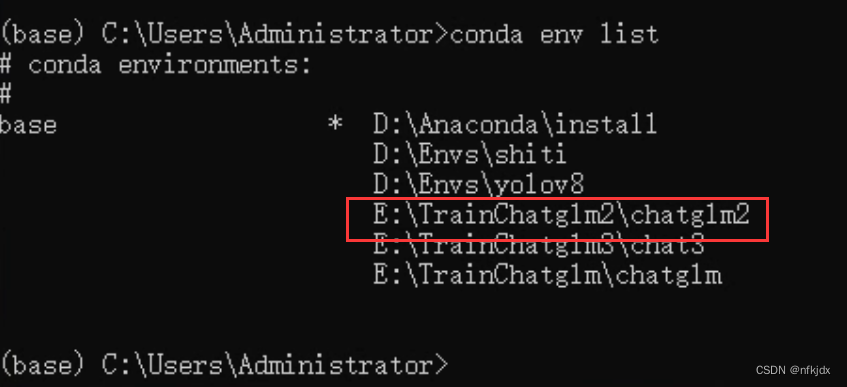
方法二:通过生成的文件夹查看
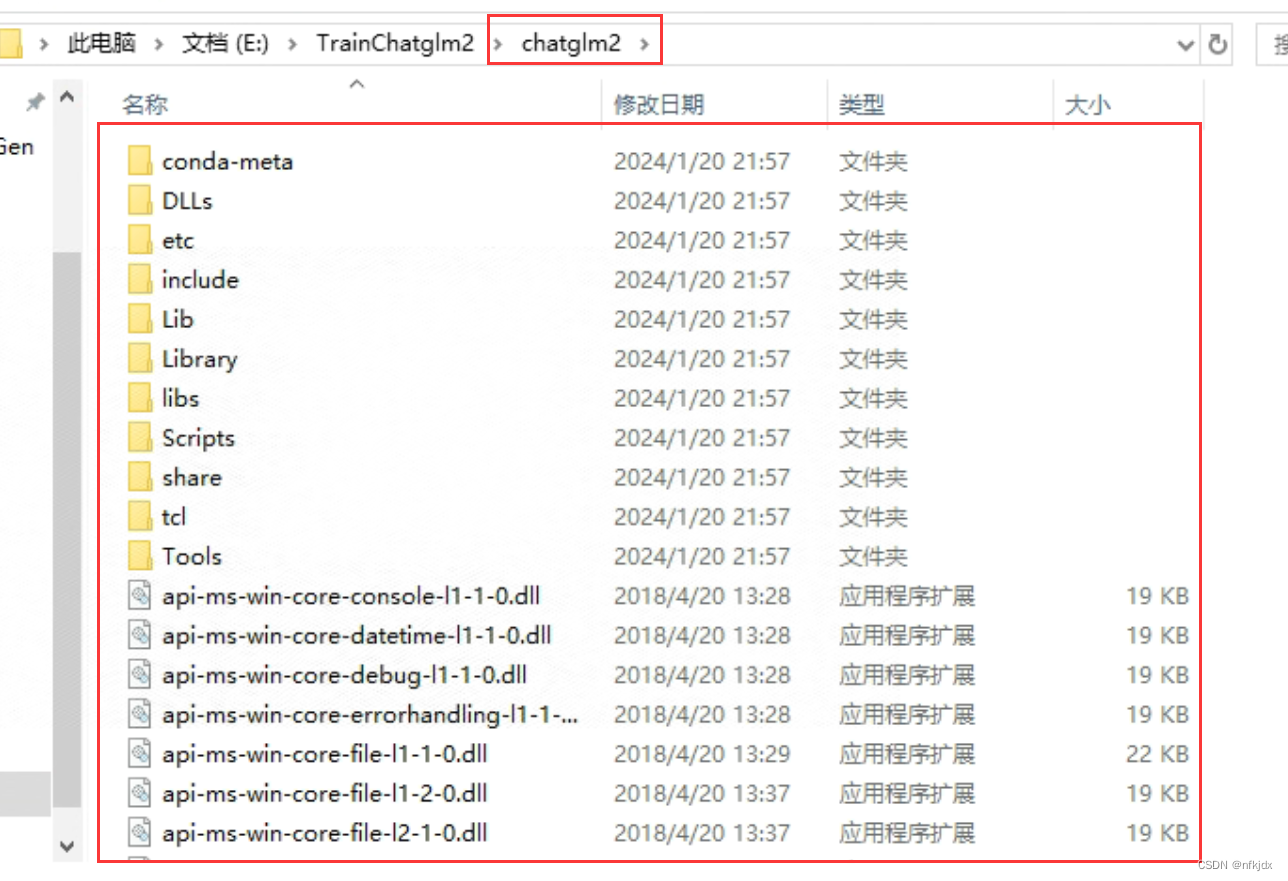
3、激活刚刚创建的虚拟环境并查看里面已有的依赖
activate E:\TrainChatglm2\chatglm2
pip list
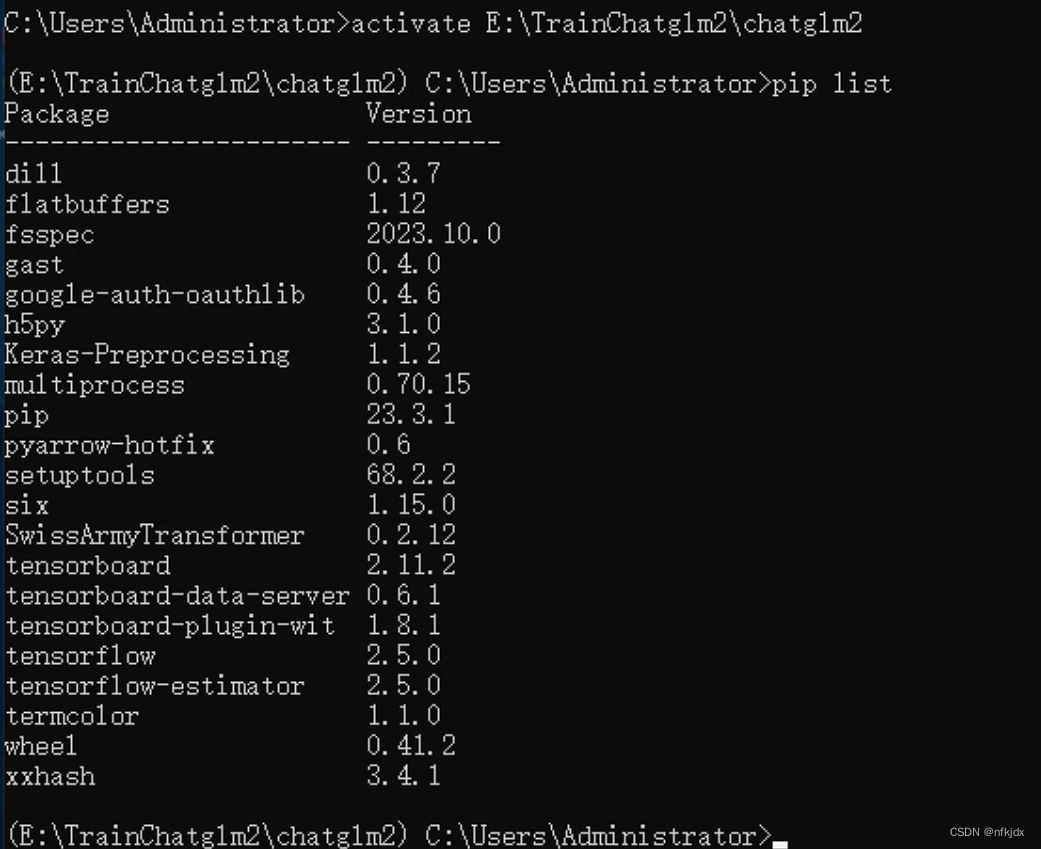
4、先安装除了torch之外所需要的依赖
清华大学 :https://pypi.tuna.tsinghua.edu.cn/simple/
阿里云:http://mirrors.aliyun.com/pypi/simple/
中国科学技术大学 :http://pypi.mirrors.ustc.edu.cn/simple/
华中科技大学:http://pypi.hustunique.com/
豆瓣源:http://pypi.douban.com/simple/
腾讯源:http://mirrors.cloud.tencent.com/pypi/simple
华为镜像源:https://repo.huaweicloud.com/repository/pypi/simple/
比如:pip install -i https://pypi.tuna.tsinghua.edu.cn/simple/ transformers==4.30.2

5、安装torch依赖
(1)查看本机的cuda版本,再根据版本去安装合适的torch
nvidia-smi
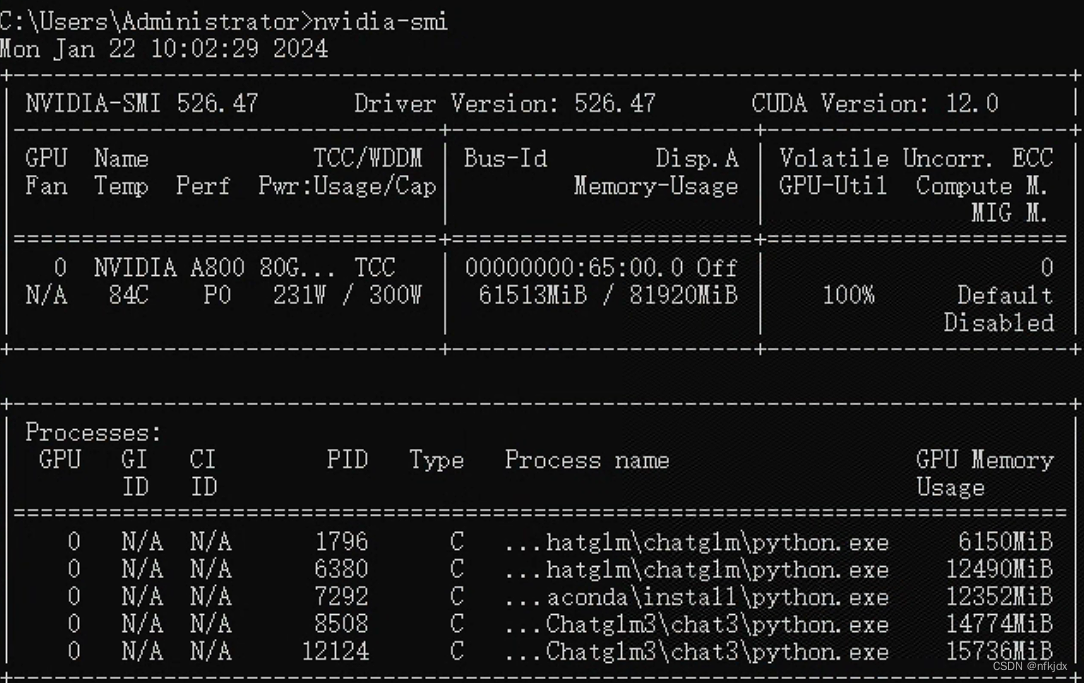
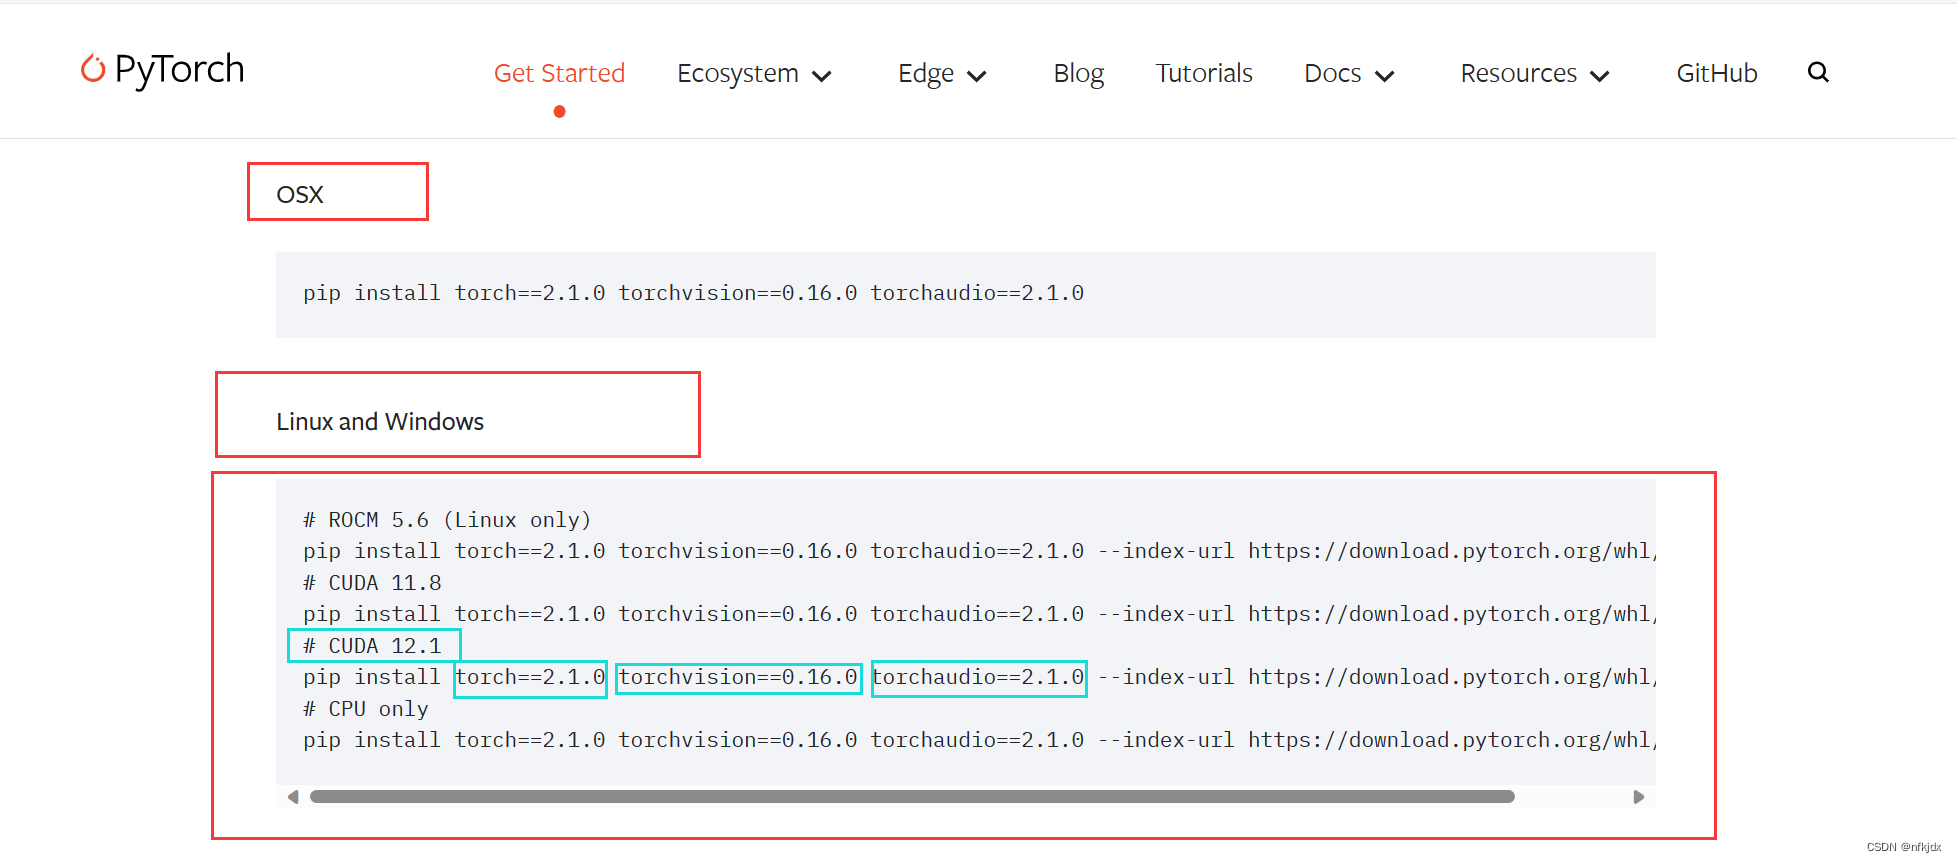
(2)查看本机的cuda版本,再根据版本去安装合适的torch
打开网址:https://pytorch.org/get-started/previous-versions/,查找本机对应的torch,并通过命令在线安装,如下图所示;
# CUDA 11.8
pip install torch==2.0.0+cu118 torchvision==0.15.1+cu118 torchaudio==2.0.1 --index-url https://download.pytorch.org/whl/cu118
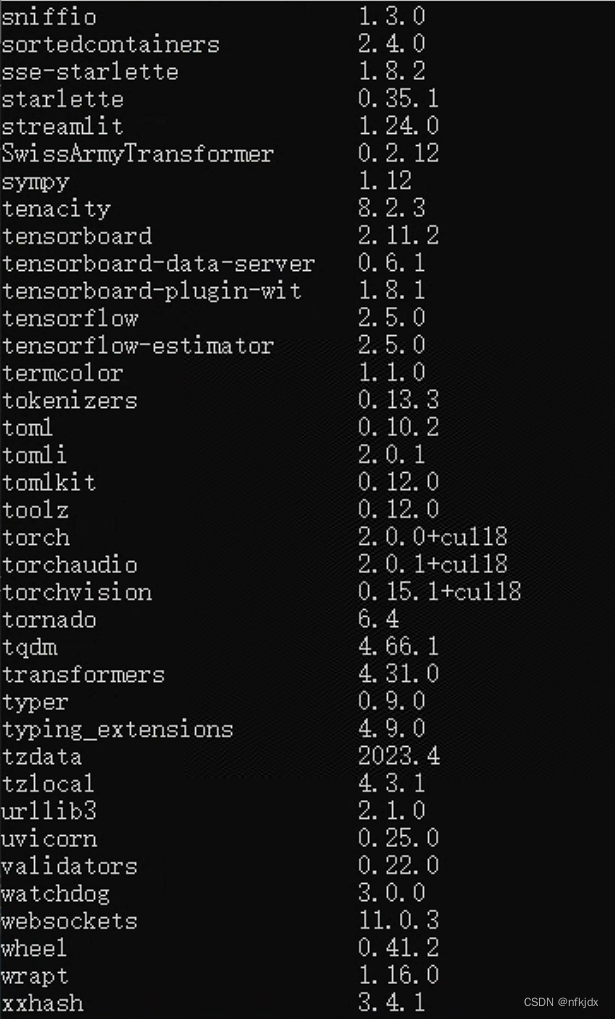
6、安装的结果如下:
四、下载官方所示的微调数据集(你也可以自己按照训练数据的输入格式,创建数据集)【json的数据集】
1、点击项目中的README.md文件中的Tsinghua Cloud就直接在网页中下载数据


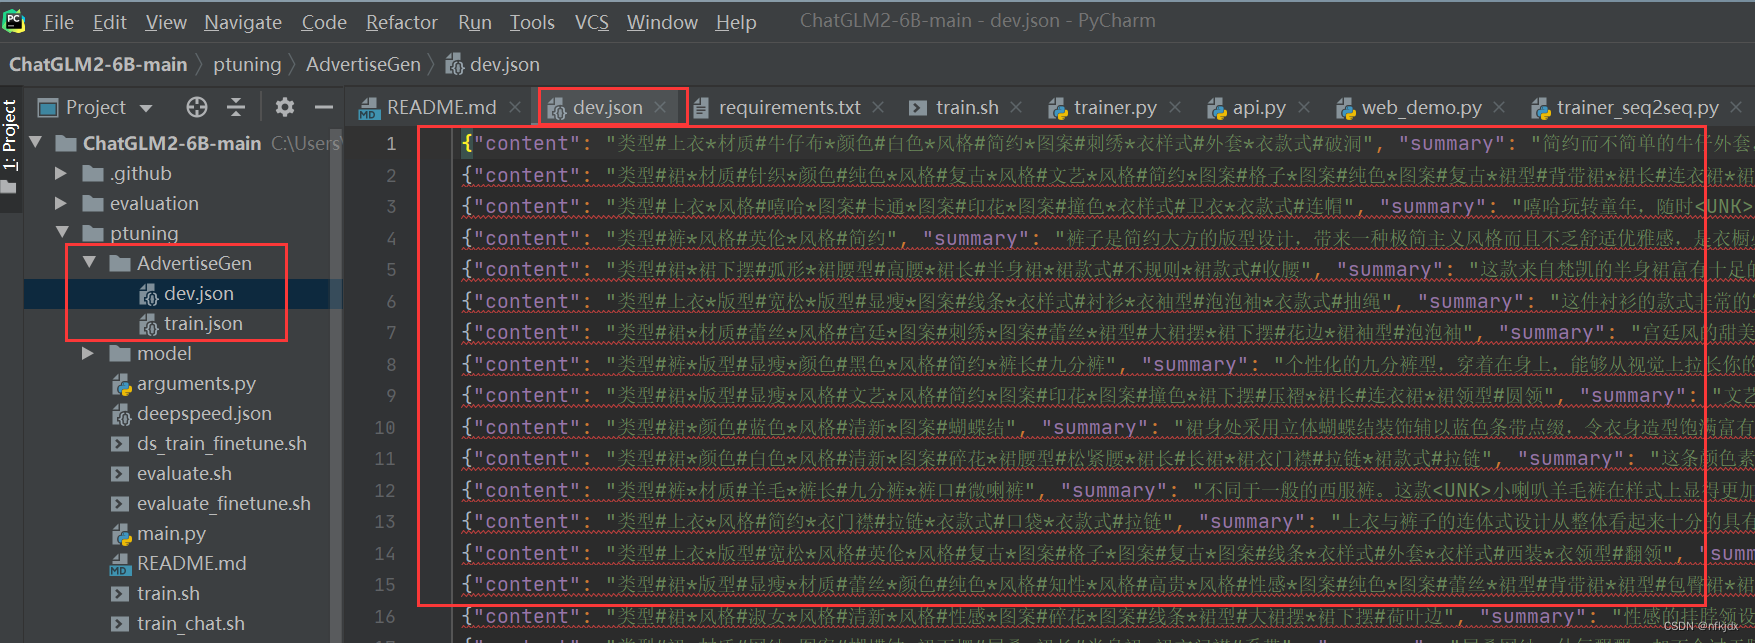
2、解压数据集并放在项目的ptuning文件夹下
五、因为微调训练的文件为sh格式,因此需要Linux环境的操作命令。这里有两种方法解决在window环境下运行sh文件:
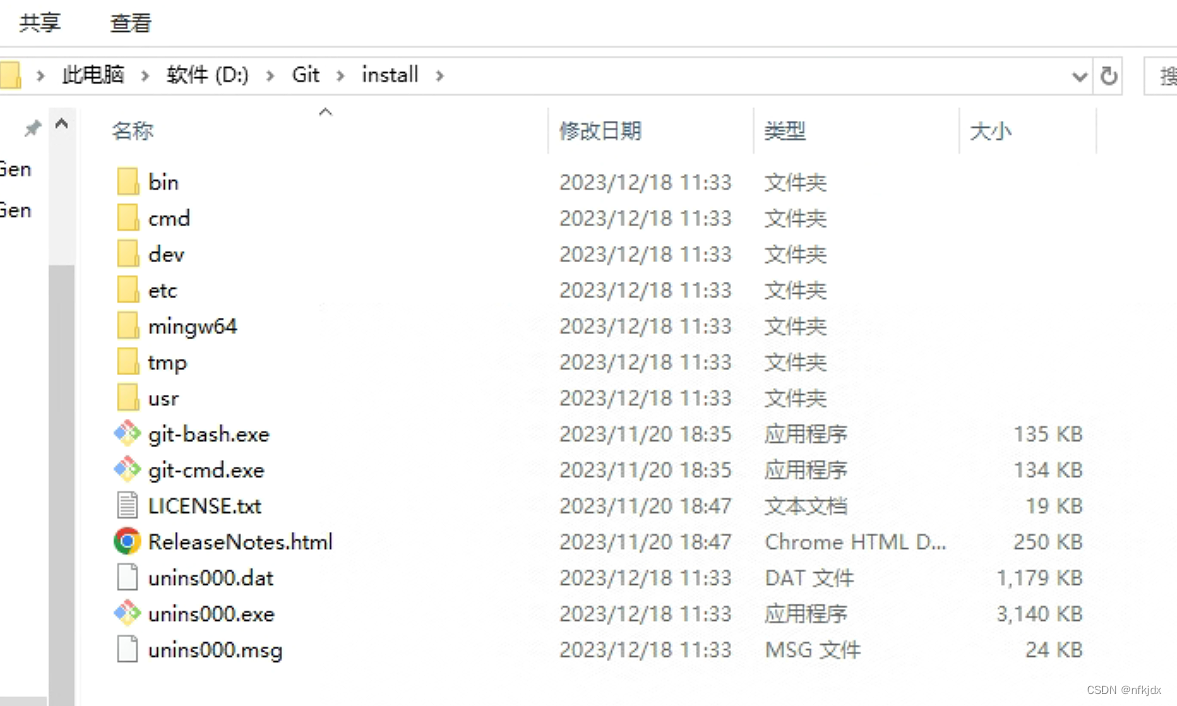
方法一:安装git bash
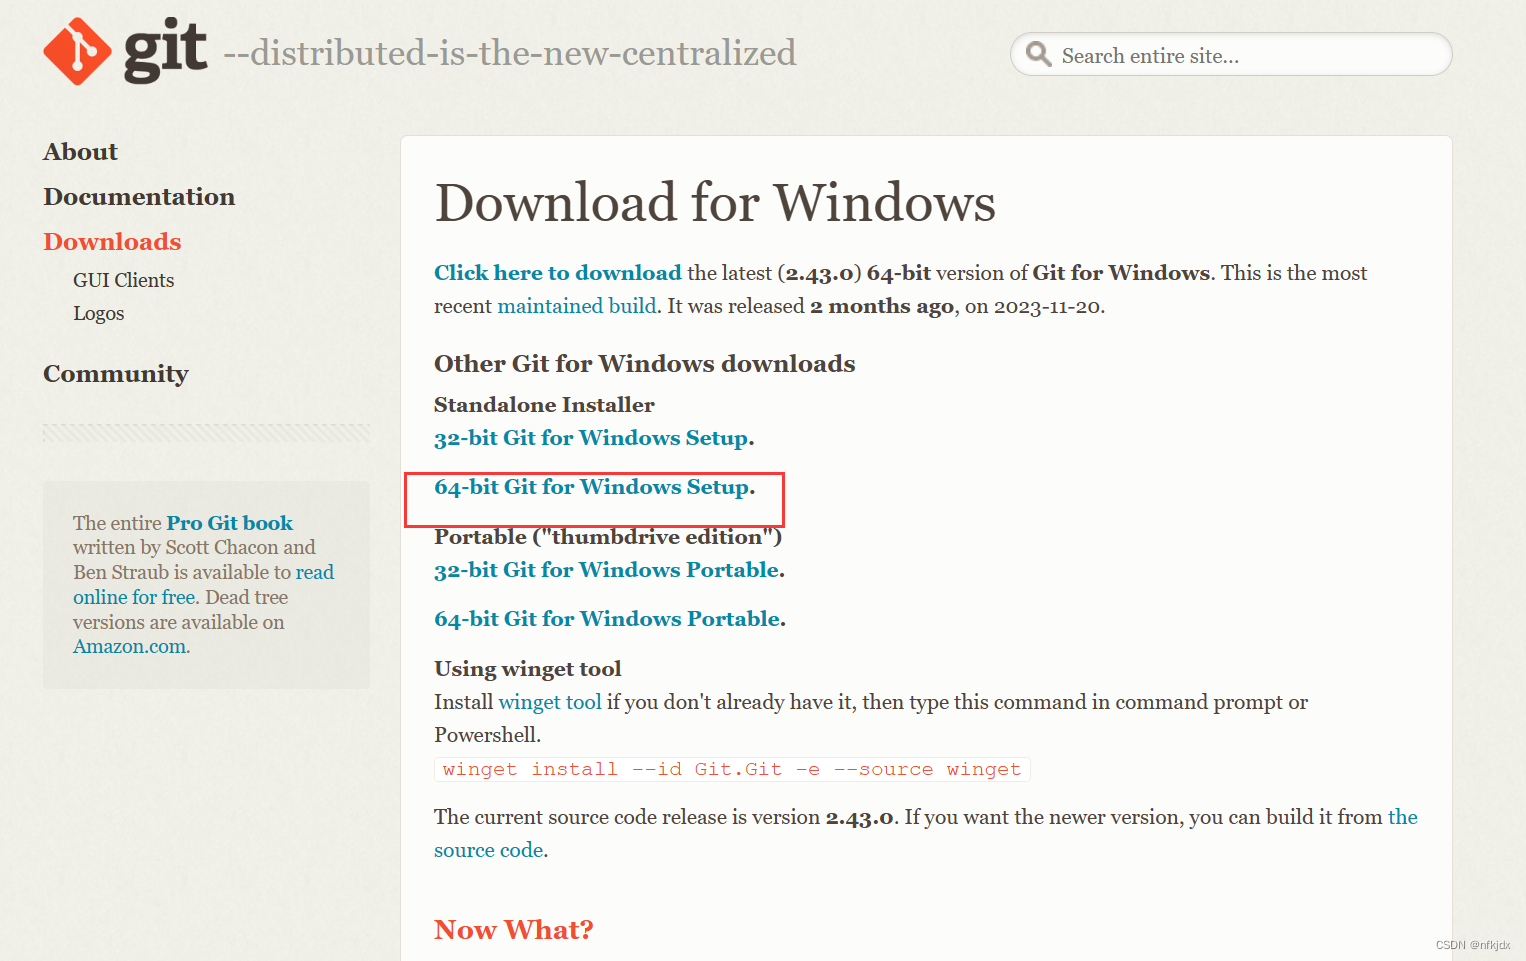
1、下载地址
https://www.git-scm.com/download/

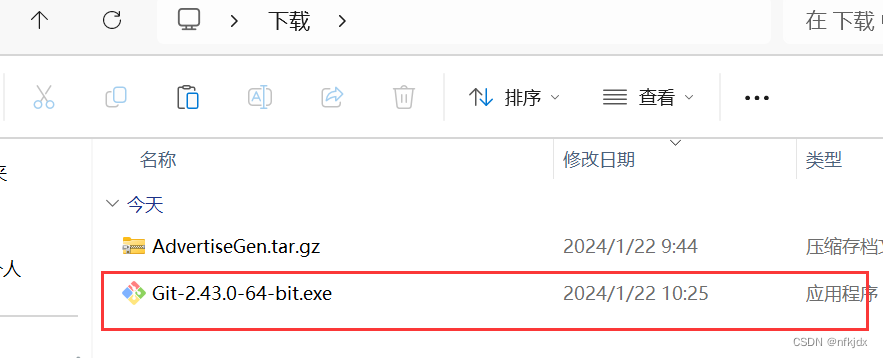
2、直接安装:点击exe应用程序进行安装即可
方法二:将sh文件转化为bat文件格式,再运行训练。
1、原train.sh中的内容
2、复制一个train.sh,并将后缀名.sh改为.bat
六、对train.sh和train.bat文件内的配置进行调整修改
1、首先了解train.sh里面的内容有哪些,表示哪些意义
PRE_SEQ_LEN=128 #  soft prompt 长度
LR=2e-2     # 训练学习率
NUM_GPUS=2  # GPU卡的数量

torchrun --standalone --nnodes=1 --nproc-per-node=$NUM_GPUS main.py \
    --do_train \   # 执行训练功能,还可以执行评估功能
    --train_file AdvertiseGen/train.json \   # 训练文件目录
    --validation_file AdvertiseGen/fval.json \   # 验证文件目录
    --prompt_column content \       # 训练集中prompt提示名称,对应训练文件,测试文件的"content"
    --response_column summary \      # 训练集中答案名称,对应训练文件,测试文件的"summary"
    --overwrite_cache \              # 缓存,重复训练一次的时候可删除
    --model_name_or_path THUDM/chatglm-6b \  # 加载模型文件目录,也可修改为本地模型的路径
    --output_dir output/adgen-chatglm-6b-pt-$PRE_SEQ_LEN-$LR \    # 保存训练模型文件目录
    --overwrite_output_dir \     # 覆盖训练文件目录
    --max_source_length 64 \     # 最大输入文本的长度
    --max_target_length 128 \
    --per_device_train_batch_size 1 \    # batch_size 训练批次根据显存调节
    --per_device_eval_batch_size 1 \     # 验证批次
    --gradient_accumulation_steps 16 \   # 梯度累加的步数
    --predict_with_generate \
    --max_steps 3000 \    # 最大训练模型的步数
    --logging_steps 10 \  # 多少步打印日志一次
    --save_steps 1000 \    # 多少步保存模型一次
    --learning_rate $LR \  # 学习率
    --pre_seq_len $PRE_SEQ_LEN \
    --quantization_bit 4   # 量化,也可修改为int8
训练配置参数具体解释
(1)长度和 学习率
–PRE_SEQ_LEN 是 soft prompt 长度,可以进行调节以取得最佳的效果。
–LR 是训练的学习率
(2)本地数据,训练集和测试集的路径
–train_file AdvertiseGen/train.json
–validation_file AdvertiseGen/dev.json
(3)模型目录。
如果你想要从本地加载模型,可以将THUDM/chatglm2-6b 改为你本地的模型路径。
–model_name_or_path THUDM/chatglm-6b
(4) 最大训练步数
–max_steps 3000
(5)模型量化
可通过调整 quantization_bit 来被原始模型的量化等级,不加此选项则为 FP16 精度加载。在默认配置 quantization_bit=4
–quantization_bit 4 # 量化,也可修改为int8
(6)批次,迭代参数
在默认配置 per_device_train_batch_size=1、gradient_accumulation_steps=16 下,一次训练迭代会以 1 的批处理大小进行 16 次累加的前后向传播,等效为 16 的总批处理大小,此时最低只需 6.7G 显存。若想在同等批处理大小下提升训练效率,可在二者乘积不变的情况下,加大 per_device_train_batch_size 的值,但也会带来更多的显存消耗,请根据实际情况酌情调整。
–per_device_train_batch_size 1 \ # batch_size 训练批次根据显存调节
–per_device_eval_batch_size 1 \ # 验证批次
–gradient_accumulation_steps 16 \ # 梯度累加的步数
2、对train.sh里面的内容根据自己实际情况进行修改,结果如下:
其中set LR学习率要进行修改,因为使用官方的学习率(2e-2 )可能会使得训练之后的模型回答的问题会发生严重的错误回答,称为灾难性遗忘!因此需要进行一个调整。其它的模型路径、数据路径也需要进行修改!
set PRE_SEQ_LEN=128
set LR=1e-4

CUDA_VISIBLE_DEVICES=0 python E:/TrainChatglm/ChatGLM2-6B-main/ptuning/main.py \
    --do_train \
    --train_file E:/TrainChatglm/ChatGLM2-6B-main/ptuning/AdvertiseGen/trainss.json \
    --validation_file E:/TrainChatglm/ChatGLM2-6B-main/ptuning/AdvertiseGen/devss.json \
    --preprocessing_num_workers 10 \
    --prompt_column content \
    --response_column summary \
    --overwrite_cache \
    --model_name_or_path E:/TrainChatglm/ChatGLM2-6B-main/ptuning/model/chatglm2-6B \
    --output_dir C:/Users/Administrator/Desktop/saves/adgen-chatglm-6b-pt \
    --overwrite_output_dir \
    --max_source_length 64 \
    --max_target_length 128 \
    --per_device_train_batch_size 1 \
    --per_device_eval_batch_size 1 \
    --gradient_accumulation_steps 16 \
    --predict_with_generate \
    --max_steps 3000 \
    --logging_steps 10 \
    --save_steps 1000 \
    --learning_rate 1e-4 \
    --pre_seq_len 128 \
    --quantization_bit 4
3、对train.bat里面的内容根据自己实际情况进行修改,结果如下:
其中把每行后面的" \ " 改为 " ^ ",其它的根据自己实际情况进行调整
set PRE_SEQ_LEN=128
set LR=1e-4

python main.py ^
    --do_train ^
    --train_file AdvertiseGen/trains.json ^
    --validation_file AdvertiseGen/devs.json ^
    --preprocessing_num_workers 10 ^
    --prompt_column content ^
    --response_column summary ^
    --overwrite_cache ^
    --model_name_or_path model/chatglm2-6B ^
    --output_dir C:/Users/Administrator/Desktop/save/adgen-chatglm-6b-pt ^
    --overwrite_output_dir ^
    --max_source_length 64 ^
    --max_target_length 128 ^
    --per_device_train_batch_size 24 ^
    --per_device_eval_batch_size 1 ^
    --gradient_accumulation_steps 16 ^
    --predict_with_generate ^
    --max_steps 3000 ^
    --logging_steps 10 ^
    --save_steps 1000 ^
    --learning_rate %LR% ^
    --pre_seq_len %PRE_SEQ_LEN% ^
    --quantization_bit 4
七、对train.sh和train.bat进行训练
1、训练train.sh
(1)首先打开git bash:进入项目目录下:

(2)激活虚拟环境
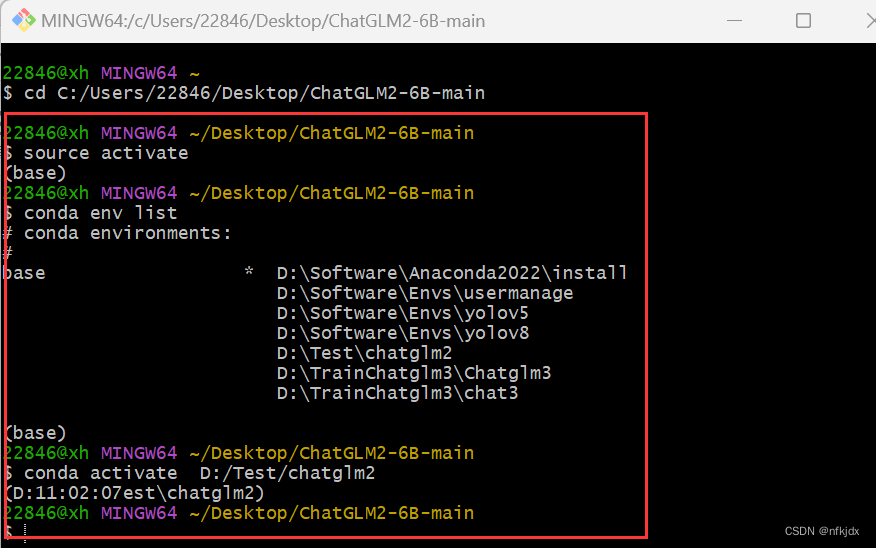
(3)输入命令,开始训练

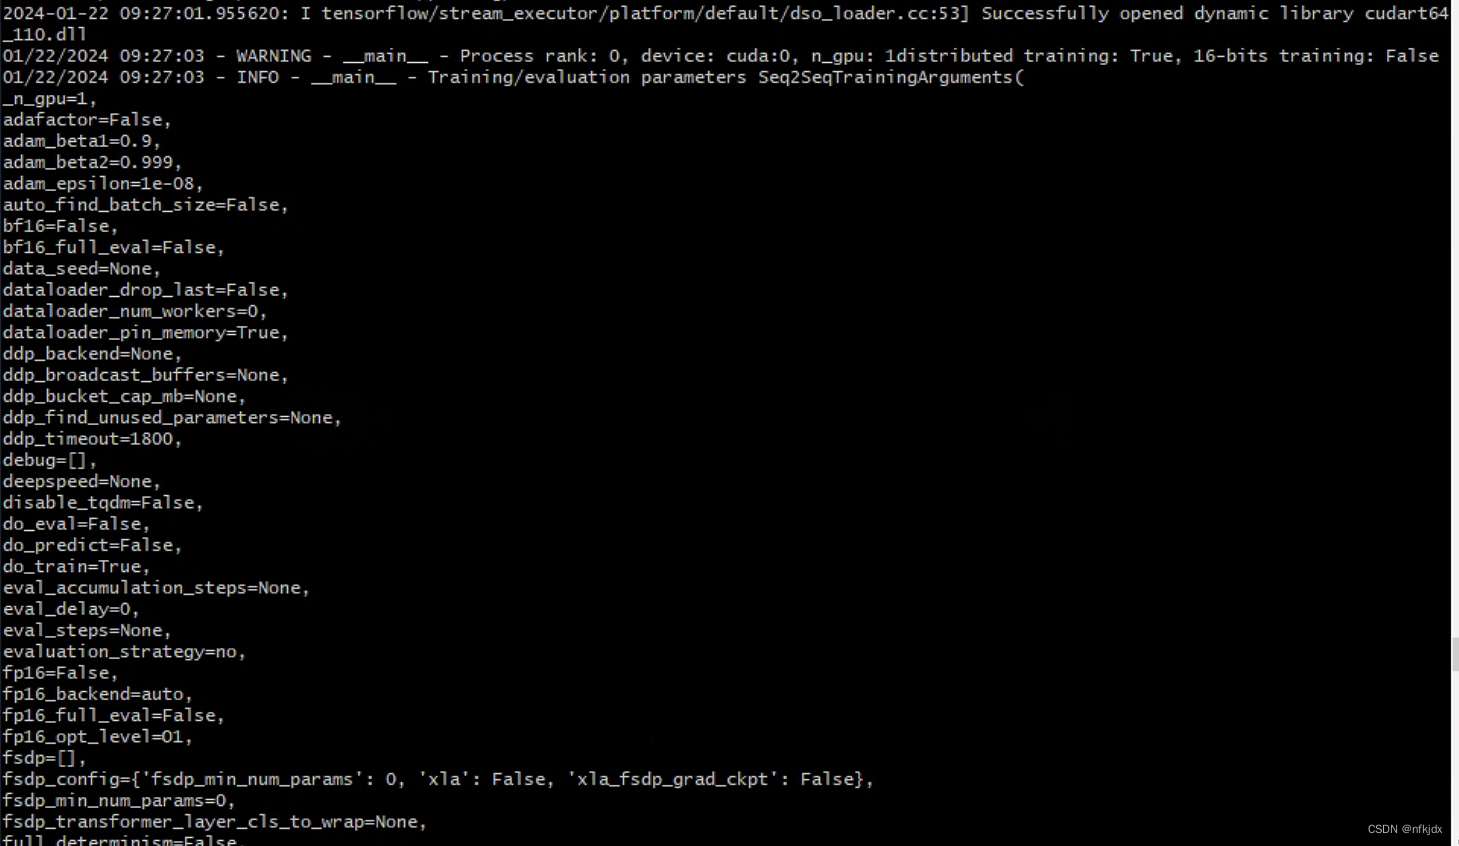
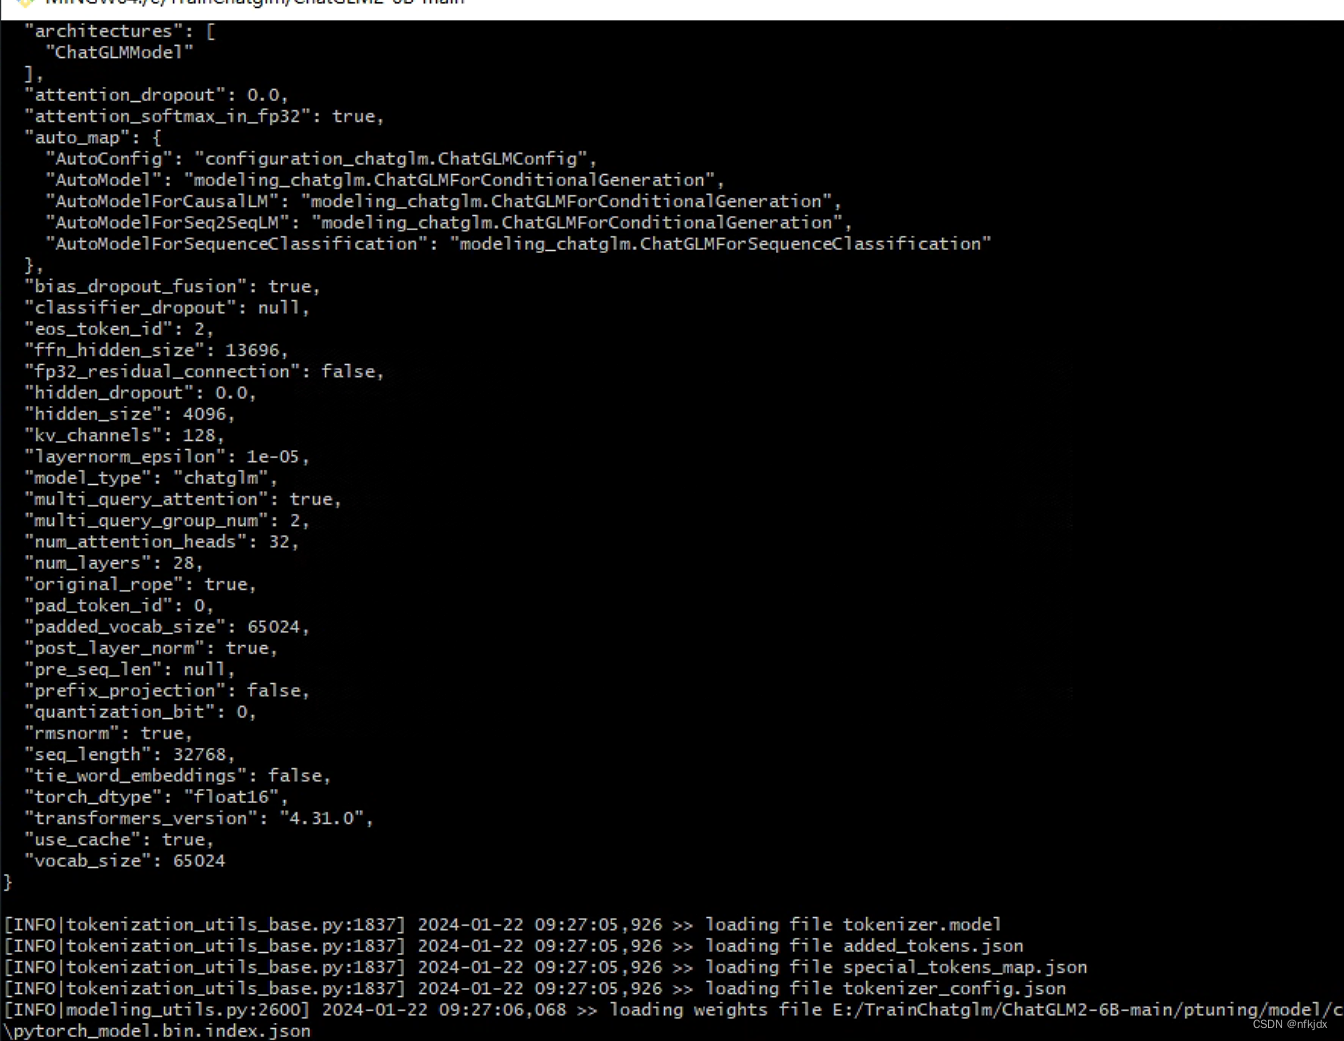
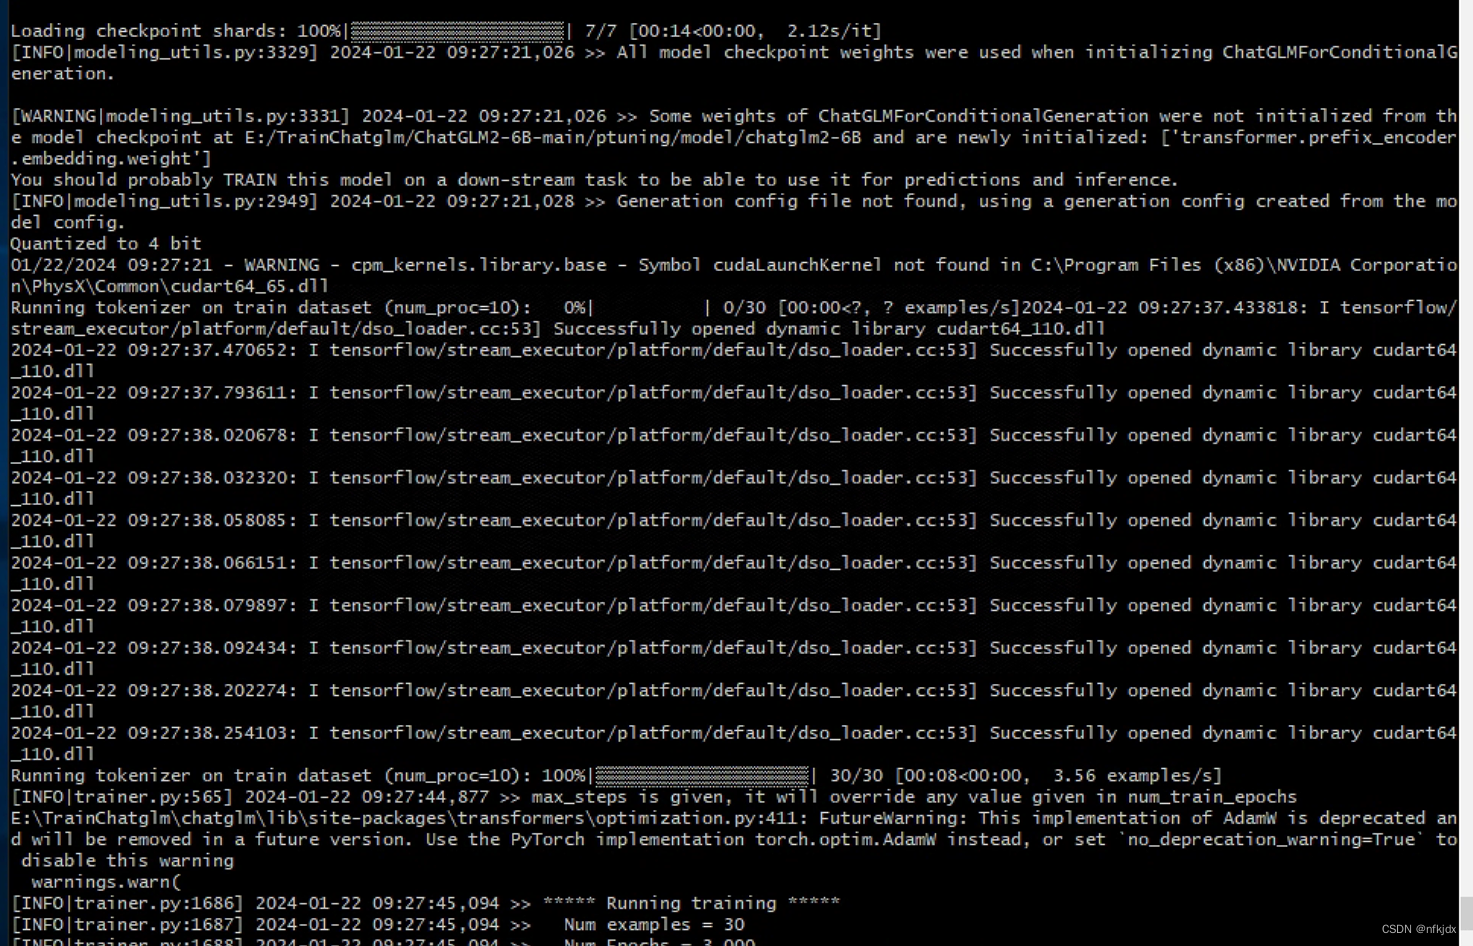
(4)训练完成后保存的结果如下:

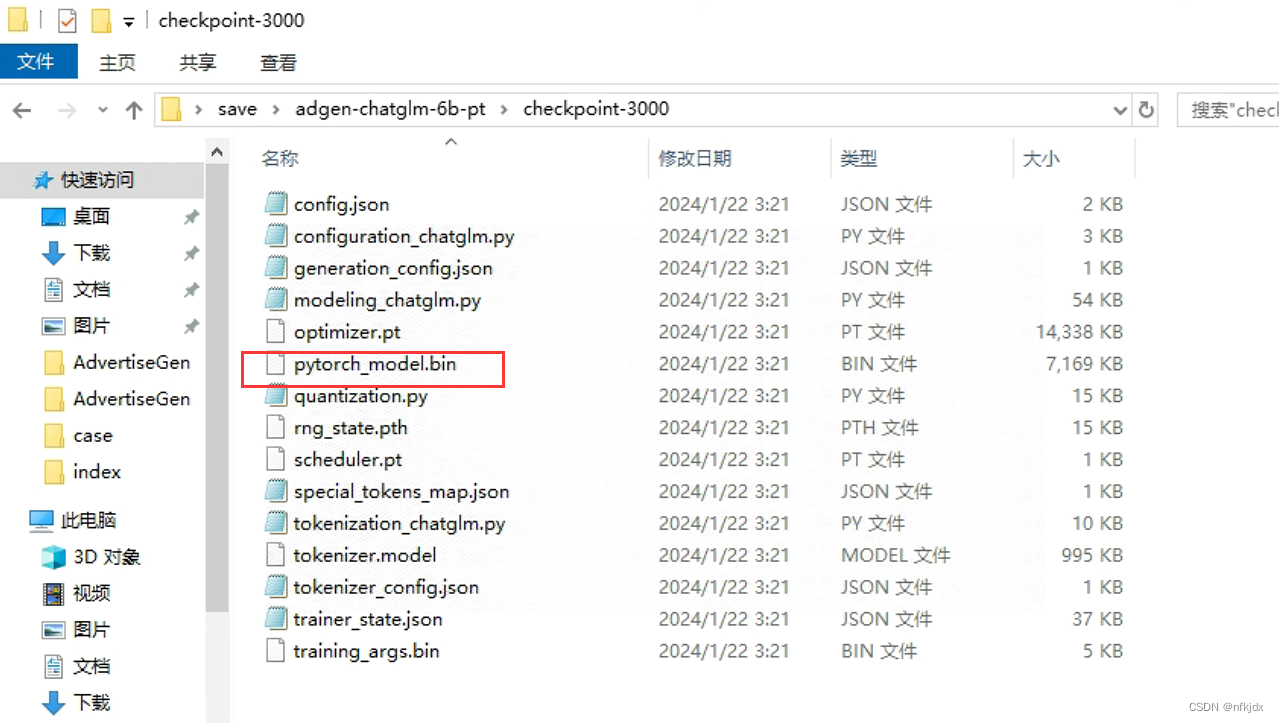
2、训练train.bat
(1)打开cmd,激活虚拟环境
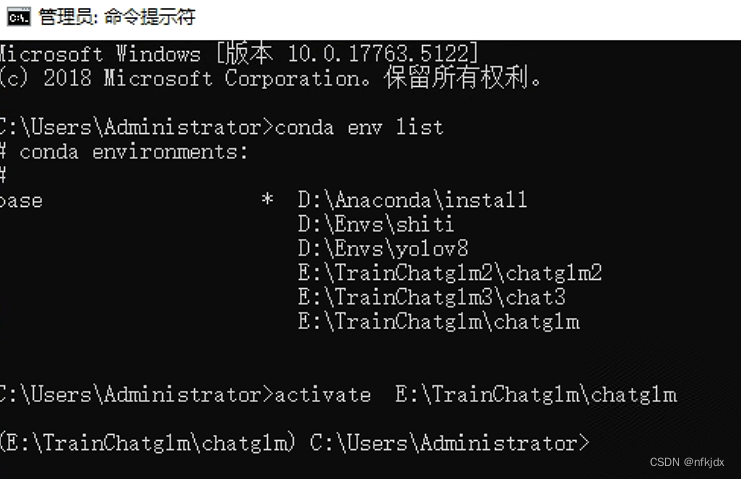
(2)进入项目路径,运行train.bat文件

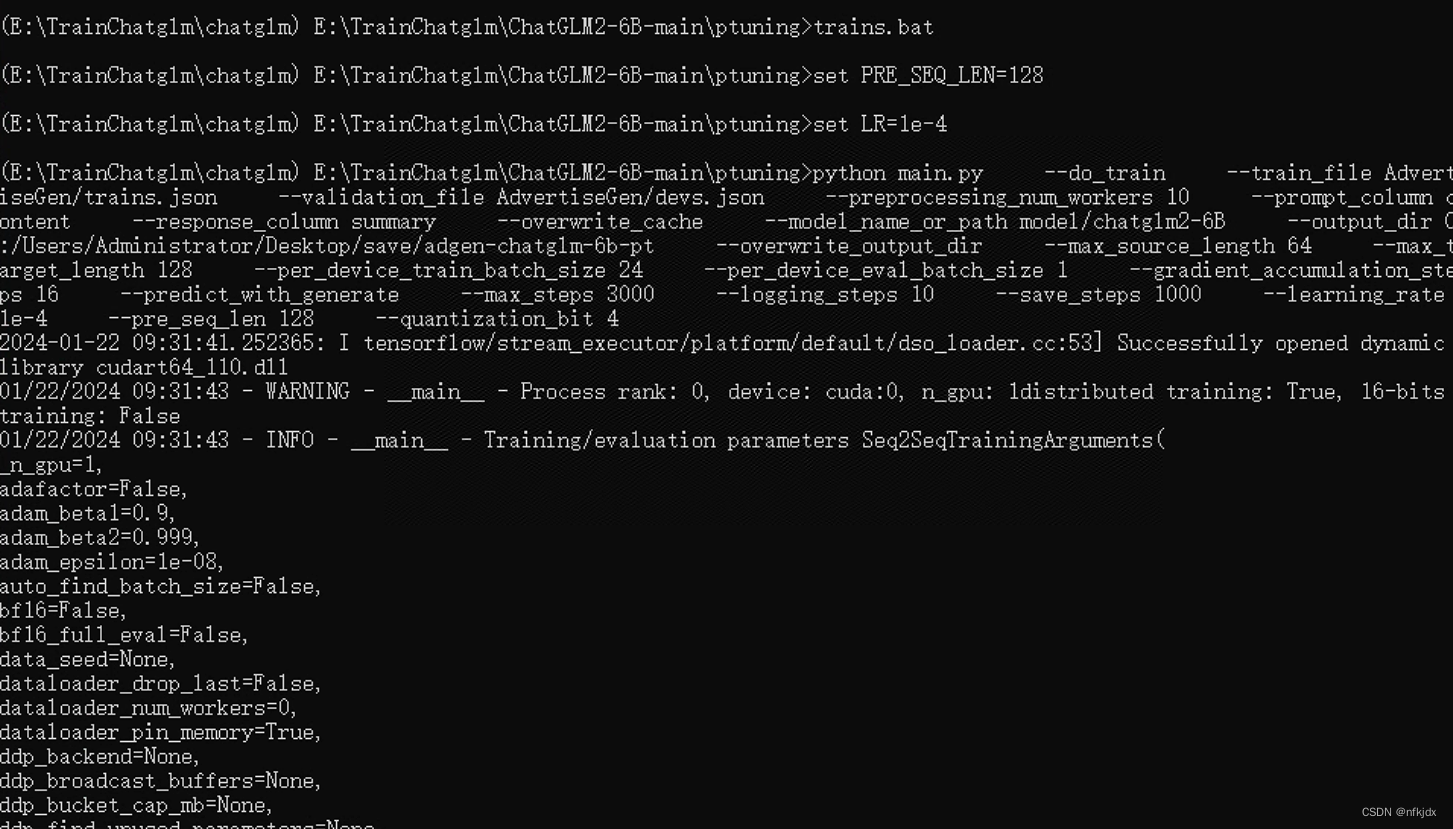
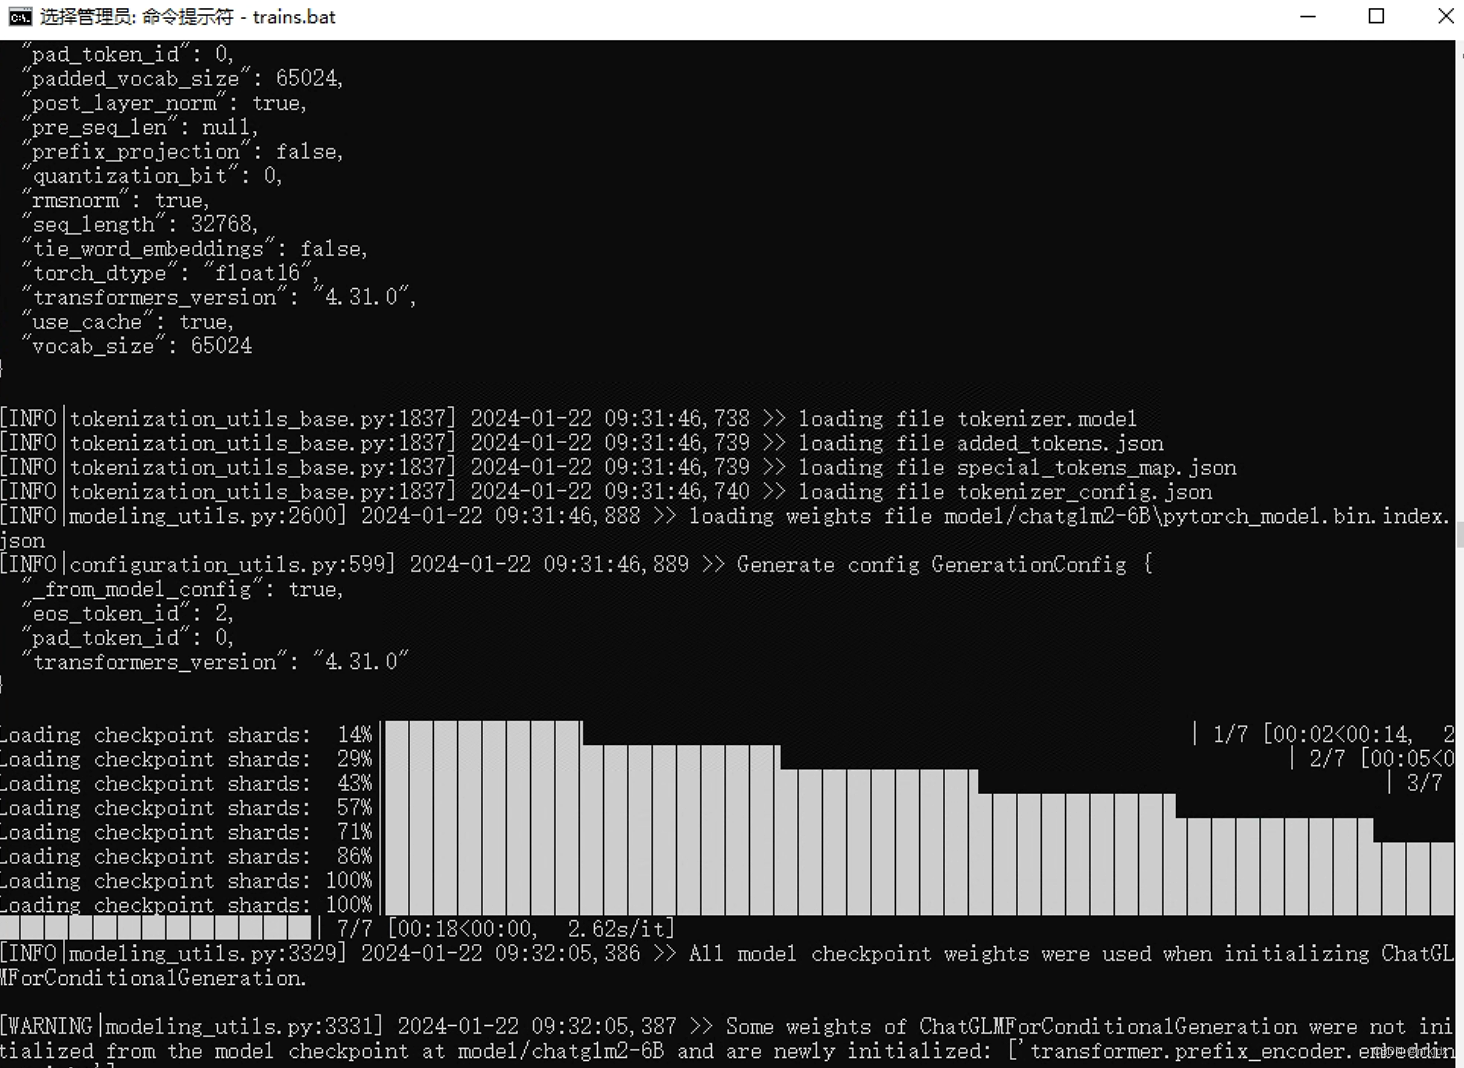
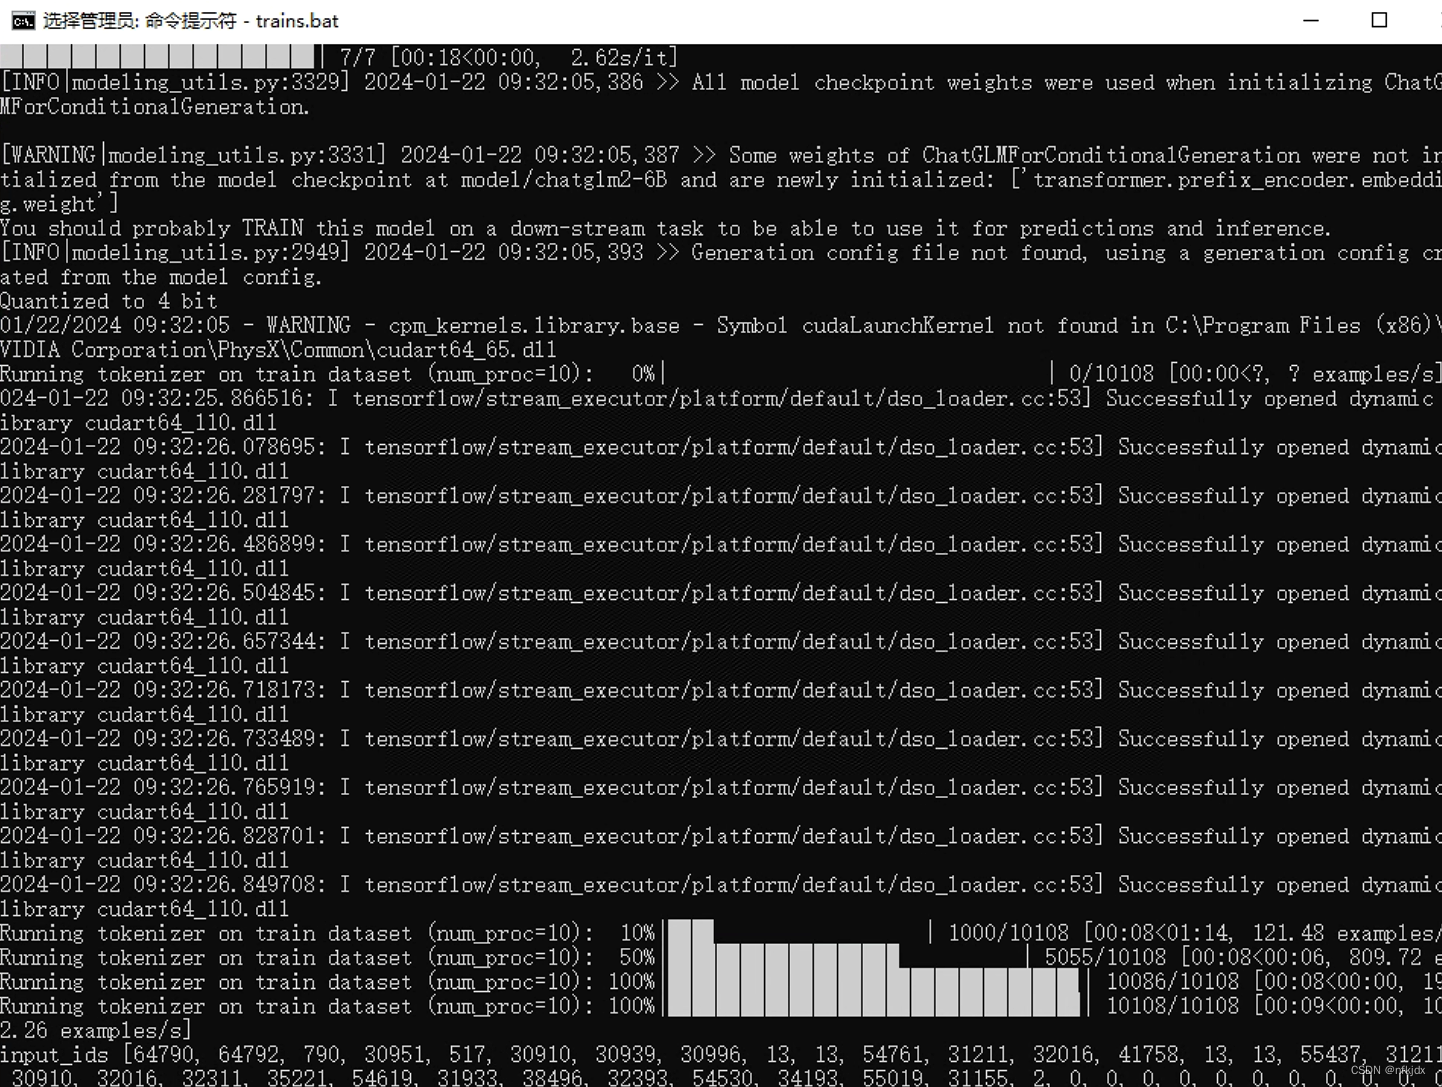
(3)结果如下:

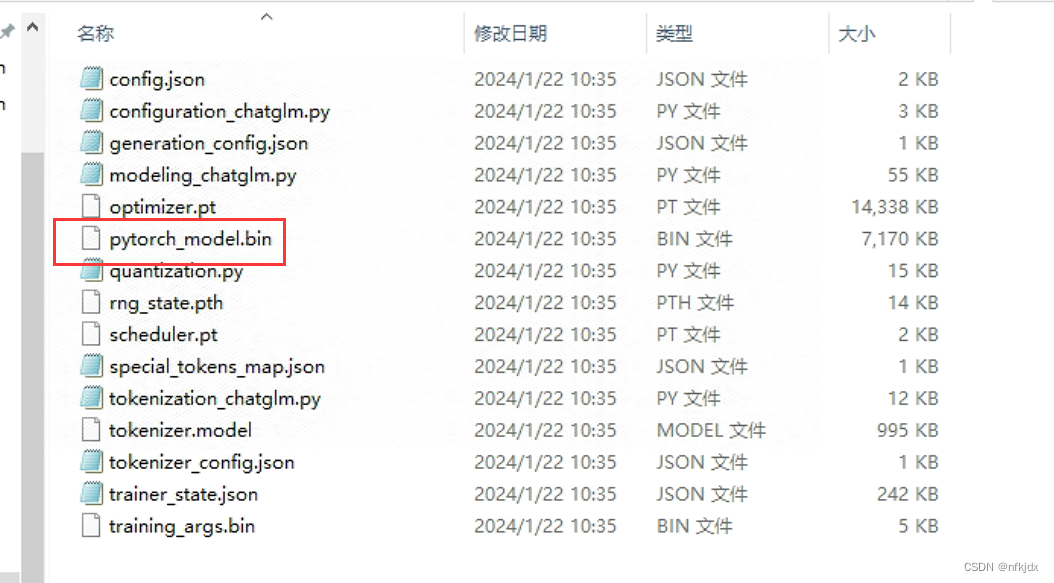
八、对微调训练生成的模型进行验证
1、验证方法多种多样,这里采用之前部署的chatglm2-6(在我的csdn里面有详细过程)的流式和非流式接口进验证:
(1)这是之前的流式与非流式接口代码:
#encoding:utf-8
import platform
from fastapi import FastAPI, Request
from transformers import AutoTokenizer, AutoModel,AutoConfig
import uvicorn, json, datetime
import torch,os
from sse_starlette.sse import EventSourceResponse
from pydantic import BaseModel
from utils import load_model_on_gpus
from fastapi.middleware.cors import CORSMiddleware

class Item(BaseModel):
    prompt: str = None
    history: list = None
    max_length: int = None
    top_p: float = None
    temperature: float = None

app = FastAPI()
os_name = platform.system()
clear_command = 'cls' if os_name == 'Windows' else 'clear'
stop_stream = False

# 这里配置支持跨域访问的前端地址
# origins = [
#     "http://192.168.1.122:9001",
#     "http://192.168.1.122",
#     "http://192.168.1.122/cb/index.html",
#     "http://localhost/cb/index.html",
#     "http://localhost:80",     # 带端口的
#     "http://localhost:9001",    # 不带端口的
# ]

# 将配置挂在到app上
# 添加CORS中间件
app.add_middleware(
    CORSMiddleware,
    allow_origins=["http://localhost"],
    allow_credentials=True,
    allow_methods=["*"],
    allow_headers=["*"],
)
# app.add_middleware(
#     CORSMiddleware,
#     # 这里配置允许跨域访问的前端地址
#     allow_origins=origins,
#     # 跨域请求是否支持 cookie, 如果这里配置true,则allow_origins不能配置*
#     allow_credentials=True,
#     # 支持跨域的请求类型,可以单独配置get、post等,也可以直接使用通配符*表示支持所有
#     allow_methods=["*"],
#     allow_headers=["*"],
# )

# 流式推理
def predict_stream(tokenizer, prompt, history, max_length, top_p, temperature):
    global stop_stream
    print("欢迎使用 ChatGLM3-6B 模型,输入内容即可进行对话,clear 清空对话历史,stop 终止程序")
    while True:
        current_length = 0
        for response, history in model.stream_chat(tokenizer, prompt, history=history,):

            if stop_stream:
                stop_stream = False
                break
            else:

                yield json.dumps({
                    'response': response[current_length:],
                    'history': history,
                    'status': 200,
                    'sse_status': 1,
                }, ensure_ascii=False)

        return torch_gc()

# GC回收显存
def torch_gc():
    if torch.cuda.is_available():
        with torch.cuda.device(CUDA_DEVICE):
            torch.cuda.empty_cache()
            torch.cuda.ipc_collect()

# sse流式方式
@app.post("/chatglm3-6-32k/server/sse")
async def create_item_sse(request_data: Item):
    res = predict_stream(tokenizer, request_data.prompt, request_data.history, request_data.max_length, request_data.top_p, request_data.temperature)
    return EventSourceResponse(res)

# nsse非流式方式
@app.post("/chatglm3-6-32k/server/nsse")
async def create_item_nsse(request_data: Item):
    response, history = model.chat(tokenizer,
                                   request_data.prompt,
                                   history= request_data.history,
                                   max_length=request_data.max_length ,
                                   top_p=request_data.top_p ,
                                   temperature=request_data.temperature)
    now = datetime.datetime.now()
    time = now.strftime("%Y-%m-%d %H:%M:%S")
    answer = {
        "response": response,
        "history": history,
        "status": 200,
        "time": time
    }
    log = "[" + time + "] " + '", prompt:"' + request_data.prompt + '", response:"' + repr(response) + '"'
    print(log)
    torch_gc()
    return answer

if __name__ == '__main__':
    # cpu/gpu推理,建议GPU,CPU实在是忒慢了
    DEVICE = "cuda"
    DEVICE_ID = "0"
    CUDA_DEVICE = f"{DEVICE}:{DEVICE_ID}" if DEVICE_ID else DEVICE

    # 多显卡支持,使用下面三行代替上面两行,将num_gpus改为你实际的显卡数量
    # model_path = "./THUDM/chatglm3-6B-32k"
    # tokenizer = AutoTokenizer.from_pretrained(model_path, trust_remote_code=True)
    # model = load_model_on_gpus(model_path, num_gpus=2)
    tokenizer = AutoTokenizer.from_pretrained(r"E:\TrainChatglm\ChatGLM2-6B-main\ptuning\model\chatglm2-6b",
                                              trust_remote_code=True)
    model = AutoModel.from_pretrained(r"E:\TrainChatglm\ChatGLM2-6B-main\ptuning\model\chatglm2-6b",
                                      trust_remote_code=True).cuda()
    model.eval()
    uvicorn.run(app, host='192.168.1.122', port=9001, workers=1)
(2)对改代码进行一个改写
这是改写的内容:主要是引入生成的模型权重
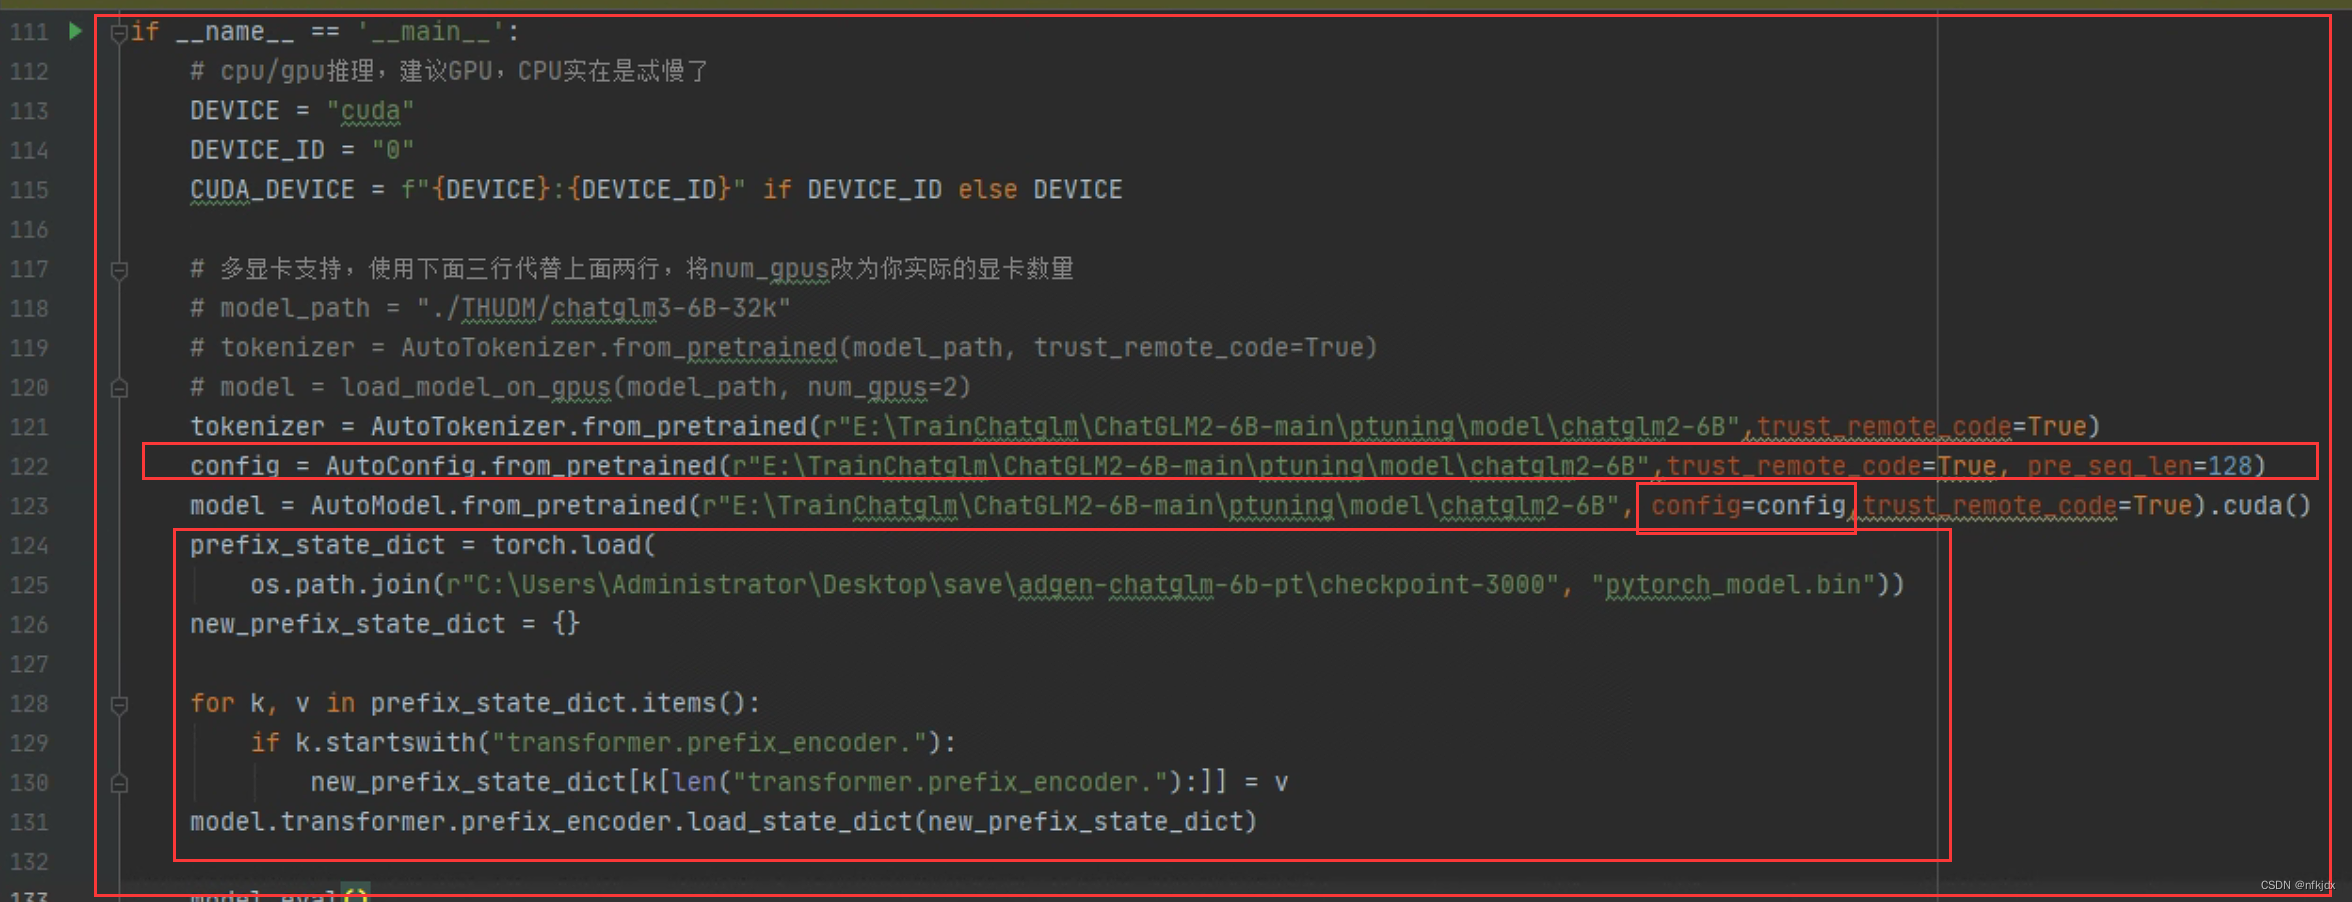
代码如下:
#encoding:utf-8
import platform
from fastapi import FastAPI, Request
from transformers import AutoTokenizer, AutoModel,AutoConfig
import uvicorn, json, datetime
import torch,os
from sse_starlette.sse import EventSourceResponse
from pydantic import BaseModel
from utils import load_model_on_gpus
from fastapi.middleware.cors import CORSMiddleware

class Item(BaseModel):
    prompt: str = None
    history: list = None
    max_length: int = None
    top_p: float = None
    temperature: float = None

app = FastAPI()
os_name = platform.system()
clear_command = 'cls' if os_name == 'Windows' else 'clear'
stop_stream = False

# 这里配置支持跨域访问的前端地址
# origins = [
#     "http://192.168.1.122:9001",
#     "http://192.168.1.122",
#     "http://192.168.1.122/cb/index.html",
#     "http://localhost/cb/index.html",
#     "http://localhost:80",     # 带端口的
#     "http://localhost:9001",    # 不带端口的
# ]

# 将配置挂在到app上
# 添加CORS中间件
app.add_middleware(
    CORSMiddleware,
    allow_origins=["http://localhost"],
    allow_credentials=True,
    allow_methods=["*"],
    allow_headers=["*"],
)
# app.add_middleware(
#     CORSMiddleware,
#     # 这里配置允许跨域访问的前端地址
#     allow_origins=origins,
#     # 跨域请求是否支持 cookie, 如果这里配置true,则allow_origins不能配置*
#     allow_credentials=True,
#     # 支持跨域的请求类型,可以单独配置get、post等,也可以直接使用通配符*表示支持所有
#     allow_methods=["*"],
#     allow_headers=["*"],
# )

# 流式推理
def predict_stream(tokenizer, prompt, history, max_length, top_p, temperature):
    global stop_stream
    print("欢迎使用 ChatGLM3-6B 模型,输入内容即可进行对话,clear 清空对话历史,stop 终止程序")
    while True:
        current_length = 0
        for response, history in model.stream_chat(tokenizer, prompt, history=history,):

            if stop_stream:
                stop_stream = False
                break
            else:

                yield json.dumps({
                    'response': response[current_length:],
                    'history': history,
                    'status': 200,
                    'sse_status': 1,
                }, ensure_ascii=False)

        return torch_gc()

# GC回收显存
def torch_gc():
    if torch.cuda.is_available():
        with torch.cuda.device(CUDA_DEVICE):
            torch.cuda.empty_cache()
            torch.cuda.ipc_collect()

# sse流式方式
@app.post("/chatglm3-6-32k/server/sse")
async def create_item_sse(request_data: Item):
    res = predict_stream(tokenizer, request_data.prompt, request_data.history, request_data.max_length, request_data.top_p, request_data.temperature)
    return EventSourceResponse(res)

# nsse非流式方式
@app.post("/chatglm3-6-32k/server/nsse")
async def create_item_nsse(request_data: Item):
    response, history = model.chat(tokenizer,
                                   request_data.prompt,
                                   history= request_data.history,
                                   max_length=request_data.max_length ,
                                   top_p=request_data.top_p ,
                                   temperature=request_data.temperature)
    now = datetime.datetime.now()
    time = now.strftime("%Y-%m-%d %H:%M:%S")
    answer = {
        "response": response,
        "history": history,
        "status": 200,
        "time": time
    }
    log = "[" + time + "] " + '", prompt:"' + request_data.prompt + '", response:"' + repr(response) + '"'
    print(log)
    torch_gc()
    return answer

if __name__ == '__main__':
    # cpu/gpu推理,建议GPU,CPU实在是忒慢了
    DEVICE = "cuda"
    DEVICE_ID = "0"
    CUDA_DEVICE = f"{DEVICE}:{DEVICE_ID}" if DEVICE_ID else DEVICE

    # 多显卡支持,使用下面三行代替上面两行,将num_gpus改为你实际的显卡数量
    # model_path = "./THUDM/chatglm3-6B-32k"
    # tokenizer = AutoTokenizer.from_pretrained(model_path, trust_remote_code=True)
    # model = load_model_on_gpus(model_path, num_gpus=2)
    tokenizer = AutoTokenizer.from_pretrained(r"E:\TrainChatglm\ChatGLM2-6B-main\ptuning\model\chatglm2-6B",trust_remote_code=True)
    config = AutoConfig.from_pretrained(r"E:\TrainChatglm\ChatGLM2-6B-main\ptuning\model\chatglm2-6B",trust_remote_code=True, pre_seq_len=128)
    model = AutoModel.from_pretrained(r"E:\TrainChatglm\ChatGLM2-6B-main\ptuning\model\chatglm2-6B", config=config,trust_remote_code=True).cuda()
    prefix_state_dict = torch.load(
        os.path.join(r"C:\Users\Administrator\Desktop\save\adgen-chatglm-6b-pt\checkpoint-3000", "pytorch_model.bin"))
    new_prefix_state_dict = {}

    for k, v in prefix_state_dict.items():
        if k.startswith("transformer.prefix_encoder."):
            new_prefix_state_dict[k[len("transformer.prefix_encoder."):]] = v
    model.transformer.prefix_encoder.load_state_dict(new_prefix_state_dict)

    model.eval()
    uvicorn.run(app, host='192.168.1.122', port=9001, workers=1)
2、运行代码,进行测试
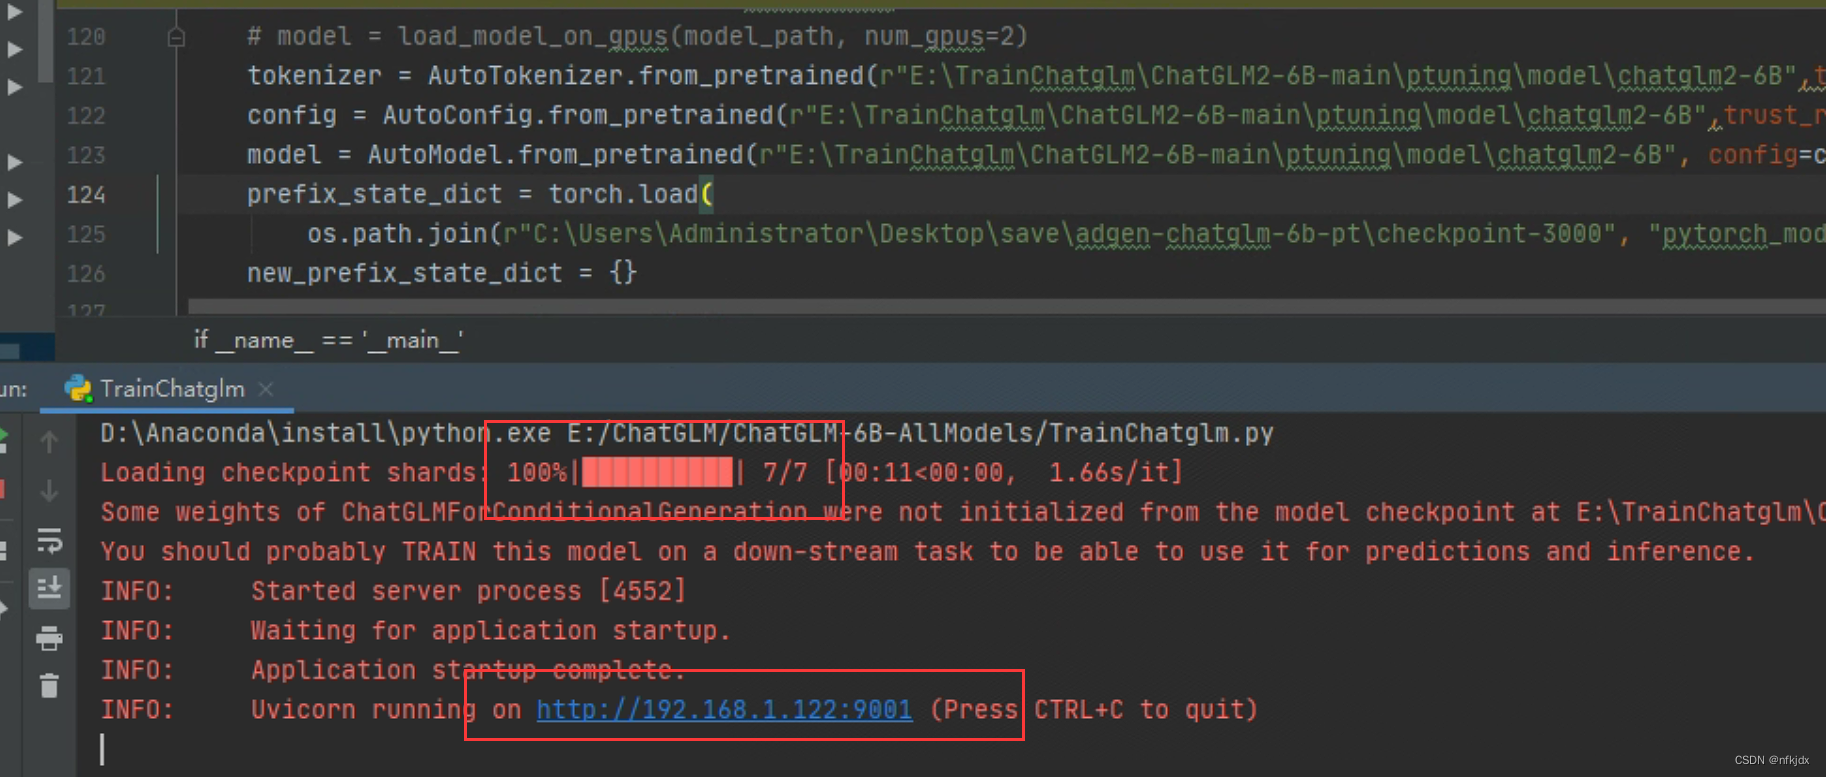
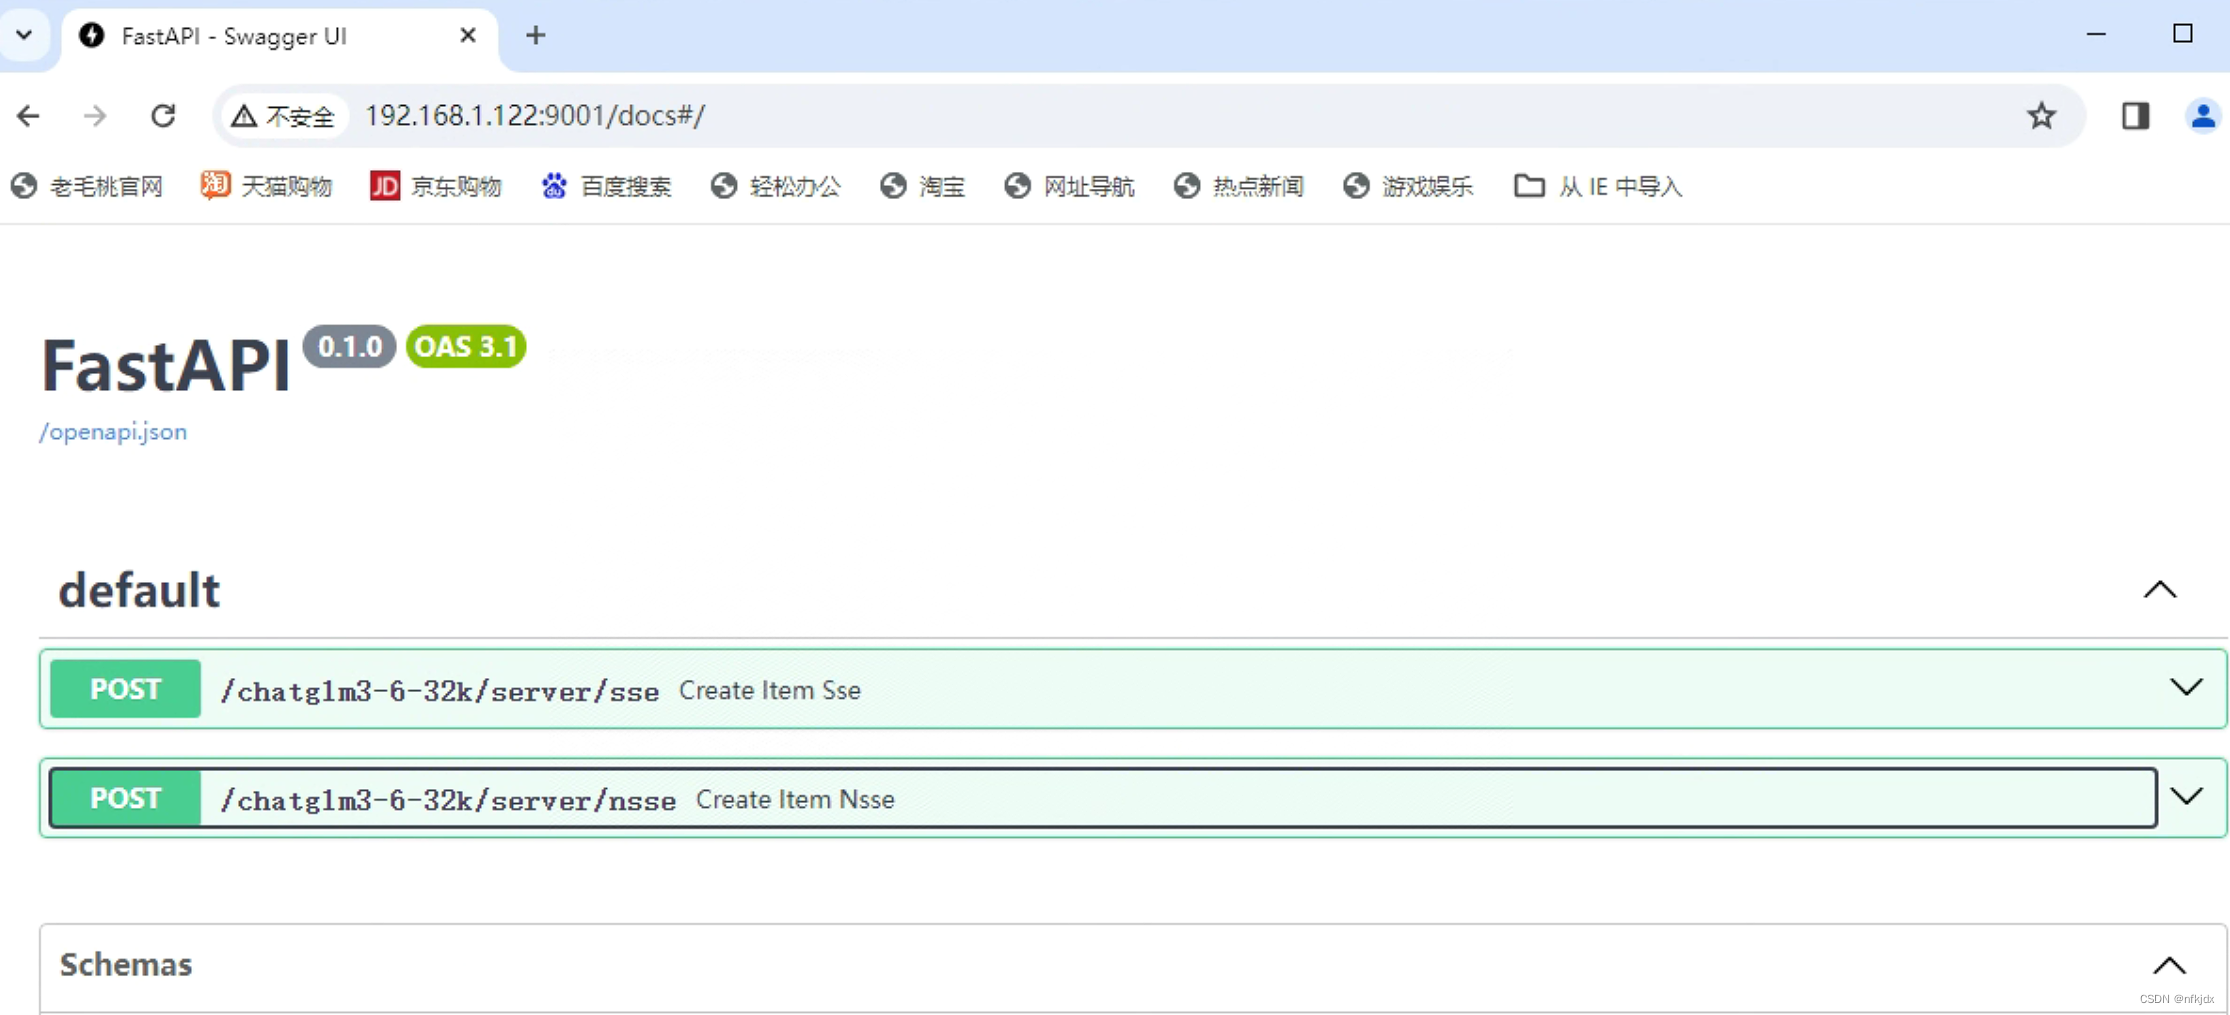
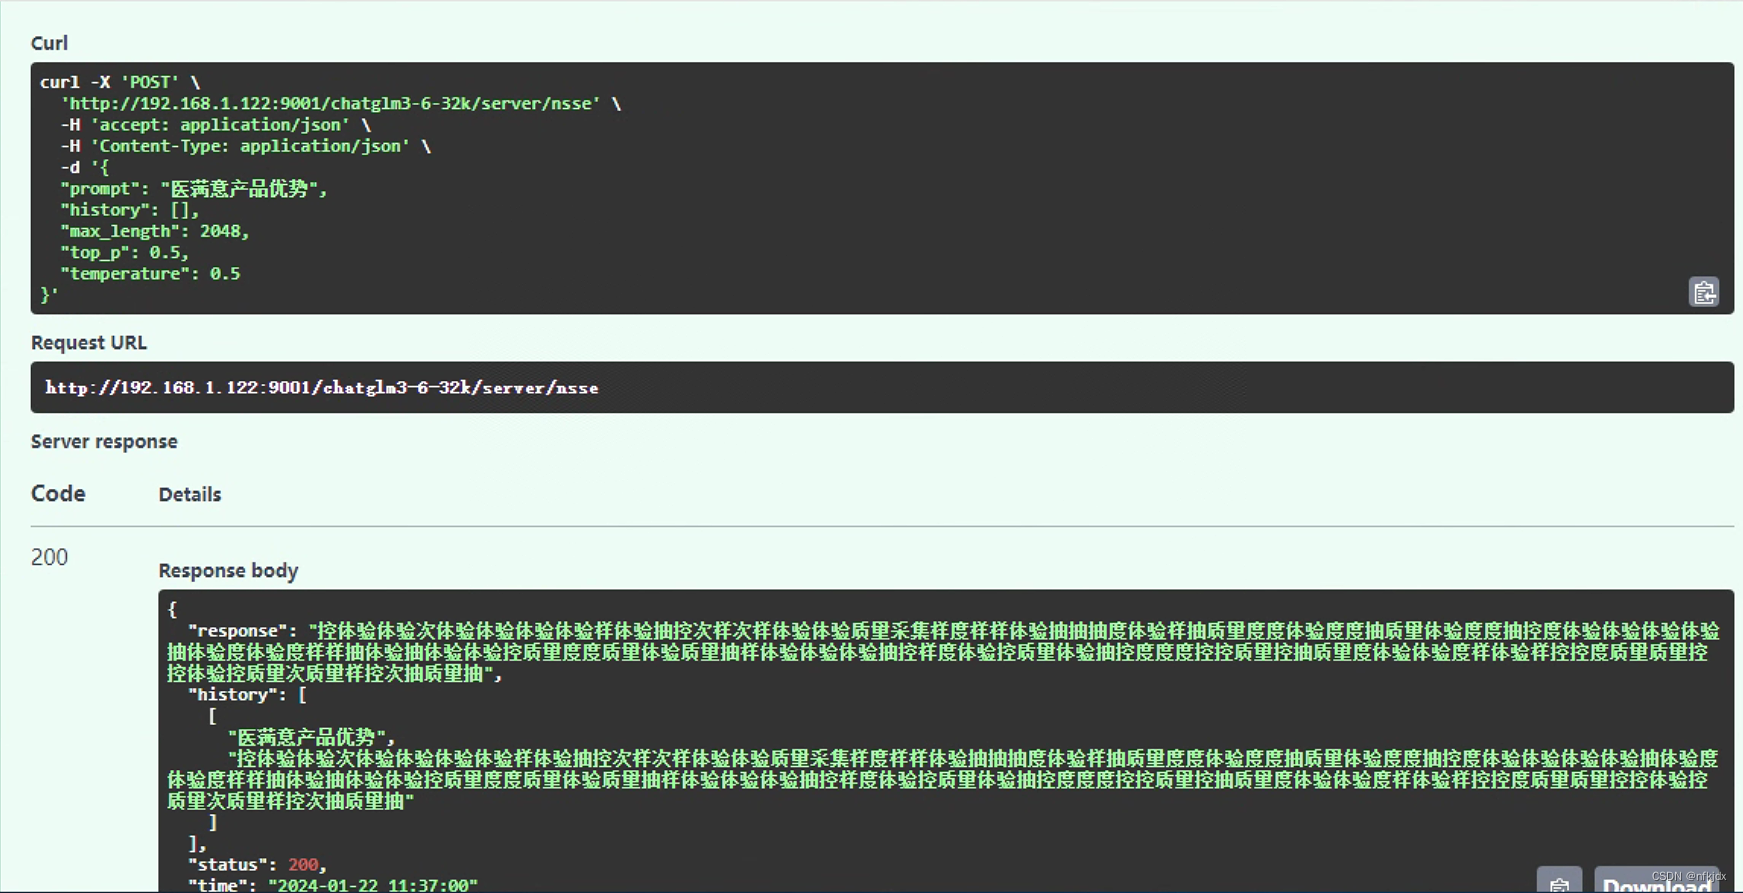
到这里微调基本结束!
九、总结
1、微调之后的模型可能存在灾难性遗忘,也就是对训练的数据回答效果还可以,但是对训练之前的模型询问的问题回答存在乱回答的情况,或者回答极不准确的情况,因此在训练微调之前需要对学习率等参数进行一个调整!
2、可能在训练过程中回报一些依赖(库)不兼容的问题,特别是transformers不兼容的问题,我这里就需要安装transformers==4.31.0版本才可以正常运行,因此要根据自己的实际情况进行调整!
3、我会将整个代码上传在资源里面,还上传了git bash安装程序,大家进行下载即可!
本文来自互联网用户投稿,该文观点仅代表作者本人,不代表本站立场。本站仅提供信息存储空间服务,不拥有所有权,不承担相关法律责任。 如若内容造成侵权/违法违规/事实不符,请联系我的编程经验分享网邮箱:chenni525@qq.com进行投诉反馈,一经查实,立即删除!