Spring成长之路—Spring Security
1、了解Spring Security
????????Spring 是非常流行和成功的 Java 应用开发框架,Spring Security 正是 Spring 家族中的成员。Spring Security 基于 Spring 框架,提供了一套 Web 应用安全性的完整解决方案。这套方案重点解决了关于安全方面的两个核心功能“认证”和“授权”
????????用户认证一般要求用户提供用户名和密码,系统通过校验用户名和密码来完成认证过程,简单理解就是我们日常中的登录过程;用户授权指的是验证某个用户是否有权限执行某个操作,不同的用户具有不同的角色,而不同的角色又对应这不同的权限(例如一个A用户他的角色是会员,另一个B用户他的角色是非会员,那这两个用户所对应的权限一定是不同的),
2、Spring Security框架的测试
测试1:
①在SpringBoot项目中添加Security依赖
        <dependency>
            <groupId>org.springframework.boot</groupId>
            <artifactId>spring-boot-starter-security</artifactId>
        </dependency>
②自定义控制层用于接收请求
package com.cola.sso.controller;

import org.springframework.web.bind.annotation.GetMapping;
import org.springframework.web.bind.annotation.RestController;

@RestController
public class SecurityController {
    @GetMapping("/hello")
    public String sayHi(){
        return "hello";
    }
}
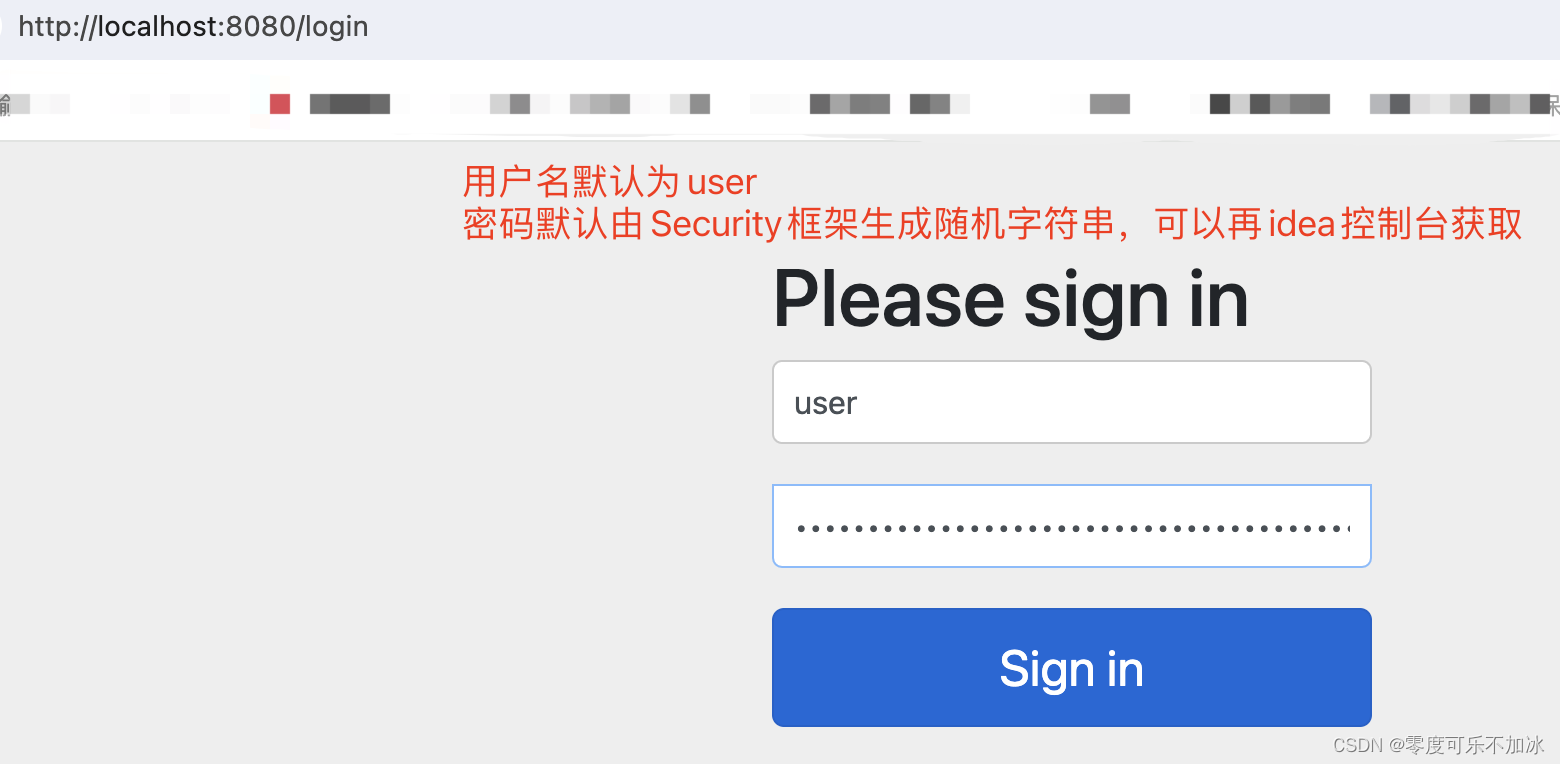
③此时当我们通过浏览器访问对应端口和路径时,会跳转到一个登录界面,我们只有通过登录才能看到前端返回的“hello”

?????????上述操作中我们使用了Security提供的默认用户名和临时密码进行登录,但是实际我们更多的是使用已经使用我们输入的用户名和密码与数据库中已经存在的用户名和密码进行比较,如果相同则登陆成功这样的方式进行认证操作,因此我们做接下来的测试:
测试2:
? ? ? ? 在这个测试中我们需要使用到一个UserDetailsService接口,当我们在输入框中输入对应的用户名和密码时,Security框架会从输入框中获取用户名和密码并且自动调用UserDetailsService接口里面的方法,而我们需要重写该方法,一旦编写了UserDetailsService接口的实现类,并将此类由Spring创建对象,则Spring Security会自动装配此类的对象,在后续启动项目时,将不再生成默认的随机密码,且默认的用户名user将不再可用。
import org.springframework.security.core.userdetails.User;
import org.springframework.security.core.userdetails.UserDetails;
import org.springframework.security.core.userdetails.UserDetailsService;
import org.springframework.security.core.userdetails.UsernameNotFoundException;
import org.springframework.stereotype.Service;

@Service
public class UserDetailsServiceImpl implements UserDetailsService {

    @Override
    public UserDetails loadUserByUsername(String s) throws
                                                  UsernameNotFoundException {

        // 模拟代码
        if ("cola".equals(s)) {
            UserDetails userDetails = User.builder()
                    //以下两行代码模拟从数据库中获取的用户名和密码
                    .username("cola") // 用户名
                    .password("123456") // 密码
                    .disabled(false) // 账号是否禁用
                    .accountLocked(false) // 账号是否锁定
                    .accountExpired(false) // 账号是否过期
                    .credentialsExpired(false) // 认证是否过期
                    .authorities("xxx") // 【必须】此账号的权限信息,临时给出随机字符串
                    .build();
            return userDetails;
        }
        return null;
    }
}
? ? ? ? 完成后启动项目再访问,会出现“用户名或密码错误”,这是为什么呢?
????????在上述代码的执行过程中,Spring Security获取在输入框中输入的用户名、密码,然后自动调loadUserByUsername(String s)方法,并获取返回的UserDetails对象, 而此对象中包含的是密码的密文值(也就是加密后的字符串),接下来,Spring Security会自动将登录界面中获取的密码原文(我们输入的密码)进行加密,并与UserDetails中的密文进行对比,以判断是否可以成功登录。
? ? ? ? 也就是说,我们原本在数据库中获取的密码应该是加密后的,这样返回的userDetails对象中才会密码的密文,才能够让Security框架进行比较。
3、Security加密测试
? ? ? ? Security本身就是一个安全验证框架,框架中包含了BCryptPasswordEncoder类,这个类可以使用BCrypt算法对密码进行处理
使用BCrypt算法进行加密的步骤:
- 生成salt:随机生成。BCrypt会自动生成一个随机的盐值
- 哈希密码:将密码和盐值作为输入,由BCrypt算法进行哈希计算,经过多轮计算生成一个长度为60的哈希值
- 返回哈希密码:BCrypt将生成的哈希密码返回
import org.junit.jupiter.api.Test;
import org.springframework.boot.test.context.SpringBootTest;
import org.springframework.security.crypto.bcrypt.BCryptPasswordEncoder;

@SpringBootTest
public class SsoMainTest {
    @Test
    //加密测试,每一次运行,加密后的结果是不一样的
    void testBCrypt(){
        //BCryptPasswordEncoder会自动生成随机盐值并包含到加密后密码中。不需要手动生成盐值
        BCryptPasswordEncoder bCryptPasswordEncoder = new BCryptPasswordEncoder();
        String rawPassword="123456";
        String encodePassword = bCryptPasswordEncoder.encode(rawPassword);
        System.out.println("rawPassword:"+rawPassword+",encodePassword:"+encodePassword);
        //第一次执行:rawPassword:123456,encodePassword:$2a$10$JifZHvYmMUHPKtGzYySRPeC/lpi9aMi1M6YU./.yZTXO3wQ6eIycm
        //第二次执行:rawPassword:123456,encodePassword:$2a$10$Bhwka8x6M6daXox/vxV/le44BKQmU6PBggJs0WUvHMRwPY94yB4QG
    }

    @Test
    //匹配测试
    void testMatch(){
        String rawPassword = "123456";
        String encodePassword = "$2a$10$JifZHvYmMUHPKtGzYySRPeC/lpi9aMi1M6YU./.yZTXO3wQ6eIycm";
        BCryptPasswordEncoder bCryptPasswordEncoder = new BCryptPasswordEncoder();
        boolean matches = bCryptPasswordEncoder.matches(rawPassword, encodePassword);
        System.out.println("匹配结果:"+matches); //true
    }
}通过使用加密后的密文对UserDetails中的password进行替换,再次启动项目访问指定端口和路径,输入自定义的用户名和密码原文,就能够跳转到我们需要访问的资源。
????????上述操作都是在Security提供的登录界面完成登录操作,但这很显然不是我们常用的,我们通常会有一个项目自己的登录流程,而基于SpringSecurity框架,我们也可以完成自定义登录流程的操作。
4、基于SpringSecurity框架实现自定义认证操作
Spring Security一般流程为:
①当用户登录时,前端将用户输入的用户名、密码信息传输到后台,后台用一个类对象将其封装起来,通常使用的是UsernamePasswordAuthenticationToken这个类。
②程序负责验证这个类对象。验证方法是调用Service根据username从数据库中取用户信息到实体类的实例中,比较两者的密码,如果密码正确就成功登陆,同时把包含着用户的用户名、密码、所具有的权限等信息的类对象放到SecurityContextHolder(安全上下文容器,类似Session)中去。
用户访问一个资源的时候,首先判断是否是受限资源。如果是的话还要判断当前是否未登录,没有的话就跳到登录页面。
③如果用户已经登录,访问一个受限资源的时候,程序要根据url去数据库中取出该资源所对应的所有可以访问的角色,然后拿着当前用户的所有角色一一对比,判断用户是否可以访问(这里就是和权限相关)。
接下来,通过简单的代码演示来分享一下自定义的登录过程?
第一步:准备好项目所需要的环境,包括数据库依赖、MyBatis依赖和相关配置
        <dependency>
            <groupId>org.mybatis.spring.boot</groupId>
            <artifactId>mybatis-spring-boot-starter</artifactId>
            <version>2.3.0</version>
        </dependency>
        <dependency>
            <groupId>mysql</groupId>
            <artifactId>mysql-connector-java</artifactId>
        </dependency>
        <dependency>
            <groupId>com.alibaba</groupId>
            <artifactId>druid</artifactId>
            <version>1.2.20</version>
        </dependency>
###访问端口
server:
port: 8080
###数据库配置
spring:
datasource:
url: jdbc:mysql://localhost:3306/ssoTest?useSSL=false&useUnicode=true&characterEncoding=utf-8&serverTimezone=Asia/Shanghai&allowMultiQueries=true&allowPublicKeyRetrieval=true
username: root
password: Qwertuiop123.
###读取xml文件中的sql语句
mybatis:
mapper-locations: classpath:mapper/*.xml注:在数据库url中最好添加“allowPublicKeyRetrieval=true” ,否则可能会报java.sql.SQLNonTransientConnectionException: Public Key Retrieval is not all错误
第二部:准备一个实体类,用于接收请求数据(为了方便测试前端传入和数据层反馈的实体类我们都用同一个)
@Data
public class AdminLoginDTO implements Serializable {
    private static final Long seriaVersionUID=1L;
    private String name;
    private String password;
}
第三步:定义控制层、业务层、持久层
//控制层
@RestController
public class AdminLoginController {
    @Autowired(required = false)
    private IAdminService adminService;
    @PostMapping("/login")
    public String login(@RequestBody AdminLoginDTO adminLoginDTO){
        adminService.login(adminLoginDTO);
        return "登陆成功";
    }
}

//业务层
public interface IAdminService {
    void login(AdminLoginDTO adminLoginDTO);
}

//持久层
@Mapper
public interface AddAdminMapper {
    AdminLoginDTO getUserByUserName(String userName);
}
第三步:在xml文件中定义sql语句,用于通过用户名查询数据库中对应数据是否存在
<?xml version="1.0" encoding="UTF-8"?>
<!DOCTYPE mapper PUBLIC "-//mybatis.org//DTD Mapper 3.0//EN" "http://mybatis.org/dtd/mybatis-3-mapper.dtd">

<mapper namespace="com.cola.sso.mapper.AddAdminMapper">

    <select id="getUserByUserName" resultType="com.cola.sso.entity.AdminLoginDTO">
        select
           id,name,password
        from
            admin_login
        where
            name=#{userName}
    </select>

</mapper>
第四部:将UserDetailsServiceImpl中代码稍作修改,增加从数据库查询操作
@Service
public class UserDetailsServiceImpl implements UserDetailsService {
    @Autowired
    private AddAdminMapper adminMapper;
    @Override
    public UserDetails loadUserByUsername(String userName) throws UsernameNotFoundException {
        AdminLoginDTO admin = adminMapper.getUserByUserName(userName);
        System.out.println(admin.getName());
        System.out.println(admin.getPassword());
        UserDetails userDetails = User.builder()
                .username(admin.getName())
                .password(admin.getPassword())
                .disabled(false)
                .accountLocked(false)
                .accountExpired(false)
                .credentialsExpired(false)
                .authorities("xxx")
                .build();
        return userDetails;
    }
}
第五步:定义如下代码来执行认证过程,这里我们需要额外用到一个AuthenticationManager类对象,这个类可以作为配置类写在Config包中
//配置类代码
@Configuration
@Slf4j
public class SecurityConfig extends WebSecurityConfigurerAdapter {
    //准备BCryptPasswordEncoder实例
    @Bean
    public PasswordEncoder passwordEncoder(){
        log.info("创建密码编码器组件: BCryptPasswordEncoder");
        return new BCryptPasswordEncoder();
    }
    @Bean
    @Override
    protected AuthenticationManager authenticationManager() throws Exception {
        return super.authenticationManager();
    }
    @Override
    protected void configure(HttpSecurity http) throws Exception {
        http.csrf().disable(); //禁止跨域。如果不禁止,白名单路径的异步访问会出现403错误
    }
}


//实现类代码
@Service
@Slf4j
public class AdminServiceImpl implements IAdminService{


    @Autowired(required = false)
    private AuthenticationManager authenticationManager;
    @Override
    public void login(AdminLoginDTO adminLoginDTO) {
        //利用Security进行认证,通过AuthenticationManager对象来执行认证过程(保存用户信息?、授权访问等需要)
        Authentication authentication =
        //security会从登录的信息中获取用户名和密码并且保存在authentication对象中
                new UsernamePasswordAuthenticationToken(adminLoginDTO.getName(),adminLoginDTO.getPassword());
        authenticationManager.authenticate(authentication);
        //以上调用的authenticate方法会抛出异常(抛出异常疑问程序的终止),如果还能执行到以下代码,表示用户名与密码是匹配的
        log.info("登录成功");
    }
}注意在配置类中一定要配置静止跨域,否则只能使用Get请求访问,使用post请求访问会报错?
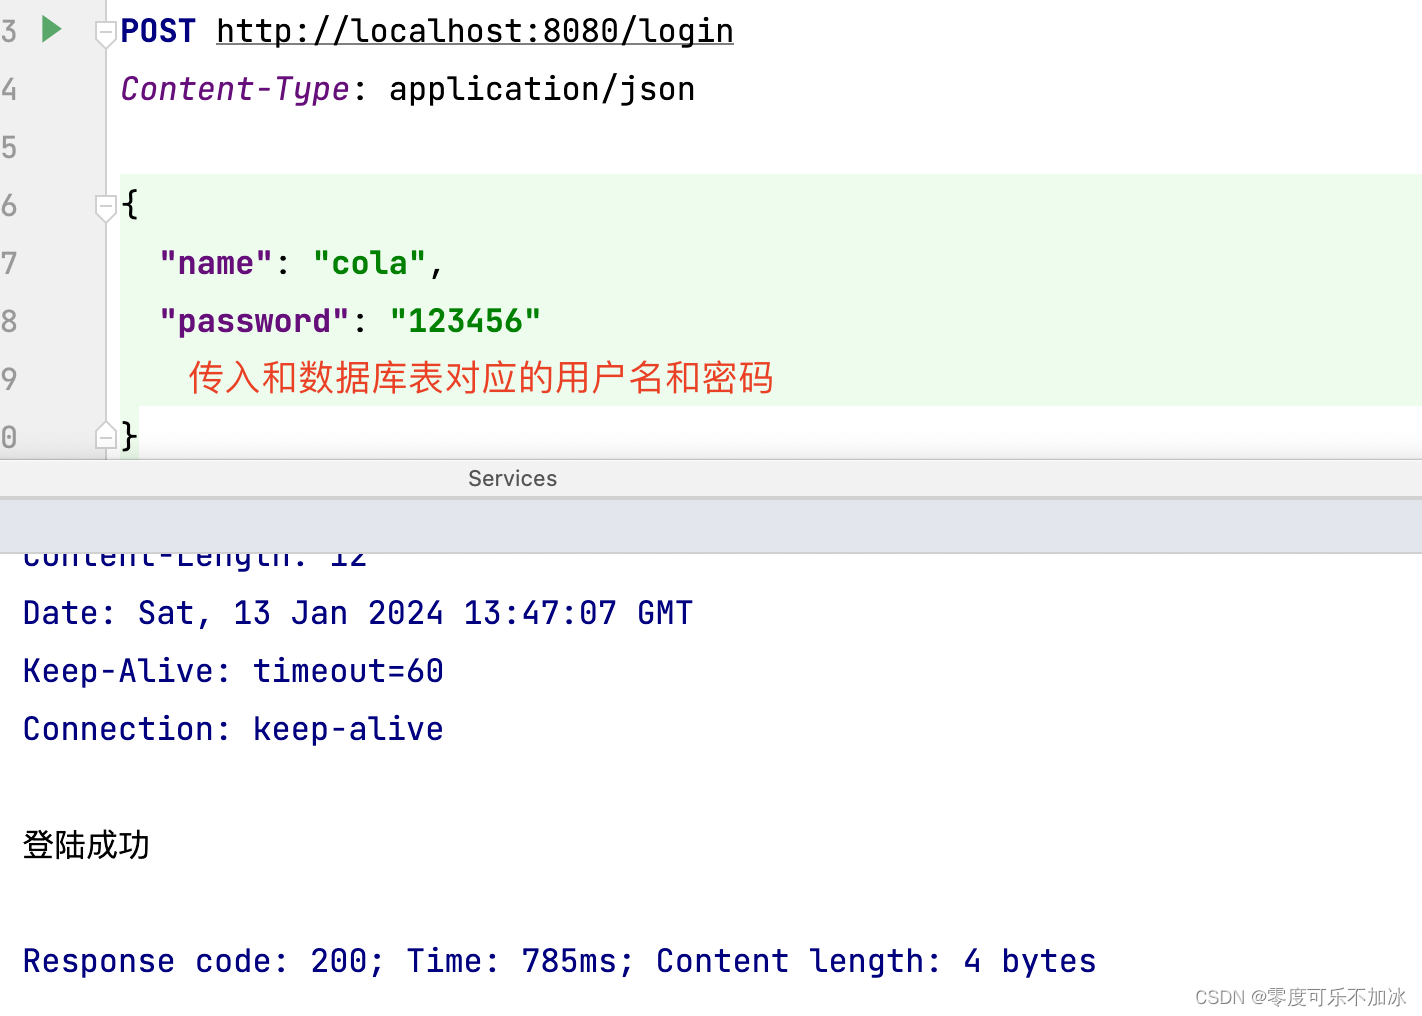
第六步:由于没有进行在线文档配置,这里使用http请求测试

本文来自互联网用户投稿,该文观点仅代表作者本人,不代表本站立场。本站仅提供信息存储空间服务,不拥有所有权,不承担相关法律责任。 如若内容造成侵权/违法违规/事实不符,请联系我的编程经验分享网邮箱:chenni525@qq.com进行投诉反馈,一经查实,立即删除!
- Python教程
- 深入理解 MySQL 中的 HAVING 关键字和聚合函数
- Qt之QChar编码(1)
- MyBatis入门基础篇
- 用Python脚本实现FFmpeg批量转换
- 使用Guava Retrying优雅的实现业务异常重试
- 算法考试——填空题
- 查看目录命令pwd
- 前端笔试题(八)——手写代码
- Nginx系列--return的使用
- 强化学习应用(六):基于Q-learning算法的无人车配送路径规划(通过Python代码)
- 外贸自建站用什么服务器?海洋建站的主机?
- vmware安装龙蜥操作系统
- JoySSL怎么样
- 代码随想录训练营第四十九天| ● 121. 买卖股票的最佳时机 ● 122.买卖股票的最佳时机II