【电商项目实战】MD5登录加密及JSR303自定义注解

🎉🎉欢迎来到我的CSDN主页!🎉🎉
🏅我是Java方文山,一个在CSDN分享笔记的博主。📚📚
🌟推荐给大家我的专栏《电商项目实战》。🎯🎯
👉点击这里,就可以查看我的主页啦!👇👇
🎁如果感觉还不错的话请给我点赞吧!🎁🎁
💖期待你的加入,一起学习,一起进步!💖💖

目录
一、登录功能实现
1.数据接收类
我们在做登录功能的时候肯定需要接收前端传递到后端的值,但是我们直接用已有的实体会污染这个类(如果还需要做验证之类的话)所以我们先编写一个Vo类进行参数接收。
UserVo
@Data
public class UserVo {

    private String phone;//用户电话
    private String password;//用户密码

}
?2.数据响应类
?我们后端向前端响应数据最好统一格式,所以这里就有两个类响应类和响应枚举类JsonResponseBody
package com.csdn.shop.resp;

import lombok.Data;

@Data
public class JsonResponseBody<T> {

    private Integer code;
    private String msg;
    private T data;
    private Long total;

    private JsonResponseBody(com.star.easyshop.resp.JsonResponseStatus jsonResponseStatus, T data) {
        this.code = jsonResponseStatus.getCode();
        this.msg = jsonResponseStatus.getMsg();
        this.data = data;
    }

    private JsonResponseBody(com.star.easyshop.resp.JsonResponseStatus jsonResponseStatus, T data, Long total) {
        this.code = jsonResponseStatus.getCode();
        this.msg = jsonResponseStatus.getMsg();
        this.data = data;
        this.total = total;
    }

    public static <T> JsonResponseBody<T> success() {
        return new JsonResponseBody<T>(com.star.easyshop.resp.JsonResponseStatus.OK, null);
    }

    public static <T> JsonResponseBody<T> success(T data) {
        return new JsonResponseBody<T>(com.star.easyshop.resp.JsonResponseStatus.OK, data);
    }

    public static <T> JsonResponseBody<T> success(T data, Long total) {
        return new JsonResponseBody<T>(com.star.easyshop.resp.JsonResponseStatus.OK, data, total);
    }

    public static <T> JsonResponseBody<T> unknown() {
        return new JsonResponseBody<T>(com.star.easyshop.resp.JsonResponseStatus.UN_KNOWN, null);
    }

    public static <T> JsonResponseBody<T> other(com.star.easyshop.resp.JsonResponseStatus jsonResponseStatus) {
        return new JsonResponseBody<T>(jsonResponseStatus, null);
    }

}
JsonResponseStatus
package com.csdn.shop.resp;

import lombok.Getter;

@Getter
public enum JsonResponseStatus {

    OK(200, "OK"),
    UN_KNOWN(500, "未知错误"),
    LOGIN_MOBILE_INFO(5001, "未携带手机号或手机号格式有误"),
    LOGIN_PASSWORD_INFO(5002, "未携带密码或不满足格式"),
    LOGIN_NO_EQUALS(5003, "登录信息不一致"),
    LOGIN_MOBILE_NOT_FOUND(5004, "登录手机号未找到"),
    ;

    private final Integer code;
    private final String msg;

    JsonResponseStatus(Integer code, String msg) {
        this.code = code;
        this.msg = msg;
    }

    public String getName(){
        return this.name();
    }

}
3.功能实现
这里就直接展示controller和servicelmpl的代码,接口的定义我相信大家也都会写。
?controller
@Controller
@RequestMapping("/user")
public class UserController {

    @Autowired
    private IUserService userService;

    @ResponseBody
    @RequestMapping("/login")
    public JsonResponseBody<?> login(UserVo vo){
      return userService.login(vo);
    }

}
UserServiceImpl
@Service
public class UserServiceImpl extends ServiceImpl<UserMapper, User> implements IUserService {

    @Autowired
    private UserMapper userMapper;

    @Override
    public JsonResponseBody<?> login(UserVo vo) {
        //手机号为空
        if (vo.getPhone()==null || vo.getPhone().trim().length()==0){
            return  JsonResponseBody.other(JsonResponseStatus.LOGIN_MOBILE_INFO);
        }
        //密码为空
        if (vo.getPassword()==null || vo.getPassword().trim().length()==0){
            return  JsonResponseBody.other(JsonResponseStatus.LOGIN_PASSWORD_INFO);
        }
        //根据手机号和密码查询
        User one = getOne(new QueryWrapper<User>().lambda().eq(User::getId, vo.getPhone()).eq(User::getPassword, vo.getPassword()), false);
        //用户未找到
        if (one==null){
            return  JsonResponseBody.other(JsonResponseStatus.LOGIN_NO_EQUALS);
        }
        return  JsonResponseBody.other(JsonResponseStatus.OK);
    }
}
二、全局异常抓捕
1.自定义异常
全局异常捕获可以用于收集应用程序中发生的异常信息,并进行监控和分析。通过记录异常日志、统计异常发生的频率和类型等,可以帮助开发人员及时发现潜在的问题,并进行修复和优化。
如果直接在刚刚我们所写的代码中添加日志记录,会比较麻烦,我们将他变成一个异常然后被异常抓捕后进行记录就大大减少了我们的代码量。
BusinessException
@EqualsAndHashCode(callSuper = true)
@AllArgsConstructor
@NoArgsConstructor
@Data
public class BusinessException extends RuntimeException {

    private JsonResponseStatus jsonResponseStatus;

}
自定义异常类并提供了一些常用的方法和构造函数,方便在业务逻辑中抛出和处理异常。异常类中的 JsonResponseStatus?用于封装业务异常的相关状态信息,方便异常处理器进行处理和返回给前端。
2.全局异常抓捕
首先修改UserServiceImpl的代码,全部改为抛异常的方式
@Service
public class UserServiceImpl extends ServiceImpl<UserMapper, User> implements IUserService {

    @Autowired
    private UserMapper userMapper;

    @Override
    public JsonResponseBody<?> login(UserVo vo) {
        //手机号为空
        if (vo.getPhone()==null || vo.getPhone().trim().length()==0){
           throw new BusinessException(JsonResponseStatus.LOGIN_MOBILE_INFO);

        }
        //密码为空
        if (vo.getPassword()==null || vo.getPassword().trim().length()==0){
            throw new BusinessException(JsonResponseStatus.LOGIN_PASSWORD_INFO);
        }
        //根据手机号和密码查询
        User one = getOne(new QueryWrapper<User>().lambda().eq(User::getId,     vo.getPhone()).eq(User::getPassword, vo.getPassword()), false);
        //用户未找到
        if (one==null){
            throw new BusinessException(JsonResponseStatus.LOGIN_NO_EQUALS);
        }
        return  JsonResponseBody.other(JsonResponseStatus.OK);
    }
}
编写一个全局异常抓捕类,进行异常抓捕,该类是一个增强controller,会将原本的异常拦截在此
@RestControllerAdvice
@Slf4j
public class GlobalExceptionHandler {

    //业务异常抓捕
    @ExceptionHandler(BusinessException.class)
    public JsonResponseBody<?> exceptionBusinessException(BusinessException e) {
        JsonResponseStatus status = e.getJsonResponseStatus();
        //日志记录
        log.info(status.getMsg());
        return JsonResponseBody.other(status);
    }

    //未知异常抓捕
    @ExceptionHandler(Throwable.class)
    public JsonResponseBody<?> exceptionThrowable(Throwable e) {
        //日志记录
        log.info(e.getMessage());
        return JsonResponseBody.other(JsonResponseStatus.UN_KNOWN);
    }


}
测试一下,查看效果

?三、JSR303验证
1.JSR303验证
在刚刚的那种方式中太过于简单,而且还没有进行手机号正则判断、密码正则判断等,如果我们需要判断的属性非常多if标签就需要写很多,非常的不方便,所以需要用到JSR303进行验证
JSR303是依赖所以首先需要在pom文件中添加依赖
        <dependency>
            <groupId>org.springframework.boot</groupId>
            <artifactId>spring-boot-starter-validation</artifactId>
        </dependency>
?JSR303基本校验规则
| 注解 | 作用类型 | 解释 |
|---|---|---|
| @NotNull | 任何类型 | 属性不能为null |
| @NotEmpty | 集合 | 集合不能为null,且size大于0 |
| @NotBlanck | 字符串、字符 | 字符类不能为null,且去掉空格之后长度大于0 |
| @AssertTrue | Boolean、boolean | 布尔属性必须是true |
| @Min | 数字类型(原子和包装) | 限定数字的最小值(整型) |
| @Max | 同@Min | 限定数字的最大值(整型) |
| @DecimalMin | 同@Min | 限定数字的最小值(字符串,可以是小数) |
| @DecimalMax | 同@Min | 限定数字的最大值(字符串,可以是小数) |
| @Range | 数字类型(原子和包装) | 限定数字范围(长整型) |
| @Length | 字符串 | 限定字符串长度 |
| @Size | 集合 | 限定集合大小 |
| @Past | 时间、日期 | 必须是一个过去的时间或日期 |
| @Future | 时期、时间 | 必须是一个未来的时间或日期 |
| 字符串 | 必须是一个邮箱格式 | |
| @Pattern | 字符串、字符 | 正则匹配字符串 |
在我们的Vo类加上注解
@Data
public class UserVo {

    @NotBlank
    private String phone;//用户电话
    @NotBlank
    private String password;//用户密码

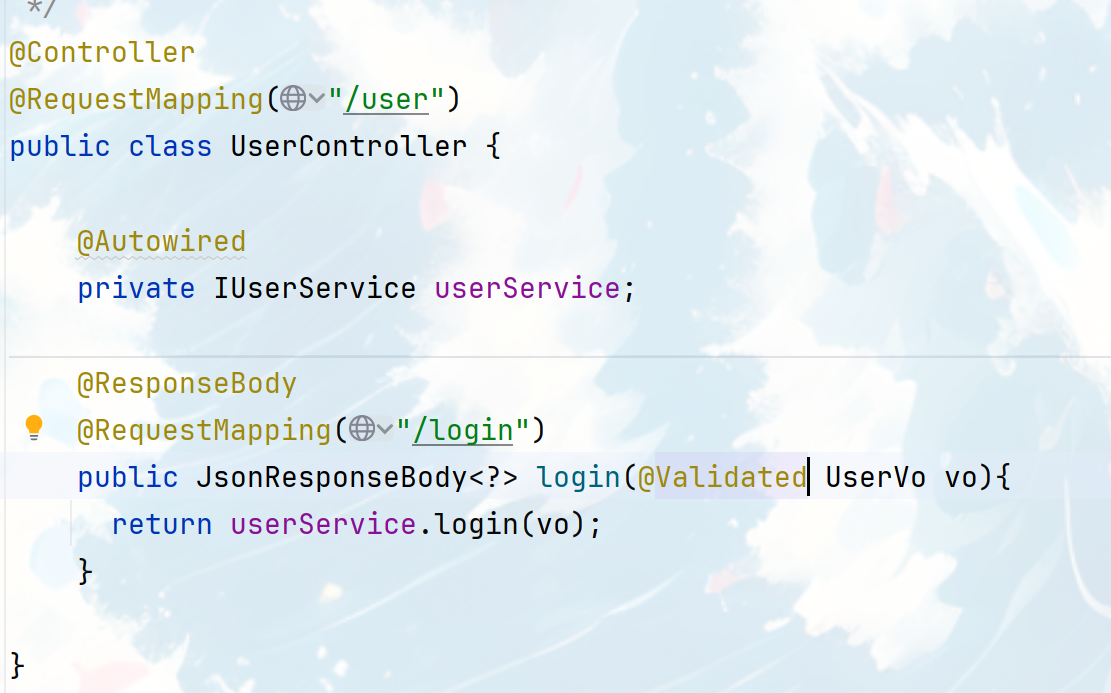
}在controller的方法上开启检查加上注解@Valid?或者?@Validated?进行参数校验的时候,如果不加BindingResult那么会抛出异常

既然这里会抛出异常,那么我们继续往全局异常抓捕类里面加一个异常抓捕方法
     //绑定异常抓捕
    @ExceptionHandler(BindException.class)
    public JsonResponseBody<?> exceptionThrowable(BindException e) {
        //日志记录
        log.info(e.getMessage());
        return JsonResponseBody.other(JsonResponseStatus.LOGIN_NO_EQUALS);
    }
2.自定义JSR303注解
刚刚我们的JSR303虽然拦截非空字段但是没有判断手机号是否正常等,所以我们现在写一个自定义JSR303注解类进行正则判断
package com.csdn.shop.core;

import javax.validation.Constraint;
import javax.validation.Payload;
import java.lang.annotation.*;

/**
 * @author Java方文山
 * @compay csdn_Java方文山
 * @create 2023-12-29-19:03
 */
@Documented
@Target(ElementType.FIELD)
@Retention(RetentionPolicy.RUNTIME)
@Constraint(
        validatedBy = {MatchExprConstraintValidator.class}
)
public @interface BooleanExpr {
    String message() default "{javax.validation.constraints.NotBlank.message}";

    Class<?>[] groups() default {};

    Class<? extends Payload>[] payload() default {};

    boolean require () default  false;//判断这个字段是否是必填
    String expr () default "" ;//正则规则

}
?这里的expr也就是正则判断是通过用户定义的,大大提升了复用性。
@Data
public class UserVo {

    @BooleanExpr(require = true,expr = "(13[0-9]|14[01456879]|15[0-35-9]|16[2567]|17[0-8]|18[0-9]|19[0-35-9])\\d{8}")
    private String phone;//用户电话

    @BooleanExpr(require = true ,expr ="[a-zA-Z0-9]{32}")
    private String password;//用户密码

}
我们还需要 自定义的验证器,用于验证字符串是否满足指定的正则表达式规则。
package com.csdn.shop.core;

import com.baomidou.mybatisplus.core.toolkit.StringUtils;
import lombok.Data;

import javax.validation.ConstraintValidator;
import javax.validation.ConstraintValidatorContext;

@Data
class MatchExprConstraintValidator implements ConstraintValidator<BooleanExpr, String> {

    private boolean require;
    private String expr;

    @Override
    public void initialize(BooleanExpr matchExpr) {
        expr = matchExpr.expr();
        require = matchExpr.require();
    }

    @Override
    public boolean isValid(String value, ConstraintValidatorContext context) {
        if (!require) return true;
        if (StringUtils.isEmpty(value)) return false;
        return value.matches(expr);
    }

}在这个类中,?ConstraintValidator<BooleanExpr, String> 表示该验证器的泛型参数,其中 BooleanExpr 是一个自定义注解,String 则是要验证的目标类型。
该类实现了 ConstraintValidator 接口,并重写了 initialize 和 isValid 方法。initialize 方法用于初始化验证器,从注解中获取正则表达式和是否必须的信息。isValid 方法用于实际的验证逻辑,根据是否必须和目标字符串是否为空来判断是否满足正则表达式规则。
现在我们登录错误的电话验证一下

四、MD5加密登录
首先看一下登录页面
<!DOCTYPE html>
<html>
	<head>
		<#include "common/head.html">
		<link rel="stylesheet" type="text/css" href="css/public.css"/>
		<link rel="stylesheet" type="text/css" href="css/login.css"/>
		<script type="text/javascript" src="js/jquery-1.12.4.min.js"></script>
	</head>
	<body>
		<!-------------------login-------------------------->
		<div class="login">
			<form action="${ctx}/user/login" method="post">
				<h1><a href="${ctx}/"><img src="img/temp/logo.png"></a></h1>
				<p></p>
				<div class="msg-warn hide"><b></b>公共场所不建议自动登录,以防账号丢失</div>
				<p><input style="font-size:14px;" type="text" id="phone" value="" placeholder="昵称/邮箱/手机号"></p>
				<p><input style="font-size:14px;" type="password" id="password" value="" placeholder="密码"></p>
				<p><input type="button" id="login" value="登  录"></p>
				<p class="txt"><a class="" href="${ctx}/page/reg.html">免费注册</a><a href="${ctx}/page/forget.html">忘记密码?</a></p>
			</form>
		</div>

	</body>
</html>

<script>
	//登陆点击事件
	$("#login").click(()=>{
		//获取手机号和密码的值
		let phone=$("#phone").val()
		let password=$("#password").val()
		$.post('${springMacroRequestContext.contextPath}/user/login',{
			phone,password
		},resp=>{

		},"json")
	})
</script>
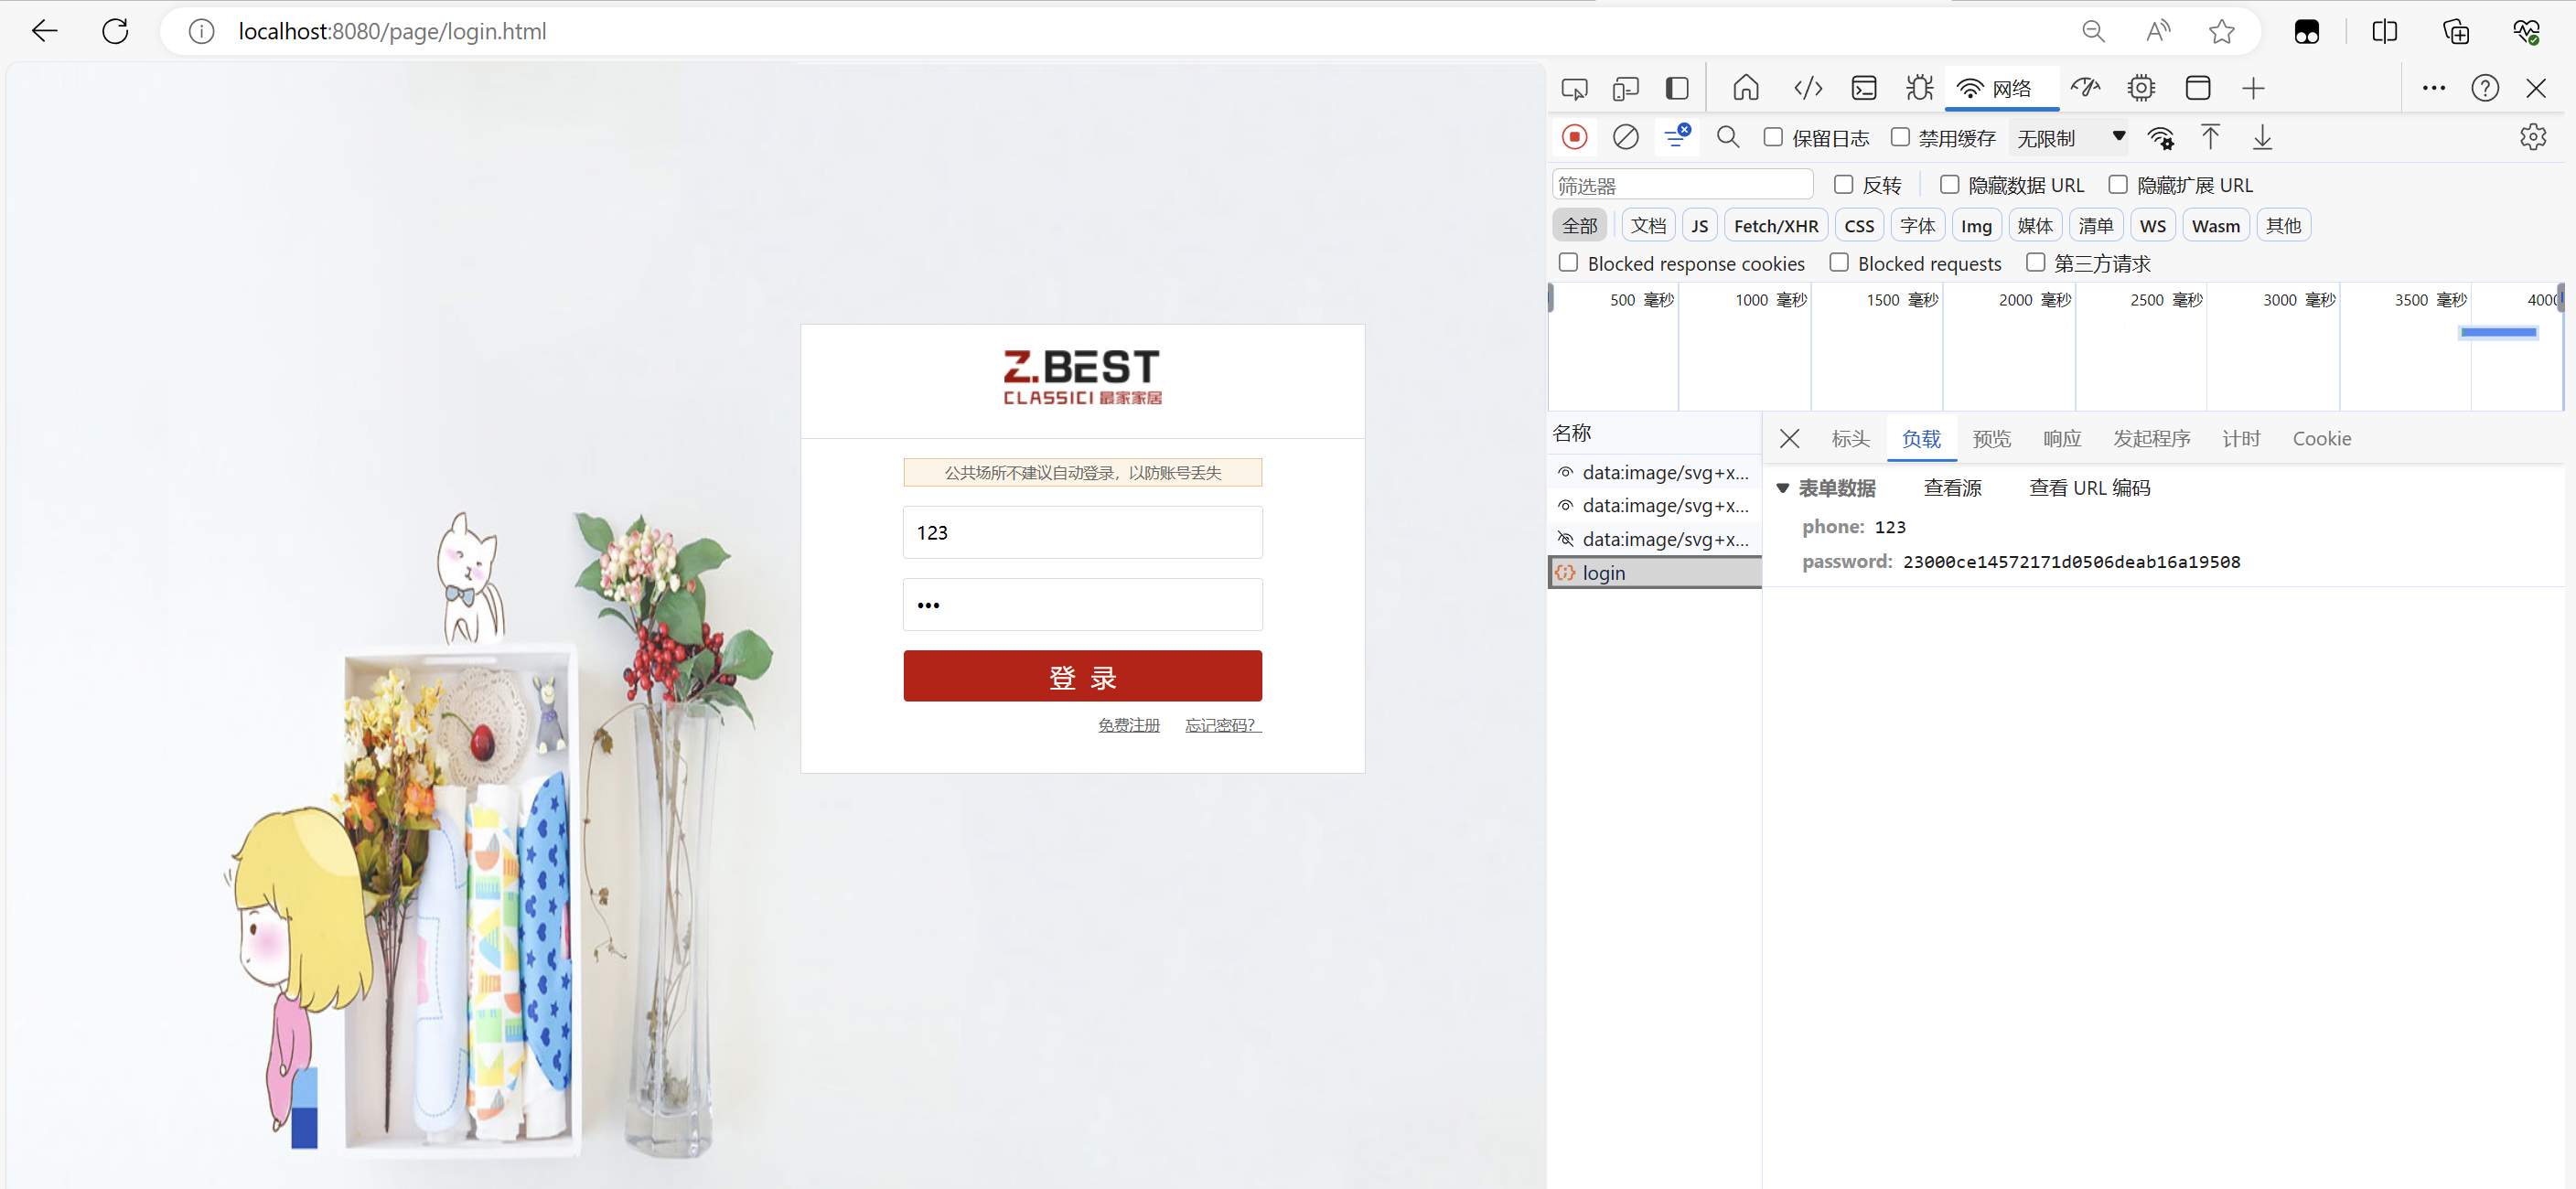
这么发送登录请求,密码暴露的风险太大了
 ?1.前端加密
首先引入md5的依赖
<script src="http://www.gongjuji.net/Content/files/jquery.md5.js" type="text/javascript"></script>
对password进行加密
<script>
	//登陆点击事件
	$("#login").click(()=>{
		//获取手机号和密码的值
		let phone=$("#phone").val()
		let password=$("#password").val()
		//加密的同时加salt
		password=$.md5("csdn"+password+"xw"+password)
		$.post('${springMacroRequestContext.contextPath}/user/login',{
			phone,password
		},resp=>{

		},"json")
	})
</script>
这时候同样的密码123显示的就不一样了

?2.后端加密
在后端也进行加密双重保证,这里提供一个MD5工具类方便大家使用
package com.csdn.shop.utils;

import org.springframework.stereotype.Component;
import org.springframework.util.DigestUtils;

import java.nio.charset.StandardCharsets;
import java.util.UUID;

@Component
public class MD5Utils {

    //加密盐,与前端一致
    private static final String salt = "f1g2h3j4";

    public static String md5(String src) {
        return DigestUtils.md5DigestAsHex(src.getBytes(StandardCharsets.UTF_8));
    }

    public static String createSalt() {
        return UUID.randomUUID().toString().replace("-", "");
    }

    /**
     * 将前端的明文密码通过MD5加密方式加密成后端服务所需密码,混淆固定盐salt,安全性更可靠
     */
    public static String inputPassToFormPass(String inputPass) {
        String str = salt.charAt(1) + String.valueOf(salt.charAt(5)) + inputPass + salt.charAt(0) + salt.charAt(3);
        return md5(str);
    }

    /**
     * 将后端密文密码+随机salt生成数据库的密码,混淆固定盐salt,安全性更可靠
     */
    public static String formPassToDbPass(String formPass, String salt) {
        String str = salt.charAt(7) + String.valueOf(salt.charAt(9)) + formPass + salt.charAt(1) + salt.charAt(5);
        return md5(str);
    }

    public static void main(String[] args) {
        String formPass = inputPassToFormPass("123456");
        System.out.println("前端加密密码:" + formPass);
        String salt = createSalt();
        System.out.println("后端加密随机盐:" + salt);
        String dbPass = formPassToDbPass(formPass, salt);
        System.out.println("后端加密密码:" + dbPass);
    }

}
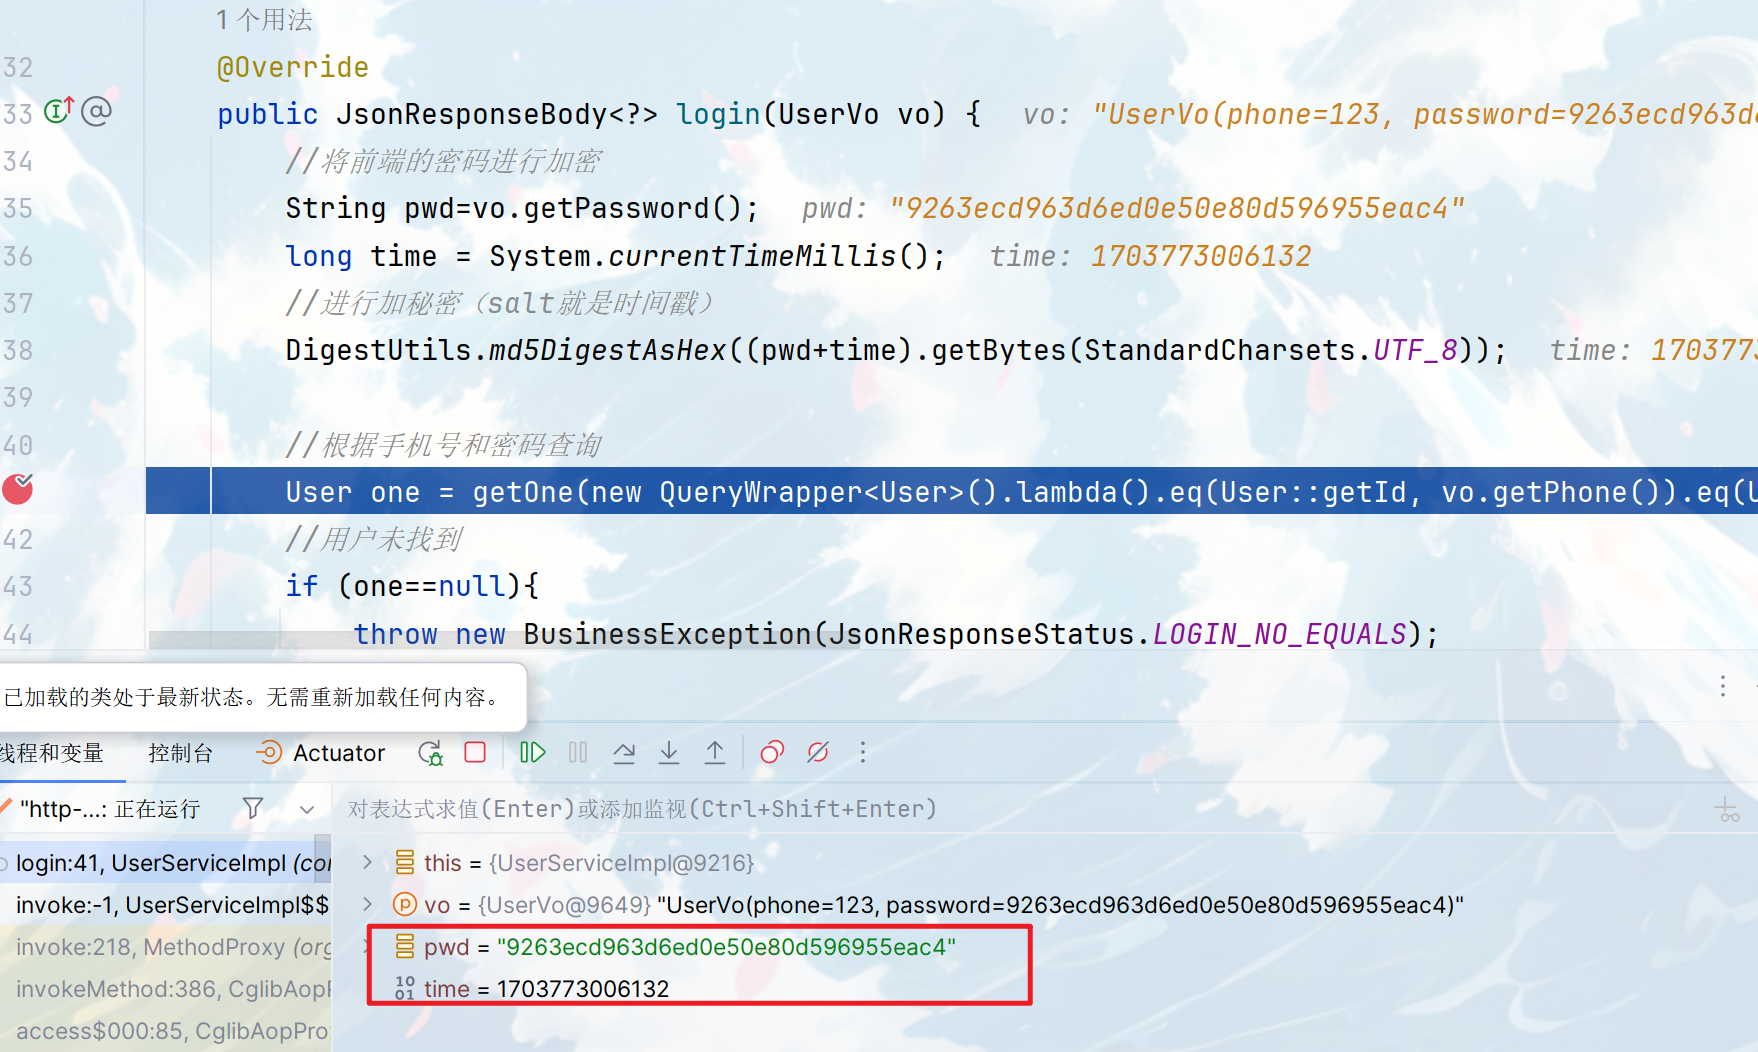
?首先需要将我们数据库的加密密码和salt修改成我们目前的规则
  @Override
    public JsonResponseBody<?> login(UserVo vo) {
        //将前端的密码进行加密
        String pwd=vo.getPassword();
        long time = System.currentTimeMillis();
        //进行加秘密(salt就是时间戳)
        DigestUtils.md5DigestAsHex((pwd+time).getBytes(StandardCharsets.UTF_8));

        //根据手机号和密码查询
        User one = getOne(new QueryWrapper<User>().lambda().eq(User::getId, vo.getPhone()).eq(User::getPassword, vo.getPassword()), false);
        //用户未找到
        if (one==null){
            throw new BusinessException(JsonResponseStatus.LOGIN_NO_EQUALS);
        }
        return  JsonResponseBody.other(JsonResponseStatus.OK);
    }
登录测试一下

?将我们的salt和加密后的密码赋值给数据库的用户(注意这个操作就类似于注册,如果不将数据库的密码和salt进行替换待会登录的时候,我们的这种加密方式是获取不到真正的密码的)

修改登录的方法
    @Override
    public JsonResponseBody<?> login(UserVo vo) {
        //根据手机号和密码查询
        User one = getOne(new QueryWrapper<User>().lambda().eq(User::getId, vo.getPhone()), false);
        //用户未找到
        if (one==null){
            throw new BusinessException(JsonResponseStatus.LOGIN_NO_EQUALS);
        }
        //前端的密码 + 数据库的盐
        String str=vo.getPassword()+one.getSalt();
        //进行加密
        str= DigestUtils.md5DigestAsHex(str.getBytes(StandardCharsets.UTF_8));
        //将加密后的密码和数据库的原密码进行比较
        if(!str.equals(one.getPassword())){

            throw new BusinessException(JsonResponseStatus.LOGIN_PASSWORD_NOT_FOUND);
        }
        return  JsonResponseBody.other(JsonResponseStatus.OK);
    }
}
?现在就是先根据电话号查询用户,将用户的salt取出来后和前端的密码进行加密,如果加密后的密码和数据库的密码一致就说明登录成功,如果salt不一样,或者前端密码不一样都不会和数据库的密码一致。
随后在前端做好返回值的判断即可

五、用户数据存储
我们用户进行登录后,肯定需要将用户信息进行存储的但是存在session会加大服务器的资源,所以我们要将登录成功的用户信息存储在redis缓存中去。
1.用户信息存储Redis
pom依赖引入
<!-- redis:缓存数据库 -->
<dependency>
    <groupId>org.springframework.boot</groupId>
    <artifactId>spring-boot-starter-data-redis</artifactId>
    <version>2.5.6</version>
</dependency>
<!-- commons-pool2:实现对象池化的框架,没有的话启动时redis报错 -->
<dependency>
    <groupId>org.apache.commons</groupId>
    <artifactId>commons-pool2</artifactId>
    <version>2.11.1</version>
</dependency>
yml配置文件
#redis
redis:
  # redis数据库索引(默认为0)
  database: 0
  # redis服务器地址(默认为localhost)
  host: 182.92.153.8
  # redis端口(默认为6379)
  port: 6379
  # redis访问密码(默认为空)
  password:
  # redis连接超时时间(单位毫秒):不能设置为0,否则报无法连接
  timeout: 6000ms
  # redis高级客户端
  lettuce:
    pool:
      # 最大可用连接数(默认为8,负数表示无限)
      max-active: 8
      # 最大空闲连接数(默认为8,负数表示无限)
      max-idle: 8
      # 最小空闲连接数(默认为0,该值只有为正数才有用)
      min-idle: 0
      # 从连接池中获取连接最大等待时间(默认为-1,单位为毫秒,负数表示无限)
max-wait: -1将用户信息存储于redis,并且将redis的键保存到前端cookie,我们首先需要在controller接收 HttpServletRequest ,?HttpServletResponse两个对象
   @ResponseBody
    @RequestMapping("/login")
    public JsonResponseBody<?> login(@Validated UserVo vo, HttpServletRequest request, HttpServletResponse response){
      return userService.login(vo,request,response);
    }
?serviceimpl代码
这里我们的键最好是唯一的,什么是唯一的?雪花ID,所以将雪花ID的依赖加入进来生成我们的token即可,在redis中的键就是"user:+token"
         <dependency>
            <groupId>com.github.yitter</groupId>
            <artifactId>yitter-idgenerator</artifactId>
            <version>1.0.6</version>
        </dependency>
        <!-- 雪花ID -->
我们的前端也需要保存用户的token方便前端向后端发送请求,这里用到cookie的一个工具类
package com.csdn.shop.utils;

import lombok.extern.slf4j.Slf4j;

import javax.servlet.http.Cookie;
import javax.servlet.http.HttpServletRequest;
import javax.servlet.http.HttpServletResponse;
import java.io.UnsupportedEncodingException;
import java.net.URLDecoder;
import java.net.URLEncoder;

@Slf4j
public class CookieUtils {

    /**
     * @Description: 得到Cookie的值, 不编码
     */
    public static String getCookieValue(HttpServletRequest request, String cookieName) {
        return getCookieValue(request, cookieName, false);
    }

    /**
     * @Description: 得到Cookie的值
     */
    public static String getCookieValue(HttpServletRequest request, String cookieName, boolean isDecoder) {
        Cookie[] cookieList = request.getCookies();
        if (cookieList == null || cookieName == null) {
            return null;
        }
        String retValue = null;
        try {
            for (int i = 0; i < cookieList.length; i++) {
                if (cookieList[i].getName().equals(cookieName)) {
                    if (isDecoder) {
                        retValue = URLDecoder.decode(cookieList[i].getValue(), "UTF-8");
                    } else {
                        retValue = cookieList[i].getValue();
                    }
                    break;
                }
            }
        } catch (UnsupportedEncodingException e) {
            e.printStackTrace();
        }
        return retValue;
    }

    /**
     * @Description: 得到Cookie的值
     */
    public static String getCookieValue(HttpServletRequest request, String cookieName, String encodeString) {
        Cookie[] cookieList = request.getCookies();
        if (cookieList == null || cookieName == null) {
            return null;
        }
        String retValue = null;
        try {
            for (int i = 0; i < cookieList.length; i++) {
                if (cookieList[i].getName().equals(cookieName)) {
                    retValue = URLDecoder.decode(cookieList[i].getValue(), encodeString);
                    break;
                }
            }
        } catch (UnsupportedEncodingException e) {
            e.printStackTrace();
        }
        return retValue;
    }

    /**
     * @Description: 设置Cookie的值 不设置生效时间默认浏览器关闭即失效,也不编码
     */
    public static void setCookie(HttpServletRequest request, HttpServletResponse response, String cookieName,
                                 String cookieValue) {
        setCookie(request, response, cookieName, cookieValue, -1);
    }

    /**
     * @param request
     * @param response
     * @param cookieName
     * @param cookieValue
     * @param cookieMaxage
     * @Description: 设置Cookie的值 在指定时间内生效,但不编码
     */
    public static void setCookie(HttpServletRequest request, HttpServletResponse response, String cookieName,
                                 String cookieValue, int cookieMaxage) {
        setCookie(request, response, cookieName, cookieValue, cookieMaxage, false);
    }

    /**
     * @Description: 设置Cookie的值 不设置生效时间,但编码
     * 在服务器被创建,返回给客户端,并且保存客户端
     * 如果设置了SETMAXAGE(int seconds),会把cookie保存在客户端的硬盘中
     * 如果没有设置,会默认把cookie保存在浏览器的内存中
     * 一旦设置setPath():只能通过设置的路径才能获取到当前的cookie信息
     */
    public static void setCookie(HttpServletRequest request, HttpServletResponse response, String cookieName,
                                 String cookieValue, boolean isEncode) {
        setCookie(request, response, cookieName, cookieValue, -1, isEncode);
    }

    /**
     * @Description: 设置Cookie的值 在指定时间内生效, 编码参数
     */
    public static void setCookie(HttpServletRequest request, HttpServletResponse response, String cookieName,
                                 String cookieValue, int cookieMaxage, boolean isEncode) {
        doSetCookie(request, response, cookieName, cookieValue, cookieMaxage, isEncode);
    }

    /**
     * @Description: 设置Cookie的值 在指定时间内生效, 编码参数(指定编码)
     */
    public static void setCookie(HttpServletRequest request, HttpServletResponse response, String cookieName,
                                 String cookieValue, int cookieMaxage, String encodeString) {
        doSetCookie(request, response, cookieName, cookieValue, cookieMaxage, encodeString);
    }

    /**
     * @Description: 删除Cookie带cookie域名
     */
    public static void deleteCookie(HttpServletRequest request, HttpServletResponse response,
                                    String cookieName) {
        doSetCookie(request, response, cookieName, null, -1, false);
    }


    /**
     * @Description: 设置Cookie的值,并使其在指定时间内生效
     */
    private static final void doSetCookie(HttpServletRequest request, HttpServletResponse response,
                                          String cookieName, String cookieValue, int cookieMaxage, boolean isEncode) {
        try {
            if (cookieValue == null) {
                cookieValue = "";
            } else if (isEncode) {
                cookieValue = URLEncoder.encode(cookieValue, "utf-8");
            }
            Cookie cookie = new Cookie(cookieName, cookieValue);
            if (cookieMaxage > 0)
                cookie.setMaxAge(cookieMaxage);
            if (null != request) {// 设置域名的cookie
                String domainName = getDomainName(request);
                log.info("========== domainName: {} ==========", domainName);
                if (!"localhost".equals(domainName)) {
                    cookie.setDomain(domainName);
                }
            }
            cookie.setPath("/");
            response.addCookie(cookie);
        } catch (Exception e) {
            e.printStackTrace();
        }
    }

    /**
     * @Description: 设置Cookie的值,并使其在指定时间内生效
     */
    private static void doSetCookie(HttpServletRequest request, HttpServletResponse response,
                                    String cookieName, String cookieValue, int cookieMaxage, String encodeString) {
        try {
            if (cookieValue == null) {
                cookieValue = "";
            } else {
                cookieValue = URLEncoder.encode(cookieValue, encodeString);
            }
            Cookie cookie = new Cookie(cookieName, cookieValue);
            if (cookieMaxage > 0)
                cookie.setMaxAge(cookieMaxage);
            if (null != request) {// 设置域名的cookie
                String domainName = getDomainName(request);
                log.info("========== domainName: {} ==========", domainName);
                if (!"localhost".equals(domainName)) {
                    cookie.setDomain(domainName);
                }
            }
            cookie.setPath("/");
            response.addCookie(cookie);
        } catch (Exception e) {
            e.printStackTrace();
        }
    }

    /**
     * @Description: 得到cookie的域名
     */
    private static String getDomainName(HttpServletRequest request) {
        String domainName = null;

        String serverName = request.getRequestURL().toString();
        if (serverName == null || serverName.equals("")) {
            domainName = "";
        } else {
            serverName = serverName.toLowerCase();
            serverName = serverName.substring(7);
            final int end = serverName.indexOf("/");
            serverName = serverName.substring(0, end);
            if (serverName.indexOf(":") > 0) {
                String[] ary = serverName.split("\\:");
                serverName = ary[0];
            }

            final String[] domains = serverName.split("\\.");
            int len = domains.length;
            if (len > 3 && !isIp(serverName)) {
                // www.xxx.com.cn
                domainName = "." + domains[len - 3] + "." + domains[len - 2] + "." + domains[len - 1];
            } else if (len <= 3 && len > 1) {
                // xxx.com or xxx.cn
                domainName = "." + domains[len - 2] + "." + domains[len - 1];
            } else {
                domainName = serverName;
            }
        }
        return domainName;
    }

    public static String trimSpaces(String IP) {//去掉IP字符串前后所有的空格
        while (IP.startsWith(" ")) {
            IP = IP.substring(1, IP.length()).trim();
        }
        while (IP.endsWith(" ")) {
            IP = IP.substring(0, IP.length() - 1).trim();
        }
        return IP;
    }

    public static boolean isIp(String IP) {//判断是否是一个IP
        boolean b = false;
        IP = trimSpaces(IP);
        if (IP.matches("\\d{1,3}\\.\\d{1,3}\\.\\d{1,3}\\.\\d{1,3}")) {
            String s[] = IP.split("\\.");
            if (Integer.parseInt(s[0]) < 255)
                if (Integer.parseInt(s[1]) < 255)
                    if (Integer.parseInt(s[2]) < 255)
                        if (Integer.parseInt(s[3]) < 255)
                            b = true;
        }
        return b;
    }

}
?修改service中的代码
@Service
public class UserServiceImpl extends ServiceImpl<UserMapper, User> implements IUserService {

    @Autowired
    private UserMapper userMapper;
    @Autowired
    private RedisTemplate redisTemplate;

    @Override
    public JsonResponseBody<?> login(UserVo vo, HttpServletRequest request, HttpServletResponse response) {
        //将前端的密码进行加密
        String pwd=vo.getPassword();

        //根据手机号和密码查询
        User one = getOne(new QueryWrapper<User>().lambda().eq(User::getId, vo.getPhone()), false);
        //用户未找到
        if (one==null){
            throw new BusinessException(JsonResponseStatus.LOGIN_NO_EQUALS);
        }
        //前端的密码 + 数据库的盐
        String str=vo.getPassword()+one.getSalt();
        //进行加密
        str= DigestUtils.md5DigestAsHex(str.getBytes(StandardCharsets.UTF_8));
        //将加密后的密码和数据库的原密码进行比较
        if(!str.equals(one.getPassword())){
            throw new BusinessException(JsonResponseStatus.LOGIN_PASSWORD_NOT_FOUND);
        }
        //因为每个用户都是唯一的所以用到唯一表示——雪花ID
        String token = YitIdHelper.nextId()+"";
        //将用户信息保存到Redis
        redisTemplate.opsForValue().set("user:"+token,one);
        //将token保存在cookie方便前端向后端取值
        CookieUtils.setCookie(request,response,"userToken",token,7200);
        return  JsonResponseBody.other(JsonResponseStatus.OK);
    }
}这里还需要注意两个地方,我们的实体中的时间类型是LocalDateTime我们需要改成Date

?第二个就是我们的数据存储在redis的时候格式不美观所以借助一个工具类进行格式转换避免乱码
package com.csdn.shop.config;

import org.springframework.context.annotation.Bean;
import org.springframework.context.annotation.Configuration;
import org.springframework.data.redis.connection.RedisConnectionFactory;
import org.springframework.data.redis.core.RedisTemplate;
import org.springframework.data.redis.serializer.GenericJackson2JsonRedisSerializer;
import org.springframework.data.redis.serializer.StringRedisSerializer;

@Configuration
public class RedisConfig {

    @Bean
    public RedisTemplate<String, Object> redisTemplate(RedisConnectionFactory connectionFactory) {
        RedisTemplate<String, Object> redisTemplate = new RedisTemplate<>();
        redisTemplate.setKeySerializer(new StringRedisSerializer());
        redisTemplate.setValueSerializer(new GenericJackson2JsonRedisSerializer());
        redisTemplate.setHashKeySerializer(new StringRedisSerializer());
        redisTemplate.setHashValueSerializer(new GenericJackson2JsonRedisSerializer());
        redisTemplate.setConnectionFactory(connectionFactory);
        redisTemplate.afterPropertiesSet();
        return redisTemplate;
    }

}
这时候进行登录测试一下

 可以看到我们的token存储在了浏览器,用户信息也存储在了redis,下次前端想要获取用户信息就可以带着这个token去到redis进行查找。?
2.Redis存储代码优化
在我们刚刚的代码中用到的键都是手写的"user:"+token,但是这样的代码不好维护,所以我们将这个自变量变为常量(我们也可将上面的正则设置为常量)
public class Constants {

    public static final  String REDIS_USER_PREFIX="user:";

    public static final String EXPR_MOBILE = "(13[0-9]|14[01456879]|15[0-35-9]|16[2567]|17[0-8]|18[0-9]|19[0-35-9])\\d{8}";

    public static final String EXPR_PASSWORD = "[a-zA-Z0-9]{32}";

}
其次,我们操作Redis的代码可能在别的地方也需要用到,所以我们将其进行封装
Service
public interface IRedisService {

    // 添加用户数据
    void saveUser(String token,User user);

    // 根据token查询用户信息
    User loadUser(String token);

}
ServiceImpl
@Service
public class IRedisServiceImpl implements IRedisService {

    @Autowired
    private RedisTemplate redisTemplate;
    @Override
    public void saveUser(String token,User user) {
        //将用户信息保存到Redis
        redisTemplate.opsForValue().set(Constants.REDIS_USER_PREFIX +token,user);
    }

    @Override
    public User loadUser(String token) {
        return (User) redisTemplate.opsForValue().get(Constants.REDIS_USER_PREFIX +token);
    }
}
?随后修改我们UserServiceImpl的代码即可,调用IRedisServiceImpl的方法

?3.前端顶部信息显示
  $(function(){
       let nickname=getCookie("nickname");
       if(null!=nickname&&''!=nickname&&undefined!=nickname) {
           //设置昵称
           $('#nickname').text("您好,"+nickname);
           //隐藏登录注册按钮
           $('p.fl>span:eq(1)').css("display","none");
           //显示昵称和退出按钮
           $('p.fl>span:eq(0)').css("display","block");
       }else{
           //隐藏昵称
           $('#nickname').text("");
           //显示登录注册按钮
           $('p.fl>span:eq(1)').css("display","block");
           //隐藏昵称和退出按钮
           $('p.fl>span:eq(0)').css("display","none");
       }
在前端做好有无用户登录的显示,并在后端做好相应数据的回显

登录前:

登录后:

 ?
?
到这里我的分享就结束了,欢迎到评论区探讨交流!!
💖如果觉得有用的话还请点个赞吧 💖

本文来自互联网用户投稿,该文观点仅代表作者本人,不代表本站立场。本站仅提供信息存储空间服务,不拥有所有权,不承担相关法律责任。 如若内容造成侵权/违法违规/事实不符,请联系我的编程经验分享网邮箱:chenni525@qq.com进行投诉反馈,一经查实,立即删除!