【golang/g3n】3D游戏引擎G3N的windows安装与测试
发布时间:2023年12月17日
说在前面
- 操作系统:win 11
- go version:go1.21.5 windows/amd64
- g3n版本:github.com/g3n/engine v0.2.0
- 其他:找了下golang 3d相关的库,目前好像就这个比较活跃
安装
- 按照官方教程所说,需要mingw环境,首先按照教程去下载
We tested the Windows build using the mingw-w64 toolchain (you can download this file in particular).
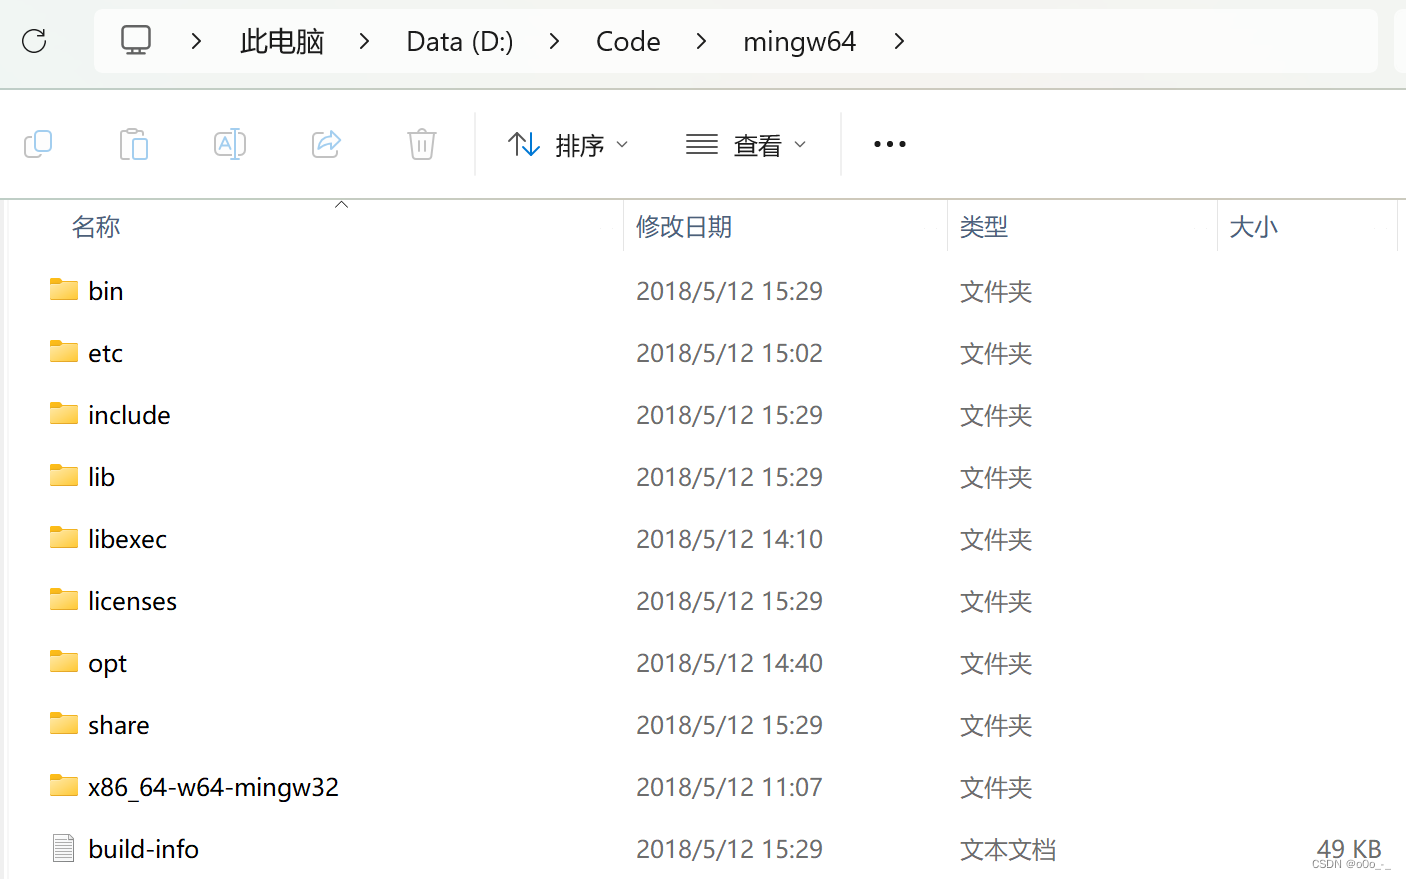
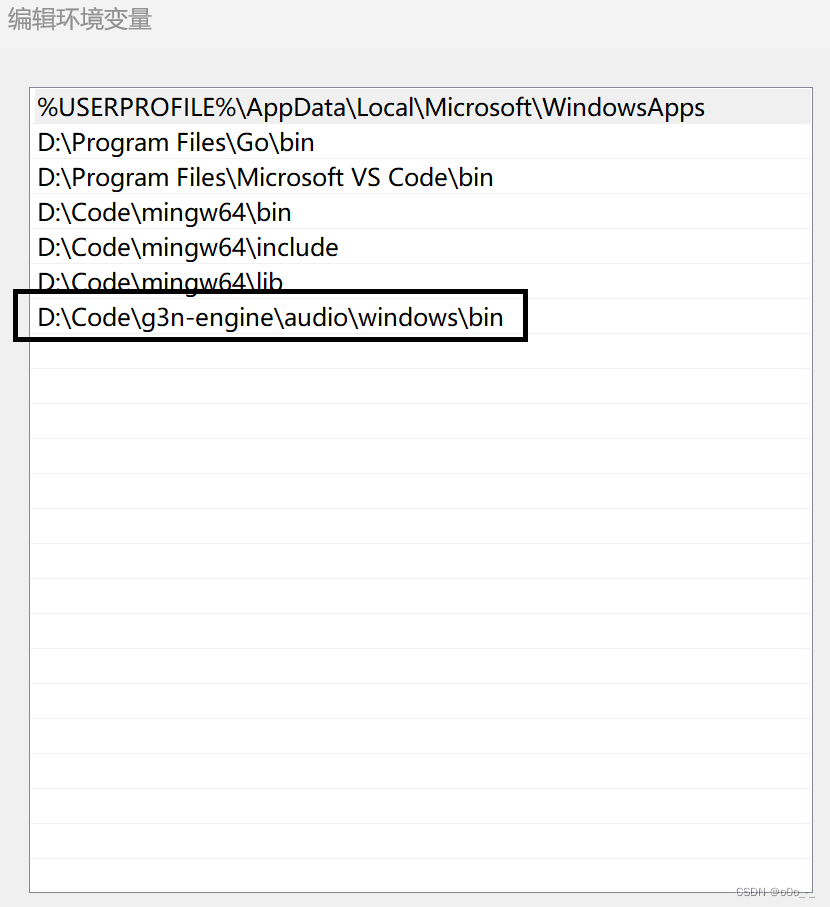
- 下载后将文件解压,并添加环境变量(主要是
bin、include、lib)


- 然后下载g3n源代码
同样添加下环境变量git clone https://github.com/g3n/engine g3n-engine

- 重启
- 然后可以开始
install了cd g3n-engine go install ./...
测试
- 创建一个空文件加,创建一个main.go 文件
package main import ( "time" "github.com/g3n/engine/app" "github.com/g3n/engine/camera" "github.com/g3n/engine/core" "github.com/g3n/engine/geometry" "github.com/g3n/engine/gls" "github.com/g3n/engine/graphic" "github.com/g3n/engine/gui" "github.com/g3n/engine/light" "github.com/g3n/engine/material" "github.com/g3n/engine/math32" "github.com/g3n/engine/renderer" "github.com/g3n/engine/util/helper" "github.com/g3n/engine/window" ) func main() { // 创建app a := app.App() // 创建scene scene := core.NewNode() // 设置gui控制器 gui.Manager().Set(scene) // 创建相机 cam := camera.New(1) cam.SetPosition(0, 0, 3) scene.Add(cam) // 初始化相机控制器 camera.NewOrbitControl(cam) // 设置窗口回调 onResize := func(evname string, ev interface{}) { // Get framebuffer size and update viewport accordingly width, height := a.GetSize() a.Gls().Viewport(0, 0, int32(width), int32(height)) // Update the camera's aspect ratio cam.SetAspect(float32(width) / float32(height)) } a.Subscribe(window.OnWindowSize, onResize) onResize("", nil) // 添加一个蓝色甜甜圈 geom := geometry.NewTorus(1, .4, 12, 32, math32.Pi*2) mat := material.NewStandard(math32.NewColor("DarkBlue")) mesh := graphic.NewMesh(geom, mat) scene.Add(mesh) // 添加一个改变甜甜圈颜色的按钮 btn := gui.NewButton("Make Red") btn.SetPosition(100, 40) btn.SetSize(40, 40) btn.Subscribe(gui.OnClick, func(name string, ev interface{}) { mat.SetColor(math32.NewColor("DarkRed")) }) scene.Add(btn) // 添加光照 scene.Add(light.NewAmbient(&math32.Color{1.0, 1.0, 1.0}, 0.8)) pointLight := light.NewPoint(&math32.Color{1, 1, 1}, 5.0) pointLight.SetPosition(1, 0, 2) scene.Add(pointLight) // 添加坐标系显示 scene.Add(helper.NewAxes(0.5)) // 设置灰色背景色 a.Gls().ClearColor(0.5, 0.5, 0.5, 1.0) // 运行应用 a.Run(func(renderer *renderer.Renderer, deltaTime time.Duration) { a.Gls().Clear(gls.DEPTH_BUFFER_BIT | gls.STENCIL_BUFFER_BIT | gls.COLOR_BUFFER_BIT) renderer.Render(scene, cam) }) } - 初始化
go mod init test go mod tidy - 运行
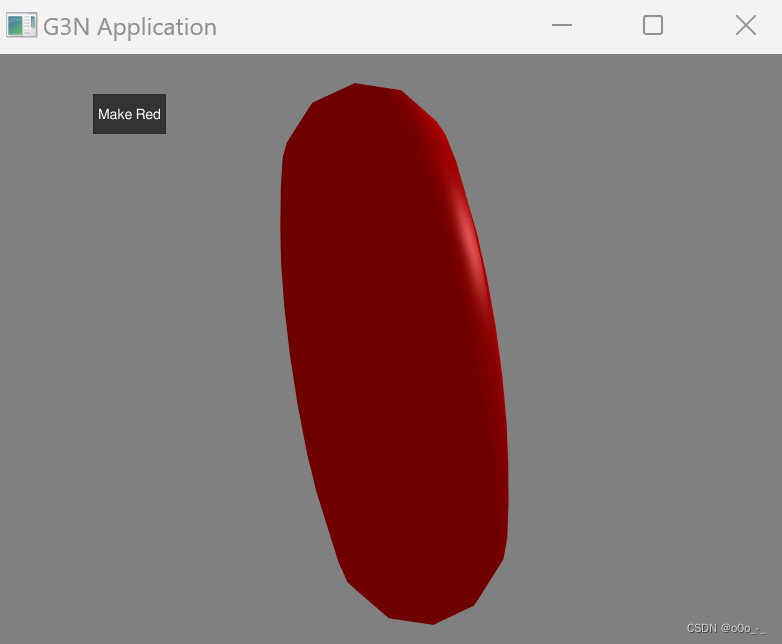
go run main.go
- 内存和cpu

文章来源:https://blog.csdn.net/qq_33446100/article/details/135032940
本文来自互联网用户投稿,该文观点仅代表作者本人,不代表本站立场。本站仅提供信息存储空间服务,不拥有所有权,不承担相关法律责任。 如若内容造成侵权/违法违规/事实不符,请联系我的编程经验分享网邮箱:chenni525@qq.com进行投诉反馈,一经查实,立即删除!
本文来自互联网用户投稿,该文观点仅代表作者本人,不代表本站立场。本站仅提供信息存储空间服务,不拥有所有权,不承担相关法律责任。 如若内容造成侵权/违法违规/事实不符,请联系我的编程经验分享网邮箱:chenni525@qq.com进行投诉反馈,一经查实,立即删除!
最新文章
- Python教程
- 深入理解 MySQL 中的 HAVING 关键字和聚合函数
- Qt之QChar编码(1)
- MyBatis入门基础篇
- 用Python脚本实现FFmpeg批量转换
- 动态规划基础 ——装箱问题
- Vue3+Vite+Cesium项目开发心得(实时更新)
- C语言例题5
- OSI 的七层模型都有哪些?
- 自然语言处理1——探索自然语言处理的基础 - Python入门篇
- 仓库管理用什么软件?盘点10款顶级的WMS仓库管理软件
- 2024年腾讯云轻量服务器优惠价格多少钱?
- 基于稀疏表示的小波变换多光谱图像融合算法matlab仿真
- 小程序系列--11.小程序自定义组件
- 【STM32】STM32学习笔记-按键控制LED 光敏传感器控制蜂鸣器(08)