Maya-UE xgen-UE 毛发导入UE流程整理
发布时间:2023年12月28日
首先声明:maya建议用2022版本及一下,因为要用到Python 2 ,Maya2023以后默认是Python3不再支持Python2;
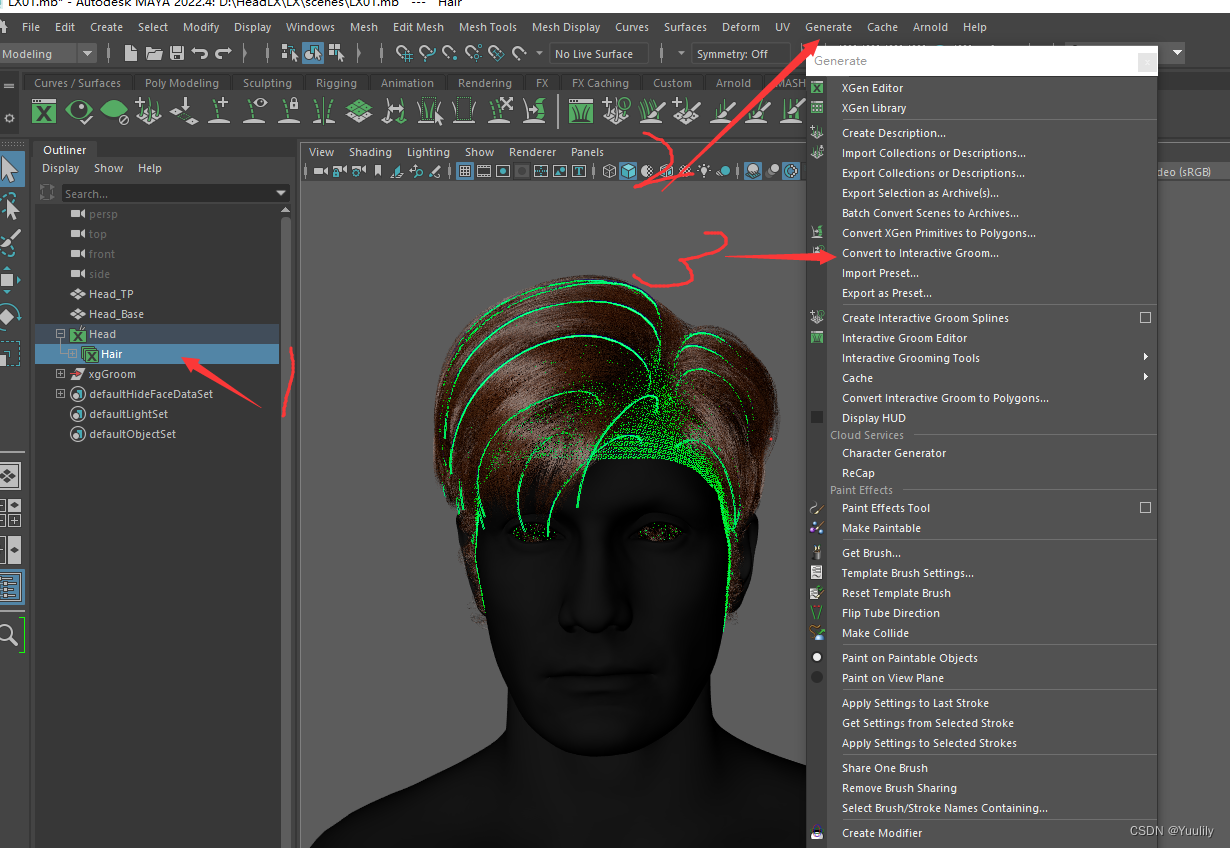
第一步:Xgen做好的毛发转成交互式Groom
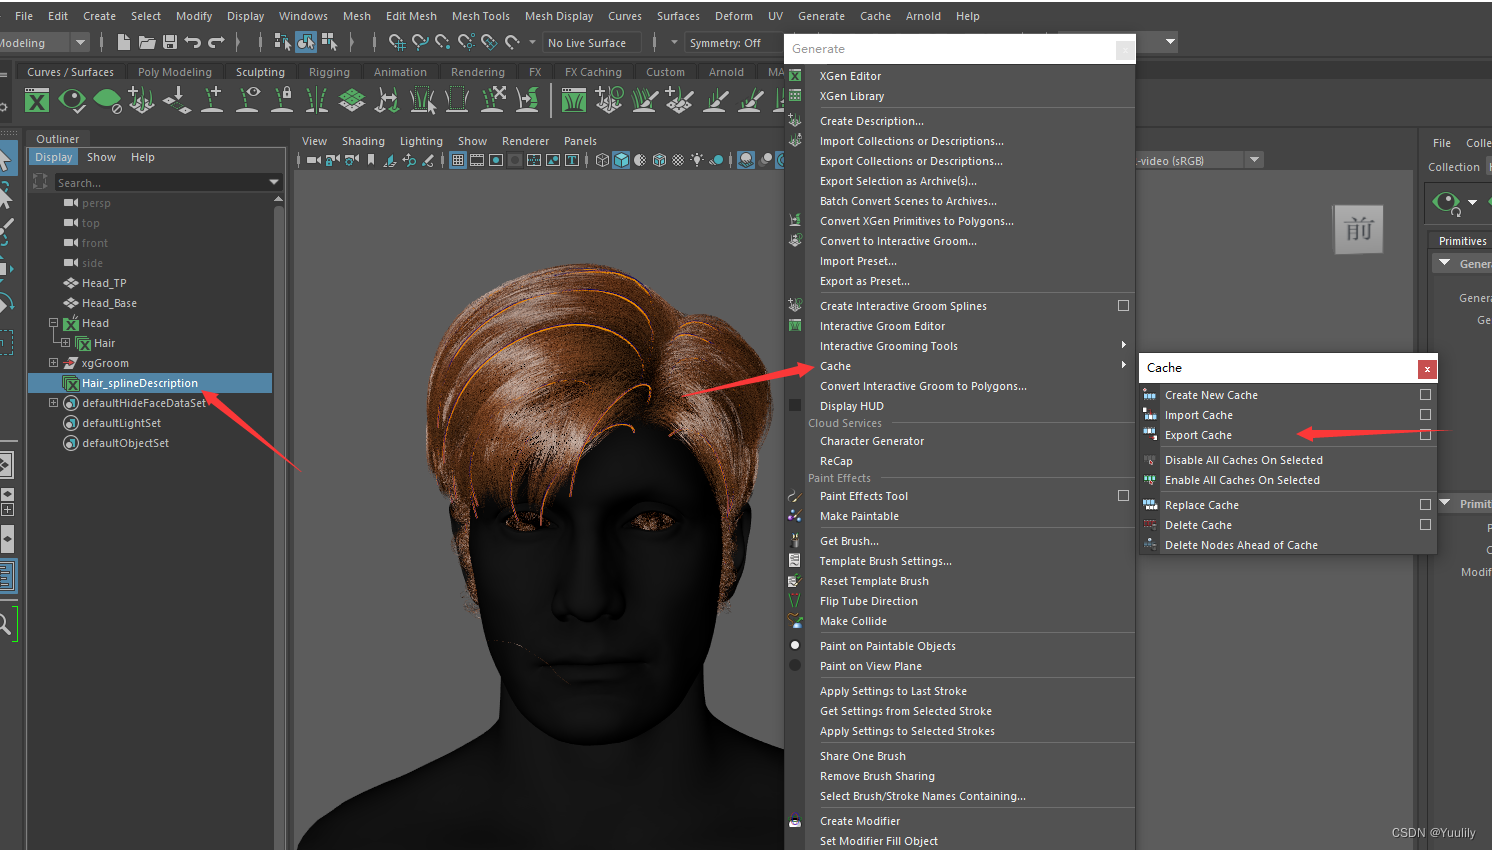
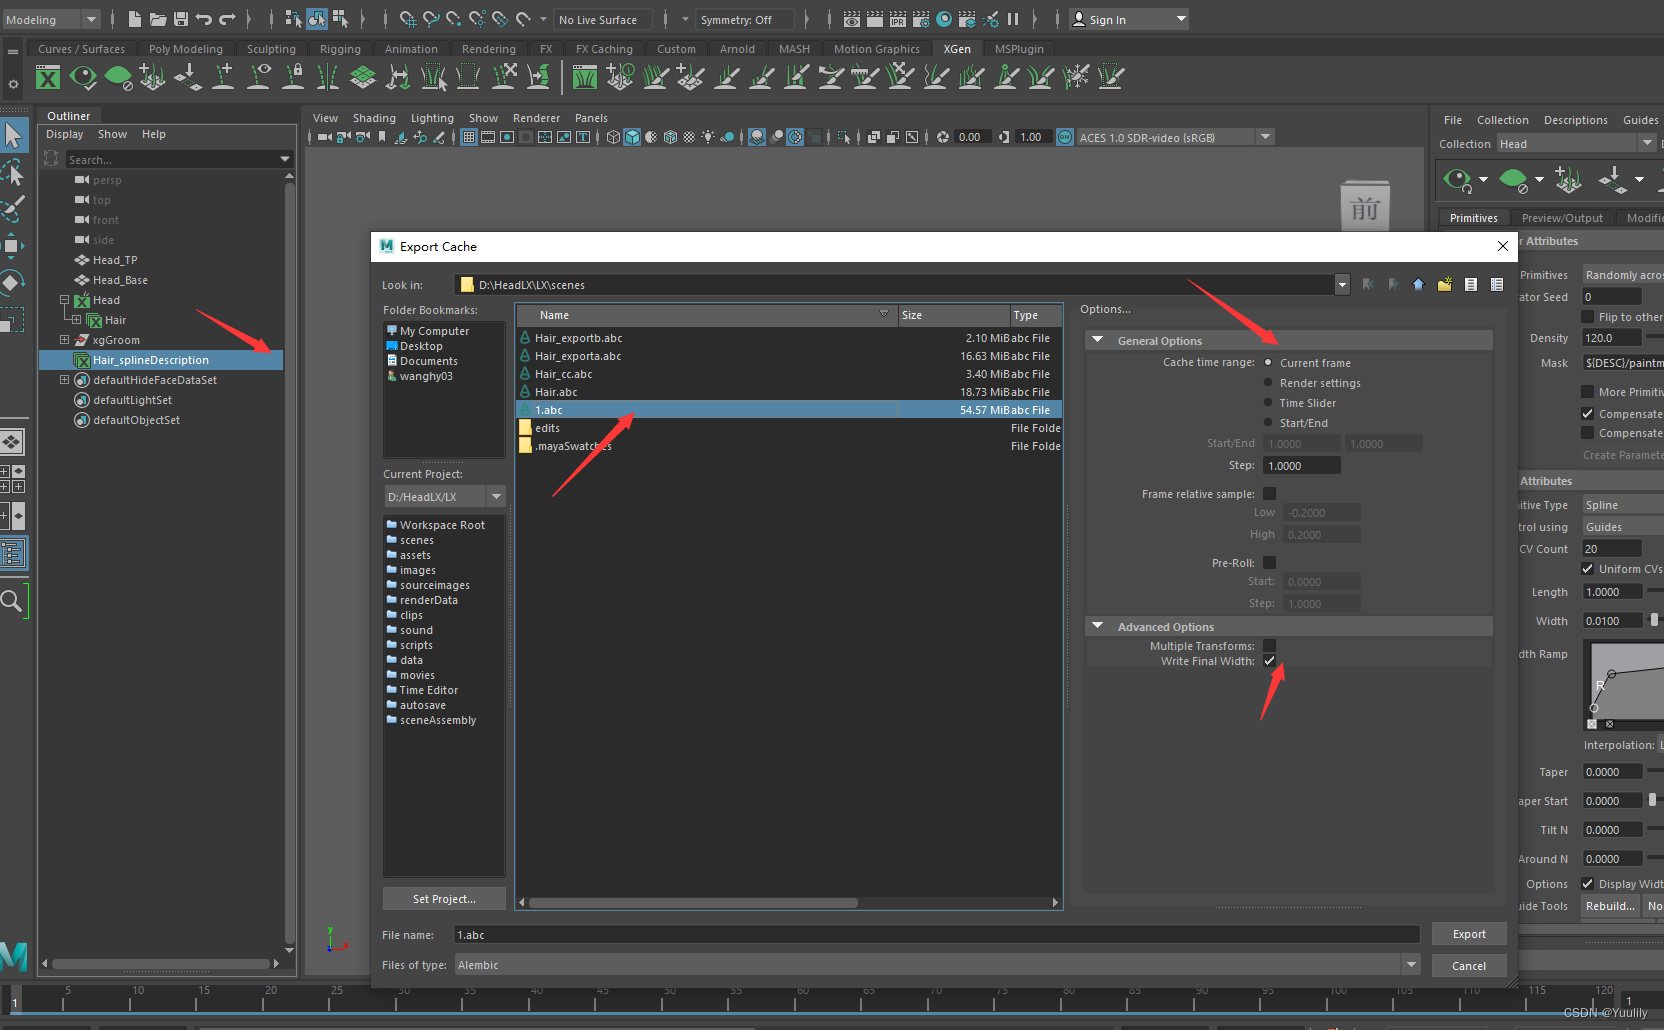
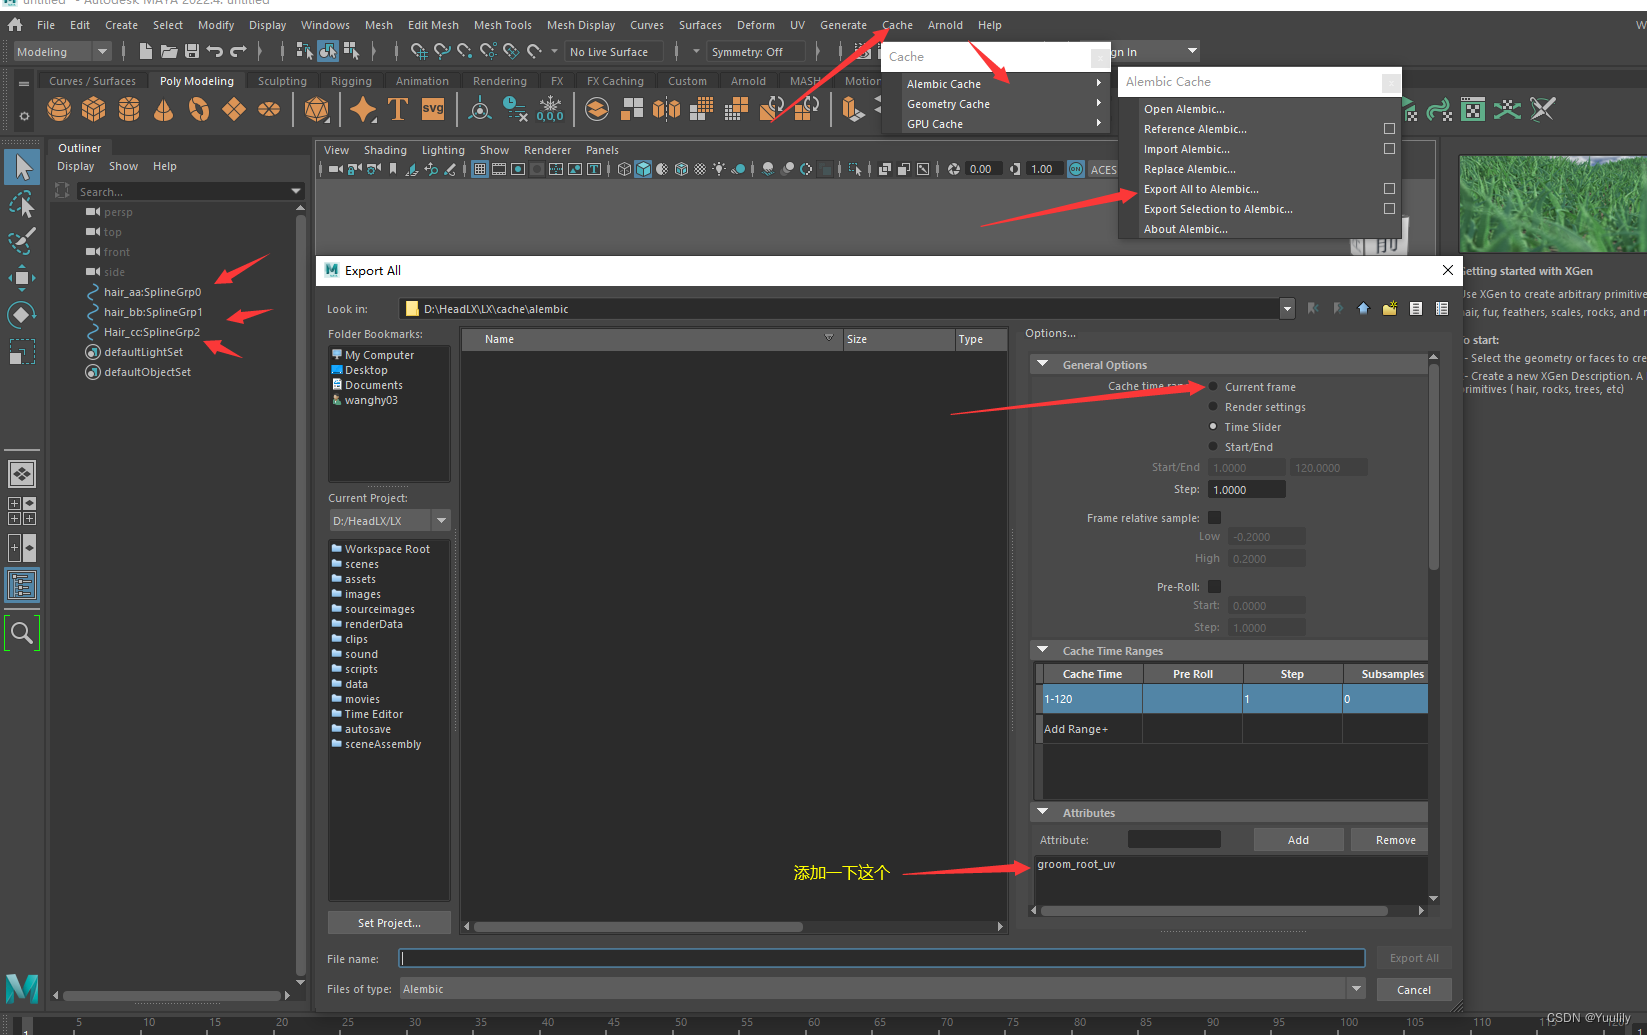
第二步:导出刚生成的交互式Groom缓存,需要设置一下当前帧,和写入宽度;到这里其实就可以直接导入到UE了,为了后面能做多颜色毛发和渐变毛发可以继续看,如果不需要,到这一步就可以直接打开UE导入了,按照后面的流程导入UE就可以了!
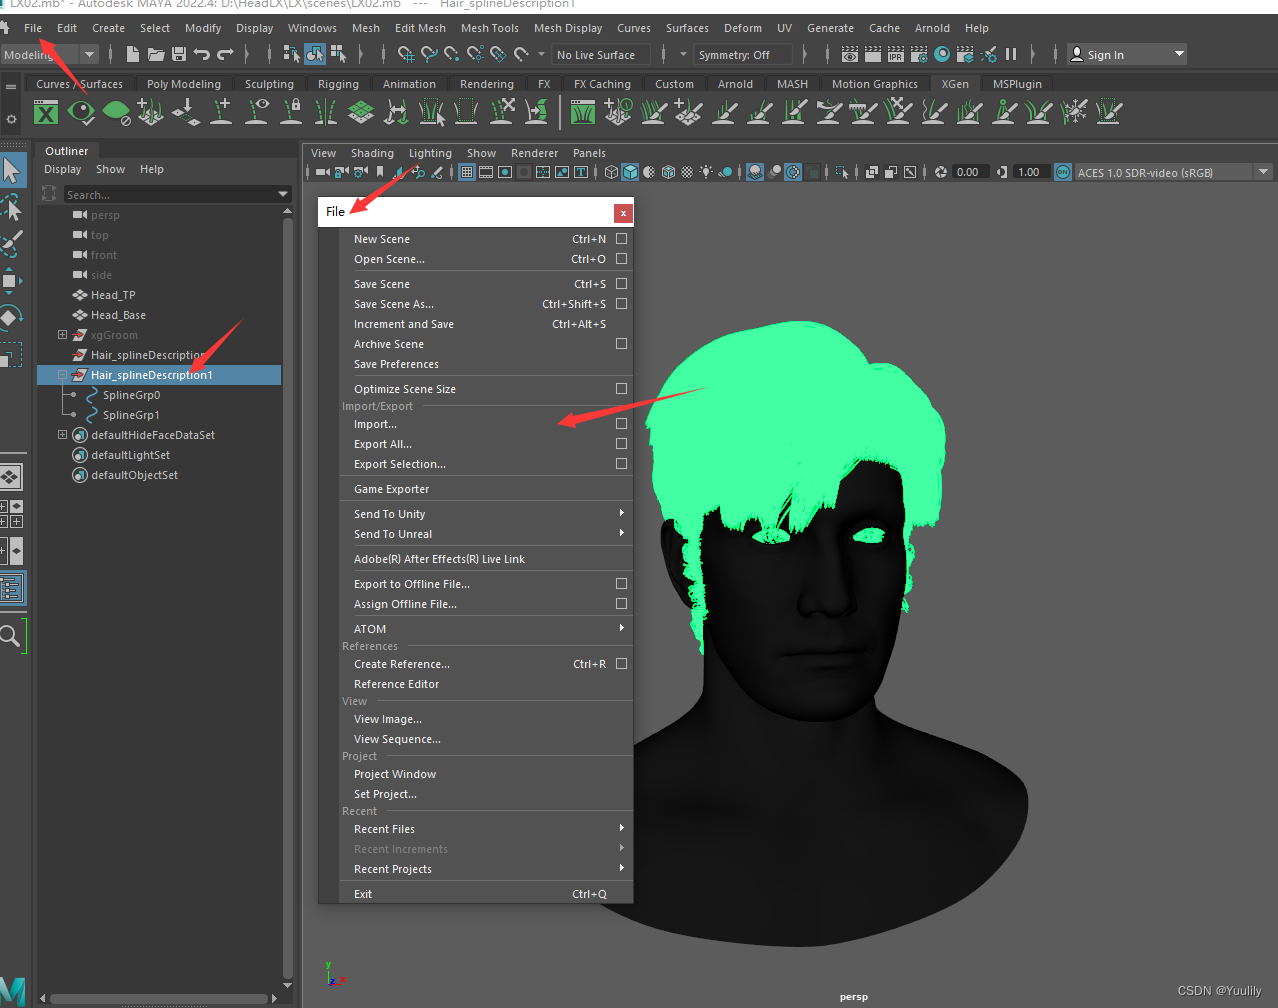
第三步:导入刚刚导出的缓存文件,导入后会根据毛发数量自动分组;
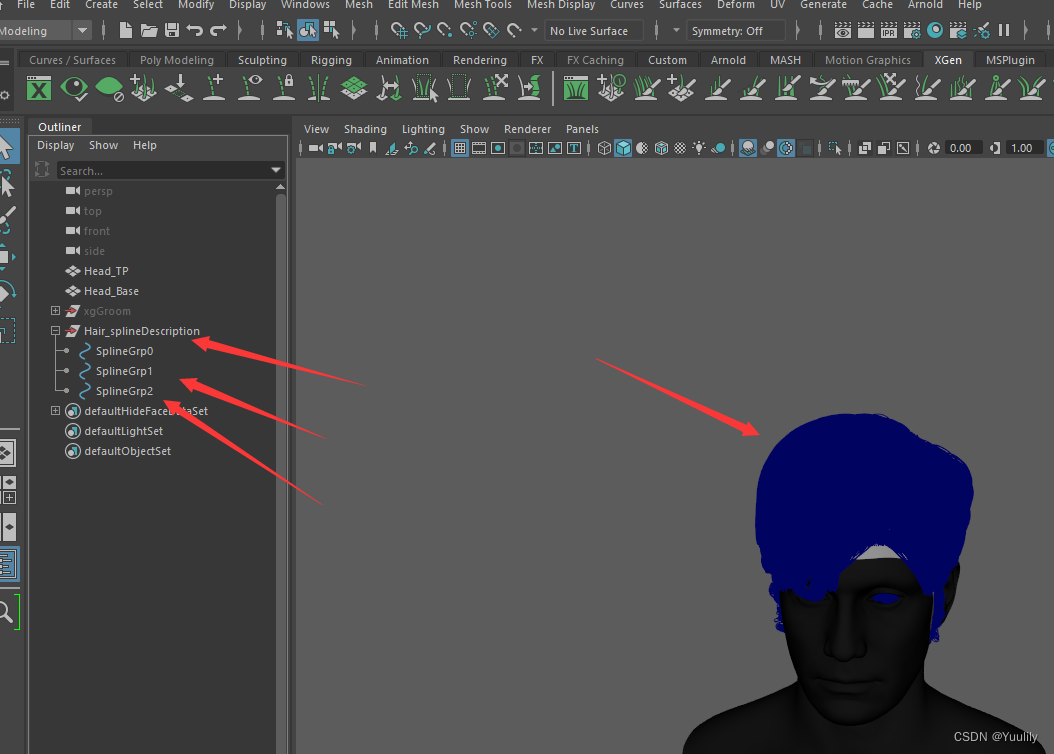
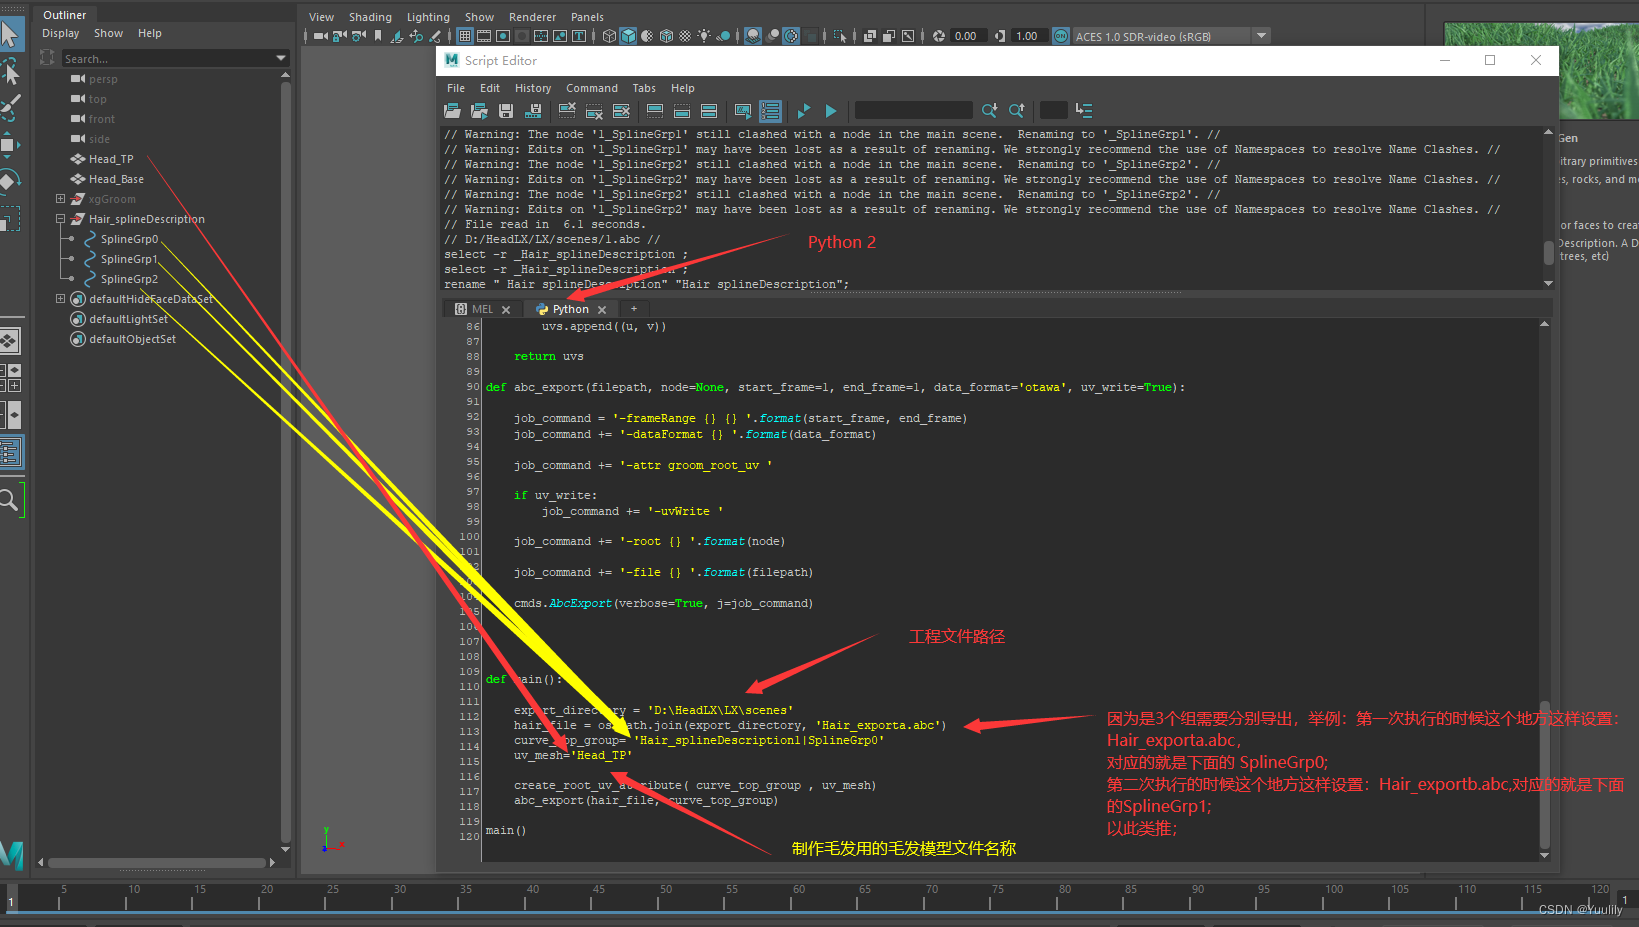
第四步:利用官方文档的Python脚本分别重新导出这三个分好组的缓存文件,这一步的目的是为了让缓存文件拥有UV,方便进去UE后根据需求继续调整(举例做渐变毛发和多颜色毛发);可以直接复制,有几个代码需要修改,看说明;
from maya import cmds
from maya import OpenMaya
import os


def create_root_uv_attribute(curves_group, mesh_node, uv_set='map1'):
    '''
    Create "groom_root_uv" attribute on group of curves.
    '''

    # check curves group
    if not cmds.objExists(curves_group):
        raise RuntimeError('Group not found: "{}"'.format(curves_group))

    # get curves in group
    curve_shapes = cmds.listRelatives(curves_group, shapes=True, noIntermediate=True)
    curve_shapes = cmds.ls(curve_shapes, type='nurbsCurve')
    if not curve_shapes:
        raise RuntimeError('Invalid curves group. No nurbs-curves found in group.')
    else:
        print "found curves"
        print curve_shapes

    # get curve roots
    points = list()
    for curve_shape in curve_shapes:
        point = cmds.pointPosition('{}.cv[0]'.format(curve_shape), world=True)
        points.append(point)

    # get uvs
    values = list()
    uvs = find_closest_uv_point(points, mesh_node, uv_set=uv_set)
    for u, v in uvs:
        values.append([u, v, 0])
        #print (str(u) + " , " + str(v)  )

    # create attribute
    name = 'groom_root_uv'
    cmds.addAttr(curves_group, ln=name, dt='vectorArray')
    cmds.addAttr(curves_group, ln='{}_AbcGeomScope'.format(name), dt='string')
    cmds.addAttr(curves_group, ln='{}_AbcType'.format(name), dt='string')

    cmds.setAttr('{}.{}'.format(curves_group, name), len(values), *values, type='vectorArray')
    cmds.setAttr('{}.{}_AbcGeomScope'.format(curves_group, name), 'uni', type='string')
    cmds.setAttr('{}.{}_AbcType'.format(curves_group, name), 'vector2', type='string')

    return uvs

def find_closest_uv_point(points, mesh_node, uv_set='map1'):
    '''
    Find mesh UV-coordinates at given points.
    '''

    # check mesh
    if not cmds.objExists(mesh_node):
        raise RuntimeError('Node not found: "{}"'.format(mesh_node))

    # check uv_set
    uv_sets = cmds.polyUVSet(mesh_node, q=True, allUVSets=True)
    if uv_set not in uv_sets:
        raise RuntimeError('Invalid uv_set provided: "{}"'.format(uv_set))

    # get mesh as dag-path
    selection_list = OpenMaya.MSelectionList()
    selection_list.add(mesh_node)

    mesh_dagpath = OpenMaya.MDagPath()
    selection_list.getDagPath(0, mesh_dagpath)
    mesh_dagpath.extendToShape()

    # get mesh function set
    fn_mesh = OpenMaya.MFnMesh(mesh_dagpath)

    uvs = list()
    for i in range(len(points)):

        script_util = OpenMaya.MScriptUtil()
        script_util.createFromDouble(0.0, 0.0)
        uv_point = script_util.asFloat2Ptr()

        point = OpenMaya.MPoint(*points[i])
        fn_mesh.getUVAtPoint(point, uv_point, OpenMaya.MSpace.kWorld, uv_set)

        u = OpenMaya.MScriptUtil.getFloat2ArrayItem(uv_point, 0, 0)
        v = OpenMaya.MScriptUtil.getFloat2ArrayItem(uv_point, 0, 1)

        uvs.append((u, v))

    return uvs

def abc_export(filepath, node=None, start_frame=1, end_frame=1, data_format='otawa', uv_write=True):

    job_command = '-frameRange {} {} '.format(start_frame, end_frame)
    job_command += '-dataFormat {} '.format(data_format)

    job_command += '-attr groom_root_uv '

    if uv_write:
        job_command += '-uvWrite '

    job_command += '-root {} '.format(node)

    job_command += '-file {} '.format(filepath)

    cmds.AbcExport(verbose=True, j=job_command)


def main():

    export_directory = 'D:/Dev/Ref'
    hair_file = os.path.join(export_directory, 'hair_export.abc')
    curve_top_group= 'description1|SplineGrp0'
    uv_mesh='pPlane1'

    create_root_uv_attribute( curve_top_group , uv_mesh)
    abc_export(hair_file, curve_top_group)

main()
第五步:由于是分别导出的3个文件,因为三个分别导入UE有些麻烦也没必要,需要重新整合一下;重新开一个新的maya文件,把3个缓存文件重新导入到新的maya里面,再次整体导出一个缓存文件;这里需要添加一个groom_root_UV(说明 :groom_root_uv属性为每根头发指定它所附加到的基础网格uv。该属性是可选的,如果未指定,将使用球形贴图在引擎中自动生成一个根UV)
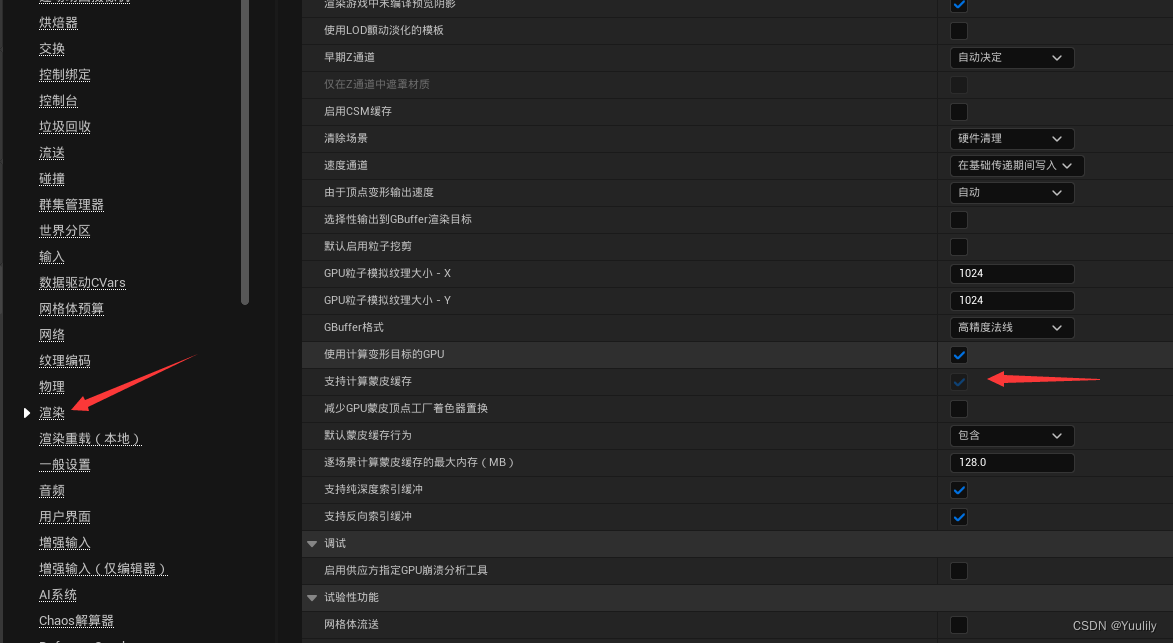
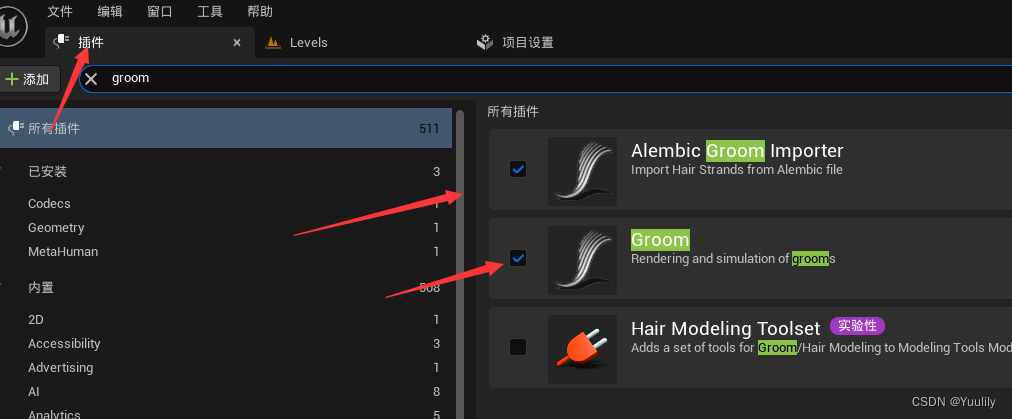
第六步:导入UE,需要设置一下项目设置和插件;
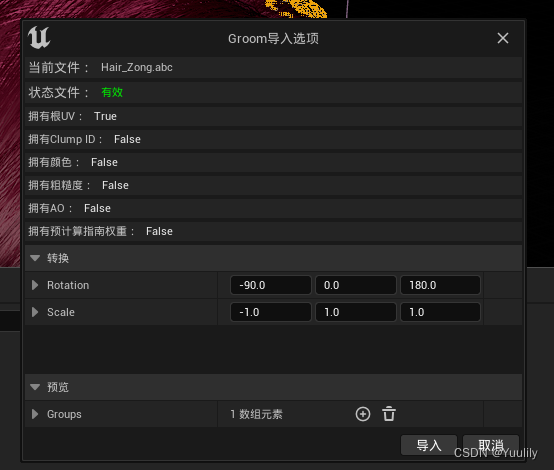
然后导入窗口的旋转设置一下;
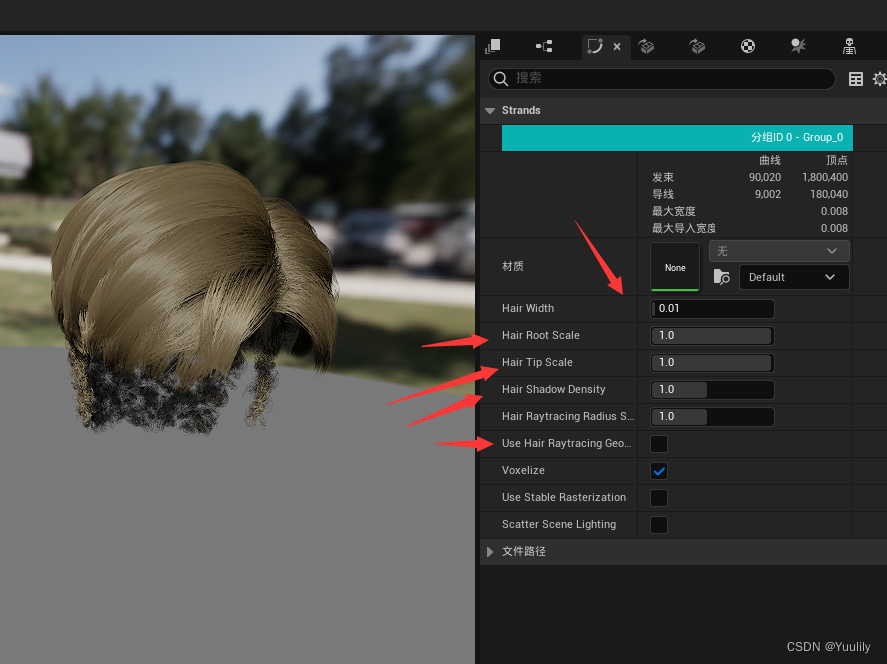
这里可以设置一下基础属性;
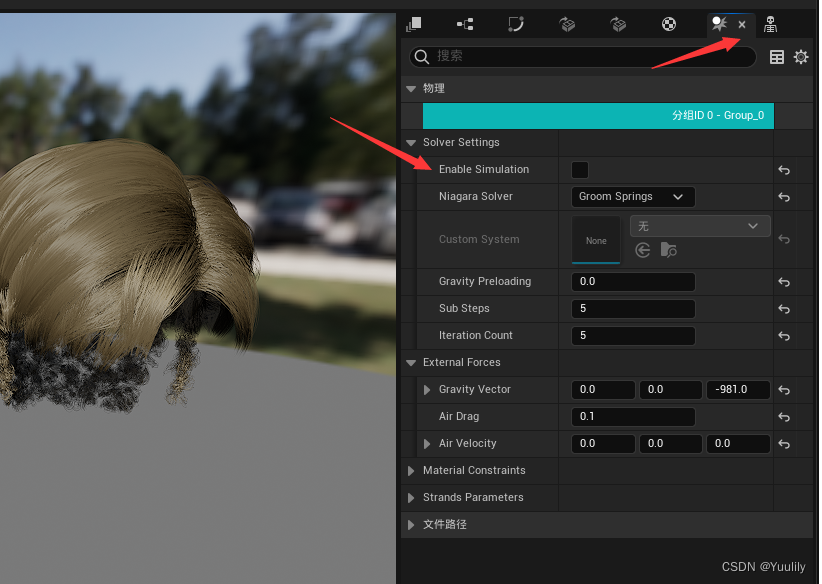
这里可以开启物理模拟;
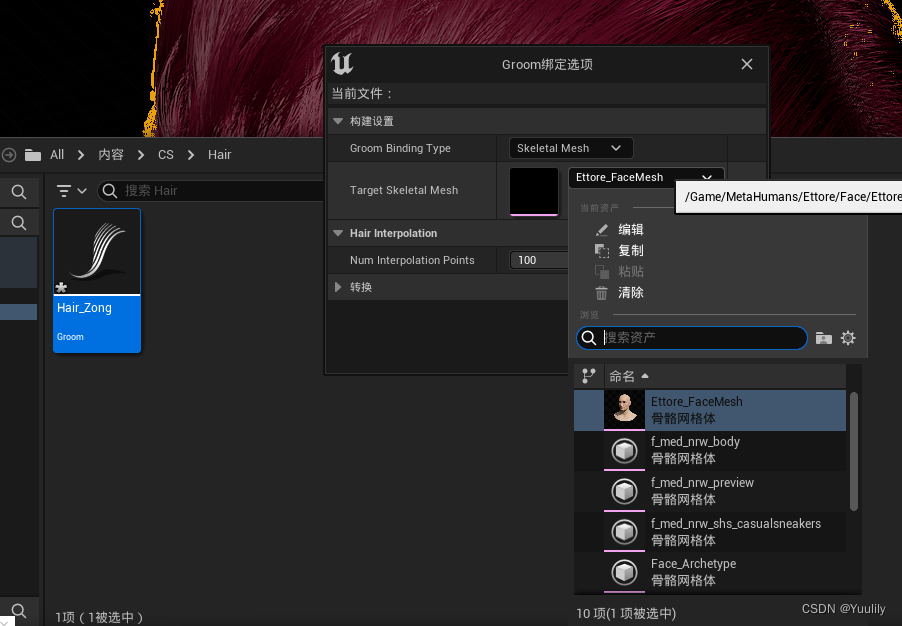
 可以创建绑定;这样就可以替换默认的头发了,也可以通道添加组件添加到骨骼模型上;
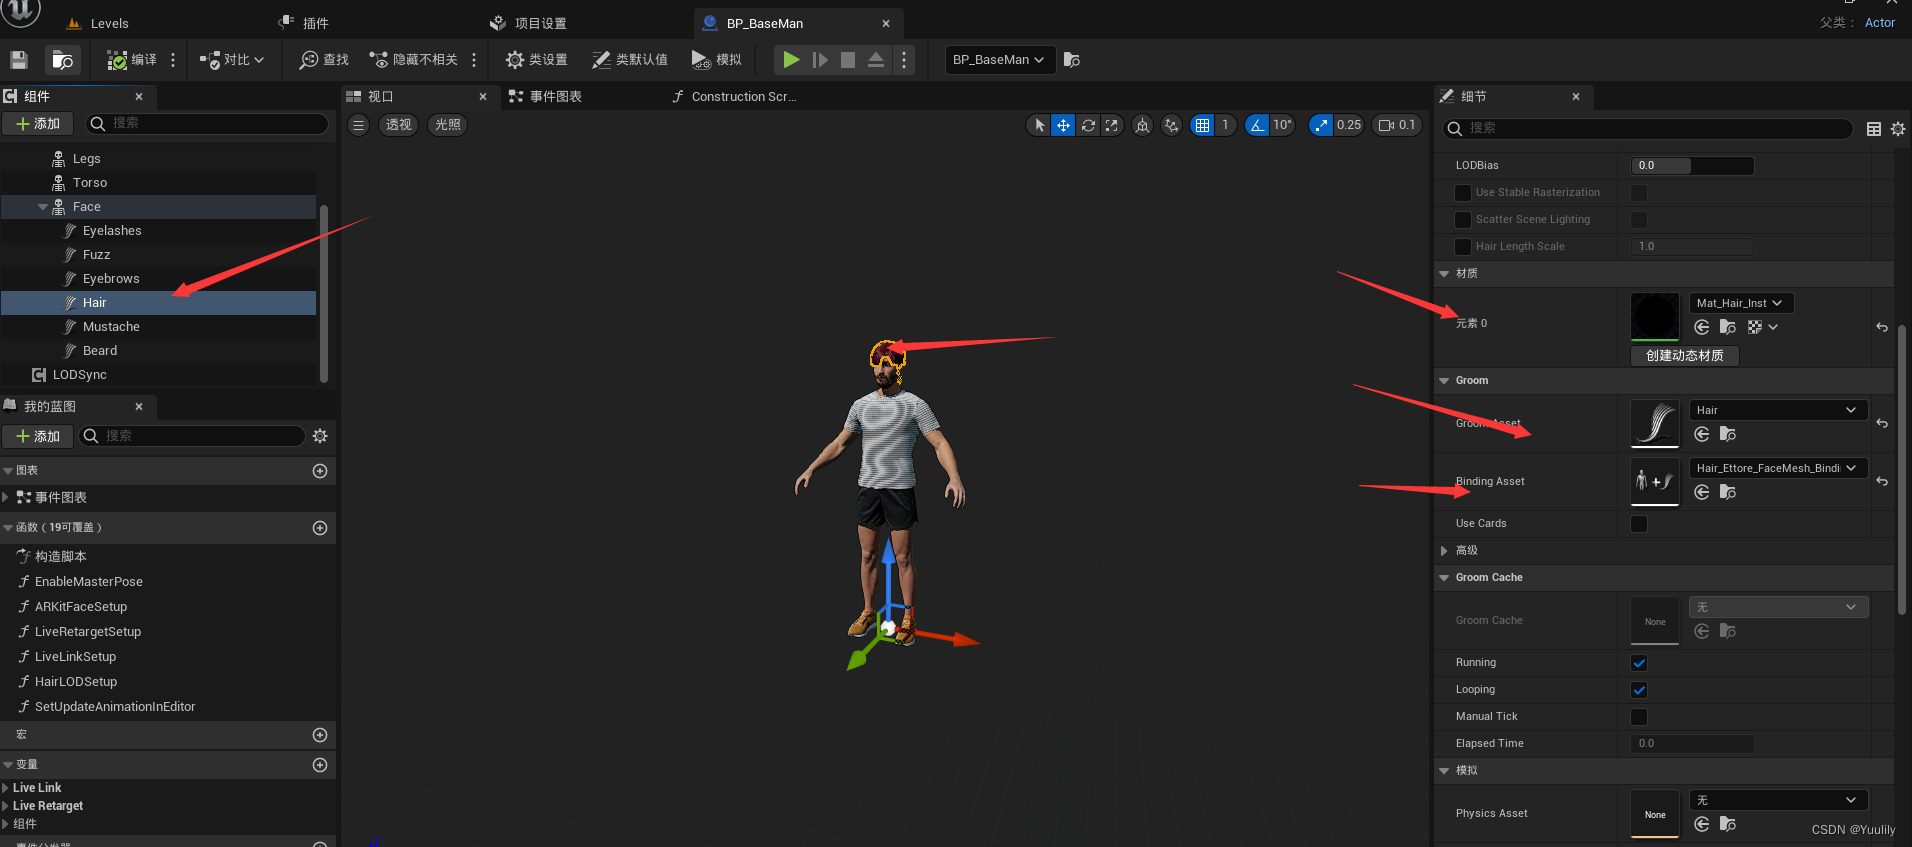
打开角色蓝图,就可以替换之前的模型资产和材质了;
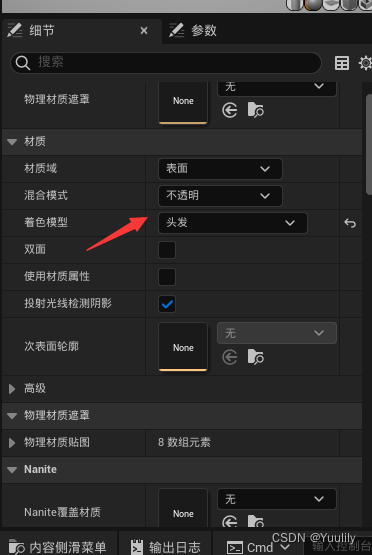
材质球设置:
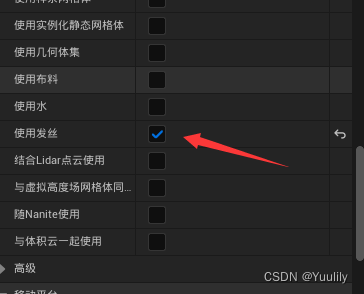
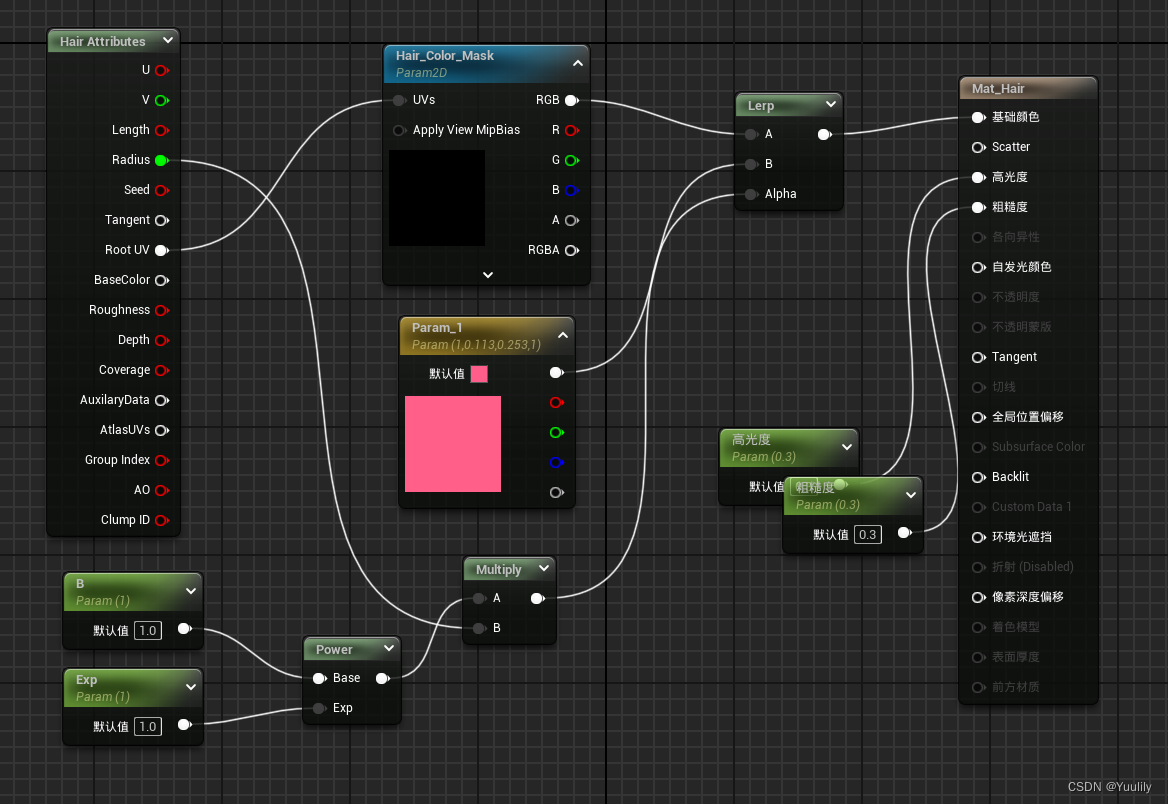
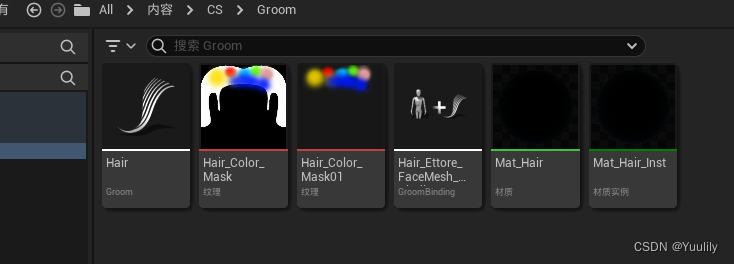
这里可以通过绘画贴图来实现不同颜色的发色;
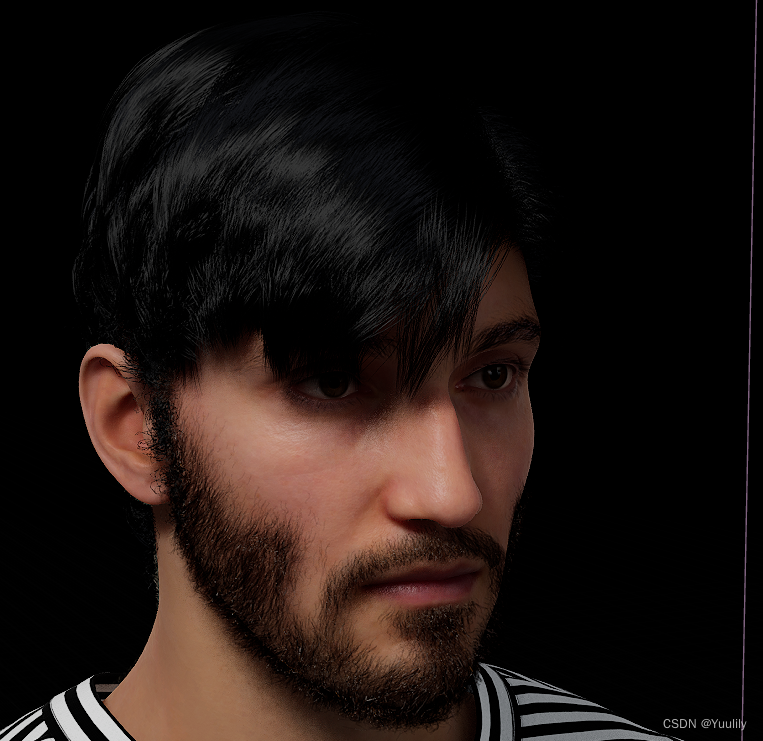
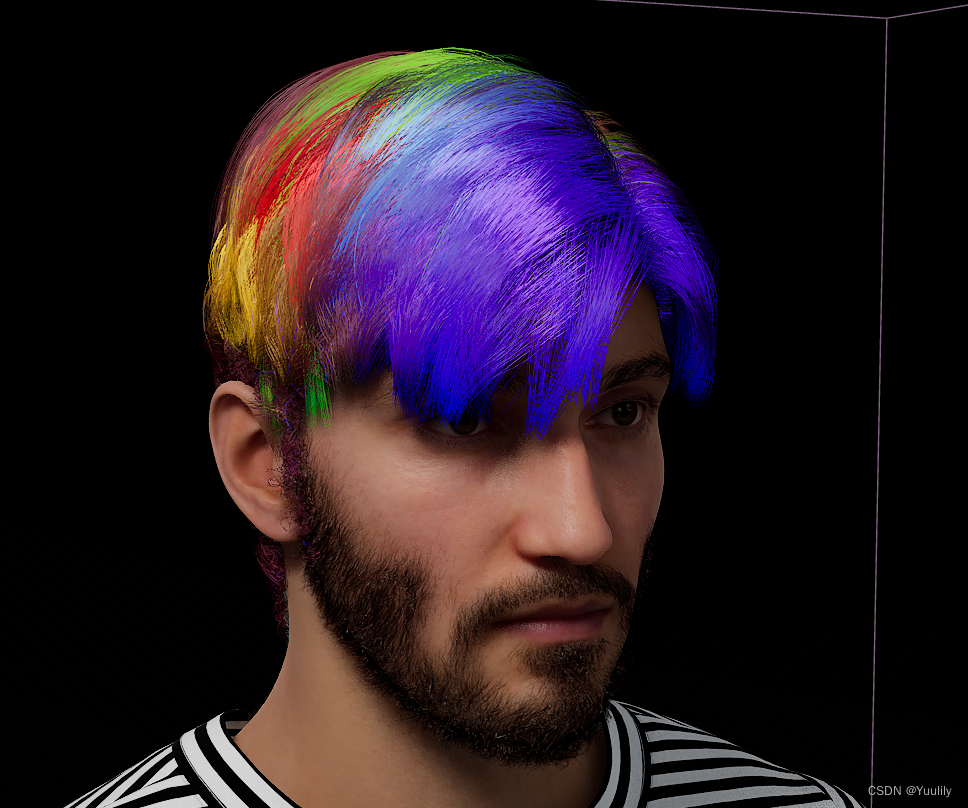
文章来源:https://blog.csdn.net/qq_39947564/article/details/135272651
本文来自互联网用户投稿,该文观点仅代表作者本人,不代表本站立场。本站仅提供信息存储空间服务,不拥有所有权,不承担相关法律责任。 如若内容造成侵权/违法违规/事实不符,请联系我的编程经验分享网邮箱:chenni525@qq.com进行投诉反馈,一经查实,立即删除!
本文来自互联网用户投稿,该文观点仅代表作者本人,不代表本站立场。本站仅提供信息存储空间服务,不拥有所有权,不承担相关法律责任。 如若内容造成侵权/违法违规/事实不符,请联系我的编程经验分享网邮箱:chenni525@qq.com进行投诉反馈,一经查实,立即删除!
最新文章
- Python教程
- 深入理解 MySQL 中的 HAVING 关键字和聚合函数
- Qt之QChar编码(1)
- MyBatis入门基础篇
- 用Python脚本实现FFmpeg批量转换
- 如何拥有一个自己的公网IP地址
- 30天精通Nodejs--第十五天:Websocket
- QT UI自动化测试(1)
- 自营商城与多商户入驻商城功能与开发流程_OctShop
- Pytorch基础:nn模块与网络创建——卷积模块的使用
- PyQt5实现学生管理系统第三天
- YOLOv8涨点技巧:一种新颖的多尺度滑窗注意力,助力小目标和遥感影像场景
- STM32 SPI通信协议3——读取MAX6675温度传感器
- Huffuman 树(0009)
- C语言浮点类型、值和精度范围