Squid代理服务器
发布时间:2024年01月02日
1、代理的工作机制
????????当客户机通过代理来请求Web页面时,指定的代理服务器会先检查自己的缓存,如果缓存中已经有客户机需要的页面,则直接将缓存中的页面内容反馈给客户机;如果缓存中没有客户机要访问的页面,则由代理服务器向Internet发送访问请求,获得返回的Web页面以后,将页面数据保存到缓存中并发送给客户机。
2、安装及运行控制
2.1、编译安装Squid
? ? ? ??配置Squid的编译选项时,将安装目录设为/usr/local/squid。
[root@localhost ~]# tar zxf squid-3.5.23.tar.gz
[root@localhost ~]# cd squid-3.5.23/
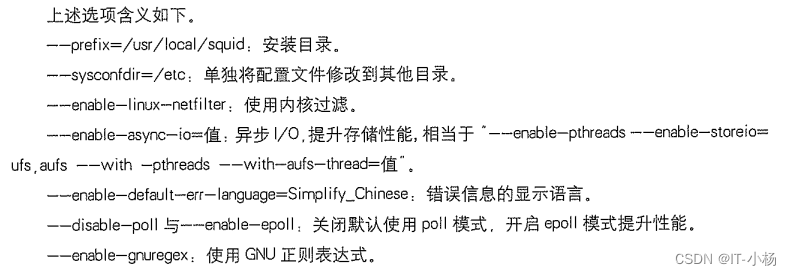
[root@localhost squid-3.5.23]# ./configure --prefix=/usr/local/squid --sysconfdir=/etc --enable-linux-netfilter --enable-async-io=240 --enable-default-err-language=Simplify_Chinese --disable-poll --enable-epoll --enable-gnuregex
[root@localhost squid-3.5.23]# make
[root@localhost squid-3.5.23]# make install

安装完后,创建链接文件、创建用户和组
[root@localhost ~]# ln -s /usr/local/squid/sbin/* /usr/local/sbin/
[root@localhost ~]# useradd -M -s /sbin/nologin squid
[root@localhost ~]# chown -R squid:squid /usr/local/squid/var/
2.2、 Squid的配置文件
????????通常情况下,配置文件中不包括cache_ffective_user与cache_effective_group配置项,需要手动添加,否则启动不成功。

?2.3、Squid的运行控制
1)检查配置文件语法是否正确
[root@localhost ~]# squid -k parse
2)启动、停止Squid
? ? ? ? 第一次启动Squid服务时,会自动初始化缓存目录。在没有可用的Squid脚本的情况下,也可以直接调用Squid程序来启动服务,这时需要先进行初始化。
[root@localhost ~]# squid -z  //-z选项用来初始化缓存目录
[root@localhost ~]# squid  //启动squid服务
????????确认Squid服务处于正常监听状态
[root@localhost ~]# netstat -anpt | grep squid
tcp6 0 0 :::3128 :::* LISTEN 52304/(squid-1) ?3)使用Squid服务脚本
????????为了使Squid服务的启动、停止、重载等操作更加方便,可以编写Squid服务脚本,并使用chkconfig和systemctl 工具来进行管理。
[root@localhost ~]# cat /etc/init.d/squid
#!/bin/bash
# chkconfig: 2345 90 25
# config: /etc/squid.conf
# pidfile: /usr/local/squid/var/run/squid.pid
# Description: Squid - Internet Object Cache.
PID="/usr/local/squid/var/run/squid.pid"
CONF="/etc/squid.conf"
CMD="/usr/local/squid/sbin/squid"
case "$1" in
  start)
      netstat -anpt | grep squid &> /dev/null
	  if [ $? -eq 0 ]
	  then
	    echo "Squid is running"
		  else
		echo "正在启动squid..."
		$CMD
	  fi
  ;;
  stop)
       $CMD -k kill &> /dev/null
	   rm -rf $PID &> /dev/null
  ;;
  status)
       [ -f $PID ] &> /dev/null
	         if [ $? -eq 0 ]
			   then
	   netstat -anpt | grep squid
	         else
			   echo "Squid is not running."
			 fi
  ;;
  restart)
      $0 stop &> /dev/null
	   echo "正在关闭squid..."
	           $0 start &> /dev/null
	   echo "正在启动squid..."
  ;;
  reload)
      $CMD -k reconfigure
  ;;
  check)
	  $CMD -k parse
  ;;
  *)
       echo "用法:$0 {start | stop | restart | reload | check | status}"
  ;;
esac
[root@localhost ~]# chmod +x /etc/init.d/squid
[root@localhost ~]# chkconfig --add squid
[root@localhost ~]# systemctl restart squid
3、构建代理服务器
3.1、Squid服务器的配置
1)修改squid.conf配置文件
[root@localhost ~]# vim /etc/squid.conf

reply_body_max_size 10 MB  //允许下载的最大文件大小(10MB)
http_access allow all  //放在http_access deny all之前

2)重载squid服务
[root@localhost ~]# systemctl restart squid
3.2、客户机的代理配置
????????使用【ctrl+r】打开cmd工具,输入"control"打开控制面板,按照下面操作进行设置代理服务器的IP地址和端口号


3.3、代理服务的验证方法
1)查看Squid访问日志的新增记录
[root@localhost ~]# tail -f /usr/local/squid/var/logs/access.log
1704184961.350   5173 192.168.136.11 TCP_TUNNEL/200 589 CONNECT h.trace.qq.com:443 - HIER_DIRECT/113.240.72.96 -
1704184974.554  21002 192.168.136.11 TAG_NONE/503 0 CONNECT arc.msn.com:443 - HIER_NONE/- -
1704184974.554  21002 192.168.136.11 TAG_NONE/503 0 CONNECT arc.msn.com:443 - HIER_NONE/- -
1704184974.556  21004 192.168.136.11 TAG_NONE/503 0 CONNECT arc.msn.com:443 - HIER_NONE/- -
1704184974.556  21004 192.168.136.11 TAG_NONE/503 0 CONNECT arc.msn.com:443 - HIER_NONE/- -
?4、构建透明代理服务器
4.1、配置Squid支持透明代理
????????Squid服务的默认配置并不支持透明代理,因此需要调整相关设置

?4.2、设置firewalld的重定向策略
[root@localhost ~]# systemctl start firewalld
[root@localhost ~]# firewall-cmd --zone=external --add-interface=ens37 --permanent
[root@localhost ~]# firewall-cmd --zone=internal --add-interface=ens33 --permanent
[root@localhost ~]# firewall-cmd --zone=external --add-service=http --permanent
[root@localhost ~]# firewall-cmd --zone=external --add-service=https --permanent
[root@localhost ~]# firewall-cmd --zone=external --add-port=3128/tcp --permanent
[root@localhost ~]# firewall-cmd --direct --add-rule ipv4 nat PREROUTING 0 -i ens37 -p tcp --dport 80 -j REDIRECT --to-ports 3128
[root@localhost ~]# firewall-cmd --direct --add-rule ipv4 nat PREROUTING 0 -i ens37 -p tcp --dport 443 -j REDIRECT --to-ports 3128
[root@localhost ~]# firewall-cmd --runtime-to-permanent
文章来源:https://blog.csdn.net/hey1616/article/details/135342780
本文来自互联网用户投稿,该文观点仅代表作者本人,不代表本站立场。本站仅提供信息存储空间服务,不拥有所有权,不承担相关法律责任。 如若内容造成侵权/违法违规/事实不符,请联系我的编程经验分享网邮箱:chenni525@qq.com进行投诉反馈,一经查实,立即删除!
本文来自互联网用户投稿,该文观点仅代表作者本人,不代表本站立场。本站仅提供信息存储空间服务,不拥有所有权,不承担相关法律责任。 如若内容造成侵权/违法违规/事实不符,请联系我的编程经验分享网邮箱:chenni525@qq.com进行投诉反馈,一经查实,立即删除!
最新文章
- Python教程
- 深入理解 MySQL 中的 HAVING 关键字和聚合函数
- Qt之QChar编码(1)
- MyBatis入门基础篇
- 用Python脚本实现FFmpeg批量转换
- 【12.24】转行小白历险记-刷算法03
- 【快速全面掌握 WAMPServer】04.人生初体验
- 算法--插值法
- gavk225-GAVJ305是什么片子(220v转变5v输出)
- 可直接将视频转文字的工具,速到快到离谱!
- SpringBoot Starter机制(自定义Start案例,实际开发场景中的短信模拟,AOP实现日志打印)
- 3D摄影棚布光:Set A Light 3D Studio
- 网络面试题总结
- SVG 文件的引入方式之一:以 URL 的方式引入 SVG 文件,vue2、vue3+Vite vite-svg-loader
- 简单Web UI 自动化测试框架 seldom