Jetson Orin安装riva以及llamaspeak,使用 Riva ASR/TTS 与 Llama 进行实时交谈,大语言模型成功运行笔记
NVIDIA 的综合语音 AI 工具包 RIVA 可以处理这种情况。此外,RIVA 可以构建应用程序,在本地设备(如 NVIDIA Jetson)上处理所有这些内容。
RIVA 是一个综合性库,包括:
- 自动语音识别 (ASR)
- 文本转语音合成 (TTS)
- 神经机器翻译 (NMT)(语言到语言的翻译,例如英语到西班牙语)
- 自然语言处理 (NLP) 服务的集合,例如命名实体识别 (NER)、标点符号和意图分类。
RIVA 在运行 JetPack 5 及更高版本的 Jetson Orin 和 Xavier 系列处理器上运行。在视频中,我们使用的是Jetson Orin模组和国产载板,usb免驱声卡和麦克风耳机。
riva和ngc的安装和测试
安装
通常,我们不涵盖演练安装。然而,这已经足够具有挑战性了,值得写这篇文章。RIVA 目前处于 Jetsons 的测试阶段(表示为 ARM64 或嵌入在 NVIDIA 文档中的多个位置)。您可能会发现,随着时间的流逝,某些方向会发生变化。
话虽如此,如果您是初学者,这可能有点困难。我们假设您正在关注视频。所以我尽可能的多写一些步骤。
RIVA 快速入门指南
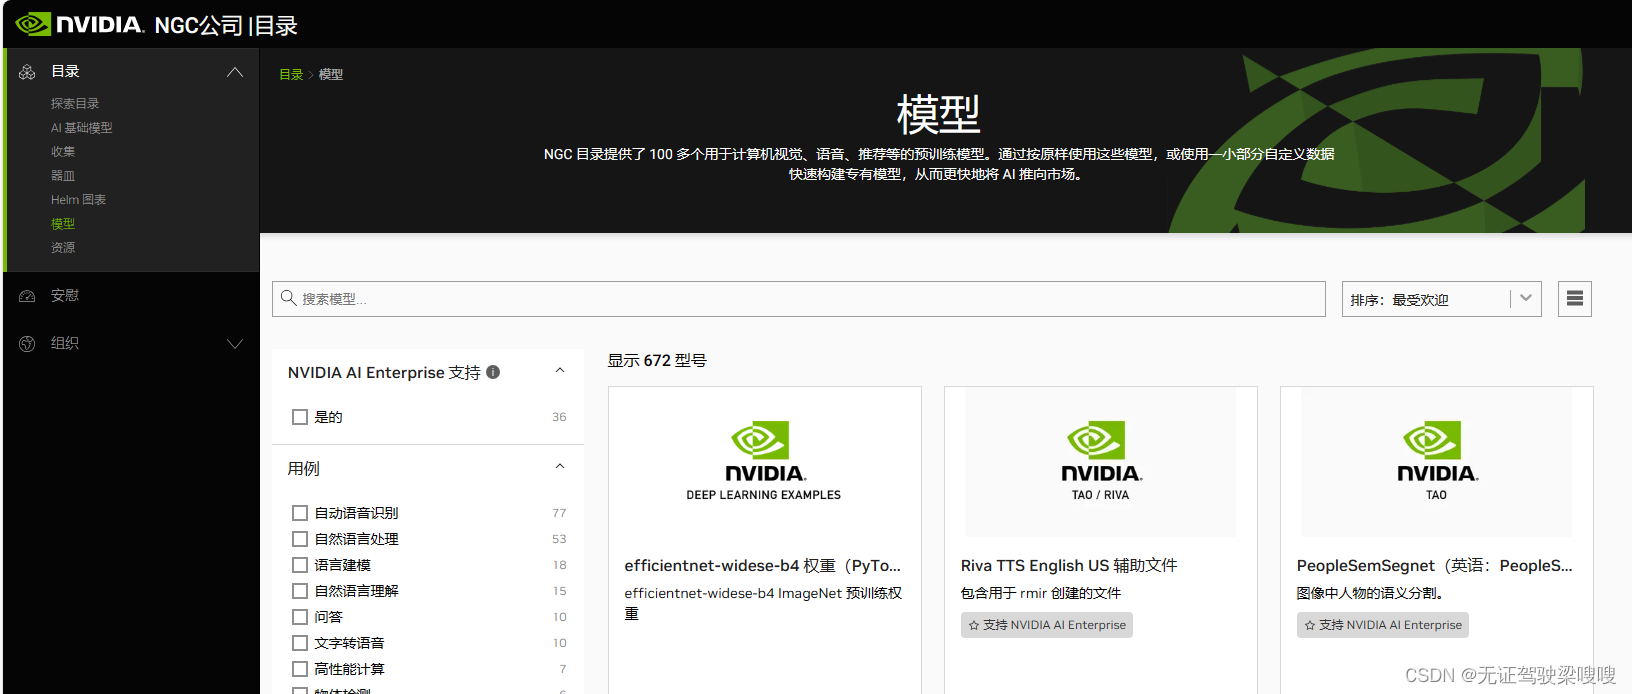
您需要遵循?RIVA 快速入门指南。您应该能够按照操作,从“嵌入式”部分开始。您需要访问?NVIDIA NGC。NVIDIA NGC 是 NVIDIA AI 的仓库。NGC 需要一个免费的开发者帐户。NVIDIA有几个关于设置帐户和获取开发者密钥的视频:

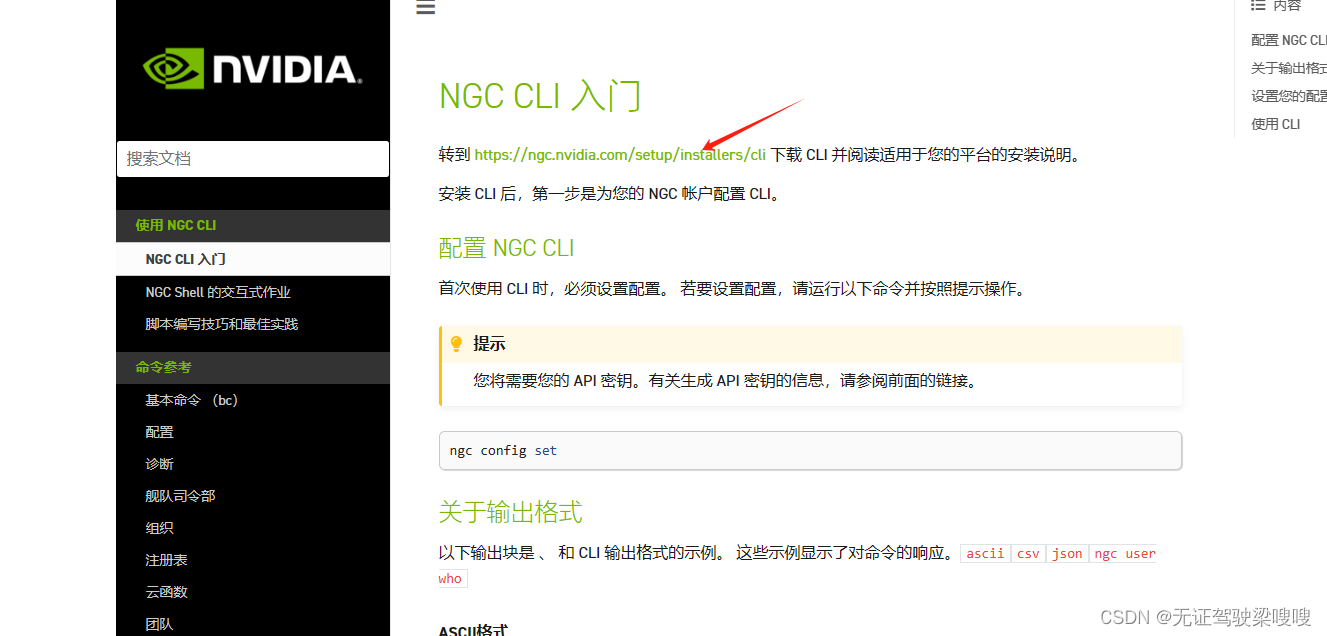
NGC CLI 入门 — ngc-cli documentation (nvidia.com)


ARM64 Linux Install
The NGC CLI binary for ARM64 is supported on Ubuntu 18.04 and later distributions.

Click Download CLI to download the zip file that contains the binary, then transfer the zip file to a directory where you have permissions and then unzip and execute the binary. You can also download, unzip, and install from the command line by moving to a directory where you have execute permissions and then running the following command:

wget --content-disposition https://api.ngc.nvidia.com/v2/resources/nvidia/ngc-apps/ngc_cli/versions/3.35.0/files/ngccli_arm64.zip -O ngccli_arm64.zip && unzip ngccli_arm64.zip
Check the binary's md5 hash to ensure the file wasn't corrupted during download:

find ngc-cli/ -type f -exec md5sum {} + | LC_ALL=C sort | md5sum -c ngc-cli.md5
Check the binary's SHA256 hash to ensure the file wasn't corrupted during download. Run the following command

sha256sum ngccli_arm64.zip
Compare with the following value, which can also be found in the Release Notes of the Resource:

9f67759be0397d3b25eca09aeb2d3b4b7077e0c924a3198351ea75965bdec22f
After verifying value, make the NGC CLI binary executable and add your current directory to path:

chmod u+x ngc-cli/ngc
$ echo "export PATH=\"\$PATH:$(pwd)/ngc-cli\"" >> ~/.bash_profile && source ~/.bash_profile
You must configure NGC CLI for your use so that you can run the commands.

Enter the following command, including your API key when prompted:

ngc config set
ARM64 Uninstall:
Warning: If you choose to have a custom path for your installation, or move the CLI Binary, these instructions may not be safe.

For CLI versions 3.0.0 and up:

Check .dirname `which ngc`
If this directory can be deleted, move to the next step. If not, move to step 3.

Delete the NGC CLI directory:
Enter the following command.

dirname `which ngc` | xargs rm -r
Delete the NGC CLI Binary. Enter the following command.
which ngc | xargs rm
This does not delete all files downloaded from the initial NGC CLI installation. Please go to the original installation folder and delete it.
具体而言,本快速入门指南使您能够在本地工作站上部署预训练模型并运行示例客户端。
Riva Speech AI Skills 支持两种架构,Linux x86_64 和 Linux ARM64。在本文档中,它们被称为数据中心?(x86_64) 和嵌入式?(ARM64)。
有关更多信息和问题,请访问?NVIDIA Riva 开发者论坛。
先决条件
在使用 Riva Speech AI 之前,请确保您满足以下先决条件:
数据中心
嵌入式
-
您有权访问并登录 NVIDIA NGC。有关分步说明,请参阅?NGC 入门指南。
-
您可以访问 NVIDIA Jetson Orin、NVIDIA Jetson AGX Xavier 或 NVIDIA Jetson NX Xavier?。有关详细信息,请参阅支持矩阵。
-
您已在 Jetson 平台上安装了 NVIDIA JetPack? 版本 5.1 或 5.1.1。有关详细信息,请参阅支持矩阵。
-
Jetson 上有 ~15 GB 的可用磁盘空间,这是默认容器和模型所要求的。如果要部署任何 Riva 模型中间表示 (RMIR) 模型,则所需的额外磁盘空间为 ~14 GB 加上 RMIR 模型的大小。
-
您已在 Jetson 平台上启用以下电源模式。这些模式激活所有 CPU 内核,并以最大频率为 CPU/GPU 提供时钟,以实现最佳性能。
sudo nvpmodel -m 0 (Jetson Orin AGX, mode MAXN) sudo nvpmodel -m 0 (Jetson Xavier AGX, mode MAXN) sudo nvpmodel -m 2 (Jetson Xavier NX, mode MODE_15W_6CORE) -
您已通过在文件中添加以下行将默认运行时设置为在 Jetson 平台上。编辑文件后,使用重新启动 Docker 服务。
nvidia/etc/docker/daemon.jsonsudo?systemctl?restart?docker"default-runtime": "nvidia"
启用最大性能
如果您想要访问NVIDIA Jetson AGX Orin的全部性能,可以启用最大性能模式:这将在增加电力消耗的情况下最大化应用程序性能。
sudo nvpmodel -m 0将CPU、GPU和EMC时钟的静态最大频率设置为最大
sudo jetson_clocks禁用桌面图形用户界面(GUI)
我们可以禁用桌面环境以节省RAM上的内存。
sudo systemctl set-default multi-user.target然后重启
sudo reboot利用下列命令再启用GUI
sudo systemctl set-default graphical.target然后重启Jetson板子
sudo reboot性能监控工具 - jtop
Jetson Stats是由Raffaello Bonghi开发的一个具有漂亮界面的实用工具。
您可以使用以下命令进行安装:
sudo -H pip install -U jetson-stats然后运行
jtop运行截屏:
可供部署的模型
有两个按钮式部署选项可用于部署 Riva 语音 AI,它们使用 NGC 目录中提供的预训练模型:
本地 Docker:您可以使用快速入门脚本设置本地工作站并使用 Docker 部署 Riva 服务。继续阅读本指南以使用快速入门脚本。
Kubernetes 接口:Riva Helm Chart?旨在自动执行一键部署到 Kubernetes 集群的步骤。有关详细信息,请参阅?Kubernetes 部署。嵌入不支持此选项。
除了使用预训练模型外,Riva Speech AI 还可以使用?NVIDIA NeMo?与微调的自定义模型一起运行。有关使用 NVIDIA NeMo 创建模型存储库的高级选项的详细信息,请参阅“使用 NeMo 进行模型开发”部分。
使用快速启动脚本进行本地部署#
Riva 包含快速入门脚本,可帮助您开始使用 Riva 语音 AI 技能。这些脚本用于在本地部署服务、测试和运行示例应用程序。
-
下载脚本。转到 Riva?Data center?或?Embedded?快速入门,具体取决于您使用的平台。选择“文件浏览器”选项卡以下载脚本,或使用?NGC CLI 工具从命令行下载。
数据中心
ngc registry resource download-version nvidia/riva/riva_quickstart:2.14.0
嵌入式Jetson
ngc registry resource download-version nvidia/riva/riva_quickstart_arm64:2.14.0
注意:本教程使用?riva_quickstart_arm64_v2.12.1,最新版镜像拉不起来一直,本人遇到的第一个坑,小白就要多被坑。
2.初始化并启动 Riva。初始化步骤下载并准备 Docker 映像和模型。启动脚本将启动服务器。
注意
在平均互联网连接上,此过程可能需要长达一个小时。在数据中心,每个模型在下载后都会针对目标 GPU 进行单独优化。在嵌入式平台上,会下载 NVIDIA Jetson 上 GPU 的预优化模型。
自选:使用首选配置修改目录中的文件。选项包括:config.shquickstart
-
要启用哪些服务
-
从NGC检索哪些型号
-
将它们存放在哪里
-
如果系统上安装了多个 GPU,则使用哪个 GPU(有关详细信息,请参阅本地 (Docker))
-
SSL/TLS 证书的位置
-
密钥文件(如果使用安全连接)
切换到 riva_quickstart 目录并修改 config.sh 以满足您的需求。完成此操作后,您就可以初始化服务器并下载模型了。注意这里需要使用?sudo,这与文档不同:
?
sudo bash riva_init.sh要在 Docker 容器中启动 RIVA 服务器,有一个方便的脚本:
bash riva_start.sh
安装 RIVA Python 客户端
RIVA Python 客户端位于 Github 上。在开始安装之前,请确保已安装 pip。它在 Ubuntu 存储库中被命名为 python3-pip。
注意:您应该为自己的开发过程修改它。例如,您可能希望使用 Python 虚拟环境。
您还需要安装 testresources 和 portaudio 库。然后将用户添加到关联的组:
pip3 install testresources

sudo apt install portaudio19-dev

pip3 install pyaudio

sudo adduser $USER audio

sudo adduser $USER pulse-access

newgrp pulse-access
然后安装 python-clients 存储库。按照 README 文件中的说明进行操作。这是我们在视频中遵循的一个序列,以供参考。在执行此操作之前,请确保您位于顶级目录中。?
 git clone https://github.com/nvidia-riva/python-clients.git
$ cd python-clients
$ git submodule init
$ git submodule update --remote --recursive
$ pip install -r requirements.txt
$ python3 setup.py bdist_wheel
$ pip install --force-reinstall dist/*.whl
$ pip install nvidia-riva-client
?测试RIVA客户端是否正常使用:

python3 talk.py --play-audio --text 'Speech is now the component of many different applications. Sometimes speech is integrated into devices, like Apple’s SIRI or Google. Speech may be also be placed in devices like the Amazon Alexa. These devices work in much the same way. First there is a wake-up word processed locally, like “Hey Siri!”. Subsequent voice commands are round tripped to a server. The server processes the voice commands (Automatic Speech Recognition or ASR) then returns a response.' --voice English-US.Female-1
?usb声卡提前插好,热插拔不支持的话会无法识别,本人遇到的第二坑
Llamaspeak - 使用NVIDIA Riva ASR和TTS进行实时语音对话?
根据这里的指导(https://github.com/dusty-nv/jetson-containers/tree/master/packages/llm/llamaspeak)去安装?llamaspeak.
自己找可能会找错,我就找错了。遇到的第三坑
https://github.com/dusty-nv/jetson-containers/tree/master/packages/llm/llamaspeak
在进一步操作之前,请确保从Hugging Face下载了模型。Meta的LLaMA是当今最受欢迎的开源LLM(大型语言模型)之一。因此,我们可以下载LLaMA2的量化70B模型。
一旦Riva服务器状态为运行中,请打开另一个终端并执行以下命令:?

手动指定要加载的模型,而无需使用 Web UI:
./run.sh --workdir /opt/text-generation-webui $(./autotag text-generation-webui:1.7) \
   python3 server.py --listen --verbose --api \
	--model-dir=/data/models/text-generation-webui \
	--model=llama-2-13b-chat.Q4_K_M.gguf \
	--loader=llamacpp \
	--n-gpu-layers=128 \
	--n_ctx=4096 \
	--n_batch=4096 \
	--threads=$(($(nproc) - 2))
?末端运行下面提示就成功了:
llm_load_print_meta: model params     = 68.98 B
llm_load_print_meta: model size       = 38.58 GiB (4.80 BPW)
llm_load_print_meta: general.name   = LLaMA v2
llm_load_print_meta: BOS token = 1 '<s>'
llm_load_print_meta: EOS token = 2 '</s>'
llm_load_print_meta: UNK token = 0 '<unk>'
llm_load_print_meta: LF token  = 13 '<0x0A>'
llm_load_tensors: ggml ctx size =    0.26 MiB
llm_load_tensors: using CUDA for GPU acceleration
llm_load_tensors: mem required  =  140.89 MiB
llm_load_tensors: offloading 80 repeating layers to GPU
llm_load_tensors: offloading non-repeating layers to GPU
llm_load_tensors: offloaded 83/83 layers to GPU
llm_load_tensors: VRAM used: 39362.61 MiB
....................................................................................................
llama_new_context_with_model: n_ctx      = 4096
llama_new_context_with_model: freq_base  = 10000.0
llama_new_context_with_model: freq_scale = 1
llama_kv_cache_init: offloading v cache to GPU
llama_kv_cache_init: offloading k cache to GPU
llama_kv_cache_init: VRAM kv self = 1280.00 MiB
llama_new_context_with_model: kv self size  = 1280.00 MiB
llama_build_graph: non-view tensors processed: 1844/1844
llama_new_context_with_model: compute buffer total size = 4547.09 MiB
llama_new_context_with_model: VRAM scratch buffer: 4544.03 MiB
llama_new_context_with_model: total VRAM used: 45186.64 MiB (model: 39362.61 MiB, context: 5824.03 MiB)
AVX = 0 | AVX2 = 0 | AVX512 = 0 | AVX512_VBMI = 0 | AVX512_VNNI = 0 | FMA = 0 | NEON = 1 | ARM_FMA = 1 | F16C = 0 | FP16_VA = 0 | WASM_SIMD = 0 | BLAS = 1 | SSE3 = 0 | SSSE3 = 0 | VSX = 0 |
2023-12-29 09:22:20 INFO:Loaded the model in 74.01 seconds.

Starting streaming server at ws://0.0.0.0:5005/api/v1/stream
2023-12-29 09:22:20 INFO:Loading the extension "gallery"...
Starting API at http://0.0.0.0:5000/api
Running on local URL:  http://0.0.0.0:7860

To create a public link, set `share=True` in `launch()`.
![]() ?内存基本用光,最好关闭图形界面。
?内存基本用光,最好关闭图形界面。
启用 HTTPS/SSL
浏览器需要使用 HTTPS 才能访问客户端的麦克风。因此,您需要创建自签名 SSL 证书和密钥:
$ cd /path/to/your/jetson-containers/data
$ openssl req -x509 -newkey rsa:4096 -keyout key.pem -out cert.pem -sha256 -days 365 -nodes -subj '/CN=localhost'您需要将它们放在?jetson-containers/data?目录中,因为它会自动挂载到 下的容器中,并使您的 SSL 证书在容器运行中保持持久性。当您第一次将浏览器导航到使用这些自签名证书的页面时,它将向您发出警告,因为它们不是来自受信任的颁发机构:/data
您可以选择覆盖此功能,在您更改证书或设备的主机名/IP 更改之前,它不会再次出现
运行 Llamaspeak
要使用其默认参数和您生成的 SSL 密钥运行 llamaspeak 聊天服务器,请按如下方式启动它:
有关可更改的命令行选项,请参阅?chat.py。例如,要启用或日志记录:--verbose--debug
./run.sh --workdir=/opt/llamaspeak \
  --env SSL_CERT=/data/cert.pem \
  --env SSL_KEY=/data/key.pem \
  $(./autotag llamaspeak) \
  python3 chat.py --verbose --debug
如果在从 Web 客户端获取音频或响应时遇到问题,请启用调试日志记录以检查消息流量。?
加上debug后音频正常。后续有待查验,还安装了一个未知的音频库看起来并未起到效果也发出来把也许你们能用到。


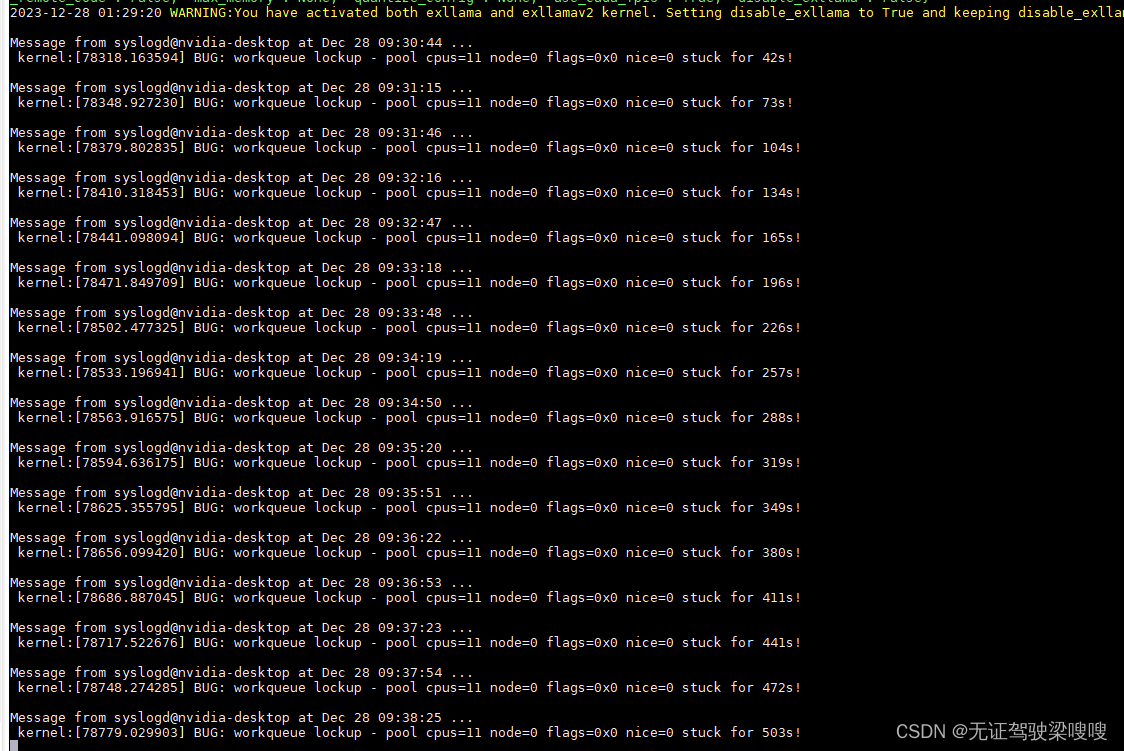
这里的错误nvidia说JETPACK5.1.1修复了,重新刷机更新系统尴尬不你们,遇到这个问题现在只能重启可能是内存不够引起的。?
演示一下效果,新年快乐明年见;
llamaspeak
本文来自互联网用户投稿,该文观点仅代表作者本人,不代表本站立场。本站仅提供信息存储空间服务,不拥有所有权,不承担相关法律责任。 如若内容造成侵权/违法违规/事实不符,请联系我的编程经验分享网邮箱:chenni525@qq.com进行投诉反馈,一经查实,立即删除!