使用rembg库提取图像前景(移除图像背景),并构建web应用
1、图像中的前景与背景
在深度学习图像处理领域中,图像内容可以被定义为前景与背景两部分,其中感兴趣图形的被定义为前景,不感兴趣区域的背景。如在目标检测中,被框出来的目标则被定义为前景。此外,前景识别也可以理解外显著性识别,具体可以查看https://zhuanlan.zhihu.com/p/441836726。本博文所涉及的rembg库,就是基于显著性提取模型u2net所实现的。
在传统图像处理中,前景是无法被直接提取出来,都是通过将前景图像的灰度与梯度特征不断进行增强,使得其与背景呈现显著性差异;而在深度学习中,前景被明确定义为感兴趣的目标。我们可以使用rembg库,以深度学习的方式进行图像前景提取,其项目地址为:https://github.com/danielgatis/rembg。
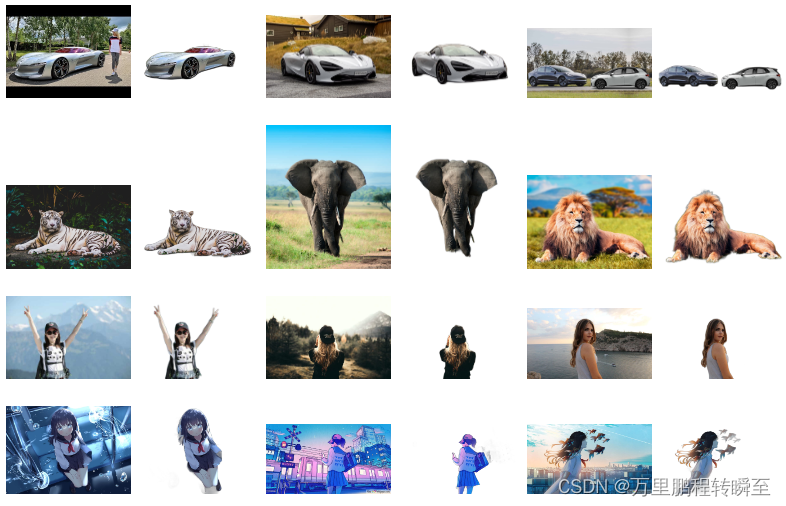
2、安装使用rembg
rembg基于u2net实现前景提取,其默认使用u2net模型进行前景提取。此外,其还提供了u2net_human_seg、u2net_cloth_seg、u2netp等模型。相比于通用模型,u2net_human_seg、u2net_cloth_seg等专业模型效果更好。u2netp是相对于u2net的轻量化模型。
2.1 安装rembg
下面的第二个命令时用于安装命令行支持,如果不在终端使用,则可以不进行安装。
pip install rembg # for library
pip install rembg[cli] # for library + cli
后续使用过程中可能会出现以下报错 requests.exceptions.SSLError: HTTPSConnectionPool(host='github.com', port=443): Max retries exceeded with url:

参考 https://blog.csdn.net/weixin_42210687/article/details/103480208进行解决,具体步骤为安装:
pip install cryptography
pip install pyOpenSSL
pip install certifi
如果安装后还有报错,则手动到 https://github.com/danielgatis/rembg/releases/download/v0.0.0/u2net.onnx下载文件,并保存到电脑用户目录下的.u2net文件夹中,具体如下所示
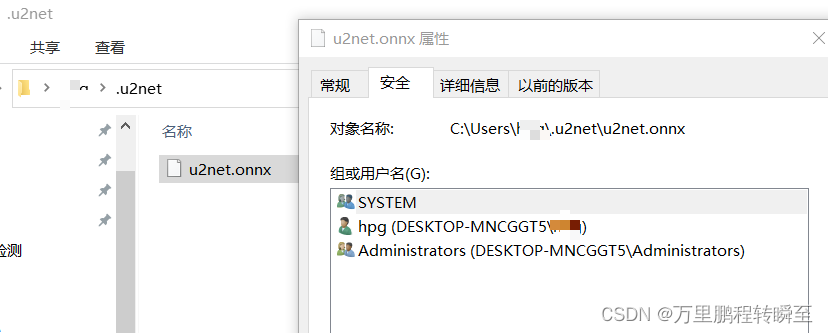
如果要使用u2net_human_seg、u2net_cloth_seg、u2netp等模型进行前景提取,也可以自行下载。
u2net_human_seg:https://github.com/danielgatis/rembg/releases/download/v0.0.0/u2net_human_seg.onnx
u2net_cloth_seg:https://github.com/danielgatis/rembg/releases/download/v0.0.0/u2net_cloth_seg.onnx
u2netp:
https://github.com/danielgatis/rembg/releases/download/v0.0.0/u2netp.onnx
2.2 在终端中使用rembg
rembg cli指定模型进行前景提取
rembg i -m u2net_custom -x '{"model_path": "~/.u2net/u2net.onnx"}' path/to/input.png path/to/output.png
rembg 命令支持4种模式:
- i 加载文件测试
- p 测试文件夹
- s 测试http图片
- b RGB24格式的二进制图片
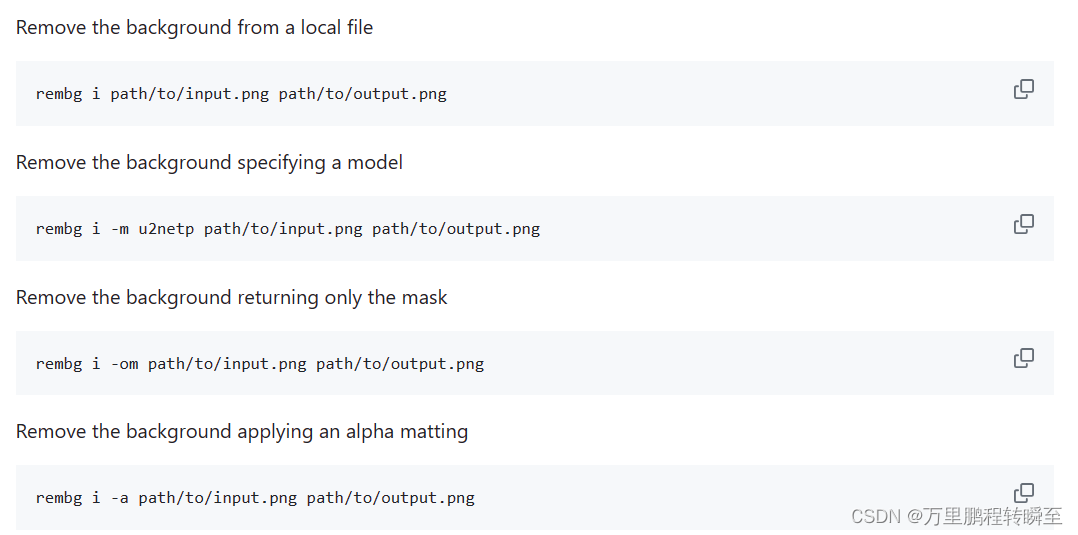
此外还有参数-m、-om 、-a,-m用于指定模型,-om用于设置保存背景,-a用于删除应用 Alpha 抠图的背景
可以使用以下命令查看命令使用帮助
rembg --help
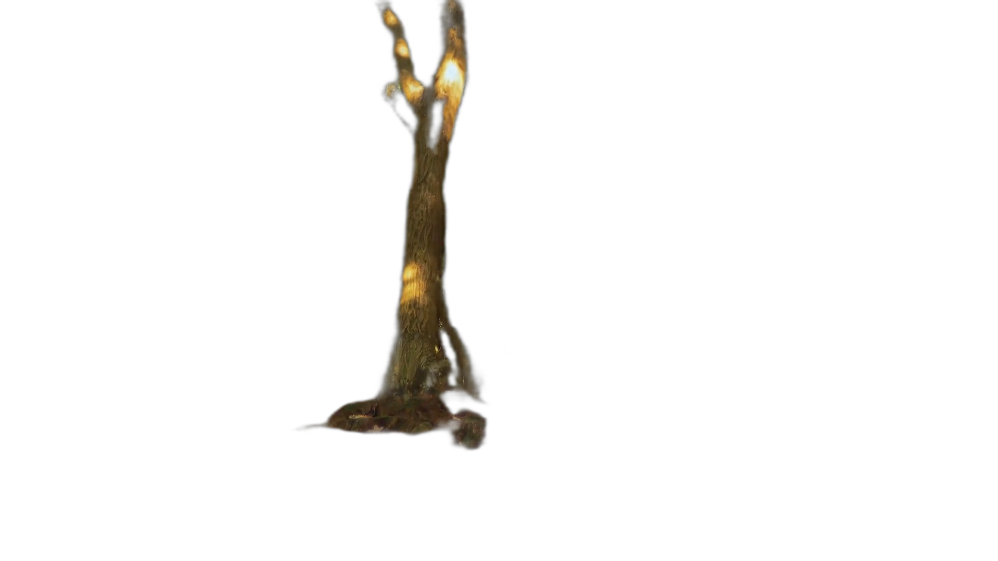
执行以下命令实现将互联网中的图片进行前景提取,并保存为output.png
curl -s "https://raw.githubusercontent.com/danielgatis/rembg/master/examples/animal-2.jpg" -o output.png
结果图如下所示
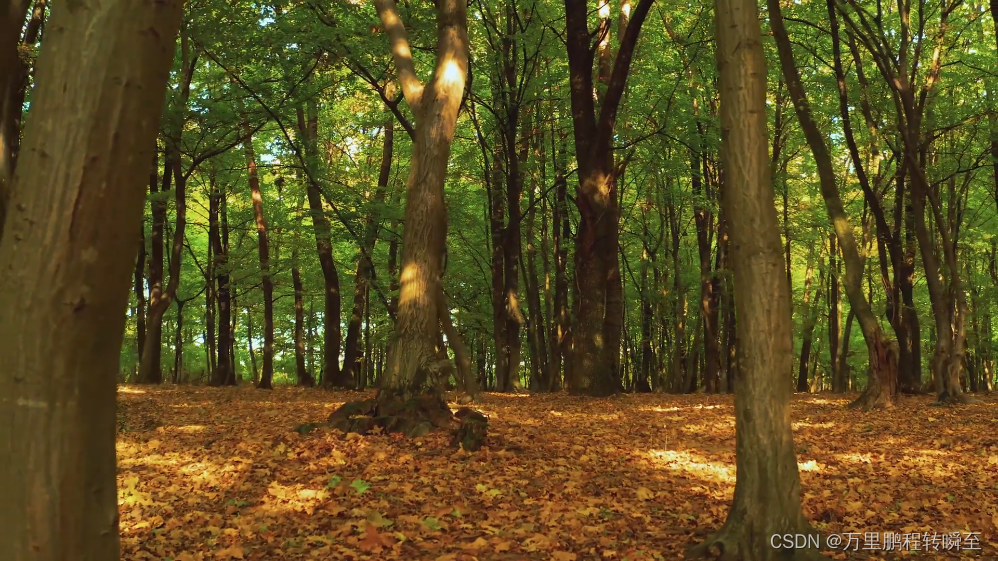
原图如下所示:
处理本地文件夹,命令如下所示,./image为要处理的图片目录,image_out为处理结果的存放目录
rembg p -m u2net ./image ./image_out

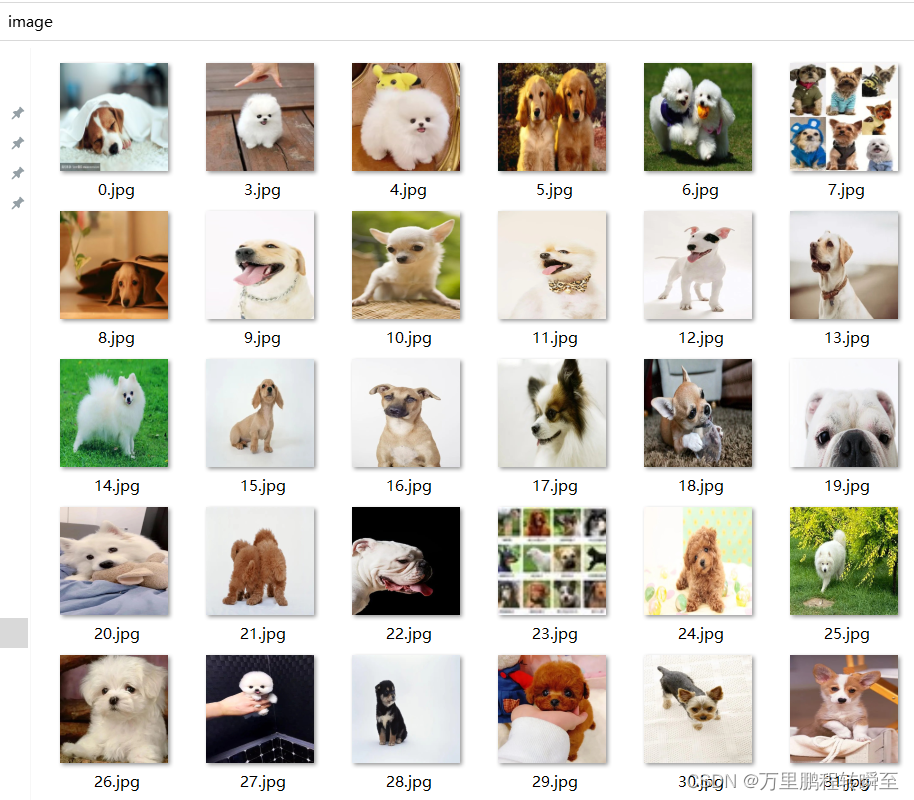
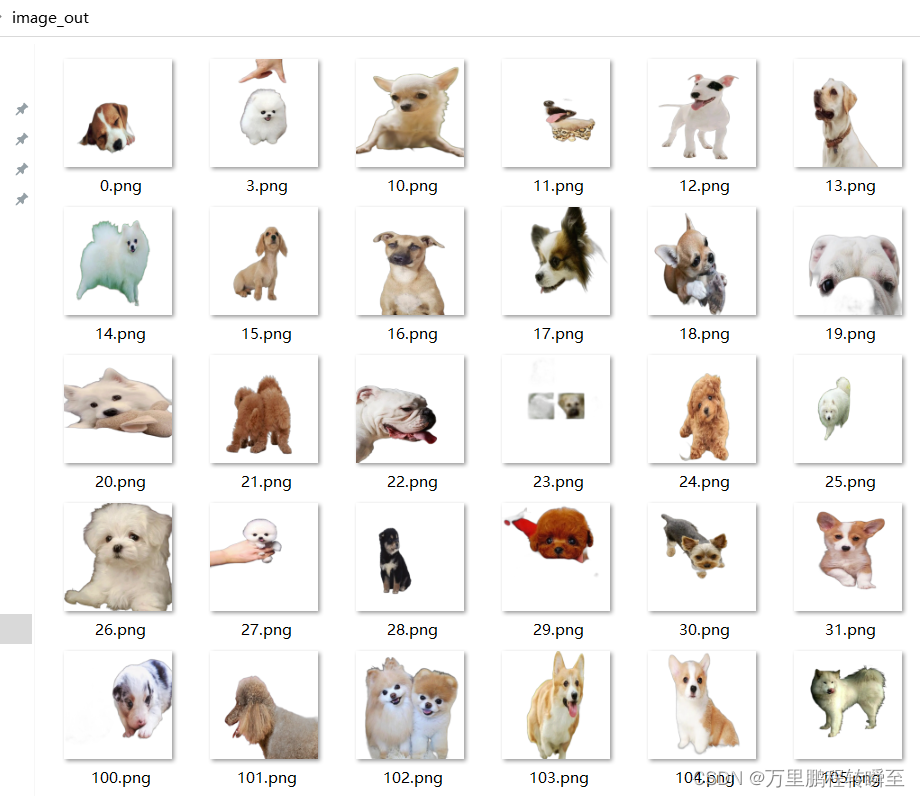
根据官网说明,还有以下命令可用
提取视频帧进行前景识别
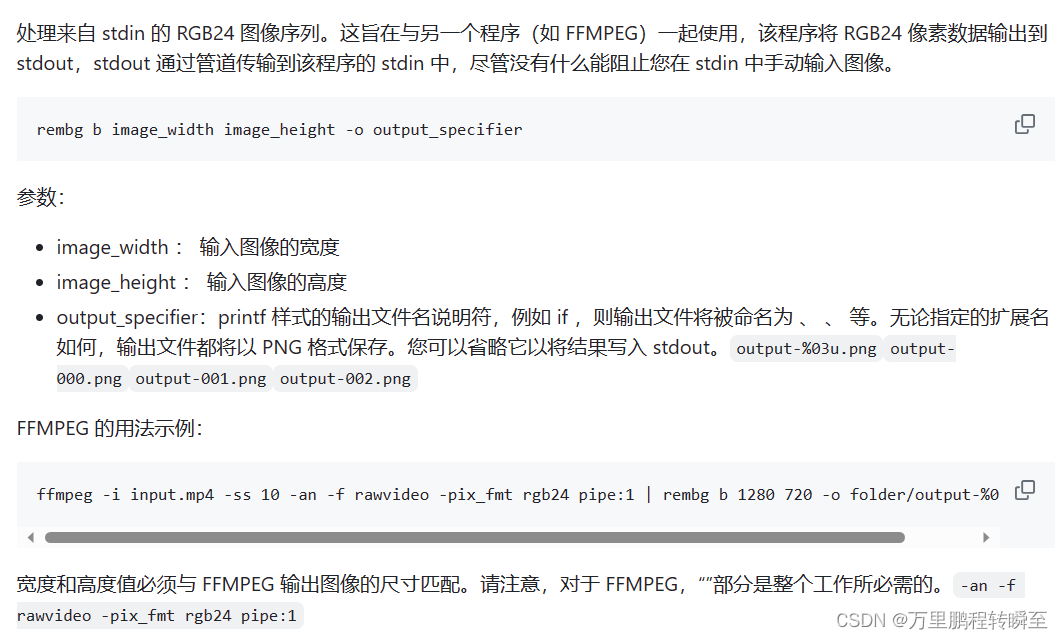
这里是b模式的使用,以下命令需要依赖ffmpeg
ffmpeg -i input.mp4 -ss 10 -an -f rawvideo -pix_fmt rgb24 pipe:1 | rembg b 1280 720 -o folder/output-%03u.png
额外命令
官方项目还指出,可以基于sam 模型输入额外提示进行前景提取
rembg i -m sam -x '{ "sam_prompt": [{"type": "point", "data": [724, 740], "label": 1}] }' examples/plants-1.jpg examples/plants-1.out.png
2.3 在代码中使用
以字节形式输入和输出
from rembg import remove

input_path = 'input.png'
output_path = 'output.png'

with open(input_path, 'rb') as i:
    with open(output_path, 'wb') as o:
        input = i.read()
        output = remove(input)
        o.write(output)
输入和输出为 PIL 图像
from rembg import remove
from PIL import Image

input_path = 'input.png'
output_path = 'output.png'

input = Image.open(input_path)
output = remove(input)
output.save(output_path)
输入和输出为 numpy 数组
from rembg import remove
import cv2

input_path = 'input.png'
output_path = 'output.png'

input = cv2.imread(input_path)
output = remove(input)
cv2.imwrite(output_path, output)
如何以高性能方式循环访问 通过这种模式调用,只加载一次模型
from pathlib import Path
from rembg import remove, new_session

session = new_session()

for file in Path('path/to/folder').glob('*.png'):
    input_path = str(file)
    output_path = str(file.parent / (file.stem + ".out.png"))

    with open(input_path, 'rb') as i:
        with open(output_path, 'wb') as o:
            input = i.read()
            output = remove(input, session=session)
            o.write(output)
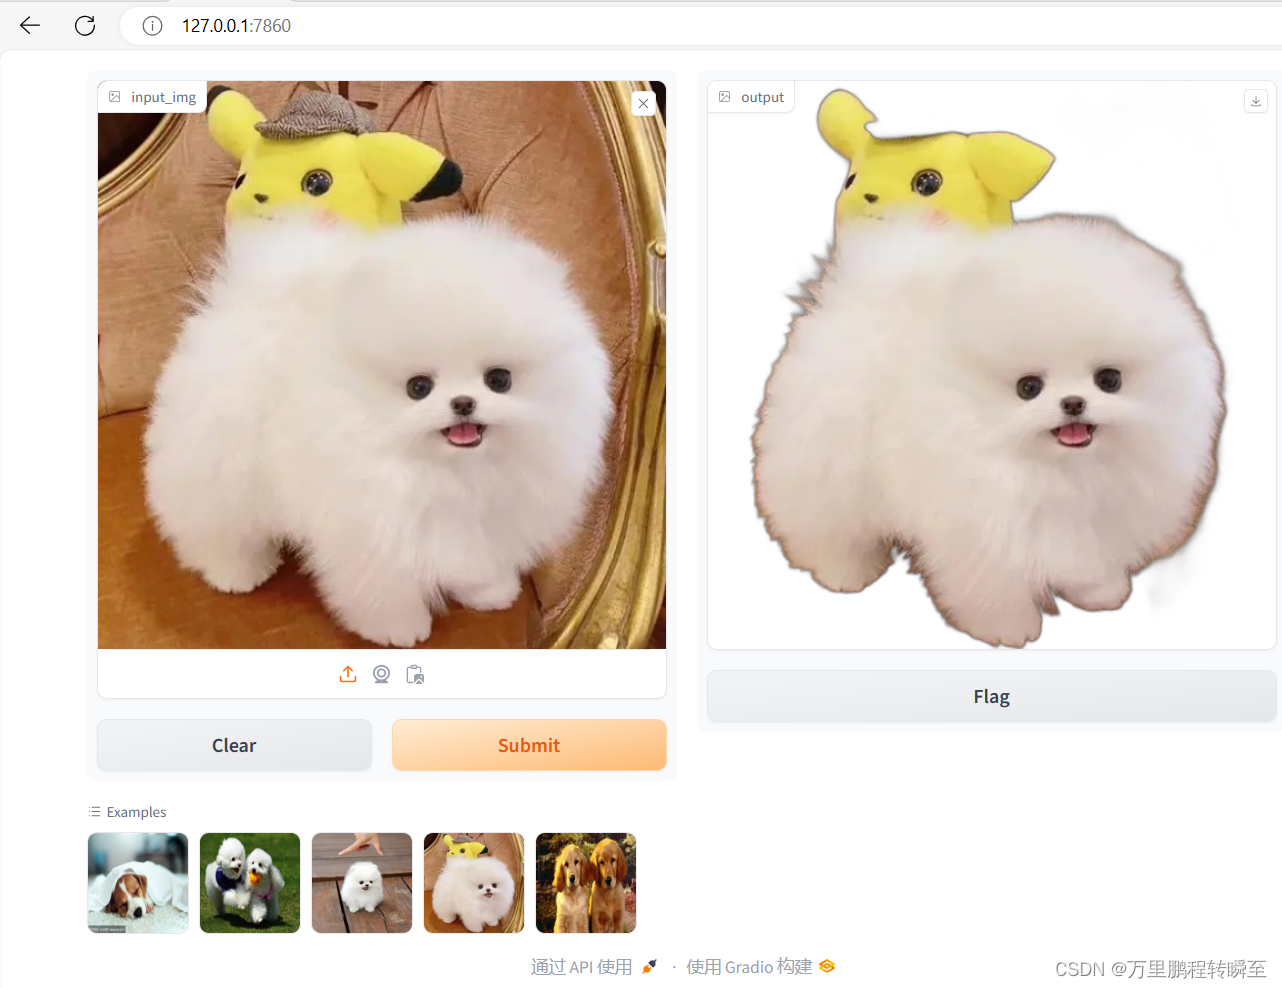
3、在graio中构建web项目使用
使用gradio部署ai模型可以参考:https://blog.csdn.net/a486259/article/details/135219068?spm=1001.2014.3001.5501
3.1 python代码
代码如下所示,在代码同级目录下创建examples文件夹,存放5个图片,文件名如代码内所示。
import gradio as gr
from PIL import Image

from pathlib import Path
from rembg import remove, new_session

session = new_session()
def predict(input_img,conf):
    output = remove(input_img, session=session)
    return output
if __name__=="__main__":
    gr.close_all()
    #demo = gr.Interface(fn = cls_predict,inputs = gr.Image(type='pil'), outputs = gr.Label(num_top_classes=5), examples = ['examples/1.jpg','examples/2.jpg','examples/3.jpg','examples/4.jpg','examples/5.jpg',])
    with gr.Blocks(title="在线抠图") as demo:
        gr.Interface(fn = predict,inputs = [gr.Image(type='pil')
                                                   ],
                                        outputs = "image",
                                        examples = [['examples/1.jpg'],
                                                                ['examples/2.jpg'],
                                                                ['examples/3.jpg'],
                                                                ['examples/4.jpg'],
                                                                ['examples/5.jpg'],
                                                                ]
                                                       )
    demo.launch()
3.2 部署效果
3.3 生成exe
基于pyinstaller将gradio程序打包为exe可以参考 使用pyinstaller打包生成exe(解决gradio程序的打包问题
本文来自互联网用户投稿,该文观点仅代表作者本人,不代表本站立场。本站仅提供信息存储空间服务,不拥有所有权,不承担相关法律责任。 如若内容造成侵权/违法违规/事实不符,请联系我的编程经验分享网邮箱:chenni525@qq.com进行投诉反馈,一经查实,立即删除!
- Python教程
- 深入理解 MySQL 中的 HAVING 关键字和聚合函数
- Qt之QChar编码(1)
- MyBatis入门基础篇
- 用Python脚本实现FFmpeg批量转换
- ARM 作业 按键中断
- 【大数据进阶第三阶段之Datax学习笔记】使用阿里云开源离线同步工具DataX 实现数据同步
- 信号处理专题设计-基于边缘检测的数字图像分类识别
- 汽车级线性电压稳压器LM317MBSTT3G:新能源汽车的理想之选
- 复杂 SQL 实现分组分情况分页查询
- Java项目:150SpringBoot的房屋租赁系统(含论文)
- python协同过滤算法实现电影推荐
- 【无标题】
- scrollTop与offsetTop解决小分辨率区域块向上滚动效果效果,结合animation与@keyframes实现标题左右闪动更换颜色效果。
- 如何在Python 3中使用注释