06 setup的基本用法
发布时间:2023年12月18日
概述
Vue3中最大的修改之一就是setup语法糖的引入,它能够极大的简化我们的代码,也使得我们的代码变得更容易拆分。
在上一个案例中,我们已经学会了如何使用setup去渲染变量,这节课我们讲一下如何使用setup去渲染响应式的变量。
通过ref定义响应式变量
在Vue3中,要定义响应式的变量,最常见的方案之一,就是使用ref去进行定义。
首先,我们创建src/components/Demo06.vue,接着,我们在setup中引入ref
<script setup>
// 第一步:引入ref
import {ref} from "vue"

</script>
然后,我们就可以使用ref去定义变量了,比如我们可以定义姓名和年龄
<script setup>
// 第一步:引入ref
import {ref} from "vue"

// 使用ref定义响应式变量
const name = ref("")
const age = ref(0)
</script>
需要注意的是,如果我们要修改或者获取响应式变量的值,则需要通过.value的方式进行,比如:
<script setup>
// 第一步:引入ref
import {ref} from "vue"

// 使用ref定义响应式变量
const name = ref("")
const age = ref(0)

// 修改响应式变量
name.value = "张三"
age.value = 23

// 访问响应式变量的值
console.log(name.value, age.value)
</script>
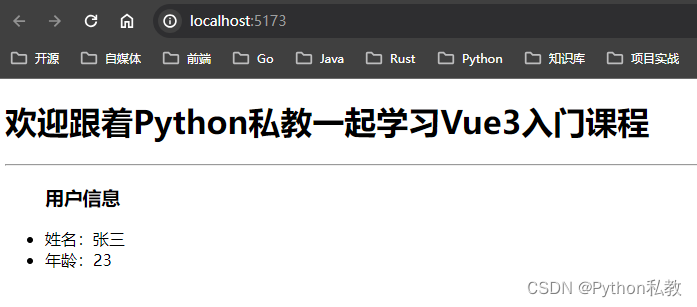
如果我们在模板中使用响应式的变量,则不需要使用.value,而是直接写变量名即可,比如:
<template>
  <ul>
    <h3>用户信息</h3>
    <li>姓名:{{ name }}</li>
    <li>年龄:{{ age }}</li>
  </ul>
</template>
最后,我们修改App.vue,引入Demo06.vue并渲染:
<script setup>
import Demo from "./components/Demo06.vue"
</script>
<template>
  <h1>欢迎跟着Python私教一起学习Vue3入门课程</h1>
  <hr>
  <Demo/>
</template>
此时我们浏览器访问:http://localhost:5173/
使用reactive定义响应式变量
如果定义对象类型的响应式变量,一般都是使用reactive,比如我们定义一个表单对象的时候,通常都是使用reactive进行定义的。
首先,我们在src/components/Demo06.vue中引入reactive:
import {ref, reactive} from "vue"
接着,我们去使用reactive定义一个响应式的变量:
// 定义响应式的变量
const user = reactive({
  name: "",
  age: 0,
})
如果我们要修改reactive定义的响应式的变量,则不需要通过.value修改,而是直接访问属性修改,比如:
// 修改响应式的变量
user.name = "李四"
user.age = 24
访问reactive定义的响应式变量的属性也是同样的:
// 获取响应式的变量
console.log(user, user.name, user.age)
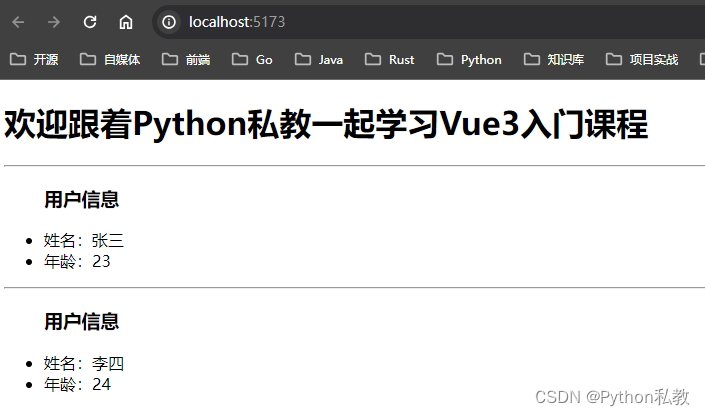
如果要在模板中使用的话,也是同样的用法:
<ul>
  <h3>用户信息</h3>
  <li>姓名:{{ user.name }}</li>
  <li>年龄:{{ user.age }}</li>
</ul>
此时,我们使用浏览器访问:http://localhost:5173/
完整代码
package.json
{
  "name": "hello",
  "private": true,
  "version": "0.1.0",
  "type": "module",
  "scripts": {
    "dev": "vite",
    "build": "vite build"
  },
  "dependencies": {
    "vue": "^3.3.8"
  },
  "devDependencies": {
    "@vitejs/plugin-vue": "^4.5.0",
    "vite": "^5.0.0"
  }
}
vite.config.js
import { defineConfig } from 'vite'
import vue from '@vitejs/plugin-vue'

export default defineConfig({
  plugins: [vue()],
})
index.html
<!doctype html>
<html lang="en">
  <head>
    <meta charset="UTF-8" />
    <link rel="icon" type="image/svg+xml" href="/vite.svg" />
    <meta name="viewport" content="width=device-width, initial-scale=1.0" />
    <title>Vite + Vue</title>
  </head>
  <body>
    <div id="app"></div>
    <script type="module" src="/src/main.js"></script>
  </body>
</html>
src/main.js
import { createApp } from 'vue'
import App from './App.vue'

createApp(App).mount('#app')
src/App.vue
<script setup>
import Demo from "./components/Demo.vue"
</script>
<template>
  <h1>Vite5+Vue3</h1>
  <div class="container">
    <Demo/>
  </div>
</template>
src/components/Demo06.vue
<script setup>
// 第一步:引入ref
import {ref, reactive} from "vue"

// 使用ref定义响应式变量
const name = ref("")
const age = ref(0)

// 修改响应式变量
name.value = "张三"
age.value = 23

// 访问响应式变量的值
console.log(name.value, age.value)

// 定义响应式的变量
const user = reactive({
  name: "",
  age: 0,
})

// 修改响应式的变量
user.name = "李四"
user.age = 24

// 获取响应式的变量
console.log(user, user.name, user.age)
</script>

<template>
  <ul>
    <h3>用户信息</h3>
    <li>姓名:{{ name }}</li>
    <li>年龄:{{ age }}</li>
  </ul>
  <hr>
  <ul>
    <h3>用户信息</h3>
    <li>姓名:{{ user.name }}</li>
    <li>年龄:{{ user.age }}</li>
  </ul>
</template>
启动方式
yarn
yarn dev
浏览器访问:http://localhost:5173/
文章来源:https://blog.csdn.net/qq_37703224/article/details/135052749
本文来自互联网用户投稿,该文观点仅代表作者本人,不代表本站立场。本站仅提供信息存储空间服务,不拥有所有权,不承担相关法律责任。 如若内容造成侵权/违法违规/事实不符,请联系我的编程经验分享网邮箱:chenni525@qq.com进行投诉反馈,一经查实,立即删除!
本文来自互联网用户投稿,该文观点仅代表作者本人,不代表本站立场。本站仅提供信息存储空间服务,不拥有所有权,不承担相关法律责任。 如若内容造成侵权/违法违规/事实不符,请联系我的编程经验分享网邮箱:chenni525@qq.com进行投诉反馈,一经查实,立即删除!
最新文章
- Python教程
- 深入理解 MySQL 中的 HAVING 关键字和聚合函数
- Qt之QChar编码(1)
- MyBatis入门基础篇
- 用Python脚本实现FFmpeg批量转换
- 【贪心算法】【中位贪心】LeetCode:100123.执行操作使频率分数最大
- 中仕公考:2024山东省事业单位发布招聘公告
- 【网络安全】-Linux操作系统—操作系统发展历史与Linux
- 98 双指针求接雨水问题
- [电磁学]大学物理陈秉乾老师课程笔记
- js实现iframe内容加载失败自动重新加载功能
- python找.exe进程基地址的方法(以微信为例子)
- Grind75第4天 | 141.环形链表、876.链表的中间节点、125.验证回文串
- 十一.MyBatis的缓存
- 【面试合集】说说你对输入输出重定向和管道的理解?应用场景?