docker-compose
发布时间:2023年12月17日
1、部署docker-compose
mv docker-compose-linux-x86_64 docker-compose
mv docker-compose /usr/local/bin/
chmod 777 /usr/local/bin/docker-compose

2、yml文件
(1)yml文件:是一种标记语言,以竖列的形式展示序列化的数据格式,可读性高,类似于json格式,语法简单
(2)yml通过缩进来表示数据结构,连续的项目用-减号来表示
3、yml文件使用的注意事项
(1)大小写敏感
(2)通过缩进表示层级关系
(3)只能用空格缩进,不能用TAB键缩进
(4)可以使用#进行注释
(5)符号字符后面都要加上空格(除了挂载卷不需要空格)
(6)单引号引起来的字符,会被当做普通字符串处理;双引号里面是特殊字符,表示其本意
4、yml文件的基本数据结构
| (1)声明变量(标量、是单个的、不可再分的值,包括整数、字符串、布尔类型): | |
| name:hyde | yyy:true |
| (2)list(列表):表示有序的元素集合 | class: ??- hyde1 ??- hyde2 |
| (3)键值对映射 | student: ??name:yyy ??age:18 student1: ??name:xxx ??age:20 |
| (4)注释 | #test |
| (5)引用 | student:&id1 ??name:yyy ??age:18 student1:*id1 用&来定义锚点,用*来进行引用 |
| (6)字符串引号 | name:”yyy” name:’yyy’ name:’$’ name:”$”(表示本意) |
5、docker-compose:单机容器编排(不能跨网段,只能在一台主机上运行)
(1)dockerfile:先配置好文件,然后build,镜像——容器
(2)docker-compose:既可以基于dockerfile,也可以基于镜像,可以一键式拉起镜像和容器
(3)docker-compose的核心:yml文件,可以定义容器的一切,通过yml配置,直接运行容器
(4)docker的应用场景:服务于单节点(docker没有统一对外提供服务的端口和配置,一般都是内网访问,无需使用https)
(5)K8S+ingress:对外以集群和分布式的方式提供统一问的端口
6、docker-compose的常用命令(要在docker-compose.yml的目录下运行命令)
| build | 构建服务 |
| ps | 列出由docker-compose编排出来的容器 |
| up | 创建和启动容器 |
| top | 显示容器的进程 |
| logs | 查看容器的输出日志 |
| down | 删除容器、网络、数据卷 |
| exec | 在容器中执行命令(一般不用) |
| stop/start/restart | 停止、启动、重启容器 |
| scale | 指定启动的容器数量(副本)——用于K8S |
7、编排yml文件
(1)部署docker-compose
![]()

(2)部署dockerfile


(3)部署docker-compose.yml文件
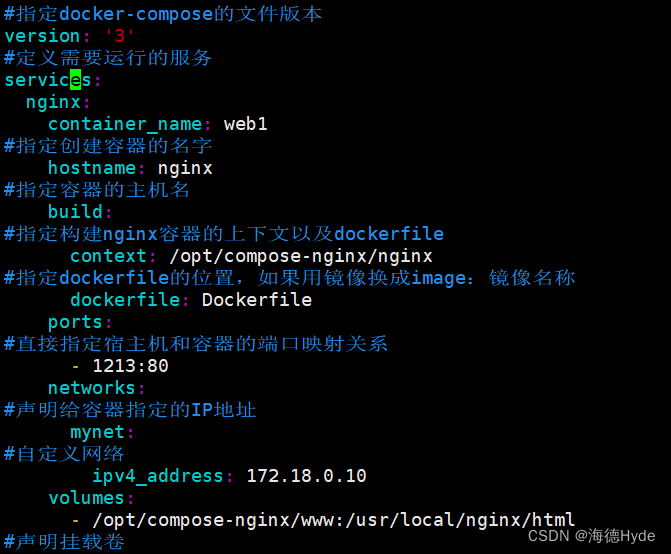


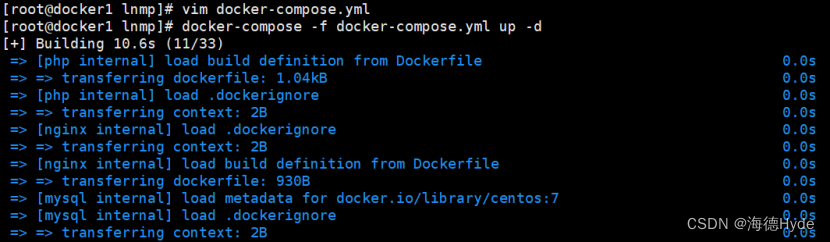
(4)构建docker-compose.yml文件
| docker-compose -f docker-compose.yml up -d | |
| docker-compose | 命令的开头,使用docker-compose进行容器编排 |
| -f | 使用特定的compose的模版文件,一般都用docker-compose.yml |
| -p | project-name:指定项目名称,如果不加,会使用目录名称 |
| -d | 后台运行 |


(5)docker-compose的常用命令

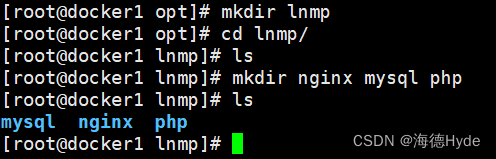
8、docker-compose创建镜像LNMP+wordpress
(1)配置目录
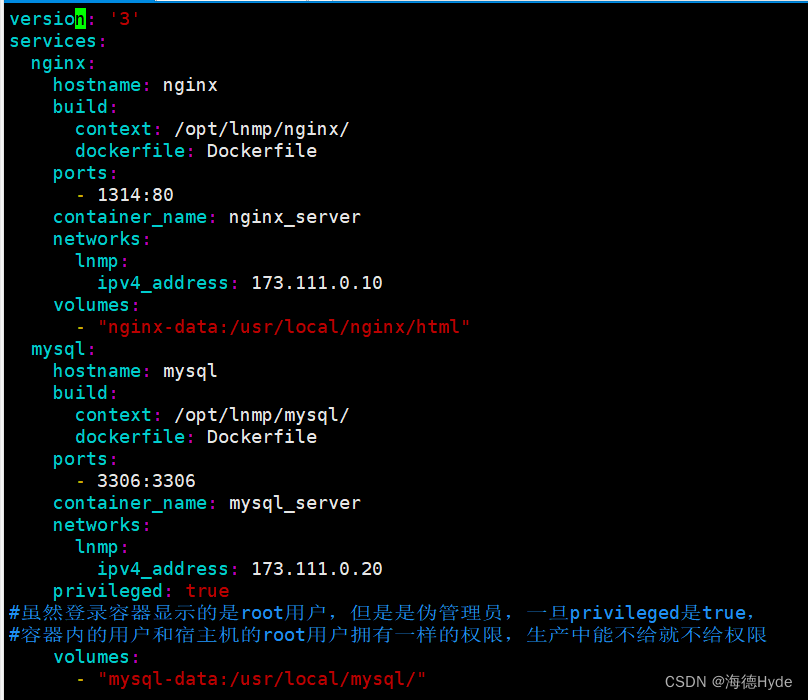
(2)配置nginx


(3)配置mysql


(4)配置php


(5)配置docker-compose.yml


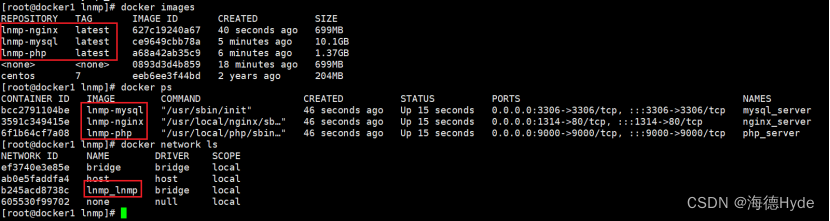
(6)构建docker-compose.yml:docker-compose -f docker-compose.yml up -d

(7)mysql数据库赋权
create database wordpress;
grant all privileges on wordpress.* to 'wordpress'@'%' identified by '123456';
grant all privileges on *.* to 'root'@'%' identified by '123456';
flush privileges;

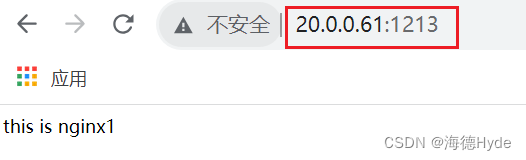
①测试


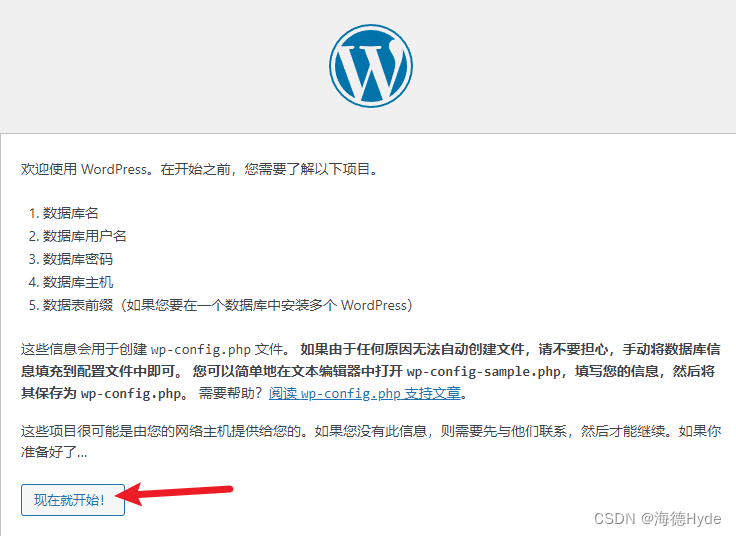
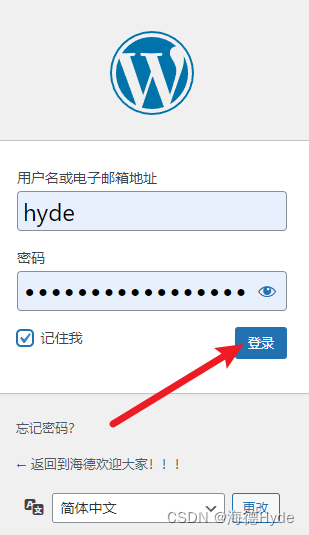
(8)测试

①20.0.0.61:1314/wordpress/index.php


9、docker-compose的特点
(1)docker-compose:单机容器编配工具,可以实现一键式拉取镜像和创建容器
(2)yml文件的格式
①version: ‘3’——解析代码的版本,声明解释器
②services:声明服务,可以有多个services
③networks:写在服务配置,服务容器IP地址,写在顶格,创建网段
④volumes:nginx nginx-data:/usr/local/ngin
⑤声明别名:
volumes:
??nginx-data:
??mysql-data:
文章来源:https://blog.csdn.net/weixin_48145965/article/details/134969078
本文来自互联网用户投稿,该文观点仅代表作者本人,不代表本站立场。本站仅提供信息存储空间服务,不拥有所有权,不承担相关法律责任。 如若内容造成侵权/违法违规/事实不符,请联系我的编程经验分享网邮箱:chenni525@qq.com进行投诉反馈,一经查实,立即删除!
本文来自互联网用户投稿,该文观点仅代表作者本人,不代表本站立场。本站仅提供信息存储空间服务,不拥有所有权,不承担相关法律责任。 如若内容造成侵权/违法违规/事实不符,请联系我的编程经验分享网邮箱:chenni525@qq.com进行投诉反馈,一经查实,立即删除!
最新文章
- Python教程
- 深入理解 MySQL 中的 HAVING 关键字和聚合函数
- Qt之QChar编码(1)
- MyBatis入门基础篇
- 用Python脚本实现FFmpeg批量转换
- 局域网下的ROS多机通信
- 网络协议分析
- 使用说明书的重要性及该如何有效创建?
- 腾讯云com域名注册怎么收费?
- NumPy 中级教程——数组操作
- 最新解决msvcr110.dll丢失的方法,实测靠谱有效的5个方法
- python操作word-基础
- 【Amazon 实验③】验证源请求策略将特定的请求信息转发至源站
- pytorch(四)、完整小网络的搭建和sequential的使用
- 从“唯分论”到“过程评价” 助力教育高质量发展