云计算:OpenStack 分布式架构部署(单控制节点与多计算节点)
目录
一、实验
1.环境
(1) 主机
表1 主机
| 主机 | 架构 | IP | 备注 |
| controller | 控制节点 | 192.168.204.210 | 已部署 |
| compute01 | 计算节点1 | 192.168.204.211? | 已部署 |
| compute02 | 计算节点2 | 192.168.204.212 |
(2)官网
OpenStack Docs: OpenStack Installation Guide for Red Hat Enterprise Linux and CentOS
(3)网络
①计算节点2? ping?控制节点

②计算节点2 ping 计算节点1

(4) 时间同步
①?计算节点2
[root@compute02 ~]# yum install -y chrony


[root@compute02 ~]# vim /etc/chrony.conf
[root@compute02 ~]# systemctl restart chronyd.service && systemctl enable chronyd.service![]()


?③测试
[root@controller ~]# date

[root@compute01 ~]# date

[root@compute02 ~]# date


(5) 控制节点查看(目前已部署controller与compute01)
# neutron agent-list
2. 计算服务安装(计算节点2)
(1)安装软件包
# yum install python-openstackclient.noarch openstack-selinux.noarch -y

# yum install openstack-nova-compute libvirt -y

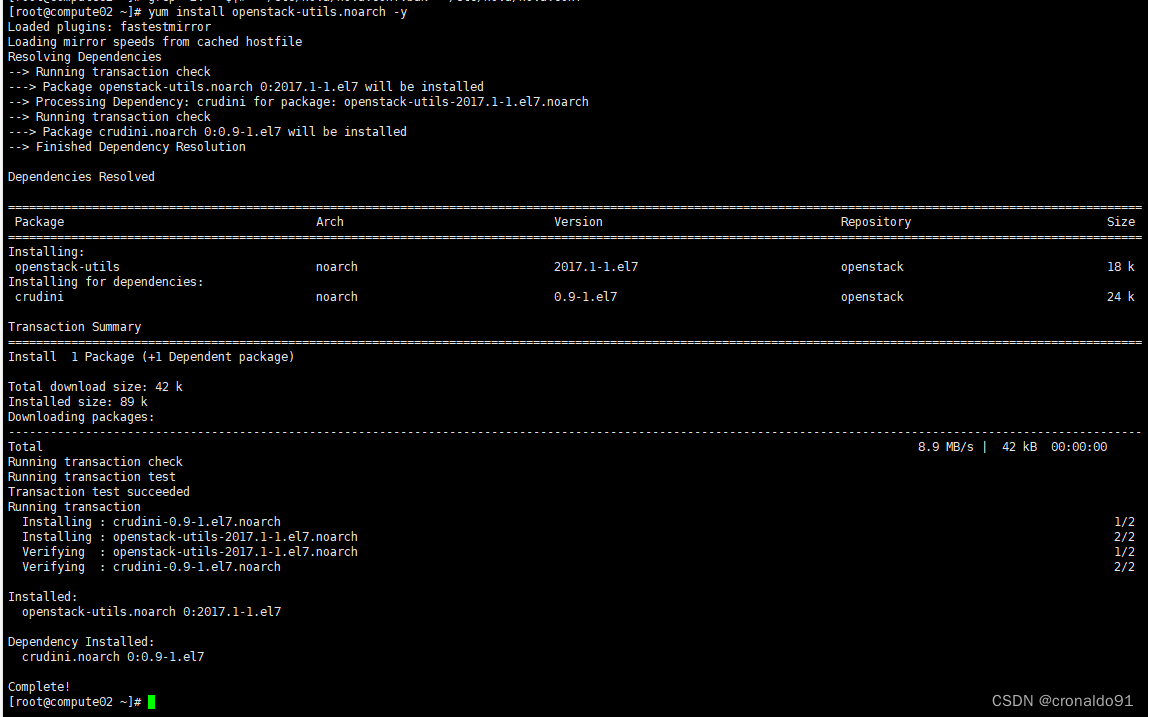
# yum install openstack-utils.noarch -y![]()

![]()

![]()

(2)编辑/etc/nova/nova.conf
①在[DEFAULT]和 [oslo_messaging_rabbit]部分,配置RabbitMQ消息队列的连接
[DEFAULT]
...
rpc_backend = rabbit

[oslo_messaging_rabbit]
...
rabbit_host = controller
rabbit_userid = openstack
rabbit_password = RABBIT_PASS
② 在 [DEFAULT]和 [keystone_authtoken]?部分,配置认证服务访问
[DEFAULT]
...
auth_strategy = keystone

[keystone_authtoken]
...
auth_uri = http://controller:5000
auth_url = http://controller:35357
memcached_servers = controller:11211
auth_type = password
project_domain_name = default
user_domain_name = default
project_name = service
username = nova
password = NOVA_PASS
③ 在?[DEFAULT]?部分,配置?my_ip?选项
[DEFAULT]
...
my_ip = 192.168.204.212
④ 在?[DEFAULT]?部分,使能 Networking 服务
[DEFAULT]
...
use_neutron = True
firewall_driver = nova.virt.firewall.NoopFirewallDriver
⑤ 在[vnc]部分,启用并配置远程控制台访问
[vnc]
...
enabled = True
vncserver_listen = 0.0.0.0
vncserver_proxyclient_address = $my_ip
novncproxy_base_url = http://controller:6080/vnc_auto.html
⑥在?[glance]?区域,配置镜像服务 API 的位置
[glance]
...
api_servers = http://controller:9292
⑦ 在?[oslo_concurrency]?部分,配置锁路径
[oslo_concurrency]
...
lock_path = /var/lib/nova/tmp
⑧ 备份修改


(3)完成安装
① ?确定计算节点是否支持虚拟机的硬件加速
$ egrep -c '(vmx|svm)' /proc/cpuinfo![]()
(4)验证操作
?3. 网络服务安装(计算节点2)
(1)安装组件
# yum install openstack-neutron-linuxbridge ebtables ipset![]()

(2)配置通用组件,编辑/etc/neutron/neutron.conf文件
①在[database]部分,注释所有connection项,因为计算节点不直接访问数据库;
②在 [DEFAULT]和 [oslo_messaging_rabbit]部分,配置 RabbitMQ消息队列的连接
[DEFAULT]
...
rpc_backend = rabbit

[oslo_messaging_rabbit]
...
rabbit_host = controller
rabbit_userid = openstack
rabbit_password = RABBIT_PASS
③ 在 [DEFAULT]和 [keystone_authtoken]部分,配置认证服务访问(将?NEUTRON_PASS?替换为在认证服务中为?neutron?用户选择的密码)
[DEFAULT]
...
auth_strategy = keystone

[keystone_authtoken]
...
auth_uri = http://controller:5000
auth_url = http://controller:35357
memcached_servers = controller:11211
auth_type = password
project_domain_name = default
user_domain_name = default
project_name = service
username = neutron
password = NEUTRON_PASS
④ 在?[oslo_concurrency]?部分,配置锁路径
[oslo_concurrency]
...
lock_path = /var/lib/neutron/tmp
⑤ 备份修改

(3)???配置Linuxbridge代理,编辑/etc/neutron/plugins/ml2/linuxbridge_agent.ini
① ?在[linux_bridge]部分,将公共虚拟网络和公共物理网络接口对应起来
[linux_bridge]
physical_interface_mappings = provider:PROVIDER_INTERFACE_NAME
② 在[vxlan]部分,禁止VXLAN覆盖网络
[vxlan]
enable_vxlan = False
③ 在?[securitygroup]部分,启用安全组并配置 Linuxbridge?iptables?firewall driver
[securitygroup]
...
enable_security_group = True
firewall_driver = neutron.agent.linux.iptables_firewall.IptablesFirewallDriver
④ 备份修改

(4)配置网络选项,编辑/etc/nova/nova.conf文件
①在[neutron]部分,配置访问参数
[neutron]
...
url = http://controller:9696
auth_url = http://controller:35357
auth_type = password
project_domain_name = default
user_domain_name = default
region_name = RegionOne
project_name = service
username = neutron
password = NEUTRON_PASS
(5)?查看服务列表
# openstack compute service list

(6)完成安装
①重启计算服务
# systemctl restart openstack-nova-compute.service②启动Linuxbridge代理并配置它开机自启动
# systemctl enable neutron-linuxbridge-agent.service
# systemctl start neutron-linuxbridge-agent.service
(7)控制节点查看(已新增compute02)
# neutron agent-list
本文来自互联网用户投稿,该文观点仅代表作者本人,不代表本站立场。本站仅提供信息存储空间服务,不拥有所有权,不承担相关法律责任。 如若内容造成侵权/违法违规/事实不符,请联系我的编程经验分享网邮箱:chenni525@qq.com进行投诉反馈,一经查实,立即删除!
- Python教程
- 深入理解 MySQL 中的 HAVING 关键字和聚合函数
- Qt之QChar编码(1)
- MyBatis入门基础篇
- 用Python脚本实现FFmpeg批量转换
- 使用Spring Boot和Apache HttpClient构建REST客户端
- 点赞模块设计 - Redis缓存 + 定时写入数据库实现高性能点赞功能
- [2023-年度总结]凡是过往,皆为序章
- python操作mysql数据库
- 如何在 Ubuntu 16.04 上使用 Minio 设置对象存储服务器
- 【快慢指针】26.删除有序数组中的重复项
- 通过全网热议的“通义舞王”,你对AI有什么奇思妙想?
- 使用 C++/WinRT 创作 API
- 系统日志表结构
- 全国多省市加强电子印章管理,契约锁帮您管章、用章、控章