数据结构实战:利用JavaScript和Python实现链表
发布时间:2024年01月12日
文章目录
一、实战概述
- 本实战通过JavaScript和Python两种编程语言分别实现单链表数据结构。首先,介绍了链表的基本概念,包括结点(包含数据域和指针域)和链表结构(由多个结点按一定顺序链接而成)。在JavaScript部分,创建了LinkedList.js文件,定义了Node类和LinkedList类,实现了链表的增删查改等核心操作,并通过HTML页面展示其功能;而在Python部分,则直接编写程序并运行,同样实现了链表节点的创建、查找、插入、更新和删除等操作,并实时查看执行结果,以验证链表功能的正确性与实用性。
二、链表
(一)链表概述
- 链表是一种基本的线性数据结构,由一系列节点组成,每个节点包含数据和指向下一个节点的引用。相比数组,链表具有动态大小、插入和删除高效等优势,但访问元素需遍历。分为单向链表和双向链表,可实现栈、队列等数据结构。链表在内存分配中更灵活,适用于频繁插入删除的场景,是计算机科学中重要的数据结构之一。
(二)结点结构
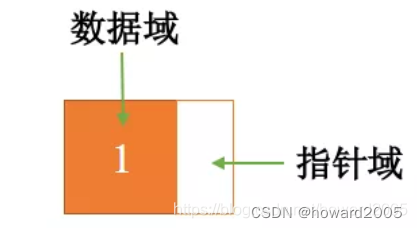
- 结点是链表中的基本构建单元,包含数据域和指针域。数据域存储具体数据,而指针域存储指向下一个结点的地址,实现结点之间的连接。这灵活的结构使得链表能够动态地存储和管理数据,支持高效的插入和删除操作。每个结点的指针域充当连接不同结点的桥梁,构建出链表的结构。这种数据结构在计算机科学中被广泛应用,特别适用于需要频繁插入和删除操作的场景。
(二)链表结构
- 链表是一种数据结构,由多个结点组成。每个结点包含数据域,存储具体数据,和指针域,指向下一个结点的地址。通过数据域可以访问所需数据,通过指针域可以访问当前结点之后的结点,形成结点之间的连接。将这些结点串起来构成链表,实现了动态存储和管理数据的功能。链表的灵活性使得它适用于需要频繁插入和删除操作的场景,是计算机科学中常用的数据结构之一。

三、利用JavaScript实现链表
(一)创建LinkedList.js
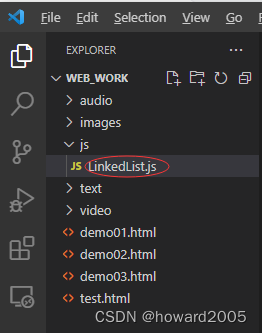
- 在
js目录里创建LinkedList.js
// 定义链表结点类,包含数据(data)和指向下一个结点的指针(next)
class Node {
    constructor(data) {
        this.data = data;
        this.next = null;
    }
}

// 定义链表类,初始化时设置头结点为一个特殊结点(通常不存储实际数据)
class LinkedList {
    constructor() {
        // 初始化头结点
        this.head = new Node('head');
    }

    /**
     * 根据给定值查找链表中的结点
     * @param value 查找的目标值
     * @returns {Node|-1} 找到的结点或-1表示未找到
     */
    findByValue = (value) => {
        let currentNode = this.head; // 从头结点开始查找

        // 循环直到找到目标值或遍历完整个链表
        while (currentNode != null && currentNode.data !== value) {
            currentNode = currentNode.next;
        }

        // 返回找到的结点或-1
        return currentNode === null ? -1 : currentNode;
    }

    /**
     * 根据索引查找链表中的结点
     * @param index 查找的目标索引
     * @returns {Node|-1} 找到的结点或-1表示索引超出范围
     */
    findByIndex = (index) => {
        let pos = 0;
        let currentNode = this.head;

        // 循环直到找到目标索引位置或遍历完整个链表
        while (currentNode != null && pos !== index) {
            currentNode = currentNode.next;
            pos++;
        }

        // 返回找到的结点或-1
        return currentNode === null ? -1 : currentNode;
    }

    /**
     * 在指定元素后插入新元素
     * @param value 插入的新元素值
     * @param element 插入位置的参考元素值
     */
    insert = (value, element) => {
        let currentNode = this.findByValue(element);

        // 判断是否找到插入位置
        if (currentNode === -1) {
            console.log("未找到插入位置!");
        } else {
            // 创建新结点
            let newNode = new Node(value);
            // 让新结点指向当前结点的下一个结点
            newNode.next = currentNode.next;
            // 让当前结点指向新结点
            currentNode.next = newNode;
        }
    }

    /**
     * 更新指定元素的值
     * @param value 新的元素值
     * @param element 需要更新的元素值
     */
    update = (value, element) => {
        let currentNode = this.findByValue(element);

        // 判断是否找到待更新元素
        if (currentNode === -1) {
            console.log("未找到指定元素[" + element.data + "]!");
        } else {
            currentNode.data = value;
        }
    }

    /**
     * 根据给定值删除链表中的结点
     * @param value 要删除的结点值
     * @returns {number} -1表示未找到要删除的结点,否则返回0表示删除成功
     */
    delete = (value) => {
        let currentNode = this.head;
        let previousNode = null;

        // 寻找要删除的结点
        while (currentNode != null && currentNode.data !== value) {
            previousNode = currentNode;
            currentNode = currentNode.next;
        }

        // 判断是否找到并删除结点
        if (currentNode == null) {
            return -1;
        } else {
            previousNode.next = currentNode.next;
        }
    }

    /**
     * 遍历整个链表并打印所有结点的值
     */
    printAll = () => {
        let currentNode = this.head;

        // 遍历并打印所有结点的数据
        while (currentNode != null) {
            console.log(currentNode.data);
            currentNode = currentNode.next;
        }
    }
}

// 测试链表的各种操作
const list = new LinkedList();
list.printAll();

console.log('插入三个结点:mike, howard, alice');
list.insert('mike', 'head');
list.insert('alice', 'mike');
list.insert('howard', 'mike');
list.printAll();

console.log("按值查找alice结点");
console.log(list.findByValue('alice').data);

console.log('按索引查找2结点');
console.log(list.findByIndex(2).data);

console.log('将alice修改为jenny');
list.update('jenny', 'alice');
list.printAll();

console.log('删除howard结点')
list.delete('howard');
list.printAll();
- 这段代码定义了一个简单的单链表数据结构,包含结点类(Node)和链表类(LinkedList)。Node类用于创建链表中的每个元素,包含存储数据(data)和指向下一个结点(next)的指针。LinkedList类提供了插入、查找(按值或索引)、更新和删除结点的方法,以及遍历并打印所有结点数据的功能。在测试部分,首先初始化一个空链表,然后插入几个结点,通过各种方法进行操作,并输出结果以验证功能实现正确性。
(二)创建LinkedList.html
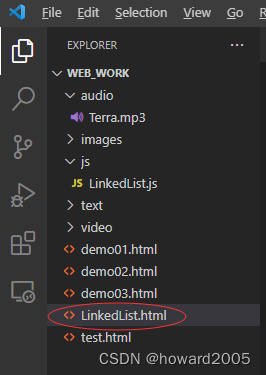
- 在根目录创建
LinkedList.html
<!DOCTYPE html>
<html>

<head>
    <meta charset="utf-8">
    <title>链表演示</title>
    <script src="js/LinkedList.js"></script>
</head>

<body>
    <h3>演示如何创建链表以及对链表进行增删改查操作</h3>
</body>

</html>
(三)浏览LinkedList.html
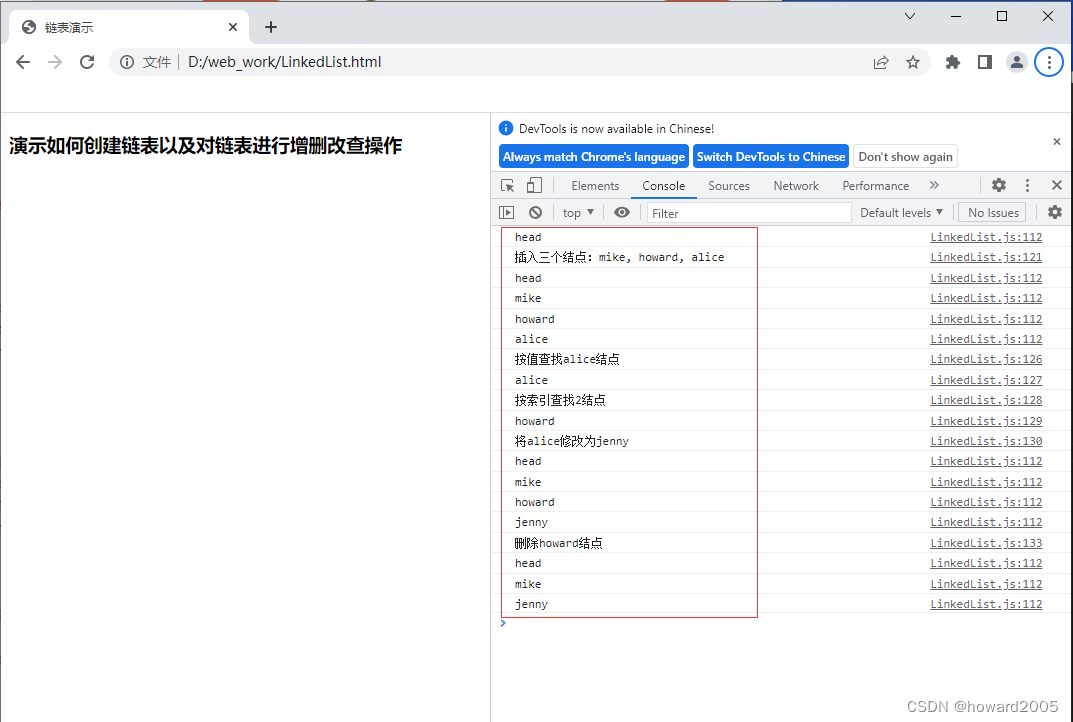
- 打开调试窗口,查看链表操作结果
四、利用Python实现链表
(一)编写程序,实现功能
- 编写程序 -
实现链表.py

# 实现链表数据结构

# 定义链表结点类,包含数据和指向下一个结点的引用
class Node:
    def __init__(self, data):
        self.data = data  # 结点的数据
        self.next = None  # 指向下一个结点的引用

# 定义链表类,包含链表操作方法
class LinkedList:
    def __init__(self):
        # 初始化头结点,通常不存储实际数据
        self.head = Node('head')

    # 根据给定值查找链表中的结点
    def findByValue(self, value):
        currentNode = self.head  # 从头结点开始查找
        while currentNode is not None and currentNode.data != value:  # 循环直到找到目标值或遍历完整个链表
            currentNode = currentNode.next
        return -1 if currentNode is None else currentNode  # 返回找到的结点或-1表示未找到

    # 根据索引查找链表中的结点
    def findByIndex(self, index):
        pos = 0
        currentNode = self.head
        while currentNode is not None and pos != index:  # 循环直到找到目标索引位置或遍历完整个链表
            currentNode = currentNode.next
            pos += 1
        return -1 if currentNode is None else currentNode  # 返回找到的结点或-1表示索引超出范围

    # 在指定元素后插入新元素
    def insert(self, value, element):
        targetNode = self.findByValue(element)  # 查找插入位置的目标结点
        if targetNode == -1:
            print("未找到插入位置!")
        else:
            newNode = Node(value)  # 创建新结点
            newNode.next = targetNode.next  # 新结点指向目标结点的下一个结点
            targetNode.next = newNode  # 目标结点指向新结点

    # 更新指定元素的值
    def update(self, newValue, element):
        targetNode = self.findByValue(element)  # 查找待更新的结点
        if targetNode == -1:
            print("未找到指定元素[" + str(element.data) + "]!")  # 若找不到该结点则输出错误信息
        else:
            targetNode.data = newValue  # 更新结点的数据值

    # 根据值删除链表中的结点
    def delete(self, value):
        currentNode = self.head
        previousNode = None
        while currentNode is not None and currentNode.data != value:  # 寻找要删除的结点
            previousNode = currentNode
            currentNode = currentNode.next
        if currentNode is None:  # 判断是否找到并删除结点
            return -1
        else:
            previousNode.next = currentNode.next  # 删除结点(断开前一个结点与当前结点的连接)

    # 遍历整个链表并打印所有结点的值
    def printAll(self):
        currentNode = self.head
        while currentNode is not None:  # 遍历并打印所有结点的数据
            print(currentNode.data)
            currentNode = currentNode.next


# 测试链表的各种操作
linked_list = LinkedList()
linked_list.printAll()  # 打印初始空链表

print('插入三个结点:mike, howard, alice');
linked_list.insert('mike', 'head')
linked_list.insert('alice', 'mike')
linked_list.insert('howard', 'mike')
linked_list.printAll()  # 插入节点后打印链表

print("按值查找alice结点");
print(linked_list.findByValue('alice').data)

print('按索引查找2结点');
print(linked_list.findByIndex(2).data)

print('将alice修改为jenny');
linked_list.update('jenny', 'alice')
linked_list.printAll()  # 修改节点后打印链表

print('删除howard结点')
linked_list.delete('howard')
linked_list.printAll()  # 删除节点后打印链表
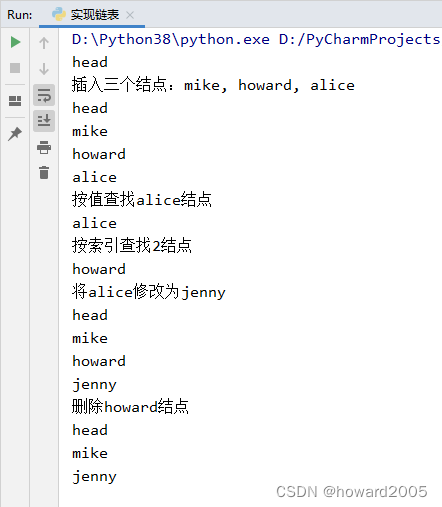
- 这段代码实现了一个简单的单链表数据结构,包括结点类(Node)和链表类(LinkedList)。Node类定义了链表中每个元素的数据(data)及指向下一个结点(next)的引用。LinkedList类初始化时创建头结点,并提供了按值查找、按索引查找、插入新元素、更新指定元素值、根据值删除结点以及遍历打印所有结点的方法。测试部分展示了如何创建一个链表并进行一系列基本操作,如插入、查找、更新和删除结点等。
(二)运行程序,查看结果
- 运行程序 -
实现链表.py
五、实战总结
- 本实战通过JavaScript和Python两种编程语言,详细实现了单链表这一基本数据结构。从理论层面介绍了链表的基本概念、节点结构以及链表结构,并通过实际代码展示了如何定义节点类(Node)和链表类(LinkedList),实现链表的增删查改等核心操作。JavaScript部分利用HTML页面直观展示了链表功能的执行结果;Python部分则直接运行程序并输出结果。实战中,不仅创建了链表,还进行了插入、查找(按值和索引)、更新和删除结点的操作演示,验证了链表功能的正确性和实用性。通过本次实战,充分理解了链表在内存管理上的灵活性以及其对于频繁插入删除操作的优势,进一步巩固了对链表这一重要数据结构的理解与应用能力。
文章来源:https://blog.csdn.net/howard2005/article/details/135550931
本文来自互联网用户投稿,该文观点仅代表作者本人,不代表本站立场。本站仅提供信息存储空间服务,不拥有所有权,不承担相关法律责任。 如若内容造成侵权/违法违规/事实不符,请联系我的编程经验分享网邮箱:chenni525@qq.com进行投诉反馈,一经查实,立即删除!
本文来自互联网用户投稿,该文观点仅代表作者本人,不代表本站立场。本站仅提供信息存储空间服务,不拥有所有权,不承担相关法律责任。 如若内容造成侵权/违法违规/事实不符,请联系我的编程经验分享网邮箱:chenni525@qq.com进行投诉反馈,一经查实,立即删除!