I.MX RT1170双核学习(3):多核管理之MCMGR源码分析详解
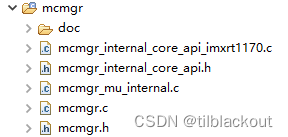
本文通过SDK中最简单的hello_world例程来说明一下双核程序如何运行。在CM7和CM4的工程中都有一个MCMGR(Multicore Manager)文件夹,它是用来管理多核之间的操作的,当然也包括我们前面提到的那些寄存器的设置。

文章目录
我们现在就以CM7核激活CM4核为例,先分析一下CM7核的代码。实际上在CM7的例程中就调用了
MCMGR_EarlyInit、
MCMGR_Init和
MCMGR_StartCore三个函数就能启动M4核了。下面就来分析一下这三个函数:
1 MCMGR_EarlyInit
无论是CM7还是CM4,都需要调用这个函数,它是用来初始化底层的多核管理库(MCMGR)的,这个函数应该尽可能在reset_handler附近调用,表示某个核已经启动并准备好执行任务。在这里,这个函数在ResetISR->SystemInit中就调用了。这个函数最终调用的是mcmgr_early_init_internal:
mcmgr_status_t mcmgr_early_init_internal(mcmgr_core_t coreNum)
{
    MU_Init(MUA);  //实际上就是使能MU的时钟(M7核初始化MUA,M4核这里的参数为MUB)
    return MCMGR_TriggerEvent(kMCMGR_RemoteCoreUpEvent, 0);
}
1.1 MCMGR_TriggerEvent
MCMGR_TriggerEvent函数实际上调用的是MCMGR_TriggerEventCommon:
mcmgr_status_t MCMGR_TriggerEvent(mcmgr_event_type_t type, uint16_t eventData)
{
    return MCMGR_TriggerEventCommon(type, eventData, false);
}
所以来看一下MCMGR_TriggerEventCommon函数:
/*! @brief Type definition of event types. */
typedef enum _mcmgr_event_type_t
{
    kMCMGR_RemoteCoreUpEvent = 1,
    kMCMGR_RemoteCoreDownEvent,
    kMCMGR_RemoteExceptionEvent,
    kMCMGR_StartupDataEvent,
    kMCMGR_FeedStartupDataEvent,
    kMCMGR_RemoteRPMsgEvent,
    kMCMGR_RemoteApplicationEvent,
    kMCMGR_FreeRtosMessageBuffersEvent,
    kMCMGR_EventTableLength
} mcmgr_event_type_t;

static mcmgr_status_t MCMGR_TriggerEventCommon(mcmgr_event_type_t type, uint16_t eventData, bool forcedWrite)
{
    uint32_t remoteData;
    remoteData = (((uint32_t)type) << 16) | eventData;
    return mcmgr_trigger_event_internal(remoteData, forcedWrite);
}
接着看一下mcmgr_trigger_event_internal函数:
/* MCMGR MU channel index - used for passing startupData */
#define MCMGR_MU_CHANNEL 3

mcmgr_status_t mcmgr_trigger_event_internal(uint32_t remoteData, bool forcedWrite)
{
    /* When forcedWrite is false, execute the blocking call, i.e. wait until previously
       sent data is processed. Otherwise, run the non-blocking version of the MU send function. */
    if (false == forcedWrite)
    {
        MU_SendMsg(MUA, MCMGR_MU_CHANNEL, remoteData);// M7执行这条,M4的第一个参数MUA换为MUB
    }
    else
    {
        MU_SendMsgNonBlocking(MUA, MCMGR_MU_CHANNEL, remoteData);// M7执行这条,M4的第一个参数MUA换为MUB
    }
    return kStatus_MCMGR_Success;
}
这里的forcedWrite参数为false的时候,执行阻塞写函数,等待上一次发送的数据处理完了才发送;forcedWrite参数为true时,直接往寄存器中写数据,这个函数最好搭配中断使用。
从上面我们知道,mcmgr_early_init_internal实际上就是通过自己核对应的MU的通道3发送一个组合的32位数(高16位为type,低16位为eventData,这里type为kMCMGR_RemoteCoreUpEvent,eventData为0)给对方核对应的MU的通道3。
- 如果不知道
MU的,建议看一下我之前介绍MU的文章:双核通信之MU消息单元详解
2 MCMGR_Init函数
接着就是调用MCMGR_Init函数:
mcmgr_status_t MCMGR_Init(void)
{
	// 通过OCOTP熔丝相应位可以判断当前是CM4(返回0)还是CM7核(返回1)
	mcmgr_core_t coreNum = MCMGR_GetCurrentCore();
	// 两个回调函数
    MCMGR_RegisterEvent(kMCMGR_StartupDataEvent, MCMGR_StartupDataEventHandler, (void *)&s_mcmgrCoresContext[coreNum]);

    MCMGR_RegisterEvent(kMCMGR_FeedStartupDataEvent, MCMGR_FeedStartupDataEventHandler, (void *)&s_mcmgrCoresContext[(coreNum == 0) ? 1 : 0]);
	return mcmgr_late_init_internal(coreNum);
}
MCMGR_RegisterEvent用来注册某个事件(参数一)的回调函数(参数二),其中参数三s_mcmgrCoresContext会传给回调函数作为其参数供其使用,它的定义如下:
typedef struct _mcmgr_core_context
{
    /*! @brief Current state of the core. */
    mcmgr_core_state_t state;
    /*! @brief Startup data, if state >= kMCMGR_RunningCoreState */
    uint32_t startupData;
} mcmgr_core_context_t;

/*! @brief Type definition of possible core states. */
typedef enum _mcmgr_core_state
{
    kMCMGR_ResetCoreState = 0,
    kMCMGR_StartupGettingLowCoreState,
    kMCMGR_StartupGettingHighCoreState,
    kMCMGR_RunningCoreState,
} mcmgr_core_state_t;

volatile mcmgr_core_context_t s_mcmgrCoresContext[2] = {
    {.state = kMCMGR_ResetCoreState, .startupData = 0}, {.state = kMCMGR_ResetCoreState, .startupData = 0}};
看样子似乎是一个状态机,其中:
-
s_mcmgrCoresContext[0]用于kMCMGR_StartupDataEvent事件的MCMGR_StartupDataEventHandler回调 -
s_mcmgrCoresContext[1]用于kMCMGR_FeedStartupDataEvent事件的MCMGR_FeedStartupDataEventHandler回调
具体完成了什么我们后面用到了再分析。
2.1 MCMGR_RegisterEvent函数
顾名思义就是用来注册回调函数的,实现也非常简单,就是定义了一个结构体数组,然后填充即可:
/*! @brief Type definition of structure with event handler and data. */
typedef struct _mcmgr_event
{
    /*! @brief Pointer to callback function. */
    mcmgr_event_callback_t callback;
    /*! @brief Context data for callback. */
    void *callbackData;
} mcmgr_event_t;

mcmgr_event_t MCMGR_eventTable[kMCMGR_EventTableLength] = {0};

mcmgr_status_t MCMGR_RegisterEvent(mcmgr_event_type_t type, mcmgr_event_callback_t callback, void *callbackData)
{
    if (type >= kMCMGR_EventTableLength)
    {
        return kStatus_MCMGR_Error;
    }
    MCMGR_eventTable[type].callback = ((void *)0);
    MCMGR_eventTable[type].callbackData = callbackData;
    MCMGR_eventTable[type].callback = callback;

    return kStatus_MCMGR_Success;
}
在mcmgr_event_type_t有8种事件,每个事件占据MCMGR_eventTable数组的一个索引。
接下来看一下两个回调函数完成了什么:
2.2 事件回调函数
下面来看一下MCMGR_StartupDataEventHandler和MCMGR_FeedStartupDataEventHandler:
static void MCMGR_StartupDataEventHandler(uint16_t startupDataChunk, void *context)
{
    mcmgr_core_context_t *coreContext = (mcmgr_core_context_t *)context;

    switch (coreContext->state)
    {
        case kMCMGR_StartupGettingLowCoreState:
            coreContext->startupData = startupDataChunk; /* Receive the low part */
            coreContext->state       = kMCMGR_StartupGettingHighCoreState;
            (void)MCMGR_TriggerEvent(kMCMGR_FeedStartupDataEvent, (uint16_t)kMCMGR_StartupGettingHighCoreState);
            break;

        case kMCMGR_StartupGettingHighCoreState:
            coreContext->startupData |= ((uint32_t)startupDataChunk) << 16;
            coreContext->state = kMCMGR_RunningCoreState;
            (void)MCMGR_TriggerEvent(kMCMGR_FeedStartupDataEvent, (uint16_t)kMCMGR_RunningCoreState);
            break;
        default:
            break;
    }
}

static void MCMGR_FeedStartupDataEventHandler(uint16_t startupDataChunk, void *context)
{
    mcmgr_core_context_t *coreContext = (mcmgr_core_context_t *)context;

    switch ((mcmgr_core_state_t)startupDataChunk)
    {
        case kMCMGR_StartupGettingLowCoreState:
            (void)MCMGR_TriggerEvent(kMCMGR_StartupDataEvent, (uint16_t)(coreContext->startupData & 0xFFFFU));
            coreContext->state = (mcmgr_core_state_t)startupDataChunk;
            break;

        case kMCMGR_StartupGettingHighCoreState:
            (void)MCMGR_TriggerEvent(kMCMGR_StartupDataEvent, (uint16_t)((coreContext->startupData) >> 16));
            coreContext->state = (mcmgr_core_state_t)startupDataChunk;
            break;

        case kMCMGR_RunningCoreState:
            coreContext->state = (mcmgr_core_state_t)startupDataChunk;
            break;

        default:
            break;
    }
}
这里的context就是前面注册回调函数时的第三个参数s_mcmgrCoresContext[0/1],前面我们看到默认的state为kMCMGR_ResetCoreState,所以不会进入任何分支中,具体初始状态在何时改变的,我们后续分析。
我们看到这里两个Handler最后都是调用MCMGR_TriggerEvent函数,即通过MU发送一个32位数给对方核。
2.3 mcmgr_late_init_internal
MCMGR_Init最后调用mcmgr_late_init_internal打开MU的通道3的接收中断:
(下面代码为CM7核的,CM4核打开的是MUB)
mcmgr_status_t mcmgr_late_init_internal(mcmgr_core_t coreNum)
{
    MU_EnableInterrupts(MUA, (uint32_t)kMU_Rx3FullInterruptEnable);
    NVIC_SetPriority(MUA_IRQn, 2);
    NVIC_EnableIRQ(MUA_IRQn);
    return kStatus_MCMGR_Success;
}
在前面的MCMGR_TriggerEvent中,最后也是使用通道3发送的消息,所以在SDK中使用MU的通道3来完成双核执行的同步。
3 MCMGR_StartCore函数
对于CM7来说,注册完回调函数之后,还需要调用MCMGR_StartCore来启动CM4核。
MCMGR_StartCore(kMCMGR_Core1, (void *)(char *)CORE1_BOOT_ADDRESS, 2, kMCMGR_Start_Synchronous);
具体实现如下:
#define CORE1_BOOT_ADDRESS (void *)0x20200000
MCMGR_StartCore(kMCMGR_Core1, (void *)(char *)CORE1_BOOT_ADDRESS, 2, kMCMGR_Start_Synchronous); //kMCMGR_Core1=1

mcmgr_status_t MCMGR_StartCore(mcmgr_core_t coreNum, void *bootAddress, uint32_t startupData, mcmgr_start_mode_t mode)
{
    mcmgr_status_t ret;
    /* 填充startupData */
    s_mcmgrCoresContext[coreNum].startupData = startupData;
    /* 设置相关寄存器 */
    ret = mcmgr_start_core_internal(coreNum, bootAddress);

    if (mode == kMCMGR_Start_Synchronous)
    {
        /* 等待M4核读取和确认我们刚刚填充的startupData */
        while (s_mcmgrCoresContext[coreNum].state != kMCMGR_RunningCoreState){}
    }
    return kStatus_MCMGR_Success;
}
这里假设我们将CM4的程序通过CM7的映射地址0x20200000拷贝到CM4的TCM中了,如果CM4的程序在NOR Flash中,填写对应的地址即可。
mcmgr_start_core_internal就是我们上一篇文章双核相互激活和启动流程提到的CM7激活CM4相关寄存器的修改:
mcmgr_status_t mcmgr_start_core_internal(mcmgr_core_t coreNum, void *bootAddress)
{
    IOMUXC_LPSR_GPR->GPR0 = IOMUXC_LPSR_GPR_GPR0_CM4_INIT_VTOR_LOW(((uint32_t)(char *)bootAddress) >> 3u);
    IOMUXC_LPSR_GPR->GPR1 = IOMUXC_LPSR_GPR_GPR1_CM4_INIT_VTOR_HIGH(((uint32_t)(char *)bootAddress) >> 16u);

    SRC->CTRL_M4CORE = SRC_CTRL_M4CORE_SW_RESET_MASK;
    SRC->SCR |= SRC_SCR_BT_RELEASE_M4_MASK;
    return kStatus_MCMGR_Success;
}
4 MCMGR_GetStartupData函数
在CM4核启动后会调用MCMGR_GetStartupData函数,直到这个函数返回kStatus_MCMGR_Success:
do
    {
        status = MCMGR_GetStartupData(&startupData);
    } while (status != kStatus_MCMGR_Success);
现在来看一下这个函数:
mcmgr_status_t MCMGR_GetStartupData(uint32_t *startupData)
{
    if (s_mcmgrCoresContext[1].state == kMCMGR_ResetCoreState)
    {
        s_mcmgrCoresContext[1].state = kMCMGR_StartupGettingLowCoreState;
        if (kStatus_MCMGR_Success !=
        MCMGR_TriggerEvent(kMCMGR_FeedStartupDataEvent, (uint16_t)kMCMGR_StartupGettingLowCoreState))
        {
        	return kStatus_MCMGR_Error;
        }
    }
    return mcmgr_get_startup_data_internal(1, startupData);
}

mcmgr_status_t mcmgr_get_startup_data_internal(mcmgr_core_t coreNum, uint32_t *startupData)
{
    if (s_mcmgrCoresContext[1].state >= kMCMGR_RunningCoreState)
    {
        *startupData = s_mcmgrCoresContext[1].startupData;
        return kStatus_MCMGR_Success;
    }
    return kStatus_MCMGR_NotReady;
}
实际上也是和刚刚的状态机相关。
5 MU中断接收函数
现在我们对CM7和CM4的交互过程还是一头雾水,前面注册的回调函数什么时刻被调用,CM7启动CM4后等待s_mcmgrCoresContext[coreNum].state变为kMCMGR_RunningCoreState,还有CM4启动后,CM4也要等待状态变化再往下执行程序,那么这些状态是在哪里被修改的呢?下面就来分析一下这个过程。
前面我们打开了中断,所以我们首先看一下中断处理回调函数,在通道三收到数据后将调用此回调函数:(下面为CM7核MUA的回调,MUB的类似)
void MU_Rx3FullFlagISR(void)
{
    uint32_t data;
    uint16_t eventType;
    uint16_t eventData;

#if defined(FSL_FEATURE_MU_SIDE_A)
    data = MU_ReceiveMsgNonBlocking(MUA, 3);
#elif defined(FSL_FEATURE_MU_SIDE_B)
    data = MU_ReceiveMsgNonBlocking(MUB, 3);
#endif

    /* To be MISRA compliant, return value needs to be checked even it could not never be 0 */
    if (0U != data)
    {
        eventType = (uint16_t)(data >> 16u);
        eventData = (uint16_t)(data & 0x0000FFFFu);

        if (((mcmgr_event_type_t)eventType >= kMCMGR_RemoteCoreUpEvent) &&
            ((mcmgr_event_type_t)eventType < kMCMGR_EventTableLength))
        {
            if (MCMGR_eventTable[(mcmgr_event_type_t)eventType].callback != ((void *)0))
            {
                MCMGR_eventTable[(mcmgr_event_type_t)eventType].callback(
                    eventData, MCMGR_eventTable[(mcmgr_event_type_t)eventType].callbackData);
            }
        }
    }
}
- 在理论上我们的程序中没有发送数据内容为0的代码,但是为了符合
MISRA规范,这里还是检查了0U != data。
前面在MCMGR_TriggerEvent中,我们将type和event组合成一个32位的数发送给对方,这里同样的,我们收到数据后取出高16位的type和低16位的event。然后调用我们使用MCMGR_RegisterEvent注册的回调函数,第一个参数为eventData,第二个参数为我们注册的时候提供的callbackData(这里为s_mcmgrCoresContext)。
6 双核状态机交互过程详解
看完了中断函数后,感觉两个核有一些联系了,我们先来看一下两个核的执行流程:

这些函数前面都分析过了,但是里面状态机的状态改变似乎有些复杂,而状态的改变是通过双核之间的通道3进行交互的,这里我们就来捋清里面的流程:
- 这里通道间发送数据为32位,高16位为
type,低16位为eventData,下面都表示为(type, eventData)
1、MCMGR_EarlyInit
发送32位数据,(kMCMGR_RemoteCoreUpEvent,0)。由于后面我们在MCMGR_Init函数中并没有注册kMCMGR_RemoteCoreUpEvent的回调函数,实际上这个消息会被忽略。
2、MCMGR_Init
这里没有发送任何数据,但是注册了两个回调函数,在回调函数中会发送数据:

3、启动CM4:MCMGR_StartCore
s_mcmgrCoresContext[1].startupData = 2;
while (s_mcmgrCoresContext[1].state != kMCMGR_RunningCoreState);
这里CM7将s_mcmgrCoresContext[1]的startupData设置为了2,然后等待s_mcmgrCoresContext[1]的state变为kMCMGR_RunningCoreState。
4、CM4和CM7消息同步
(1)CM4在MCMGR_GetStartupData中将s_mcmgrCoresContext[1]的state设置为了kMCMGR_StartupGettingLowCoreState,然后向CM7发送(kMCMGR_FeedStartupDataEvent, kMCMGR_StartupGettingLowCoreState)。
(2)在CM7接收到这个32位消息后,将进入MCMGR_FeedStartupDataEventHandler中,向CM4发送(kMCMGR_StartupDataEvent, 2),然后将state设置为kMCMGR_StartupGettingLowCoreState。
case kMCMGR_StartupGettingLowCoreState:
	(void)MCMGR_TriggerEvent(kMCMGR_StartupDataEvent, (uint16_t)(coreContext->startupData & 0xFFFFU));
	coreContext->state = (mcmgr_core_state_t)startupDataChunk;
	break;
此时双核的状态如下:

(3)CM4收到(kMCMGR_StartupDataEvent, 0),进入MCMGR_StartupDataEventHandler的下面分支:
case kMCMGR_StartupGettingLowCoreState:
	coreContext->startupData = startupDataChunk; /* Receive the low part */
	coreContext->state       = kMCMGR_StartupGettingHighCoreState;
	(void)MCMGR_TriggerEvent(kMCMGR_FeedStartupDataEvent, (uint16_t)kMCMGR_StartupGettingHighCoreState);
	break;
将startupData设置为2,state设置为kMCMGR_StartupGettingHighCoreState,然后发送(kMCMGR_FeedStartupDataEvent, kMCMGR_StartupGettingHighCoreState)给CM7。
(4)CM7收到(kMCMGR_FeedStartupDataEvent, kMCMGR_StartupGettingHighCoreState),进入MCMGR_FeedStartupDataEventHandler的下面分支:
case kMCMGR_StartupGettingHighCoreState:
	(void)MCMGR_TriggerEvent(kMCMGR_StartupDataEvent, (uint16_t)((coreContext->startupData) >> 16));
	coreContext->state = (mcmgr_core_state_t)startupDataChunk;
	break;
这里发送(kMCMGR_StartupDataEvent, (uint16_t)(2>> 16))给CM4,然后设置自身的state为kMCMGR_StartupGettingHighCoreState。
此时双核的状态如下:

(5)CM4收到(kMCMGR_StartupDataEvent, 0)后,进入MCMGR_StartupDataEventHandler的下面分支:
case kMCMGR_StartupGettingHighCoreState:
	coreContext->startupData |= ((uint32_t)startupDataChunk) << 16;
	coreContext->state = kMCMGR_RunningCoreState;
	(void)MCMGR_TriggerEvent(kMCMGR_FeedStartupDataEvent, (uint16_t)kMCMGR_RunningCoreState);
	break;
将startupData与之前收到的低16位进行组合,然后赋到startupData中,即CM7在MCMGR_StartCore函数中的第三个参数传给了CM4。然后将state设置为kMCMGR_RunningCoreState,并向CM7发送(kMCMGR_FeedStartupDataEvent, kMCMGR_RunningCoreState)。
(6)CM7收到(kMCMGR_FeedStartupDataEvent, kMCMGR_RunningCoreState)后进入MCMGR_FeedStartupDataEventHandler中的kMCMGR_RunningCoreState分支:
case kMCMGR_RunningCoreState:
	coreContext->state = (mcmgr_core_state_t)startupDataChunk;
	break;
最终就将state设置为了kMCMGR_RunningCoreState。此时在MCMGR_StartCore中等待s_mcmgrCoresContext[1]的state变为kMCMGR_RunningCoreState则成立,此时CM7知道CM4已经成功启动。
最终的状态如下:

7 总结
从上面状态机分析可知,CM7仅用了kMCMGR_FeedStartupDataEvent,而CM4仅用了kMCMGR_StartupDataEvent。在CM4启动后,先发送一个消息给CM7,然后CM7开始传startupData给CM4,最终CM7的状态都变为kMCMGR_RunningCoreState,表示CM7知道CM4已经启动了,就可以执行其它操作了。
本文来自互联网用户投稿,该文观点仅代表作者本人,不代表本站立场。本站仅提供信息存储空间服务,不拥有所有权,不承担相关法律责任。 如若内容造成侵权/违法违规/事实不符,请联系我的编程经验分享网邮箱:chenni525@qq.com进行投诉反馈,一经查实,立即删除!
- Python教程
- 深入理解 MySQL 中的 HAVING 关键字和聚合函数
- Qt之QChar编码(1)
- MyBatis入门基础篇
- 用Python脚本实现FFmpeg批量转换
- 行业/趋势/红利,想赚钱缺一不可!2024最火的创业项目
- 全网最新整理覆盖全平台电脑、手机的7个开源免费流媒体直播平台以及完整源码和文档
- 怎么在回收站找回已经删除的东西?删除的文件在回收站找不到怎么办
- 在排序数组中查找元素的第一个和最后一个位置
- 项目管理软件怎么选?这10款工具帮你搞定(推荐)
- Apollo自动驾驶:改变交通运输的游戏规则
- 前端基础 keep-alive的使用(Vue)
- AI手写数字识别(二)
- 【第七在线】商品计划的未来:数字化技术与创新趋势展望
- 源码又免费!新手学习!老手参考!基于蚁群算法的二维路径规划