springboot集成flowable工作流
发布时间:2024年01月03日
前言
工作流flowable更加的方便:
工作流中的表说明:
1、Flowable的所有数据库表都以ACT_开头。第二部分是说明表用途的两字符标示符。服务API的命名也大略符合这个规则。

2、ACT_RE_: 'RE’代表repository。带有这个前缀的表包含“静态”信息,例如流程定义与流程资源(图片、规则等)。

3、ACT_RU_: 'RU’代表runtime。这些表存储运行时信息,例如流程实例(process instance)、用户任务(user task)、变量(variable)、作业(job)等。Flowable只在流程实例运行中保存运行时数据,并在流程实例结束时删除记录。这样保证运行时表小和快。

4、ACT_HI_: 'HI’代表history。这些表存储历史数据,例如已完成的流程实例、变量、任务等。

5、ACT_GE_: 通用数据。在多处使用。
这些表无需手动建立,集成后,第一次启动,自动生成
一、工作流是如加载自定义流程的?
可以在 flowable-spring-boot-autoconfigure的包下中,发现配置文件中的如下这段
{
   "sourceType": "org.flowable.spring.boot.FlowableProperties",
   "defaultValue": "classpath*:\/processes\/",
   "name": "flowable.process-definition-location-prefix",
   "description": "The folder in which processes need to be searched for auto deployment.",
   "type": "java.lang.String"
 }
这也就是为什么,我们在 /resources/processes/ 中建立好一个流程文件后,就可以被工作流识别并加载到表中的原因;
二、集成flowable
1.引入依赖以及jdbc/mybatis
    <dependencies>
        <dependency>
            <groupId>org.springframework.boot</groupId>
            <artifactId>spring-boot-starter-jdbc</artifactId>
        </dependency>
        <dependency>
            <groupId>org.springframework.boot</groupId>
            <artifactId>spring-boot-starter-web</artifactId>
        </dependency>
        <dependency>
            <groupId>mysql</groupId>
            <artifactId>mysql-connector-java</artifactId>
            <scope>runtime</scope>
        </dependency>
        <dependency>
            <groupId>org.springframework.boot</groupId>
            <artifactId>spring-boot-starter-test</artifactId>
            <scope>test</scope>
        </dependency>

        <!--flowable工作流依赖-->
        <dependency>
            <groupId>org.flowable</groupId>
            <artifactId>flowable-spring-boot-starter</artifactId>
            <version>6.3.0</version>
        </dependency>
    </dependencies>
2.配置字体,防止乱码
增加一个配置类
@Configuration
public class FlowableConfig implements EngineConfigurationConfigurer<SpringProcessEngineConfiguration> {


    @Override
    public void configure(SpringProcessEngineConfiguration engineConfiguration) {
        engineConfiguration.setActivityFontName("宋体");
        engineConfiguration.setLabelFontName("宋体");
        engineConfiguration.setAnnotationFontName("宋体");
    }
}
3.连接好数据库
yml配置
server:
  port: 8080
spring:
  datasource:
    url: jdbc:mysql://127.0.0.1:3306/flowable-spring-boot?characterEncoding=UTF-8&serverTimezone=Asia/Shanghai&useTimezone=true
    username: root
    password:
    driver-class-name: com.mysql.jdbc.Driver
数据库名称无所谓,只需对应即可,需要手动创建数据库,配置好用户名密码
4.启动项目
- 右键启动后,项目会自动生成链接库中对应的所有工作流flowable中的表
- 安装插件
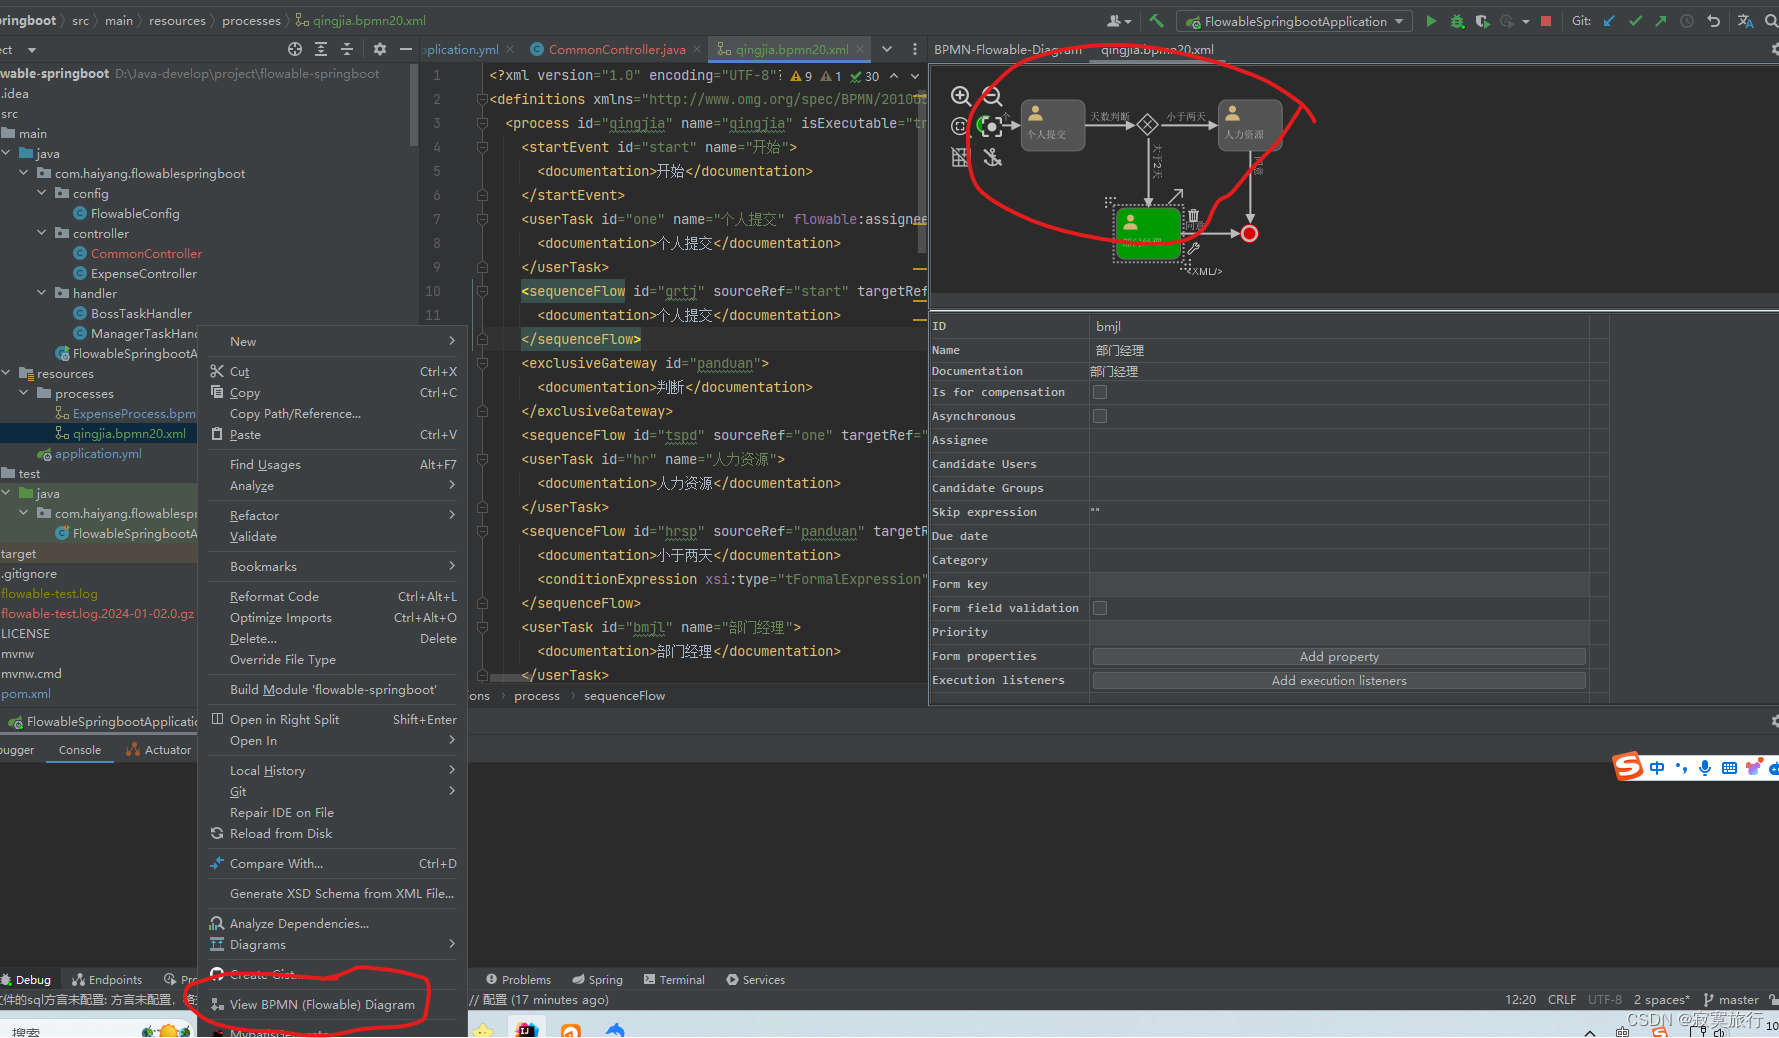
Flowable BPMN visualizer - 在 /resource 目录下创建 processes 文件夹
- 新建 类型为: bpmn20.xml 的文件, 例如名称为: qingjia
- 右键该新建文件,绘制流程图

5.开始编码
至此,准备工作全部完毕,开始编码;
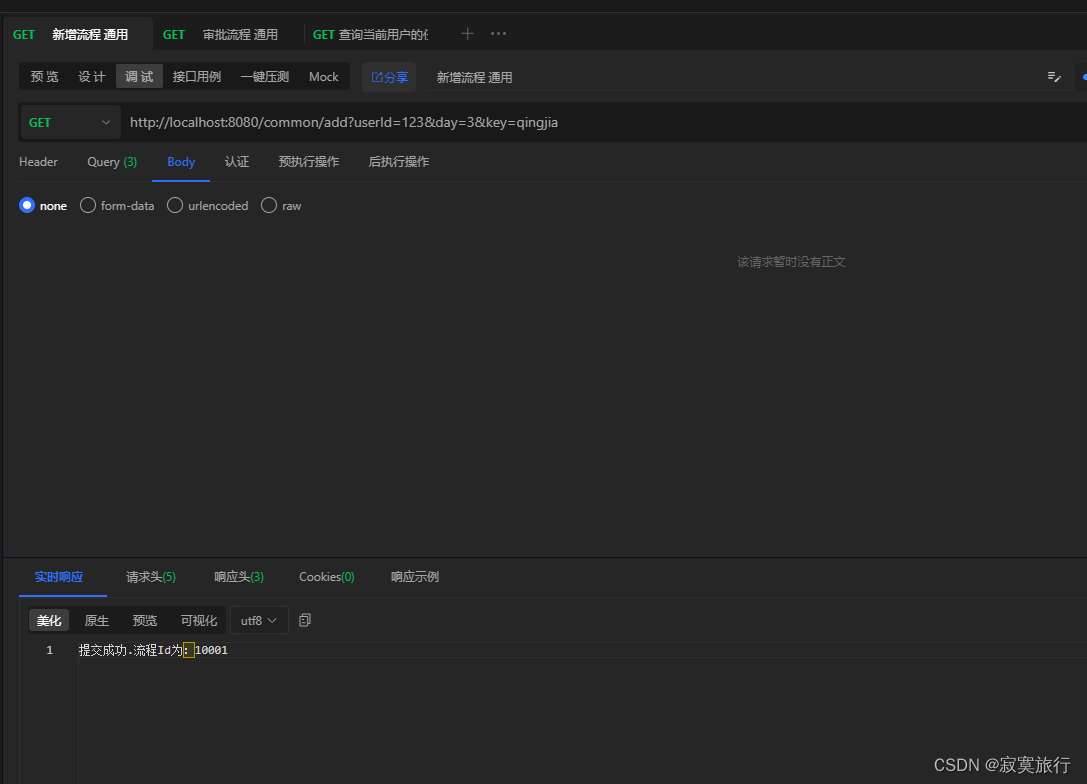
- 新增工作流
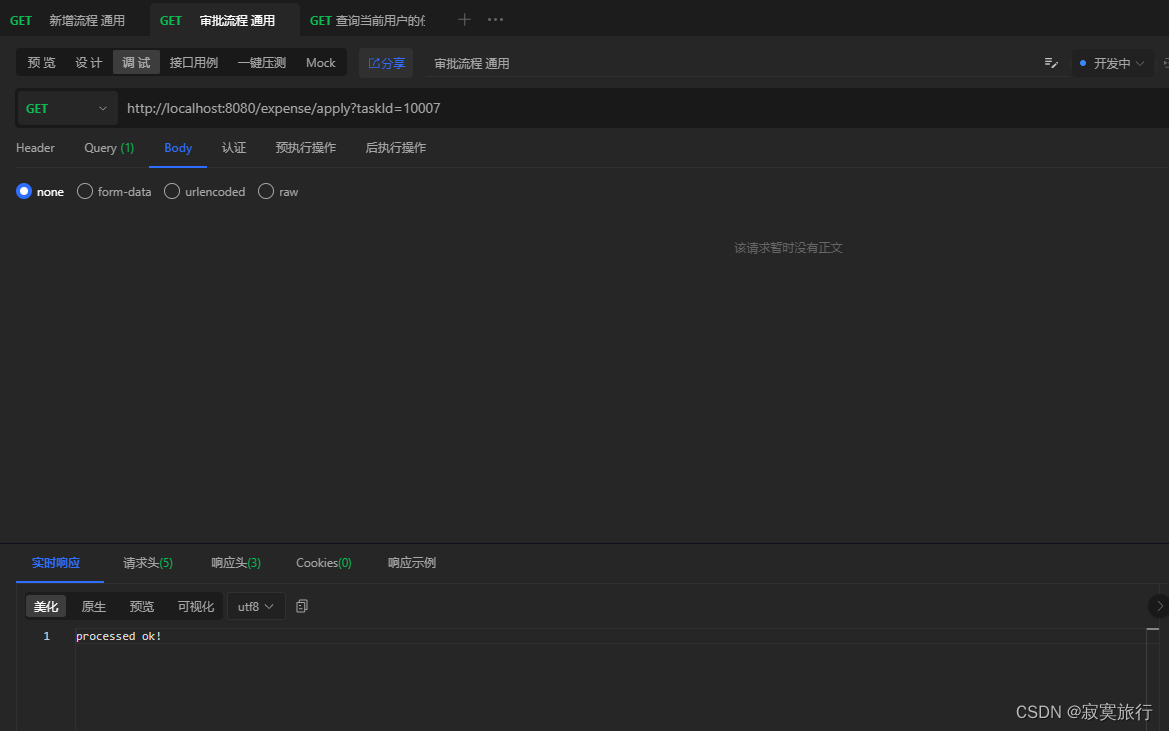
- 审批任务
- 驳回任务
- 任务查询
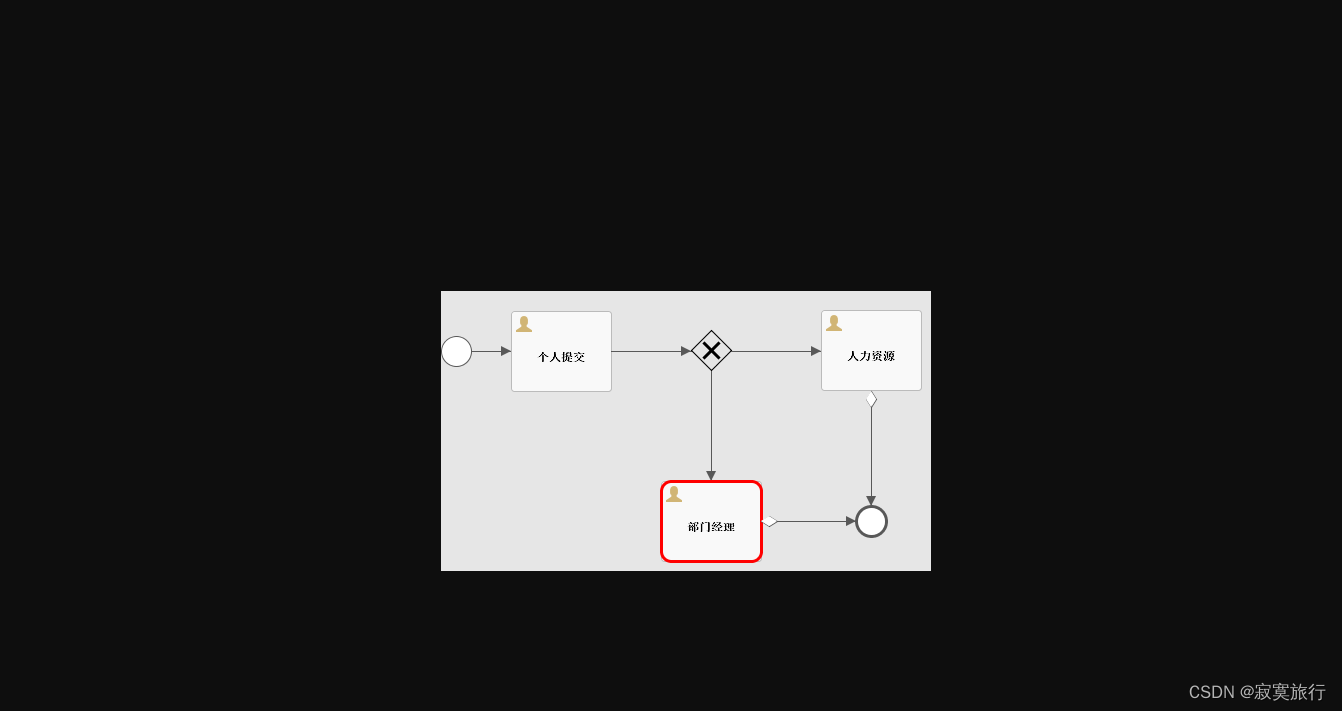
- 流程图获取
import org.flowable.bpmn.model.BpmnModel;
import org.flowable.engine.*;
import org.flowable.engine.runtime.Execution;
import org.flowable.engine.runtime.ProcessInstance;
import org.flowable.image.ProcessDiagramGenerator;
import org.flowable.task.api.Task;
import org.springframework.beans.factory.annotation.Autowired;
import org.springframework.stereotype.Controller;
import org.springframework.web.bind.annotation.RequestMapping;
import org.springframework.web.bind.annotation.ResponseBody;

import javax.servlet.http.HttpServletResponse;
import java.io.InputStream;
import java.io.OutputStream;
import java.util.ArrayList;
import java.util.HashMap;
import java.util.List;

@Controller
@RequestMapping(value = "common")
public class CommonController {
    @Autowired
    private RuntimeService runtimeService;
    @Autowired
    private TaskService taskService;
    @Autowired
    private RepositoryService repositoryService;
    @Autowired
    private ProcessEngine processEngine;

    @RequestMapping(value = "add")
    @ResponseBody
    public String addExpense(String userId, Integer day, String key) {
        //启动流程
        HashMap<String, Object> map = new HashMap<>();
        map.put("user", userId);
        map.put("day", day);
        ProcessInstance processInstance = runtimeService.startProcessInstanceByKey(key, map);
        return "提交成功.流程Id为:" + processInstance.getId();
    }

    /**
     * 获取列表
     */
    @RequestMapping(value = "/list")
    @ResponseBody
    public Object list(String userId) {
        List<Task> tasks = taskService.createTaskQuery().taskAssignee(userId).orderByTaskCreateTime().desc().list();
        for (Task task : tasks) {
            System.out.println(task.toString());
        }
        return tasks.toArray().toString();
    }

    /**
     * 批准
     *
     * @param taskId 任务ID
     */
    @RequestMapping(value = "apply")
    @ResponseBody
    public String apply(String taskId) {
        Task task = taskService.createTaskQuery().taskId(taskId).singleResult();
        if (task == null) {
            throw new RuntimeException("流程不存在");
        }
        //通过审核
        HashMap<String, Object> map = new HashMap<>();
        map.put("yijian", "tongyi");
        taskService.complete(taskId, map);
        return "processed ok!";
    }

    /**
     * 拒绝
     */
    @ResponseBody
    @RequestMapping(value = "reject")
    public String reject(String taskId) {
        HashMap<String, Object> map = new HashMap<>();
        map.put("outcome", "驳回");
        taskService.complete(taskId, map);
        return "reject";
    }

    /**
     * 生成流程图
     *
     * @param processId 任务ID
     */
    @RequestMapping(value = "processDiagram")
    public void genProcessDiagram(HttpServletResponse httpServletResponse, String processId) throws Exception {
        ProcessInstance pi = runtimeService.createProcessInstanceQuery().processInstanceId(processId).singleResult();

        //流程走完的不显示图
        if (pi == null) {
            return;
        }
        Task task = taskService.createTaskQuery().processInstanceId(pi.getId()).singleResult();
        //使用流程实例ID,查询正在执行的执行对象表,返回流程实例对象
        String InstanceId = task.getProcessInstanceId();
        List<Execution> executions = runtimeService
                .createExecutionQuery()
                .processInstanceId(InstanceId)
                .list();

        //得到正在执行的Activity的Id
        List<String> activityIds = new ArrayList<>();
        List<String> flows = new ArrayList<>();
        for (Execution exe : executions) {
            List<String> ids = runtimeService.getActiveActivityIds(exe.getId());
            activityIds.addAll(ids);
        }

        //获取流程图
        BpmnModel bpmnModel = repositoryService.getBpmnModel(pi.getProcessDefinitionId());
        ProcessEngineConfiguration engconf = processEngine.getProcessEngineConfiguration();
        ProcessDiagramGenerator diagramGenerator = engconf.getProcessDiagramGenerator();
        InputStream in = diagramGenerator.generateDiagram(bpmnModel, "png", activityIds, flows, engconf.getActivityFontName(), engconf.getLabelFontName(), engconf.getAnnotationFontName(), engconf.getClassLoader(), 1.0);
        OutputStream out = null;
        byte[] buf = new byte[1024];
        int legth = 0;
        try {
            out = httpServletResponse.getOutputStream();
            while ((legth = in.read(buf)) != -1) {
                out.write(buf, 0, legth);
            }
        } finally {
            if (in != null) {
                in.close();
            }
            if (out != null) {
                out.close();
            }
        }
    }
}
开始测试:


总结
涉及的所有代码,源码地址: flowable-springboot
文章来源:https://blog.csdn.net/qq_32419139/article/details/135356713
本文来自互联网用户投稿,该文观点仅代表作者本人,不代表本站立场。本站仅提供信息存储空间服务,不拥有所有权,不承担相关法律责任。 如若内容造成侵权/违法违规/事实不符,请联系我的编程经验分享网邮箱:chenni525@qq.com进行投诉反馈,一经查实,立即删除!
本文来自互联网用户投稿,该文观点仅代表作者本人,不代表本站立场。本站仅提供信息存储空间服务,不拥有所有权,不承担相关法律责任。 如若内容造成侵权/违法违规/事实不符,请联系我的编程经验分享网邮箱:chenni525@qq.com进行投诉反馈,一经查实,立即删除!
最新文章
- Python教程
- 深入理解 MySQL 中的 HAVING 关键字和聚合函数
- Qt之QChar编码(1)
- MyBatis入门基础篇
- 用Python脚本实现FFmpeg批量转换
- 一文看懂华润微电子IC和新型IPM等产品亮点
- 我的创作纪念日(730天)
- Live800:客户体验策略是什么?企业如何制定客户体验策略?
- 深入理解Axios的TypeScript类型约束
- 会话跟踪技术(cookie&&session)
- TypeScript前端学习(三)
- TS的高级类型
- 手机号码校验工具类(正则表达式)
- 【Java进阶】Stream 结合 Collectors 使用
- Build International Reports RTL Support-ActiveReports.NET