【深度学习目标检测】十三、YOLOv8 血细胞计数系统-含GUI(BCD数据集)
血细胞计数是医学上一种重要的检测手段,用于评估患者的健康状况,诊断疾病,以及监测治疗效果。而目标检测是一种计算机视觉技术,用于在图像中识别和定位特定的目标。在血细胞计数中,目标检测技术可以发挥重要作用。
首先,血细胞计数通常需要处理大量的血液样本,手动计数每个细胞既耗时又容易出错。使用目标检测算法,可以自动识别和计数图像中的血细胞,大大提高了计数的准确性和效率。
其次,不同的血细胞(如红细胞、白细胞和血小板)具有不同的形态和大小,这使得使用传统的图像处理方法进行区分和计数变得困难。目标检测算法可以通过训练识别不同血细胞的特征,准确地区分和计数各种血细胞。
此外,目标检测算法还可以处理一些特殊情况,如细胞重叠、不规则形状、染色不均等。这些情况可能会影响手动计数的准确性和可靠性。
最后,使用目标检测进行血细胞计数可以帮助医生更准确地分析和解读血液样本,从而为患者提供更准确的诊断和治疗方案。这有助于提高医疗质量和患者满意度。
综上所述,使用目标检测对血细胞计数具有重要的意义,可以提高计数的准确性和效率,为医生提供更可靠的诊断依据,有助于提高医疗质量。
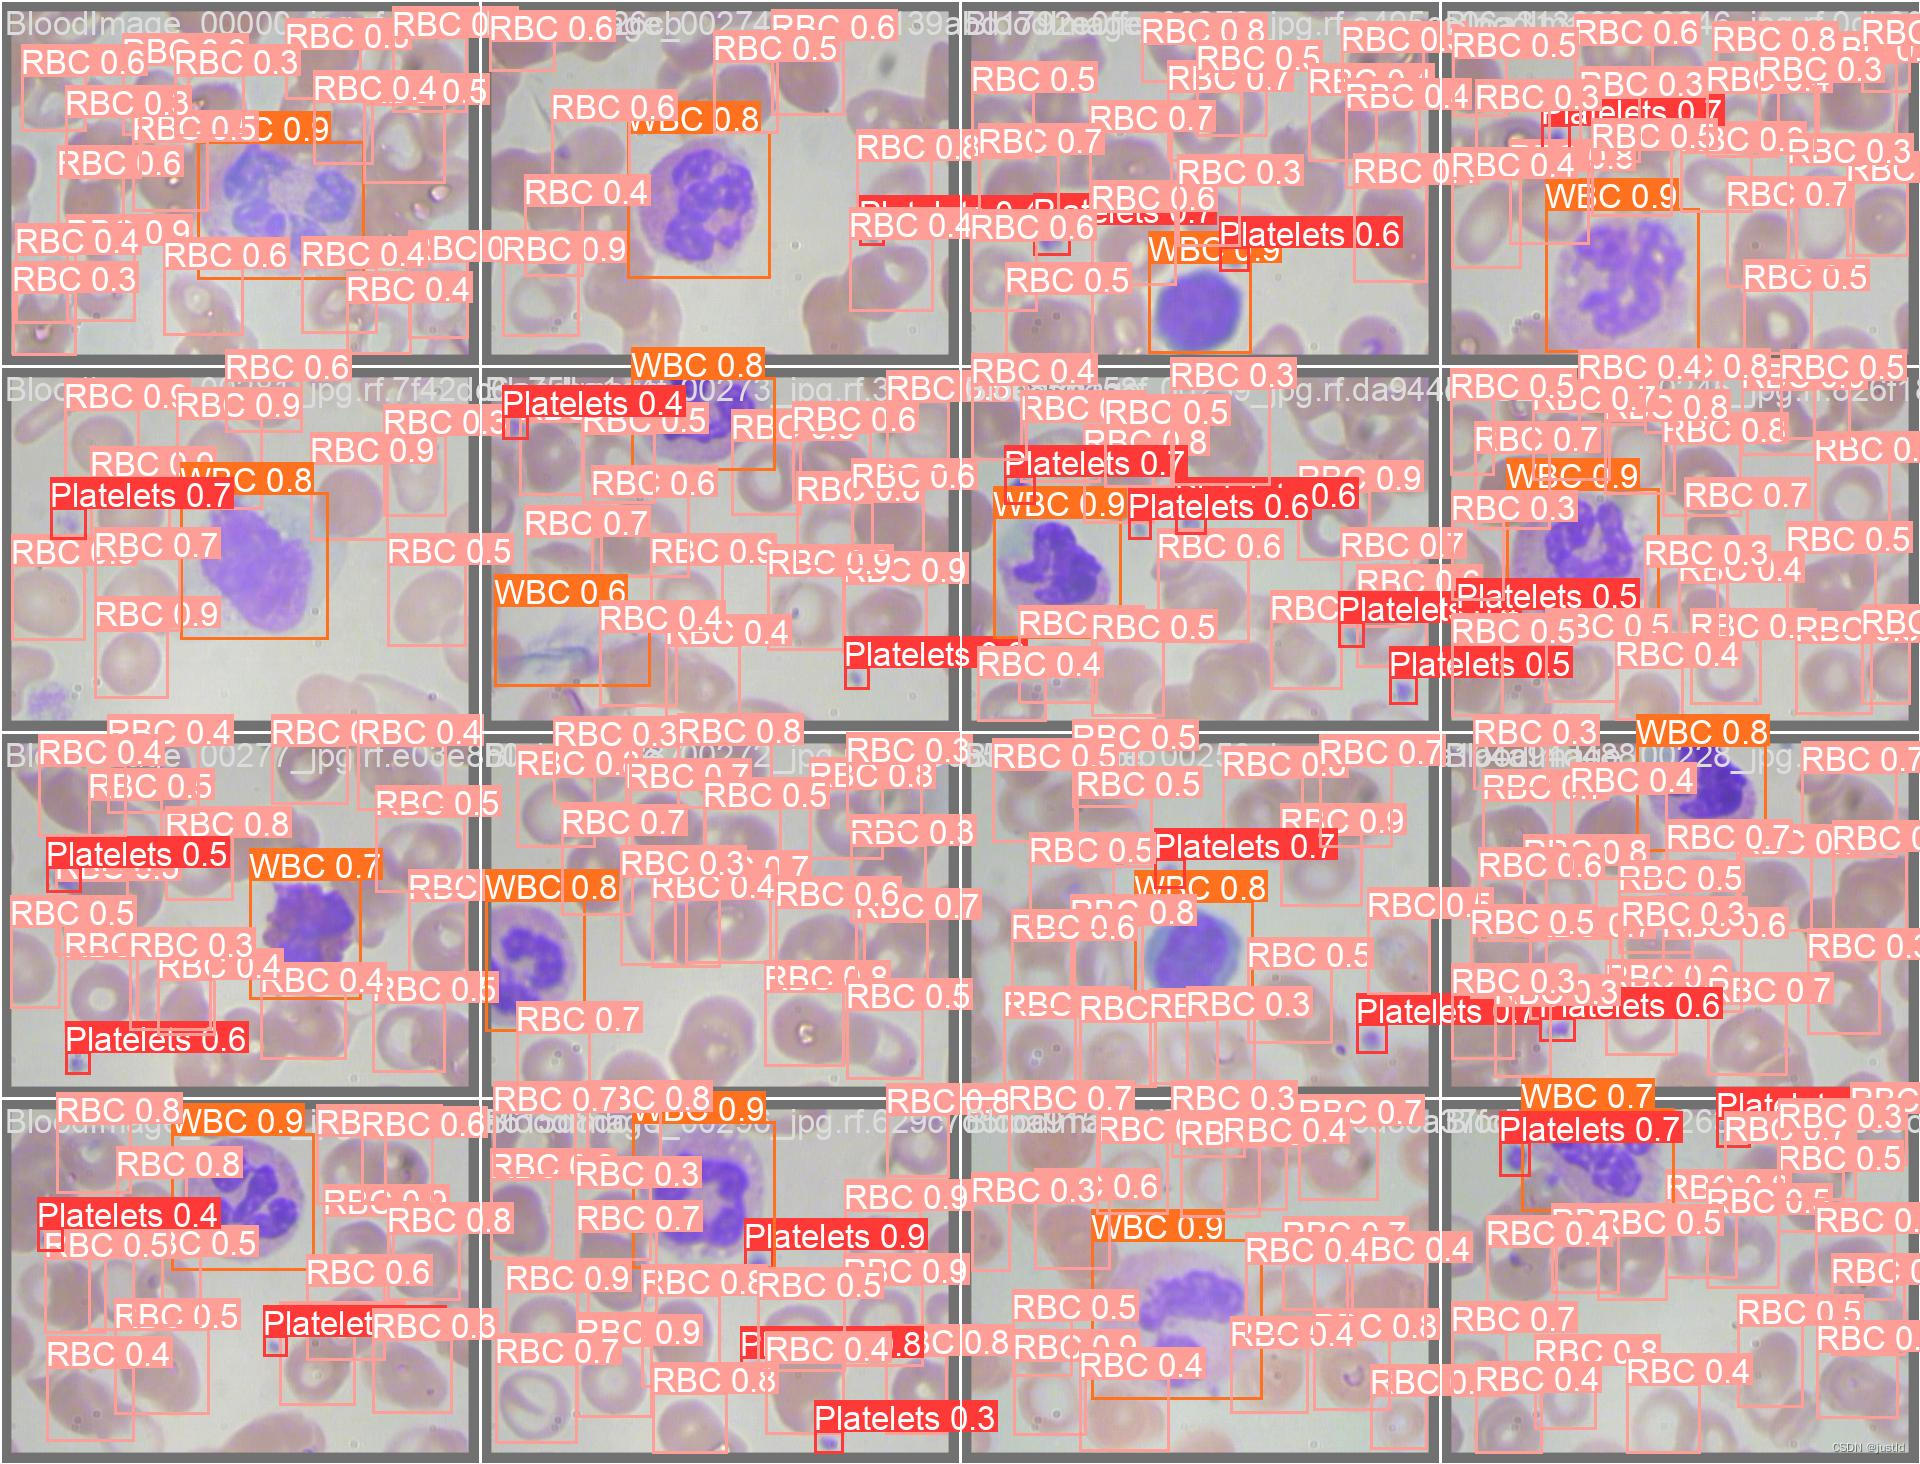
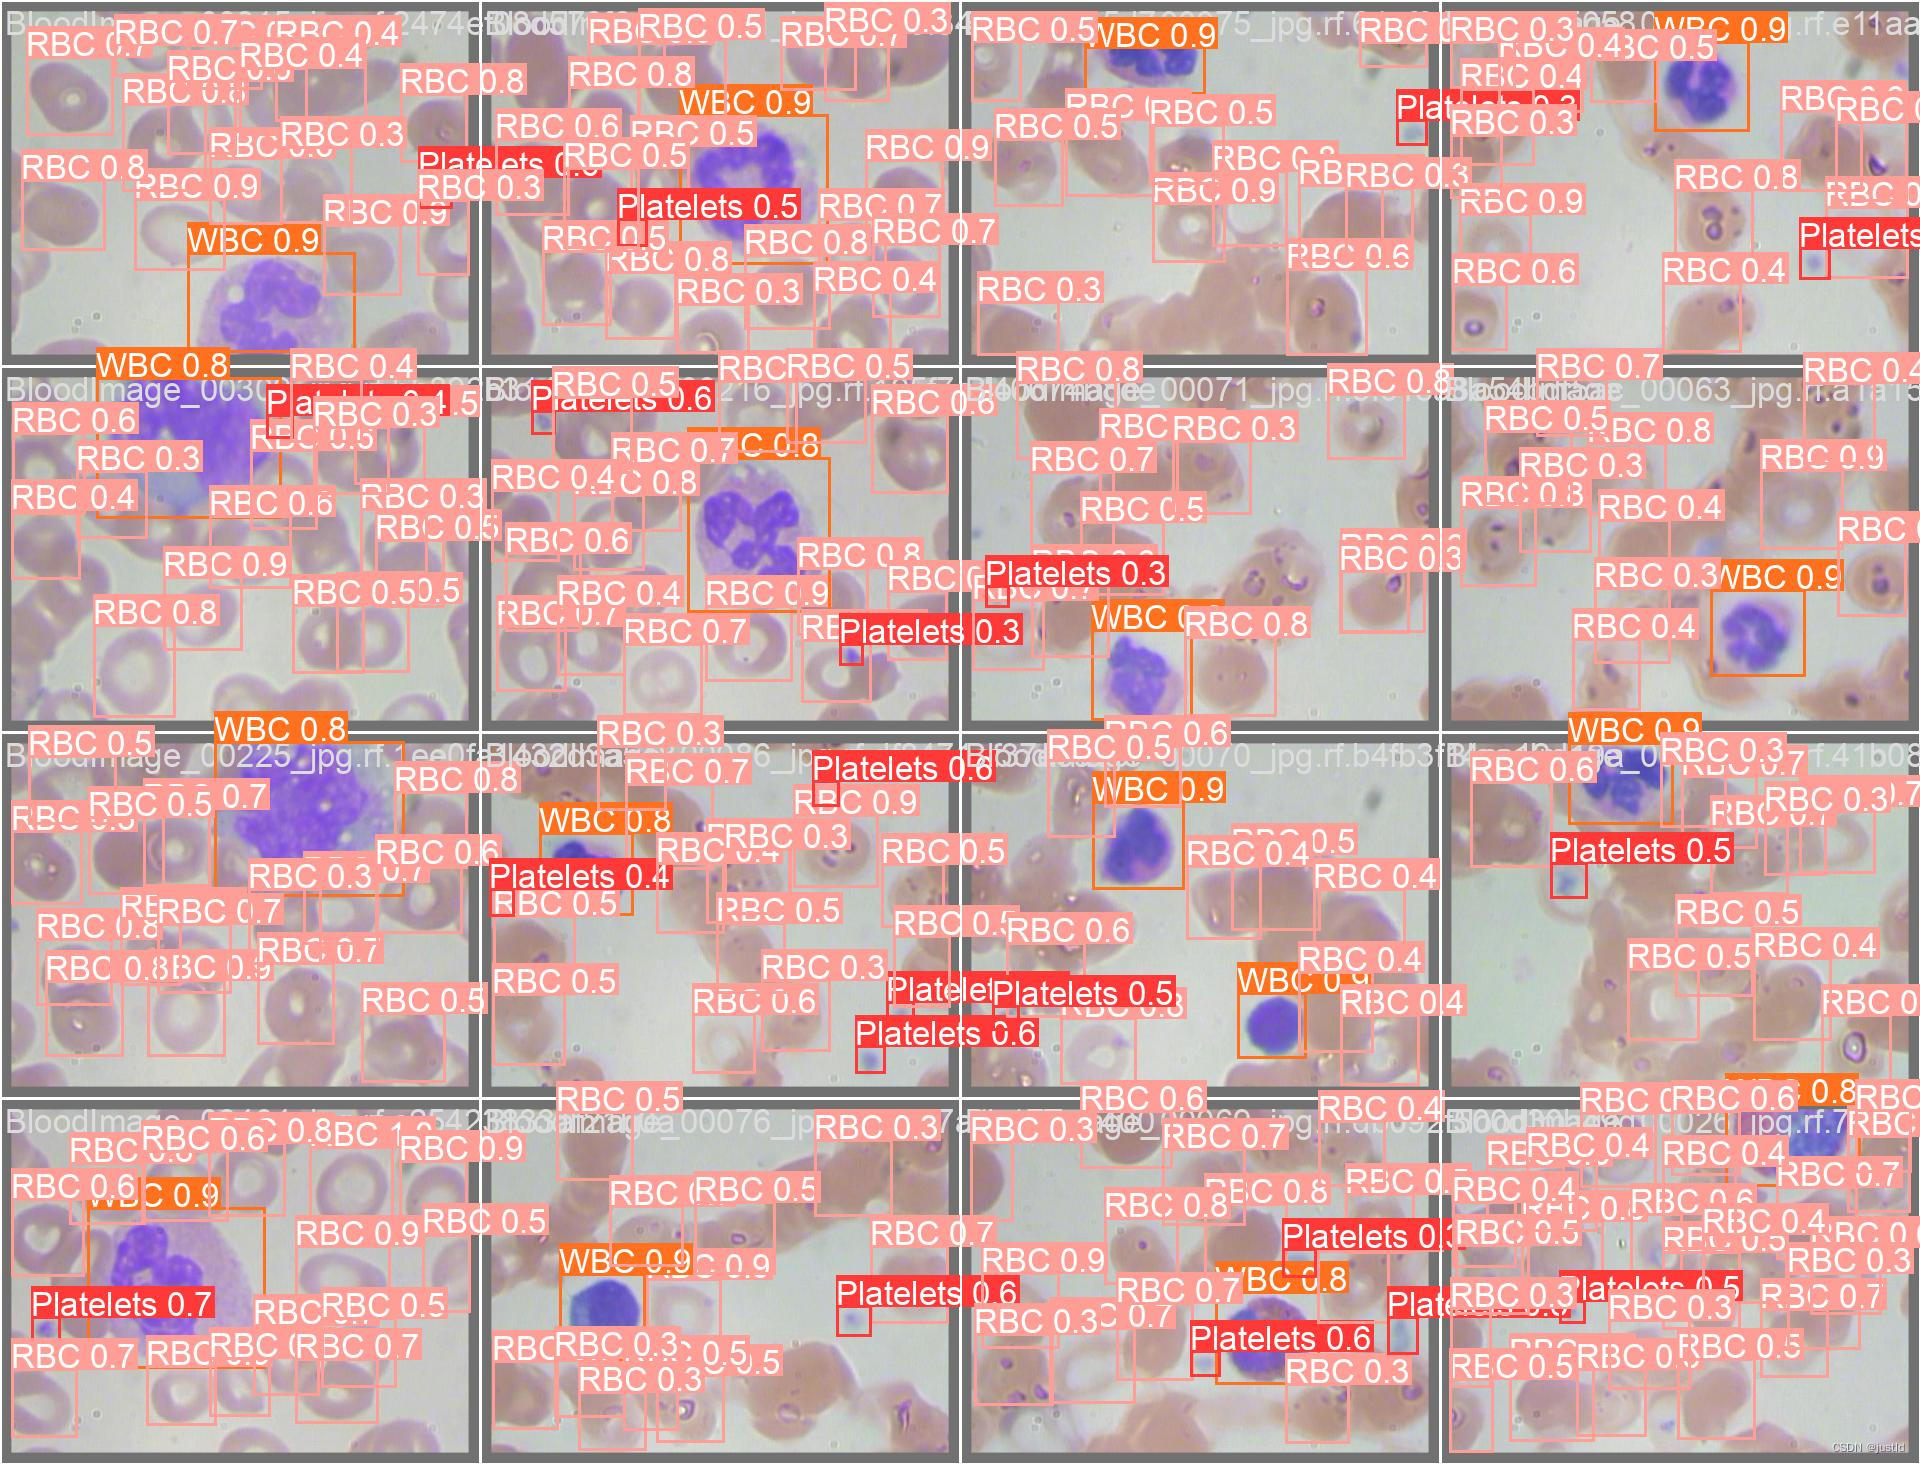
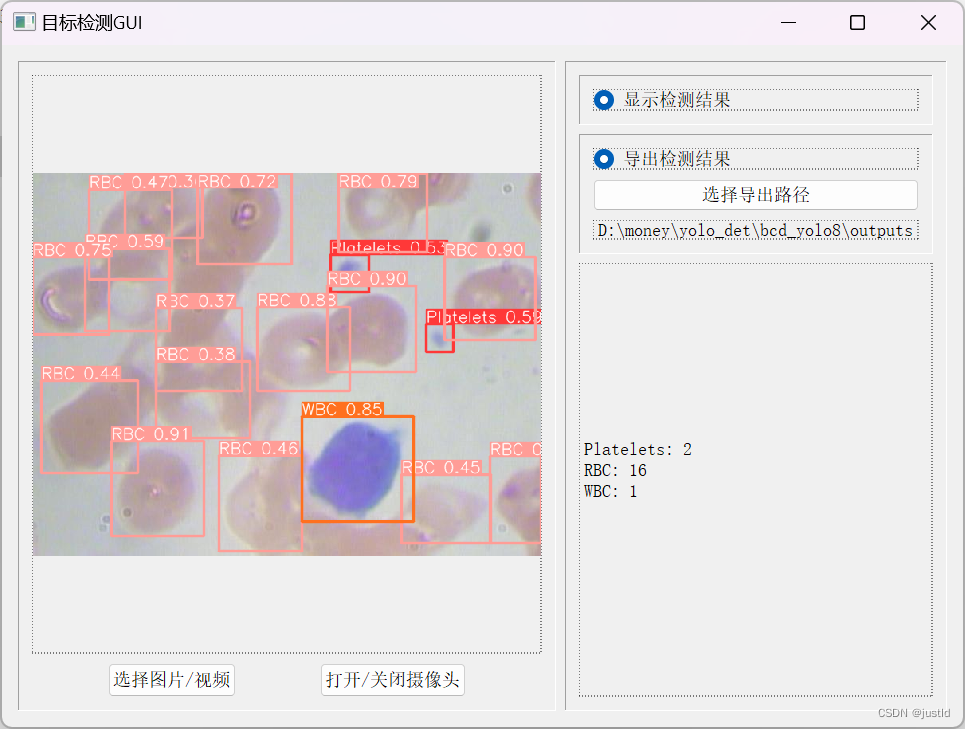
本文介绍使用yolov8进行血细胞检测的方法,在BCD数据集训练,其效果如下图:
一、安装YoloV8
yolov8官方文档:主页 - Ultralytics YOLOv8 文档
安装部分参考:官方安装教程
二、数据集准备
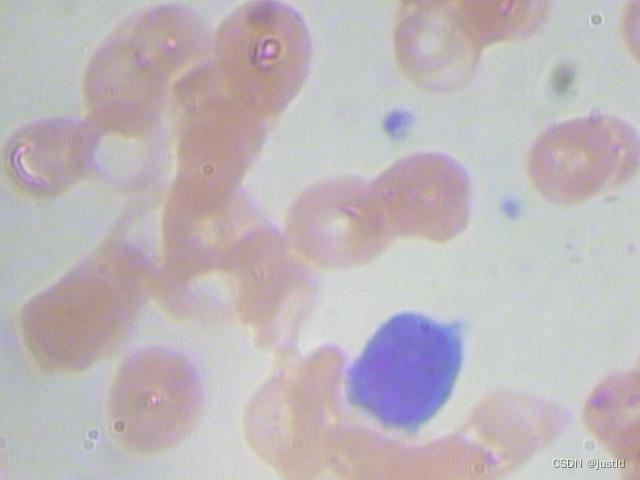
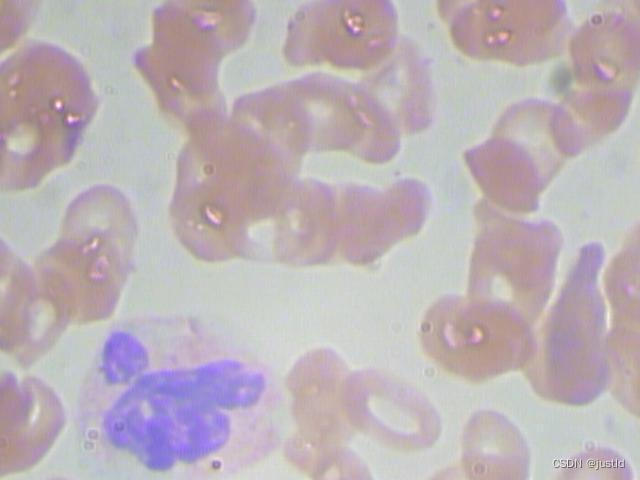
本文使用的数据集是BCD数据集,该数据集包含3个类别:白细胞(WBC)、红细胞(RBC)和血小板(Platelets)。该数据集共364张图片,其中训练集包含255张图片,验证集包含73张图片,测试集包含36张图片。
示例图片如下:
本文提供转换好的BCD数据集YOLO8格式,可以直接用于训练Yolov8模型。BCD-yolov8数据集
三、模型训练
1、数据集配置文件
在ultralytics/ultralytics/cfg/datasets目录下添加bcd.yaml,添加以下内容(path修改为自己的路径):
# Ultralytics YOLO 🚀, AGPL-3.0 license
# COCO 2017 dataset http://cocodataset.org by Microsoft
# Example usage: yolo train data=coco.yaml
# parent
# ├── ultralytics
# └── datasets
#     └── coco  ← downloads here (20.1 GB)


# Train/val/test sets as 1) dir: path/to/imgs, 2) file: path/to/imgs.txt, or 3) list: [path/to/imgs1, path/to/imgs2, ..]
path: datasets/medical/BCD_YOLO8  # dataset root dir
train: images/train  # train images (relative to 'path') 118287 images
val: images/val  # val images (relative to 'path') 5000 images
test: images/test  # 20288 of 40670 images, submit to https://competitions.codalab.org/competitions/20794

# Classes
names:
  0: Platelets
  1: RBC
  2: WBC
2、修改模型配置文件
新建ultralytics/cfg/models/medical/yolov8.yaml?,添加以下内容:,添加以下内容:
# Ultralytics YOLO 🚀, AGPL-3.0 license
# YOLOv8 object detection model with P3-P5 outputs. For Usage examples see https://docs.ultralytics.com/tasks/detect

# Parameters
nc: 3  # number of classes
scales: # model compound scaling constants, i.e. 'model=yolov8n.yaml' will call yolov8.yaml with scale 'n'
  # [depth, width, max_channels]
  n: [0.33, 0.25, 1024]  # YOLOv8n summary: 225 layers,  3157200 parameters,  3157184 gradients,   8.9 GFLOPs
  s: [0.33, 0.50, 1024]  # YOLOv8s summary: 225 layers, 11166560 parameters, 11166544 gradients,  28.8 GFLOPs
  m: [0.67, 0.75, 768]   # YOLOv8m summary: 295 layers, 25902640 parameters, 25902624 gradients,  79.3 GFLOPs
  l: [1.00, 1.00, 512]   # YOLOv8l summary: 365 layers, 43691520 parameters, 43691504 gradients, 165.7 GFLOPs
  x: [1.00, 1.25, 512]   # YOLOv8x summary: 365 layers, 68229648 parameters, 68229632 gradients, 258.5 GFLOPs

# YOLOv8.0n backbone
backbone:
  # [from, repeats, module, args]
  - [-1, 1, Conv, [64, 3, 2]]  # 0-P1/2
  - [-1, 1, Conv, [128, 3, 2]]  # 1-P2/4
  - [-1, 3, C2f, [128, True]]
  - [-1, 1, Conv, [256, 3, 2]]  # 3-P3/8
  - [-1, 6, C2f, [256, True]]
  - [-1, 1, Conv, [512, 3, 2]]  # 5-P4/16
  - [-1, 6, C2f, [512, True]]
  - [-1, 1, Conv, [1024, 3, 2]]  # 7-P5/32
  - [-1, 3, C2f, [1024, True]]
  - [-1, 1, SPPF, [1024, 5]]  # 9

# YOLOv8.0n head
head:
  - [-1, 1, nn.Upsample, [None, 2, 'nearest']]
  - [[-1, 6], 1, Concat, [1]]  # cat backbone P4
  - [-1, 3, C2f, [512]]  # 12

  - [-1, 1, nn.Upsample, [None, 2, 'nearest']]
  - [[-1, 4], 1, Concat, [1]]  # cat backbone P3
  - [-1, 3, C2f, [256]]  # 15 (P3/8-small)

  - [-1, 1, Conv, [256, 3, 2]]
  - [[-1, 12], 1, Concat, [1]]  # cat head P4
  - [-1, 3, C2f, [512]]  # 18 (P4/16-medium)

  - [-1, 1, Conv, [512, 3, 2]]
  - [[-1, 9], 1, Concat, [1]]  # cat head P5
  - [-1, 3, C2f, [1024]]  # 21 (P5/32-large)

  - [[15, 18, 21], 1, Detect, [nc]]  # Detect(P3, P4, P5)
3、训练模型
使用如下命令训练模型,相关路径更改为自己的路径,建议绝对路径:
yolo detect train project=medical_output name=bcd_yolo8 exist_ok=True optimizer=auto val=True amp=True epochs=100 imgsz=640 model=ultralytics/cfg/models/medical/yolov8.yaml data=ultralytics/cfg/datasets/bcd.yaml
4、验证模型
使用如下命令验证模型,相关路径根据需要修改:
yolo detect val model=medical_output/bcd_yolo8/weights/best.pt data=ultralytics/ultralytics/cfg/datasets/bcd.yaml
其精度如下:
# Ultralytics YOLOv8.1.0 🚀 Python-3.9.18 torch-2.1.0+cu118 CUDA:0 (NVIDIA GeForce RTX 4090, 24210MiB)
# YOLOv8 summary (fused): 168 layers, 3006233 parameters, 0 gradients, 8.1 GFLOPs
# val: Scanning /home/yq/aitools/datasets/medical/BCD_YOLO8/labels/val.cache... 73 images, 0 backgrounds, 0 corrupt: 100%|██████████|
#                  Class     Images  Instances      Box(P          R      mAP50  mAP50-95): 100%|██████████| 5/5 [00:05<00:00,  1.02s/
#                    all         73        967      0.844      0.915      0.929      0.644
#              Platelets         73         76      0.817      0.882      0.904      0.502
#                    RBC         73        819      0.764      0.864      0.893      0.635
#                    WBC         73         72      0.951          1      0.989      0.797
# Speed: 2.1ms preprocess, 7.8ms inference, 0.0ms loss, 9.1ms postprocess per image
# Results saved to /home/yq/ultralytics/runs/detect/val15
# 💡 Learn more at https://docs.ultralytics.com/modes/val
四、推理
训练好了模型,可以使用如下代码实现推理,将权重放到同级目录:
from PIL import Image
from ultralytics import YOLO

# 加载预训练的YOLOv8n模型
model = YOLO('best.pt')

image_path = 'BloodImage_00021_jpg.rf.a5330c5a9f79a73c6e526244171cf77b.jpg'
results = model(image_path)  # 结果列表

# 展示结果
for r in results:
    im_array = r.plot()  # 绘制包含预测结果的BGR numpy数组
    im = Image.fromarray(im_array[..., ::-1])  # RGB PIL图像
    im.show()  # 显示图像
    im.save('results.jpg')  # 保存图像
五、界面开发
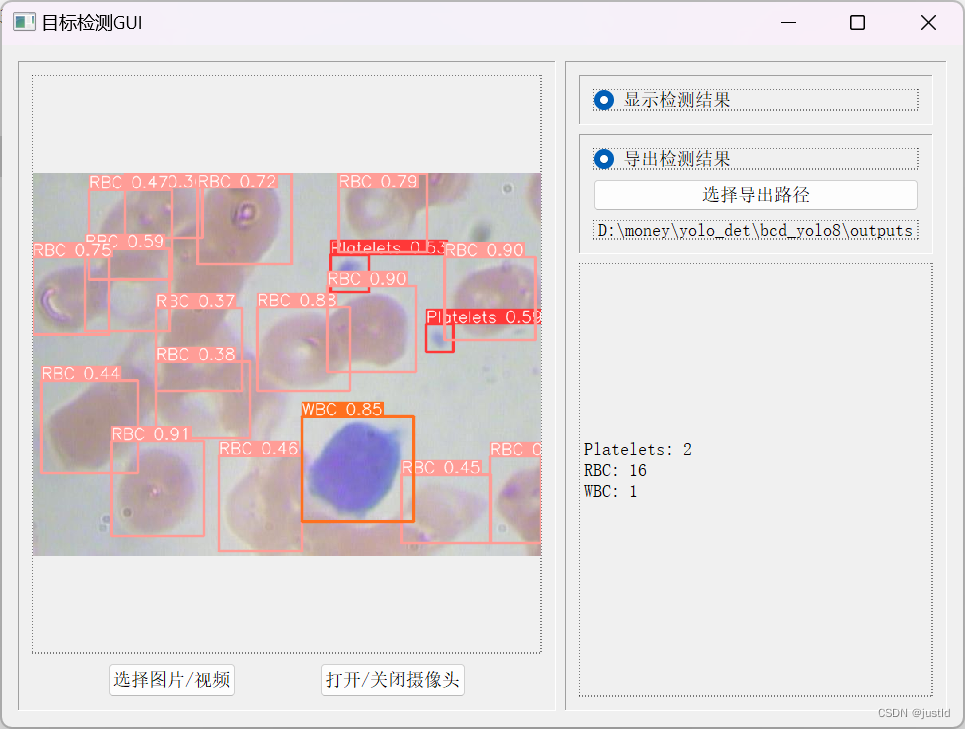
使用pyqt5开发gui界面,支持图片、视频、摄像头输入,支持导出到指定路径,其GUI如下图:
本文提供开发好的GUI界面和训练好的模型权重,可以一键启动。【BCD-yolov8-GUI检测系统】
本文来自互联网用户投稿,该文观点仅代表作者本人,不代表本站立场。本站仅提供信息存储空间服务,不拥有所有权,不承担相关法律责任。 如若内容造成侵权/违法违规/事实不符,请联系我的编程经验分享网邮箱:chenni525@qq.com进行投诉反馈,一经查实,立即删除!
- Python教程
- 深入理解 MySQL 中的 HAVING 关键字和聚合函数
- Qt之QChar编码(1)
- MyBatis入门基础篇
- 用Python脚本实现FFmpeg批量转换
- 电脑报错缺失vcomp140.dll无法执行代码怎么解决?快速的修复vcomp140.dll方案
- HBase 高可用集群详细图文安装部署
- Allins 官网正式上线,铭文赛道进入 AMM 交易时代
- 6.3.4录制屏幕
- Android蓝牙协议栈fluoride(八) - 音乐播放与控制(1)
- 网络新农村文化墙的设计与实现(JSP+java+springmvc+mysql+MyBatis)
- 24分+的医药顶刊带你学习表观组学解析超级热点“肿瘤耐药”的机制
- 内网渗透测试基础——权限提升分析及防御
- 三台CentOS7.6虚拟机搭建Hadoop完全分布式集群(一)
- 【C语言编程之旅 3】刷题篇-函数