SLAM算法与工程实践——相机篇:RealSense D435使用(1)
SLAM算法与工程实践系列文章
下面是SLAM算法与工程实践系列文章的总链接,本人发表这个系列的文章链接均收录于此
SLAM算法与工程实践系列文章链接
下面是专栏地址:
SLAM算法与工程实践系列专栏
文章目录
前言
这个系列的文章是分享SLAM相关技术算法的学习和工程实践
SLAM算法与工程实践——相机篇:RealSense D435使用(1)
参考:
图像话题的关键词含义:
- camera_info:图像的内参、畸变等参数
- depth 深度图像
- color 彩色图像
- infra1\infra2 红外图像
- pointcloud点云图像
- aligned XXX to XXX 将XXX映射对齐到XXX的图像
第三方库安装
Open3D
参考:
官网:http://www.open3d.org/
源码下载:https://github.com/isl-org/Open3D
c++安装方法:http://www.open3d.org/docs/release/compilation.html
官方文档:http://www.open3d.org/docs/release/cpp_api.html
安装依赖
# Only needed for Ubuntu
util/install_deps_ubuntu.sh
编译
cd Open3D-master
mkdir build
cd build
cmake ..
make -jx
报错
cmake版本太低
参考:
在编译Open3D时,显示cmake的版本太低,需要3.20以上的版本

官方下载地址:https://cmake.org/download/
cd cmake-3.27.5/
./bootstrap
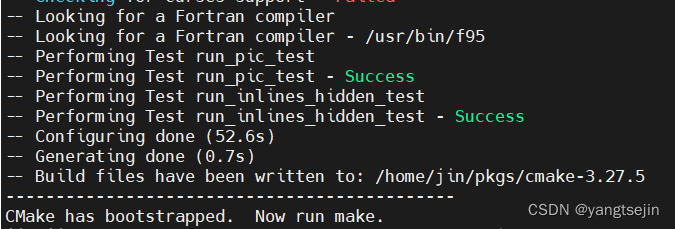
配置成功后显示:CMake has bootstrapped. Now run make. 开始编译
make -jx
# 或者单线程编译
make
然后安装
sudo make install
这时查看版本
cmake --version
显示找不到cmake目录

最后使用新安装的cmake替换旧版本,其中/usr/local/bin/cmake为新安装的cmake目录。
sudo update-alternatives --install /usr/bin/cmake cmake /usr/local/bin/cmake 1 --force
再查看cmake版本显示已经更换为新版本

PCL
官方地址:https://github.com/PointCloudLibrary/pcl
命令安装
sudo apt-get install libpcl-dev
测试是否安装成功
新建test.cpp,输入以下代码
#include <iostream>
#include <pcl/common/common_headers.h>
#include <pcl/io/pcd_io.h>
#include <pcl/visualization/pcl_visualizer.h>
#include <pcl/visualization/cloud_viewer.h>
#include <pcl/console/parse.h>

int main(int argc, char **argv)
{
    std::cout << "Test PCL !!!" << std::endl;

    pcl::PointCloud<pcl::PointXYZRGB>::Ptr point_cloud_ptr (new pcl::PointCloud<pcl::PointXYZRGB>);
    uint8_t r(255), g(15), b(15);
    for (float z(-1.0); z <= 1.0; z += 0.05)
    {
        for (float angle(0.0); angle <= 360.0; angle += 5.0)
        {
            pcl::PointXYZRGB point;
            point.x = 0.5 * cosf (pcl::deg2rad(angle));
            point.y = sinf (pcl::deg2rad(angle));
            point.z = z;
            uint32_t rgb = (static_cast<uint32_t>(r) << 16 |
                            static_cast<uint32_t>(g) << 8 | static_cast<uint32_t>(b));
            point.rgb = *reinterpret_cast<float*>(&rgb);
            point_cloud_ptr->points.push_back (point);
        }
        if (z < 0.0)
        {
            r -= 12;
            g += 12;
        }
        else
        {
            g -= 12;
            b += 12;
        }
    }
    point_cloud_ptr->width = (int) point_cloud_ptr->points.size ();
    point_cloud_ptr->height = 1;

    pcl::visualization::PCLVisualizer::Ptr RGBViewer(new pcl::visualization::PCLVisualizer("3D Viewer"));
    pcl::visualization::PointCloudColorHandlerRGBField<pcl::PointXYZRGB> rgb(point_cloud_ptr);
    RGBViewer->setBackgroundColor(0,0,0);
    RGBViewer->addPointCloud<pcl::PointXYZRGB> (point_cloud_ptr,rgb,"rgb cloud");
    RGBViewer->setPointCloudRenderingProperties(pcl::visualization::PCL_VISUALIZER_POINT_SIZE,1,"rgb cloud");
    RGBViewer->addCoordinateSystem(1.0);
    RGBViewer->initCameraParameters();

    while (!RGBViewer->wasStopped())
    {
        RGBViewer->spin();
    }
    return 0;
}
新建CMakeLists.txt,输入以下内容
cmake_minimum_required(VERSION 2.6)
project(TEST)

find_package(PCL REQUIRED)

include_directories(${PCL_INCLUDE_DIRS})
link_directories(${PCL_LIBRARY_DIRS})
add_definitions(${PCL_DEFINITIONS})

add_executable(TEST test.cpp)

target_link_libraries (TEST ${PCL_LIBRARIES})

install(TARGETS TEST RUNTIME DESTINATION bin)
编译安装运行
cd build
cmake ..
make
./TEST
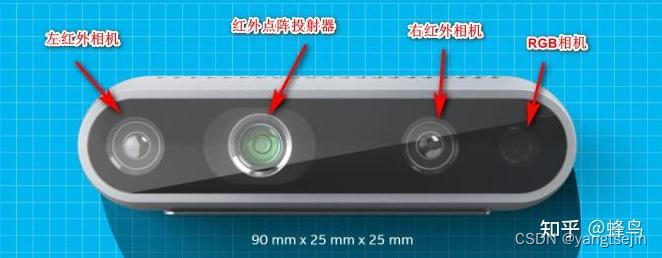
安装驱动
IntelRealSense Github上官方仓库:https://github.com/IntelRealSense
库主要分成两部分:librealsense 和 realsense-ros, 其实这相当于是Realsense库的两个版本,librealsense就是我们常说的Realsense的库(或者说SDK),而realsense-ros就是在librealsense上面又开发出来的ros版本的SDK,所以一般来说realsense-ros的版本一般比librealsense的最新版本要低一点,而且realsense-ros对librealsense有单方面的版本要求。
安装librealsense
源码安装
安装realsense SDK
首先下载安装包:
git clone https://github.com/IntelRealSense/librealsense
分别执行安装依赖项:
cd librealsense
sudo apt-get install libudev-dev pkg-config libgtk-3-dev
sudo apt-get install libusb-1.0-0-dev pkg-config
sudo apt-get install libglfw3-dev
sudo apt-get install libssl-dev
编译librealsense:
mkdir build
cd build
cmake ../ -DBUILD_EXAMPLES=true
make -jx
sudo make install
将realsense插到USB3.0插口,测试安装好的librealsense
realsense-viewer
此时会打开realsense软件,但mission一个模块,右上角会有标注,
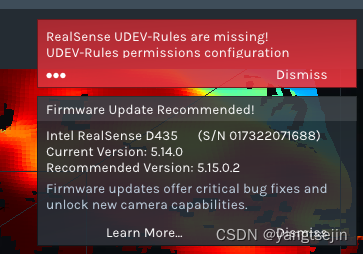
输入如下指令安装该模块:
sudo cp ~/.99-realsense-libusb.rules /etc/udev/rules.d/99-realsense-libusb.rules && sudo udevadm control --reload-rules && udevadm trigger
再次打开realsense-viewer就可以看到realsense的数据了,注意要使用USB3.0线
命令安装
官方文档:https://github.com/IntelRealSense/librealsense/blob/master/doc/distribution_linux.md
步骤:
#添加密钥:
sudo apt-key adv --keyserver keyserver.ubuntu.com --recv-key F6E65AC044F831AC80A06380C8B3A55A6F3EFCDE || sudo apt-key adv --keyserver hkp://keyserver.ubuntu.com:80 --recv-key F6E65AC044F831AC80A06380C8B3A55A6F3EFCDE

#查看添加密钥结果:
export http_proxy="http://<proxy>:<port>"

#添加仓库地址到软件源:
sudo add-apt-repository "deb https://librealsense.intel.com/Debian/apt-repo $(lsb_release -cs) main" -u

#安装必须库:
sudo apt-get install librealsense2-dkms
sudo apt-get install librealsense2-utils

#可选择安装库:
sudo apt-get install librealsense2-dev
sudo apt-get install librealsense2-dbg

#安装完成,启动SDK查看:
realsense-viewer
安装realsense-ros
参考:
【视觉SLAM(二)】Realsense D455在Jetson Nano上的安装Realsense和ROS驱动安装
官方仓库:https://github.com/IntelRealSense/realsense-ros/tree/ros1-legacy
命令安装
安装realsense-ros的方式它分了两种,一种是命令行安装,另一种是源码安装,这里直接建议命令行安装,只需要两步,而且基本不会报错:
sudo apt-get install ros-$ROS_DISTRO-realsense2-camera
sudo apt-get install ros-$ROS_DISTRO-realsense2-description

echo "source ~/catkin_ws/devel/setup.bash" >> ~/.bashrc
source ~/.bashrc


#查看安装是否成功:
roslaunch realsense2_camera rs_camera.launch
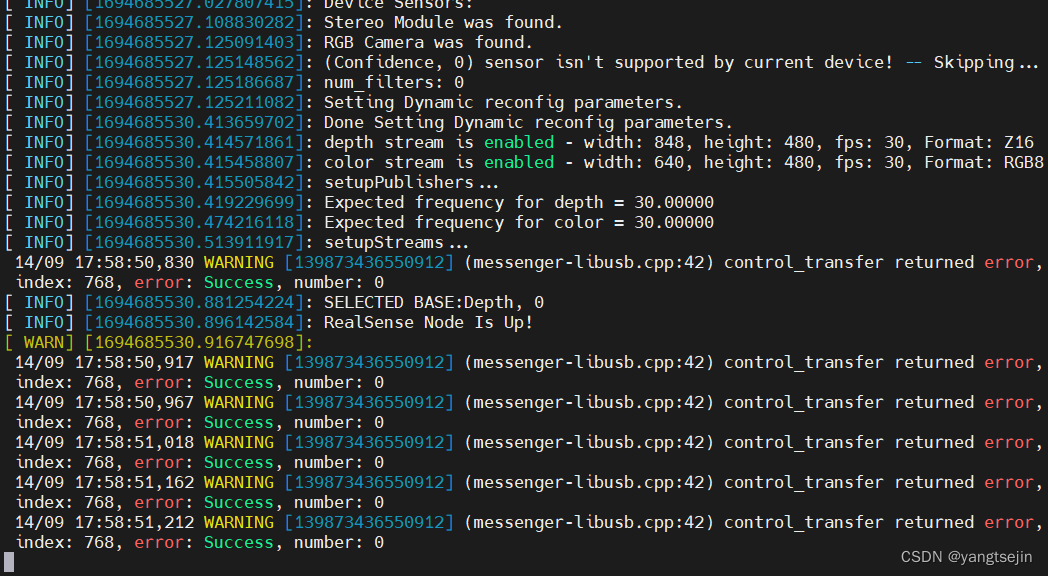
注意:
这样的方式安装的 realsense2_camera 在 /opt/ros/noetic/share/realsense2_camera/ 处
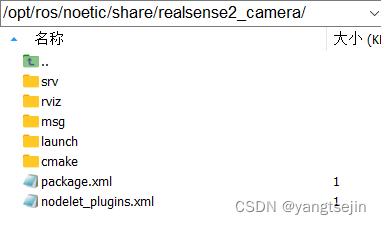
可以进去看到.launch 文件
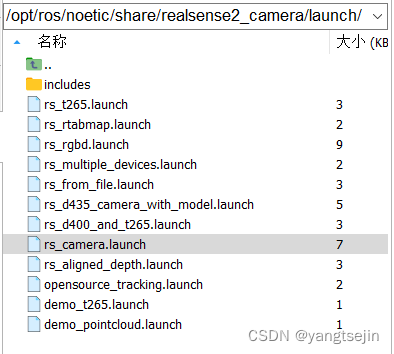
如果不能确定文件在哪里,可以使用ros命令
roscd realsense2_camera/launch/
sudo gedit rs_camera.launch
如

源码安装
将源码下载并解压到 catkin_ws/src 目录下,然后输入命令
cd ~/catkin_ws

catkin_make -DCATKIN_ENABLE_TESTING=False -DCMAKE_BUILD_TYPE=Release
catkin_make install
echo "source ~/catkin_ws/devel/setup.bash">>~/.bashrc
source ~/.bashrc
这个时候被安装到了 /home/jin/catkin_ws/install/share 文件夹中
报错
错误1
参考:
Failed to load nodelet [/camera/realsense2_camera] of type [realsense2_camera/RealSenseNodeFactory]
输入命令 roslaunch realsense2_camera rs_camera.launch 后报如下错误
[ERROR] [1694684893.036922883]: Failed to load nodelet [/camera/realsense2_camera] of type [realsense2_camera/RealSenseNodeFactory] even after refreshing the cache: Failed to load library /opt/ros/noetic/lib//librealsense2_camera.so. Make sure that you are calling the PLUGINLIB_EXPORT_CLASS macro in the library code, and that names are consistent between this macro and your XML. Error string: Could not load library (Poco exception = librealsense2.so.2.50: cannot open shared object file: No such file or directory)
[ERROR] [1694684893.036957351]: The error before refreshing the cache was: Failed to load library /opt/ros/noetic/lib//librealsense2_camera.so. Make sure that you are calling the PLUGINLIB_EXPORT_CLASS macro in the library code, and that names are consistent between this macro and your XML. Error string: Could not load library (Poco exception = librealsense2.so.2.50: cannot open shared object file: No such file or directory)
[FATAL] [1694684893.037142798]: Failed to load nodelet '/camera/realsense2_camera` of type `realsense2_camera/RealSenseNodeFactory` to manager `realsense2_camera_manager'
[camera/realsense2_camera-2] process has died [pid 1712726, exit code 255, cmd /opt/ros/noetic/lib/nodelet/nodelet load realsense2_camera/RealSenseNodeFactory realsense2_camera_manager __name:=realsense2_camera __log:=/home/jin/.ros/log/950f66ce-52e3-11ee-accf-f366021ff66f/camera-realsense2_camera-2.log].
log file: /home/jin/.ros/log/950f66ce-52e3-11ee-accf-f366021ff66f/camera-realsense2_camera-2*.log
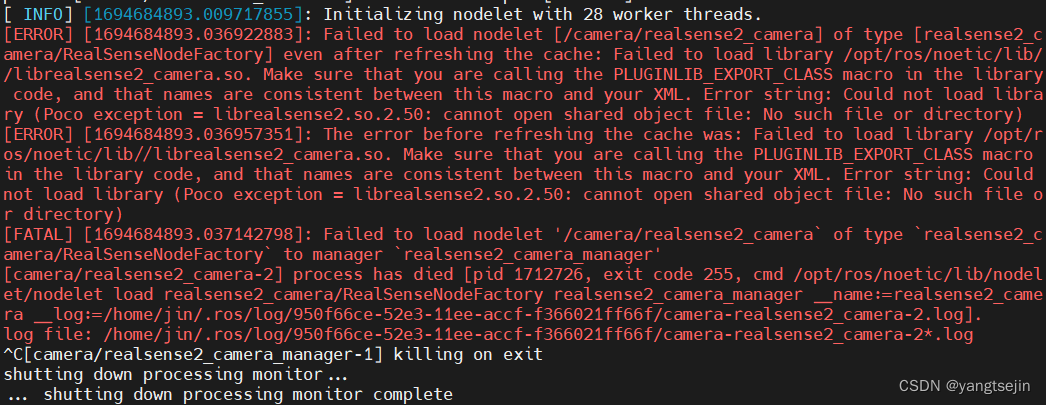
原因在于没有source,找不到realsense2_camera包,在安装D435的包时,以为bashrc文件里已存在要添加的路径故没有执行
解决方法:
echo "source ~/catkin_ws/devel/setup.bash" >> ~/.bashrc
source ~/.bashrc
错误2
参考:
ubuntu18.04 catkin_make编译报错CMake Error at /opt/ros /meLodic/ share/catkin/cmake /catkinConfig. cmake
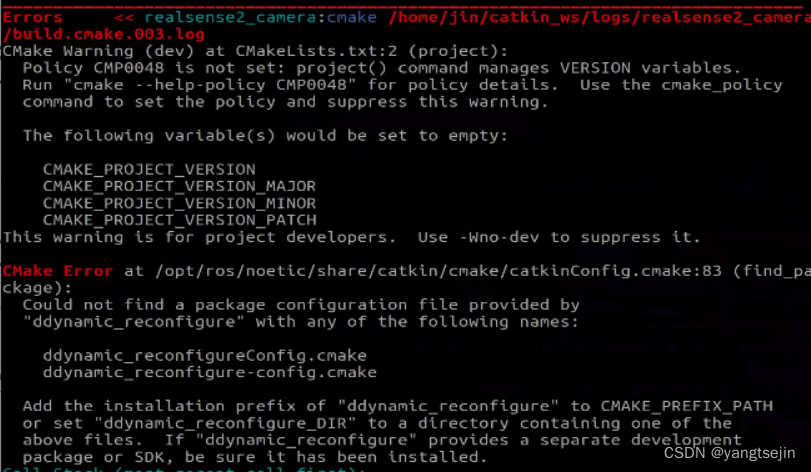
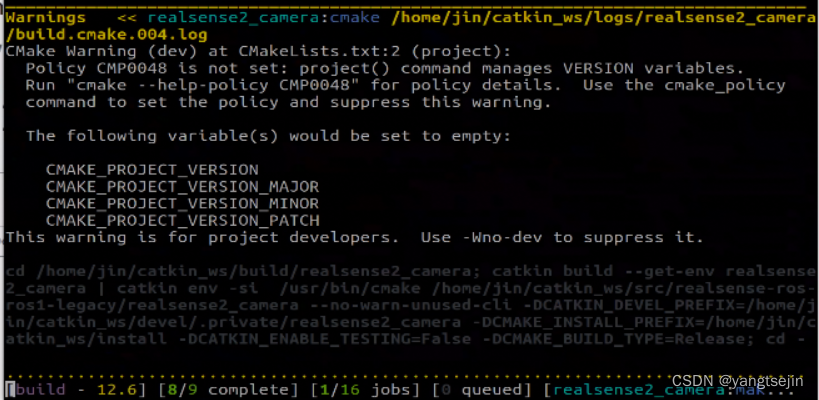
Errors     << realsense2_camera:cmake /home/jin/catkin_ws/logs/realsense2_camera/build.cmake.003.log
CMake Warning (dev) at CMakeLists.txt:2 (project):
  Policy CMP0048 is not set: project() command manages VERSION variables.
  Run "cmake --help-policy CMP0048" for policy details.  Use the cmake_policy
  command to set the policy and suppress this warning.

  The following variable(s) would be set to empty:

    CMAKE_PROJECT_VERSION
    CMAKE_PROJECT_VERSION_MAJOR
    CMAKE_PROJECT_VERSION_MINOR
    CMAKE_PROJECT_VERSION_PATCH
This warning is for project developers.  Use -Wno-dev to suppress it.

CMake Error at /opt/ros/noetic/share/catkin/cmake/catkinConfig.cmake:83 (find_package):
  Could not find a package configuration file provided by
  "ddynamic_reconfigure" with any of the following names:

    ddynamic_reconfigureConfig.cmake
    ddynamic_reconfigure-config.cmake

  Add the installation prefix of "ddynamic_reconfigure" to CMAKE_PREFIX_PATH
  or set "ddynamic_reconfigure_DIR" to a directory containing one of the
  above files.  If "ddynamic_reconfigure" provides a separate development
  package or SDK, be sure it has been installed
这是因为缺少包,安装一下就行了
sudo apt install ros-noetic-ddynamic-reconfigure
source devel/setup.bash
#或者
source /opt/ros/noetic/setup.bash
这时就不再报错了

关于librealsense和realsense-ros版本对应问题
查看librealsense版本:realsense-viewer,开始界面或者界面上方会显示SDK版本信息
查看realsense-ros版本(实际上是查看realsense-ros依赖的librealsense库的版本):
方式为:找到文件夹 realsense-ros->realsense2_camera/CMakelists.txt,然后找到find_package(realsense2 2.xx.xx), 一般情况下,若librealsense和realsense-ros的版本差别不大则可以直接修改成自己所安装的librealsense的版本。
修改话题
查看话题时,可以发现没有双目和IMU的话题,因此需要修改 rs_camera.launch 文件:
(1)找到双目
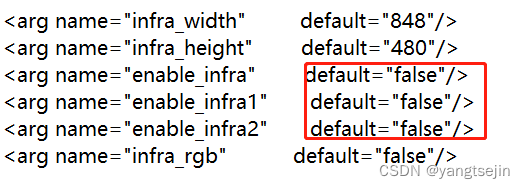
将其中的 enable_frame、enable_frame1、enable_frame2 改为 true

(2)如果需要imu数据,打开imu的加速度计和陀螺仪并合并为一个topic
将 false 改为 true

将 unite_imu_method 设置为 linear_interpolation

保存修改
此时重新rostopic list,可以看到imu和双目的话题。
我用的D435,所以只有双目信息
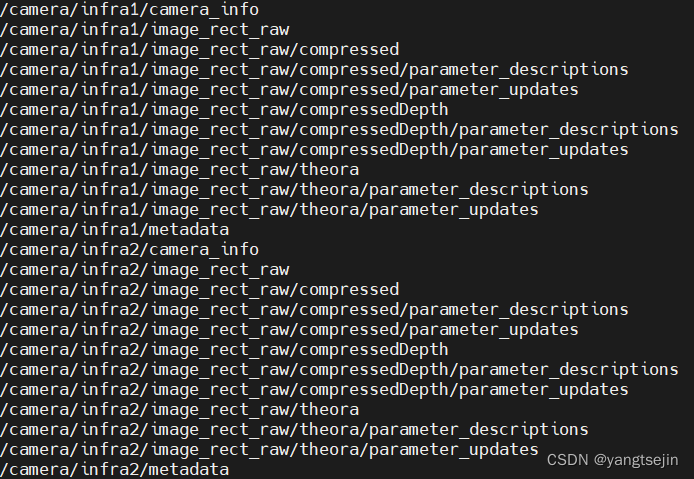
左右相机的话题为
/camera/infra1/image_rect_raw
/camera/infra2/image_rect_raw
rbg话题为
/camera/color/image_raw
开启realsense
roslaunch realsense2_camera rs_camera.launch
打开rviz,添加infra1和infra2的话题信息
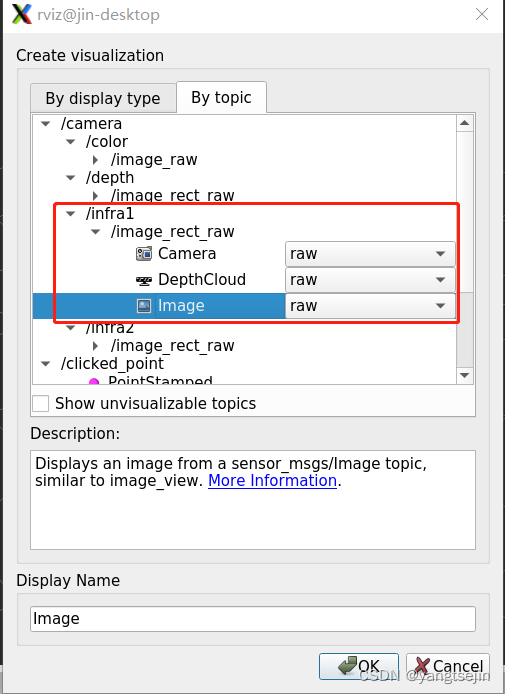
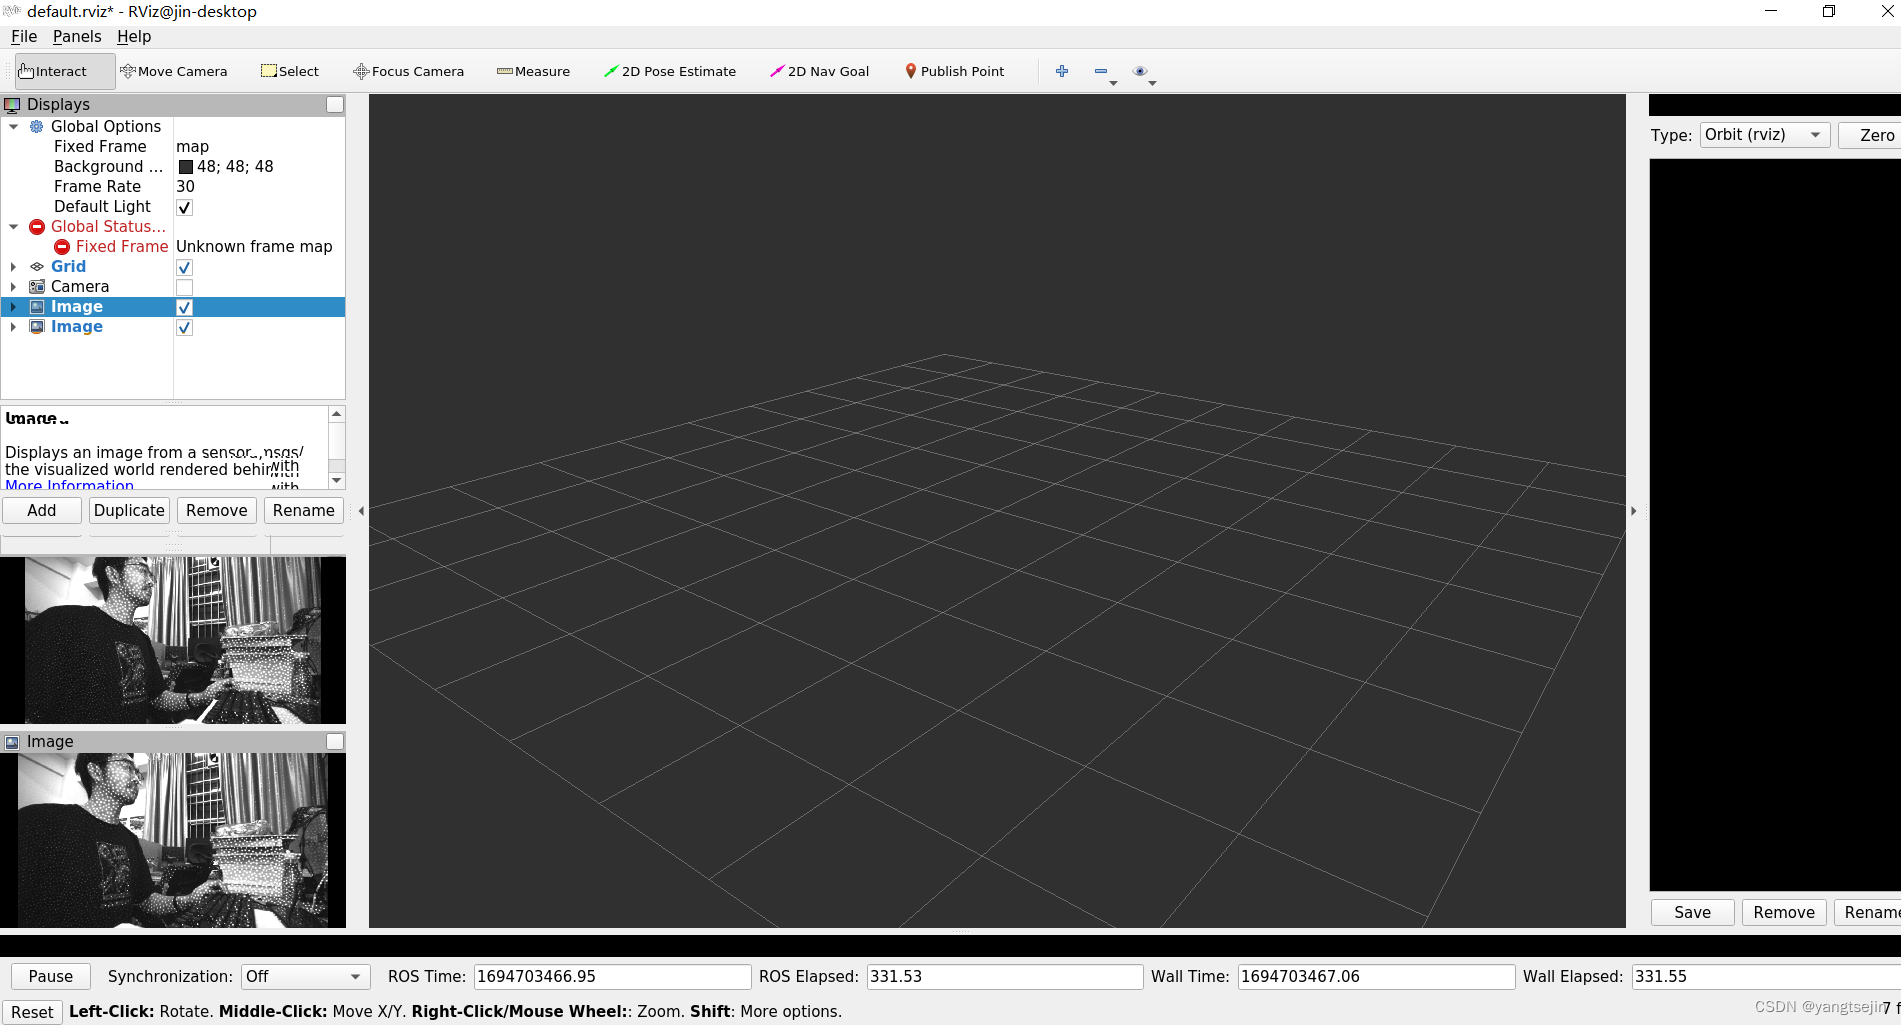
这里是能看到结构光的
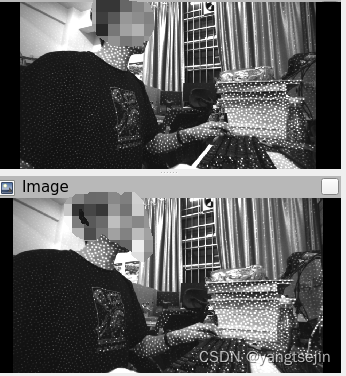
可以关闭结构光或者将结构光挡住
关闭结构光
临时关闭
默认开始结构光时,双目图像会有很多点,这些点可能对标定有影响,所以使用时需要关闭结构光。
先在终端启动
roslaunch realsense2_camera rs_camera.launch
新打开终端,运行
rosrun rqt_reconfigure rqt_reconfigure
打开后将 camera -> stereo_module 中的emitter_enabled设置为off(0)
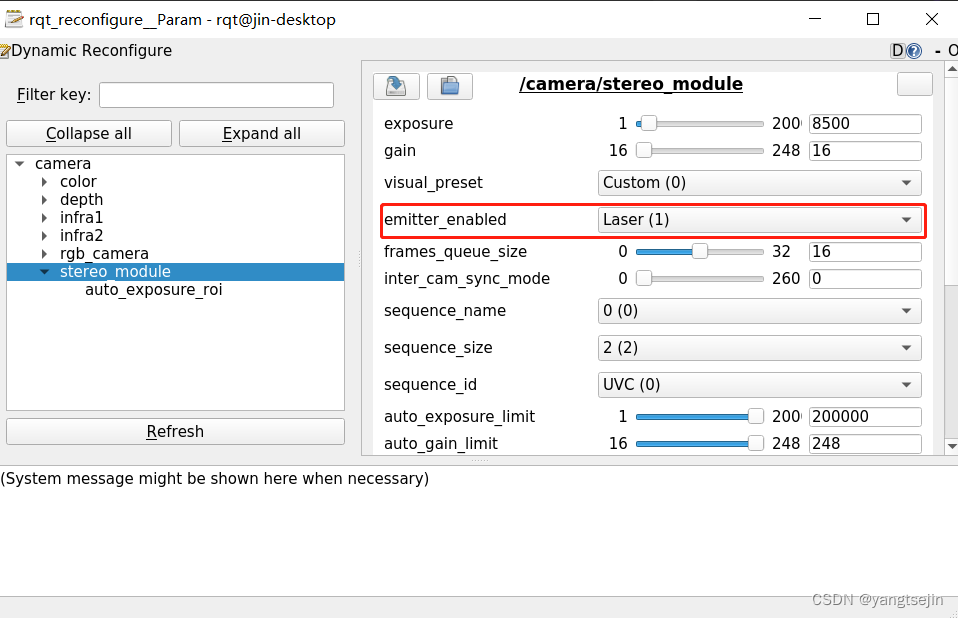

源码关闭
参考:
Customizing roslaunch rs_camera.launch #817
从源码修改可以方便的使用参数来对IR光进行开关。
在 realsense-ros/realsense2_camera/launch 文件夹中,先复制一份 rs_camera_copy.launch,以免改错了。
cp rs_camera.launch rs_camera_copy.launch
修改 rs_camera_copy.launch
gedit rs_camera_copy.launch
在这条语句下面
<arg name="allow_no_texture_points" default="false"/>
增加以下语句:
<arg name="emitter_enable"   		   default="false"/>

<!-- rosparam set /camera/stereo_module/emitter_enabled false -->

<rosparam>
/camera/stereo_module/emitter_enabled: 0
</rosparam>

<rosparam if="$(arg emitter_enable)">
  /camera/stereo_module/emitter_enabled: 1
</rosparam>
这里修改的代码意思就是说,开启 rs_camera_copy.launch 时,默认关闭IR光,当你需要它打开的时候,只需要在打开的时候,增加一个参数即可
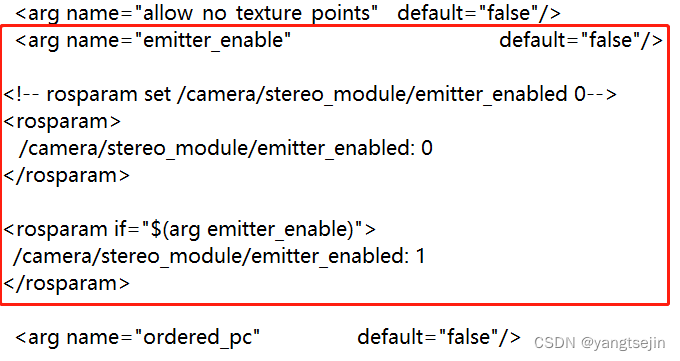
注意:
我这里的
/camera/stereo_module/emitter_enabled设置为0是关闭,设置为1是开启结构光,有的版本的是设置为false关闭,设置为true开启,这时应该设置如下<arg name="emitter_enable" default="false"/> <!-- rosparam set /camera/stereo_module/emitter_enabled false --> <rosparam> /camera/stereo_module/emitter_enabled: false </rosparam> <rosparam if="$(arg emitter_enable)"> /camera/stereo_module/emitter_enabled: true </rosparam>
下面进行示范:
(1)当你不需要IR光时,无需加参数开启launch:
roslaunch realsense2_camera rs_camera_copy.launch
(2)当你需要打开IR光时,加参数开启launch:
roslaunch realsense2_camera rs_camera_copy.launch emitter_enable:=true
这样就方便多了,IR光想开就开。
录包
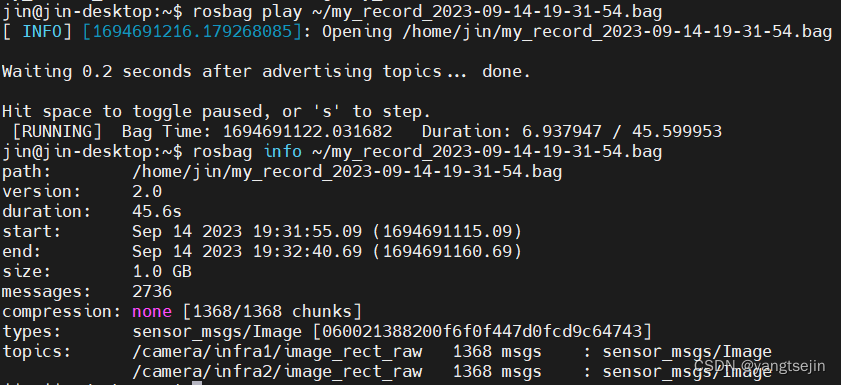
rosbag record /camera/infra1/image_rect_raw /camera/infra2/image_rect_raw -o $mypath

# 例如
rosbag record /camera/infra1/image_rect_raw /camera/infra2/image_rect_raw -o ~/my_record/

rosbag info ~/my_record_2023-09-14-19-31-54.bag
本文来自互联网用户投稿,该文观点仅代表作者本人,不代表本站立场。本站仅提供信息存储空间服务,不拥有所有权,不承担相关法律责任。 如若内容造成侵权/违法违规/事实不符,请联系我的编程经验分享网邮箱:chenni525@qq.com进行投诉反馈,一经查实,立即删除!
- Python教程
- 深入理解 MySQL 中的 HAVING 关键字和聚合函数
- Qt之QChar编码(1)
- MyBatis入门基础篇
- 用Python脚本实现FFmpeg批量转换
- c语言广度优先搜索(Breadth-First Search,BFS)
- RTC第二个功能和应用程序
- 解决vue3中不支持.sync语法糖
- API(Date类,SimpleDateFormat类,Calendar类,JDK8时间相关类,包装类,算法小题)
- [数据结构进阶 C++] 二叉搜索树(BinarySearchTree)的模拟实现
- 抽象类,接口、代码块、final、单例、枚举
- 【毕业快刊】仅用时15天!Springer旗下2区SCI,分区上升!审稿超快!
- 8-docker输出can not create unix socket /var/run/docker.sock: is a directory
- JAVA基础-----认识异常
- Python学习之路-编码风格