Springboot:knife4j集成
发布时间:2023年12月22日
提示:文章写完后,目录可以自动生成,如何生成可参考右边的帮助文档
目录
提示:以下是本篇文章正文内容,下面案例可供参考
一、添加maven依赖
<!-- Knife4j依赖 -->
<dependency>
    <groupId>com.github.xiaoymin</groupId>
    <artifactId>knife4j-spring-boot-starter</artifactId>
    <version>2.0.7</version> <!-- 请检查最新版本 -->
</dependency>
<!-- Swagger依赖 -->
<dependency>
    <groupId>io.springfox</groupId>
    <artifactId>springfox-boot-starter</artifactId>
    <version>3.0.0</version> <!-- 请检查最新版本 -->
</dependency>
二、添加配置类
?DocumentationType是可配的,可以选择高版本或者低版本
import org.springframework.context.annotation.Bean;
import springfox.documentation.builders.PathSelectors;
import springfox.documentation.builders.RequestHandlerSelectors;
import springfox.documentation.spi.DocumentationType;
import springfox.documentation.spring.web.plugins.Docket;

public class SwaggerConfig {

    @Bean
    public Docket api() {
        return new Docket(DocumentationType.SWAGGER_2)
                .select()
                .apis(RequestHandlerSelectors.basePackage("com.finance.late.controller")) // 替换成你的Controller包路径
                .paths(PathSelectors.any())
                .build();
    }

}
三、打开注解
在启动类(带该注解的类 @SpringBootApplication)上添加注解:@EnableSwagger2
四、对需要进行文档说明的类、接口、属性添加注解
在类上添加注解
@Api(tags = "XXX模块")
public class LateController {
    ......
}
在接口上添加注解
@ApiOperation("XXXX方法")
@PostMapping ("/doSomething")
public Object doSomething(@RequestBody Object object) {
	......
}
?在属性上添加注解
@Data
@ApiModel("XXXObject")
public class XXXObject implements Serializable {

    private static final long serialVersionUID = 42L;

    @ApiModelProperty(value = "xxx描述", required = false)
    private String xxx;

    @ApiModelProperty(value = "yyy描述", required = true)
    private Object yyy;

}
该处required标明该字段是否必填
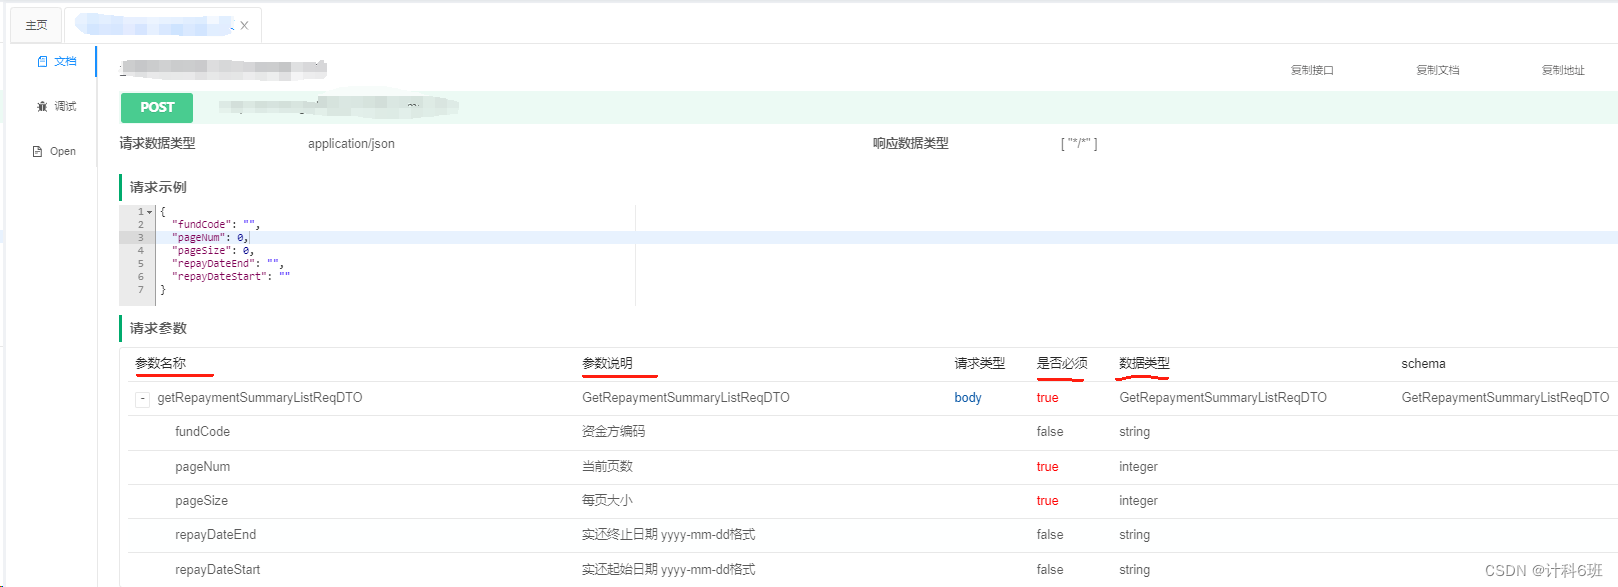
五、成果展示
访问链接:http://IP:port/doc.html
如果对应的项目有类似的配置:server.servlet.context-path = /project_name
访问链接就对应为:http://IP:port/project_name/doc.html

 ?
?
总结
没什么难度,简单到有手就行!
文章来源:https://blog.csdn.net/ql_gome/article/details/135147717
本文来自互联网用户投稿,该文观点仅代表作者本人,不代表本站立场。本站仅提供信息存储空间服务,不拥有所有权,不承担相关法律责任。 如若内容造成侵权/违法违规/事实不符,请联系我的编程经验分享网邮箱:chenni525@qq.com进行投诉反馈,一经查实,立即删除!
本文来自互联网用户投稿,该文观点仅代表作者本人,不代表本站立场。本站仅提供信息存储空间服务,不拥有所有权,不承担相关法律责任。 如若内容造成侵权/违法违规/事实不符,请联系我的编程经验分享网邮箱:chenni525@qq.com进行投诉反馈,一经查实,立即删除!
最新文章
- Python教程
- 深入理解 MySQL 中的 HAVING 关键字和聚合函数
- Qt之QChar编码(1)
- MyBatis入门基础篇
- 用Python脚本实现FFmpeg批量转换
- HTML5属性-拖拽
- Kubernetes Operator
- 2024年学鸿蒙开发有前途吗?
- 模式识别II改进版Python
- 【INTEL(ALTERA)】错误 (22507) 设备初始化时钟 INIT_INTOSC 不支持活动串行时钟 AS_FREQ_100MHZ
- 最常见的十道面试题-反射与集合
- Angular系列教程之DOM操作
- 2024年评武汉中级职称需要哪些条件,习称珺
- 米贸搜|Facebook5分钟正确了解Meta竞价策略,让广告系列超越竞争对手!
- SQL SERVER 19安装 SQL Prompt 10.02版本