第一篇【传奇开心果】Vant 开发移动应用:从helloworld开始
传奇开心果系列博文
- 博文系列目录
- Vant of Vue 开发移动应用示例
- 博文目录
- 一、从helloworld开始
- 二、添加几个常用组件
- 三、添加组件事件处理
- 四、添加页面和跳转切换路由
- 五、归纳总结知识点
- 六、知识点示例代码
博文系列目录
Vant of Vue 开发移动应用示例
博文目录
一、从helloworld开始
 要使用 Vant 实现 HelloWorld,您需要在项目中引入 Vant 组件库,并创建一个基本的页面来展示 HelloWorld。以下是一个示例:
首先,确保您的项目已经安装了 Vant 组件库。您可以通过以下命令使用 npm 安装 Vant:
npm install vant
接下来,在您的页面中引入 Vant 组件库和样式:
<template>
  <div>
    <van-button type="primary">Hello World</van-button>
  </div>
</template>

<script>
import 'vant/lib/index.css';
import { Button } from 'vant';

export default {
  components: {
    [Button.name]: Button
  }
};
</script>
在上面的示例中,我们使用了 Vant 的 Button 组件来展示 “Hello World”。我们通过在 <template> 中使用 <van-button> 标签来创建一个按钮,并在 <script> 中引入 Vant 的 Button 组件和样式。
请注意,上述示例假设您正在使用 Vue.js 框架。如果您使用的是其他框架或纯 JavaScript,您需要相应地进行调整。
完成上述步骤后,您就可以在页面中看到一个带有 “Hello World” 文本的按钮了。您可以根据需要自定义样式和交互行为。
二、添加几个常用组件
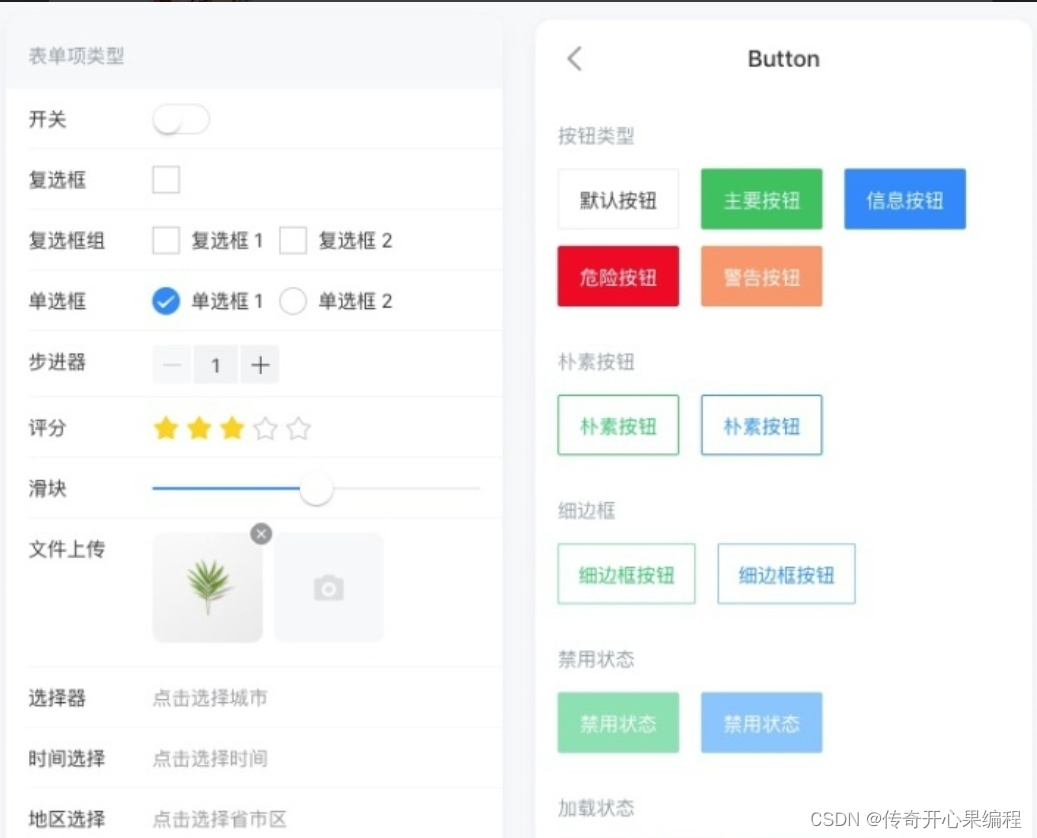 当使用 Vant 组件库时,可以添加一些常用的组件来增强页面的功能和交互性。以下是几个常用的 Vant 组件的示例:
<template>
  <div>
    <van-button type="primary">Hello World</van-button>
    <van-cell title="Cell Title" value="Cell Value" />
    <van-switch v-model="switchValue" />
    <van-dialog v-model="showDialog" title="Dialog Title">This is a dialog content.</van-dialog>
  </div>
</template>

<script>
import 'vant/lib/index.css';
import { Button, Cell, Switch, Dialog } from 'vant';

export default {
  components: {
    [Button.name]: Button,
    [Cell.name]: Cell,
    [Switch.name]: Switch,
    [Dialog.name]: Dialog
  },
  data() {
    return {
      switchValue: false,
      showDialog: false
    };
  }
};
</script>
在上面的示例中,我们添加了几个常用的 Vant 组件:
<van-cell>:用于展示标题和值的单元格组件。<van-switch>:用于切换开关状态的组件。<van-dialog>:用于展示对话框的组件。
这些组件提供了丰富的功能和样式,您可以根据您的需求进行进一步的定制和配置。
请注意,上述示例假设您正在使用 Vue.js 框架。如果您使用的是其他框架或纯 JavaScript,您需要相应地进行调整。另外,确保在 <script> 中正确引入了所需的组件,并在 data 中定义了相应的数据属性。
三、添加组件事件处理
 要在 Vant 组件中处理事件,您可以使用组件提供的事件绑定和方法。以下是对之前示例进行扩展,添加了组件事件处理的示例:
<template>
  <div>
    <van-button type="primary" @click="handleButtonClick">Hello World</van-button>
    <van-cell title="Cell Title" value="Cell Value" @click="handleCellClick" />
    <van-switch v-model="switchValue" @change="handleSwitchChange" />
    <van-dialog v-model="showDialog" title="Dialog Title" @confirm="handleDialogConfirm">
      This is a dialog content.
    </van-dialog>
  </div>
</template>

<script>
import 'vant/lib/index.css';
import { Button, Cell, Switch, Dialog } from 'vant';

export default {
  components: {
    [Button.name]: Button,
    [Cell.name]: Cell,
    [Switch.name]: Switch,
    [Dialog.name]: Dialog
  },
  data() {
    return {
      switchValue: false,
      showDialog: false
    };
  },
  methods: {
    handleButtonClick() {
      console.log('Button clicked!');
    },
    handleCellClick() {
      console.log('Cell clicked!');
    },
    handleSwitchChange(value) {
      console.log('Switch value changed:', value);
    },
    handleDialogConfirm() {
      console.log('Dialog confirmed!');
    }
  }
};
</script>
在上面的示例中,我们为每个组件添加了相应的事件处理函数:
handleButtonClick:处理按钮点击事件。handleCellClick:处理单元格点击事件。handleSwitchChange:处理开关状态变化事件,接收一个参数来表示开关的新值。handleDialogConfirm:处理对话框确认事件。
您可以根据需要在这些事件处理函数中执行相应的逻辑。在示例中,我们简单地使用 console.log 打印了一些信息,您可以根据实际需求进行进一步的操作。
请注意,示例中的事件绑定使用了 @ 符号,表示绑定相应的事件。例如,@click 表示绑定点击事件。另外,确保在 <script> 中定义了相应的方法,并在组件上使用 @ 符号绑定事件。
四、添加页面和跳转切换路由
 要在 Vant 组件中实现页面切换和路由跳转,您可以使用路由库(如 Vue Router)来管理页面和导航。以下是一个示例,展示了如何在 Vant 组件中实现页面切换和路由跳转:
<template>
  <div>
    <van-button type="primary" @click="goToPage('/page1')">Go to Page 1</van-button>
    <van-button type="primary" @click="goToPage('/page2')">Go to Page 2</van-button>
    <router-view></router-view>
  </div>
</template>

<script>
import 'vant/lib/index.css';
import { Button } from 'vant';

export default {
  components: {
    [Button.name]: Button
  },
  methods: {
    goToPage(route) {
      this.$router.push(route);
    }
  }
};
</script>
在上面的示例中,我们使用了 Vue Router 来管理页面和导航。<router-view> 标签用于展示当前路由对应的组件。
在按钮的点击事件中,我们调用了 goToPage 方法,并传入相应的路由路径作为参数。goToPage 方法使用 $router.push 方法来进行路由跳转。
确保您已经正确设置了 Vue Router,并在路由配置中定义了相应的路由路径和组件。
请注意,示例中的代码假设您已经正确设置了 Vue Router,并且路由路径对应的组件已经定义。如果您使用的是其他路由库或框架,请根据相应的文档进行调整。
五、归纳总结知识点
 当使用 Vant 组件库实现 HelloWorld 并添加组件事件处理、页面切换和路由跳转时,我们需要掌握以下知识点:
-
引入 Vant 组件库:通过引入 Vant 组件库的样式和组件,可以在项目中使用 Vant 提供的丰富组件。
-
组件事件处理:使用
@符号绑定组件的事件,例如@click表示绑定点击事件。在对应的事件处理函数中编写逻辑来响应事件。 -
页面切换和路由跳转:使用路由库(如 Vue Router)来管理页面和导航。通过定义路由路径和对应的组件,可以实现页面切换和路由跳转。使用
$router.push方法来进行路由跳转。 -
路由配置:确保正确设置了 Vue Router,并在路由配置中定义了相应的路由路径和组件。
综上所述,通过掌握以上知识点,您可以使用 Vant 组件库创建交互丰富的界面,并实现组件事件处理、页面切换和路由跳转等功能。这些知识点对于开发使用 Vant 组件库的应用程序非常重要。
六、知识点示例代码
 当使用 Vant 组件库实现 HelloWorld 并添加组件事件处理、页面切换和路由跳转时,以下是示例代码:
- 引入 Vant 组件库和样式:
<template>
  <div>
    <van-button type="primary" @click="handleButtonClick">Click Me</van-button>
    <van-cell title="Cell Title" :value="cellValue"></van-cell>
    <van-switch v-model="switchValue" @change="handleSwitchChange"></van-switch>
    <van-dialog v-model="dialogVisible" title="Dialog Title">This is a dialog content.</van-dialog>
  </div>
</template>

<script>
import 'vant/lib/index.css';
import { Button, Cell, Switch, Dialog } from 'vant';

export default {
  components: {
    [Button.name]: Button,
    [Cell.name]: Cell,
    [Switch.name]: Switch,
    [Dialog.name]: Dialog
  },
  data() {
    return {
      cellValue: 'Cell Value',
      switchValue: false,
      dialogVisible: false
    };
  },
  methods: {
    handleButtonClick() {
      // 处理按钮点击事件
      console.log('Button clicked');
    },
    handleSwitchChange(value) {
      // 处理开关状态变更事件
      console.log('Switch value changed:', value);
    }
  }
};
</script>
上述示例中,我们引入了 Vant 组件库的样式和组件,并在模板中使用了 van-button、van-cell、van-switch 和 van-dialog 组件来创建按钮、单元格、开关和对话框等常见功能。通过 @click 和 @change 绑定了相应的事件处理函数。
- 页面切换和路由跳转示例:
<template>
  <div>
    <van-button type="primary" @click="goToPage('/page1')">Go to Page 1</van-button>
    <van-button type="primary" @click="goToPage('/page2')">Go to Page 2</van-button>
    <router-view></router-view>
  </div>
</template>

<script>
import 'vant/lib/index.css';
import { Button } from 'vant';

export default {
  components: {
    [Button.name]: Button
  },
  methods: {
    goToPage(route) {
      this.$router.push(route);
    }
  }
};
</script>
在上述示例中,我们使用了 Vue Router 来管理页面和导航。通过 goToPage 方法和 $router.push 实现了路由跳转。<router-view> 标签用于展示当前路由对应的组件。
请注意,示例中的代码假设您已经正确设置了 Vue Router,并在路由配置中定义了相应的路由路径和组件。
以上示例代码展示了如何使用 Vant 组件库实现 HelloWorld,并添加了组件事件处理、页面切换和路由跳转的示例。您可以根据实际需求进行进一步的定制和配置。
3.当使用 Vant 组件库实现 HelloWorld 并添加组件事件处理时,以下是示例代码:
<template>
  <div>
    <van-button type="primary" @click="handleButtonClick">Click Me</van-button>
    <van-cell title="Cell Title" :value="cellValue"></van-cell>
    <van-switch v-model="switchValue" @change="handleSwitchChange"></van-switch>
    <van-dialog v-model="dialogVisible" title="Dialog Title">This is a dialog content.</van-dialog>
  </div>
</template>

<script>
import 'vant/lib/index.css';
import { Button, Cell, Switch, Dialog } from 'vant';

export default {
  components: {
    [Button.name]: Button,
    [Cell.name]: Cell,
    [Switch.name]: Switch,
    [Dialog.name]: Dialog
  },
  data() {
    return {
      cellValue: 'Cell Value',
      switchValue: false,
      dialogVisible: false
    };
  },
  methods: {
    handleButtonClick() {
      // 处理按钮点击事件
      console.log('Button clicked');
    },
    handleSwitchChange(value) {
      // 处理开关状态变更事件
      console.log('Switch value changed:', value);
    }
  }
};
</script>
在上述示例中,我们使用了 Vant 组件库的 van-button、van-cell、van-switch 和 van-dialog 组件,并通过 @click 和 @change 绑定了相应的事件处理函数。
-
handleButtonClick方法是按钮点击事件的处理函数。在这个示例中,我们简单地在控制台打印了一条消息。 -
handleSwitchChange方法是开关状态变更事件的处理函数。在这个示例中,我们将开关的新值打印到控制台。
通过这种方式,您可以根据实际需求编写事件处理函数来响应组件的交互操作。可以根据事件的类型和组件的需求来编写逻辑,例如更新数据、调用其他方法或触发其他操作。
请注意,在示例代码中,我们还引入了 Vant 组件库的样式,并在组件的 data 选项中定义了一些初始数据。这些数据可以在模板中使用,以实现动态渲染和交互。
4.在 Vue.js 中使用 Vue Router 进行路由管理时,您需要进行路由的配置。以下是一个简单的示例路由配置:
// main.js

import Vue from 'vue';
import VueRouter from 'vue-router';
import Home from './components/Home.vue';
import Page1 from './components/Page1.vue';
import Page2 from './components/Page2.vue';

Vue.use(VueRouter);

const routes = [
  { path: '/', component: Home },
  { path: '/page1', component: Page1 },
  { path: '/page2', component: Page2 }
];

const router = new VueRouter({
  routes
});

new Vue({
  router,
  render: h => h(App)
}).$mount('#app');
在上述示例中,我们首先导入 Vue、VueRouter 和需要配置的组件(Home、Page1、Page2)。然后,我们通过 Vue.use(VueRouter) 来使用 Vue Router 插件。
接下来,我们定义了一个 routes 数组,其中包含了路由的配置信息。每个路由对象都有 path 和 component 属性,path 指定了路由的路径,component 指定了该路径对应的组件。
然后,我们创建了一个 VueRouter 实例,并将 routes 作为配置参数传入。
最后,在创建 Vue 实例时,我们将创建的路由实例传入 router 选项中,并调用 $mount('#app') 将应用挂载到指定的 DOM 元素上。
在上述示例中,我们假设组件文件分别为 Home.vue、Page1.vue 和 Page2.vue。您需要根据实际的组件文件路径和文件名进行相应的调整。
通过这样的路由配置,您可以在模板中使用 <router-link> 标签来创建链接,并使用 <router-view> 标签来展示当前路由对应的组件。
例如,在模板中使用 <router-link> 标签创建链接:
<router-link to="/">Home</router-link>
<router-link to="/page1">Page 1</router-link>
<router-link to="/page2">Page 2</router-link>
在模板中使用 <router-view> 标签展示当前路由对应的组件:
<router-view></router-view>
这样,根据不同的路由路径,对应的组件将会被加载和展示。
请注意,示例中的代码只是一个简单的示例,实际的路由配置可能更加复杂,例如带有参数的动态路由、嵌套路由等。您可以根据需要进行进一步的配置和扩展。
本文来自互联网用户投稿,该文观点仅代表作者本人,不代表本站立场。本站仅提供信息存储空间服务,不拥有所有权,不承担相关法律责任。 如若内容造成侵权/违法违规/事实不符,请联系我的编程经验分享网邮箱:chenni525@qq.com进行投诉反馈,一经查实,立即删除!
- Python教程
- 深入理解 MySQL 中的 HAVING 关键字和聚合函数
- Qt之QChar编码(1)
- MyBatis入门基础篇
- 用Python脚本实现FFmpeg批量转换
- Jave实现分页功能
- 解决Element-Plus中el-switch的change方法自动触发问题
- 基于细粒度推理的虚假新闻检测
- 基于遗传算法改进BP神经网络的承载力预测,基于ga-bp的破坏模式预测
- springboot(ssm考编论坛网站 考公考研交流论坛系统Java系统
- DML语言(重点)———update
- C++类和对象(中)
- 【Vue3】黑马程序员 SpringBoot3+Vue3 大事件项目中 P92 抽屉样式 `:deep() Term expected` 报错的解决方法
- Copilot安装和使用最全教程
- 基于峰值自寻的多目标检测前跟踪算法