Bean作用域及生命周期
关于Bean对象,在将其存储到spring中以后,在使用或读取该Bean对象时,如果该对象是公有的,难免就会出现被一方修改,从而影响另外一方读取到的对象准确性的情况。因此了解Bean的作用域和生命周期就是十分必要的了。
首先,还是具体使用一个例子来理解上面提到的这种情况:
示例
首先,新建一个Student实体类,为其设置属性,并提供其相关的get/set方法;
package com.yun.model;

public class Student {
    private int id;
    private String name;
    private double score;

    public int getId() {
        return id;
    }

    public void setId(int id) {
        this.id = id;
    }

    public String getName() {
        return name;
    }

    public void setName(String name) {
        this.name = name;
    }

    public double getScore() {
        return score;
    }

    public void setScore(double score) {
        this.score = score;
    }

    @Override
    public String toString() {
        return "Student{" +
                "id=" + id +
                ", name='" + name + '\'' +
                ", score=" + score +
                '}';
    }
}
创建一个Bean对象,使用方法注解存储到Spring;
package com.yun.controller;

import com.yun.model.Student;
import com.yun.model.User;
import org.springframework.context.annotation.Bean;
import org.springframework.stereotype.Component;

@Component
public class StudentBean {

    @Bean
    public Student stu(){
        Student student=new Student();
        student.setId(5);
        student.setName("李大锤");
        student.setScore(99.6);
        return student;
    }
}
A首先读取并且使用bean,同时进行一定的操作;
package com.yun.controller;

import com.yun.model.Student;
import org.springframework.beans.factory.annotation.Autowired;
import org.springframework.stereotype.Controller;

/*
* A     1.获取bean;
*       2.创建了新的对象,对新创建的对象进行修改
* */
@Controller
public class StuController1 {
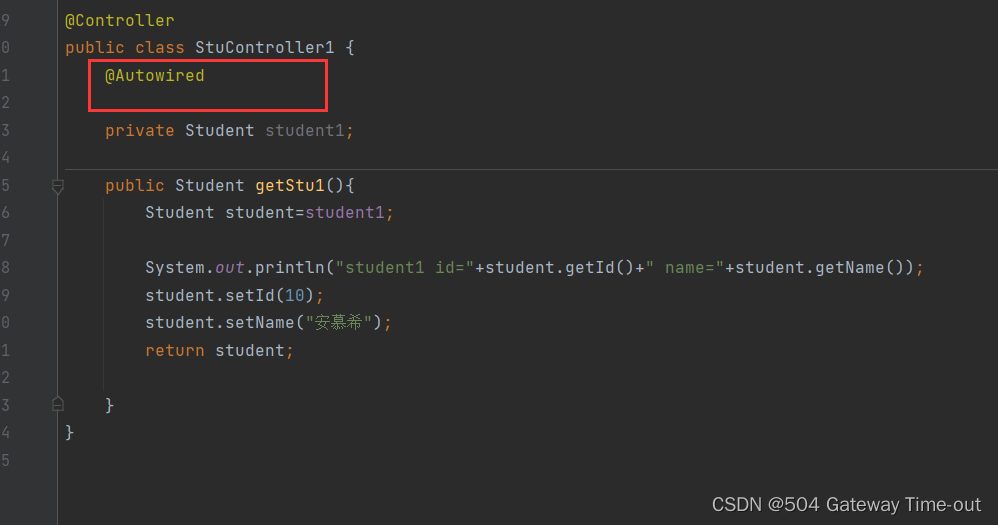
    @Autowired

    private Student student1;

    public Student getStu1(){
        Student student=student1;

        System.out.println("student1 id="+student.getId()+" name="+student.getName());
        student.setId(10);
        student.setName("安慕希");
        return student;

    }
}
B 读取bean;
package com.yun.controller;

import com.yun.model.Student;
import org.springframework.beans.factory.annotation.Autowired;
import org.springframework.stereotype.Controller;

/*
* B 读取bean,获取bean的具体值
* */
@Controller
public class StuController2 {
    @Autowired
    private Student student1;

    public Student getStud2(){
        Student student=student1;
        return student;
    }
}
获取原始bean的值,以及A读取到的值和B读取到的值;
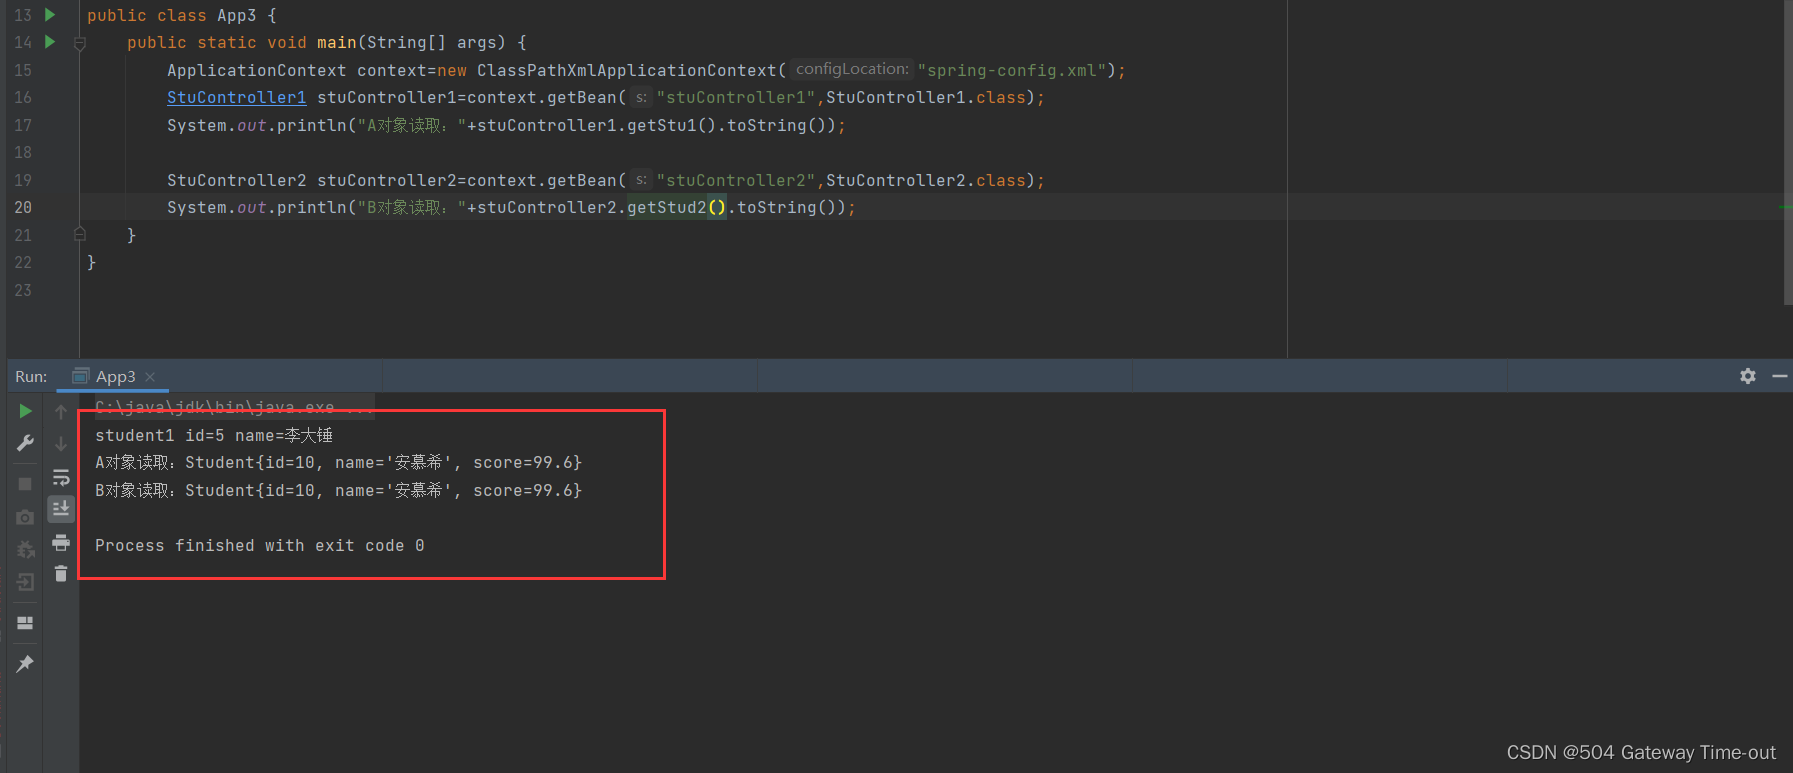
通过运行结果可以得到结论,尽管看起来A是在自己新创建的Bean对象上进行了修改,但最终还是会影响到原始公共Bean的值;
而究其出现这种结果的原因,其实就是因为Bean在默认情况下是单例模式,即只有一份对象,这份对象供所有访问者使用。因此,A进行的修改操作自然也就会影响到B的读取结果。而使用单例状态的原因就是,提高性能。
Bean的6种作用域
作用域,顾名思义就是“作用到的区域或范围”,实际就是程序中变量的一个可用的范围。而Bean的作用域其实就是Bean在Spring框架中的某种行为模式,具体共有6种:
- singleton:单例作?域
- prototype:原型作?域(多例作?域)
- request:请求作?域
- session:会话作?域
- application:全局作?域
- websocket:HTTP WebSocket 作?域
singleton
是Spring默认选择的作用域;
在此作用域下的Bean在IoC容器中只有一个实例,即只有一个全局对象;
通常当Bean对象的属性状态不需要更新时,即Bean无状态的情况下会使用该作用域;
prototype
多例模式下使用的作用域;
在此作用域下的Bean每被访问一次就会创建出一个实例;
通常当Bean对象的属性状态需要更新时,即Bean有状态的情况下会使用该作用域;
在普通的Spring项目中,一般只有前面两种作用域;而后面提到的作用域则是只能在SpringMVC中使用或只能在Spring WebSocket中使?;
request
在每次http请求时都会创建一个新的Bean的实例;
只能在SpringMVC中使用;
session
每次会话都会定义一个Bean的实例;
只能在SpringMVC中使用;
application
在一个http servlet Context中,共享一个Bean实例;
只能在SpringMVC中使用;
websocket
在一个HTTP WebSocket中,定义一个Bean实例同时共享这个实例;
只能在Spring WebSocket中使?;
Bean作用域的设置
由于我们这里主要介绍的是Spring项目,因此关于Bean作用域的设置也只涉及到两种;
singleton是Spring默认的作用域,因此一个新创建的bean对象在不进行特别设置的情况下,其作用域就是singleton;
下面具体演示prototype的设置:
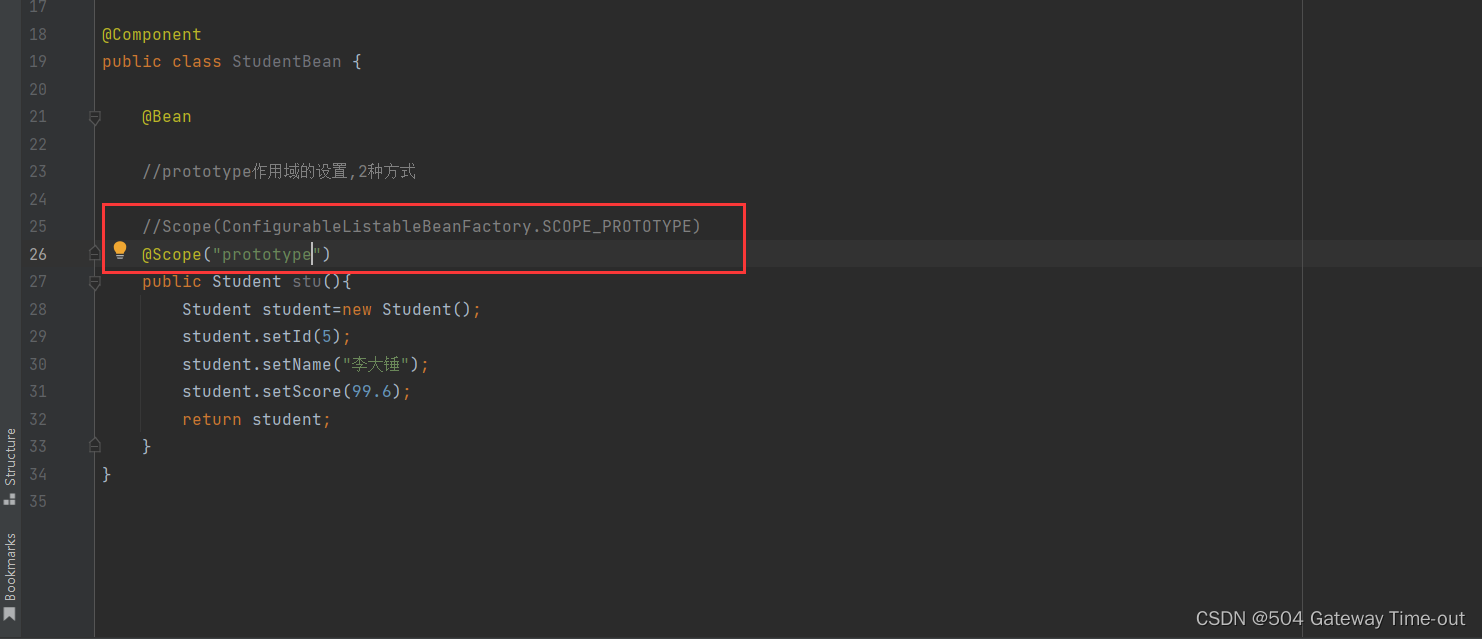
prototype的设置有上面图片中所示的两种方式,我们也可以从相关类中找到该作用域的定义信息:

在为其设置了全局作用域后,我们再次执行文章开始的实例,得到的结果如下:
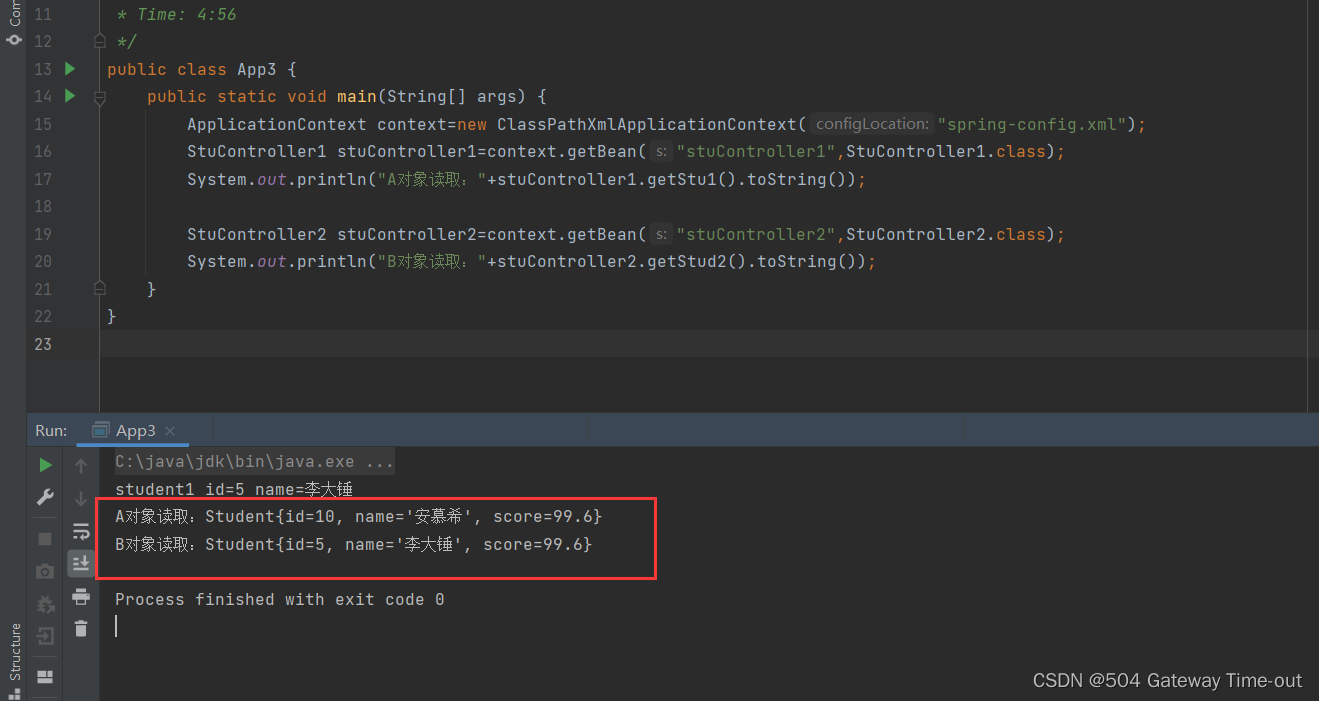
此时,A的修改操作不再影响到B的读取;
Spring的执行流程
- 启动容器;

首先,启动容器,去加载相关的配置文件;
- 进行Bean初始化
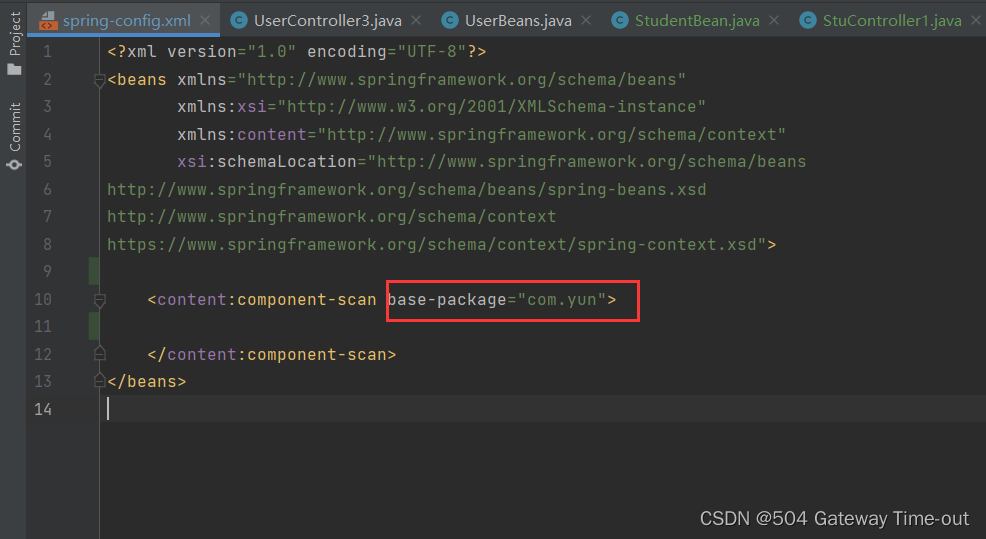
对配置了加载组件路径下的类进行扫描,即扫描该路径下的文件,查看是否有相关的类注解;
- 注册Bean对象到容器

将在加载组件路径下的类中,添加了相关注解的类注册到容器中;
- 装配或使用Bean
即将需要使用的Bean注入到需要的类中去;
- Spring销毁
相关使用操作完毕,最终Spring销毁;
Bean生命周期
生命周期实际就是一个对象从产生到被销毁的全过程,关于Bean生命周期主要有5步:
- 实例化Bean
即为Bean对象分配内存空间;
- 设置属性
对Bean对象进行依赖注入; - 进行Bean初始化
3.1 执行各种通知;
3.2 初始化的前置方法;
3.3 初始化方法;
3.4 初始化的后置方法;
- 使用Bean;
- 销毁Bean;
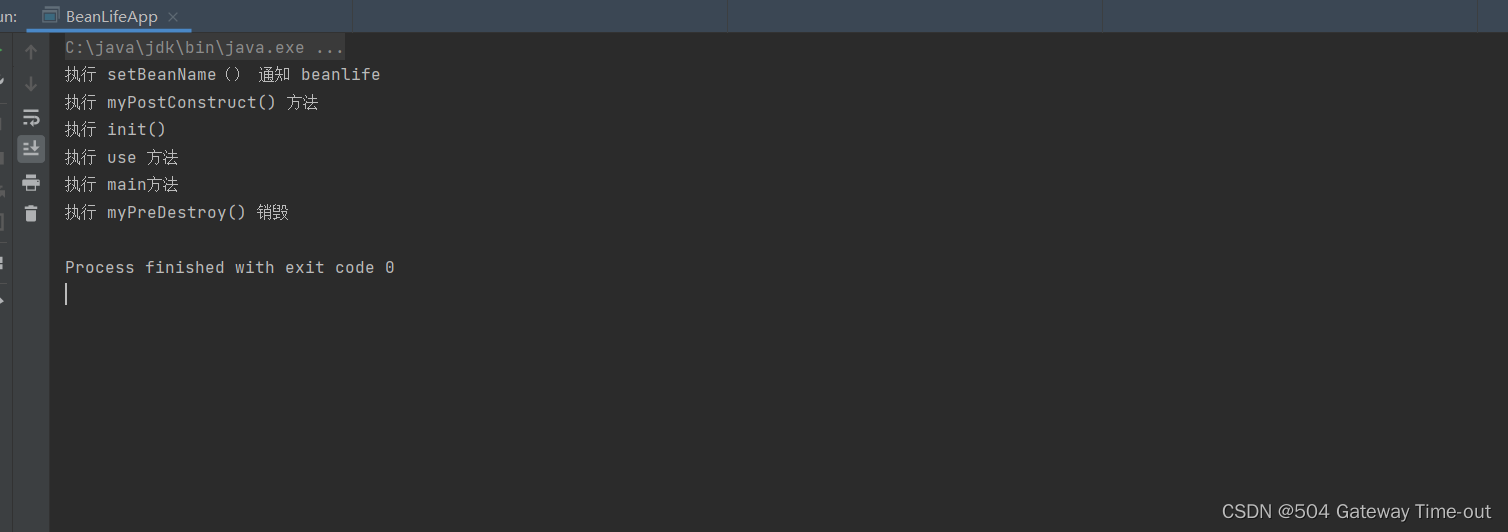
简单使用代码来观察这个过程:
package com.yun.controller;

import org.springframework.beans.factory.BeanNameAware;
import org.springframework.beans.factory.InitializingBean;
import org.springframework.stereotype.Component;

import javax.annotation.PostConstruct;
import javax.annotation.PreDestroy;

public class BeanLife implements  BeanNameAware {


    @Override
    public void setBeanName(String s) {

        System.out.println("执行 setBeanName() 通知 "+s);
    }


    @PostConstruct
    public void myPostConstruct(){
        System.out.println("执行 myPostConstruct() 方法");
    }


    public void init(){
        System.out.println("执行 init()");
    }

    public void use(){
        System.out.println("执行 use 方法");
    }

    @PreDestroy
    public void myPreDestroy(){
        System.out.println("执行 myPreDestroy() 销毁");
    }
}
使用xml的方式进行注入:
<?xml version="1.0" encoding="UTF-8"?>
<beans xmlns="http://www.springframework.org/schema/beans"
       xmlns:xsi="http://www.w3.org/2001/XMLSchema-instance"
       xmlns:content="http://www.springframework.org/schema/context"
       xsi:schemaLocation="http://www.springframework.org/schema/beans http://www.springframework.org/schema/beans/spring-beans.xsd http://www.springframework.org/schema/context https://www.springframework.org/schema/context/spring-context.xsd">

<!--    <bean id="userService" class="com.bit.service.UserService"></bean>-->


    <!-- 配置存储 Bean 对象的扫描根路径 -->
    <content:component-scan base-package="com.yun"></content:component-scan>

    <bean id="beanlife" class="com.yun.controller.BeanLife"
          init-method="init"></bean>


</beans>
设置一个启动类:
import com.yun.controller.BeanLife;
import org.springframework.context.support.ClassPathXmlApplicationContext;

public class BeanLifeApp {
    public static void main(String[] args) {

        /*
        * 必须使用ClassPathXmlApplicationContext类,ApplicationContext无方法destroy()方法
        * */
        ClassPathXmlApplicationContext context=new ClassPathXmlApplicationContext("spring-config.xml");
        BeanLife beanLife=context.getBean("beanlife",BeanLife.class);
        beanLife.use();
        System.out.println("执行 main方法");
        context.destroy();
    }
}
运行结果:
over!
本文来自互联网用户投稿,该文观点仅代表作者本人,不代表本站立场。本站仅提供信息存储空间服务,不拥有所有权,不承担相关法律责任。 如若内容造成侵权/违法违规/事实不符,请联系我的编程经验分享网邮箱:chenni525@qq.com进行投诉反馈,一经查实,立即删除!
- Python教程
- 深入理解 MySQL 中的 HAVING 关键字和聚合函数
- Qt之QChar编码(1)
- MyBatis入门基础篇
- 用Python脚本实现FFmpeg批量转换
- c++11的一些新特性
- 深入学习《大学计算机》系列之第1章 1.2节——问题描述与抽象
- ssm/php/node/python大学生兼职管理系统【计算机毕设】
- 生成模型 | 2024年新年新论文:audio2photoreal[正在更新中]
- ArcGIS Pro SDK导出的几何XML和Json
- 活动运营常用的ChatGPT通用提示词模板
- MySQL-索引的介绍和使用
- 补:Java中重写(Overriding)与重载(Overloading)的区别
- 实现高效、透明、公正的采购寻源——鸿鹄电子招投标系统
- 【MySQL】MySQL表的操作-创建查看删除和修改