openssl3.2 - 编译
文章目录
openssl3.2 - 编译
概述
ECC实现没有轻量级的工程, 那就只能用openssl了.
先从头编译一个OpenSSL.
OpenSSL源码下载
当前OpenSSL稳定版为3.2, 官方源码包url : https://www.openssl.org/source/openssl-3.2.0.tar.gz
将OpenSSL工程迁出到本地(学习和查找资料) : https://github.com/openssl/openssl.git
编译目标
在win10下编译成x64版本的OpenSSL, 用VS2019来编译源码包.
如何编译
看源码包中的README.md


前置环境 - perl
前置环境 - VS
我这已经有了VS2019企业版

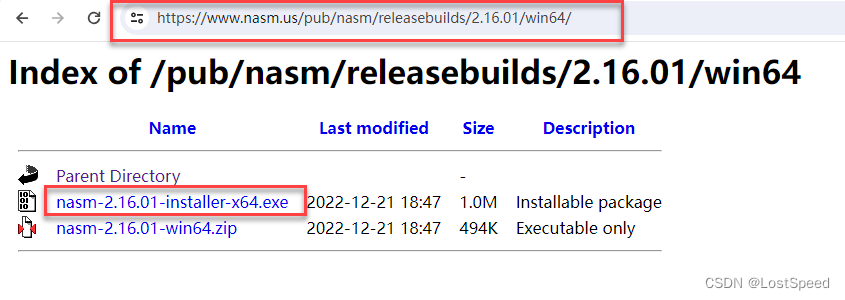
前置环境 - NASM
去NASM官方, 看到当前稳定版为2.16.01, 选win64版本.
快速编译步骤

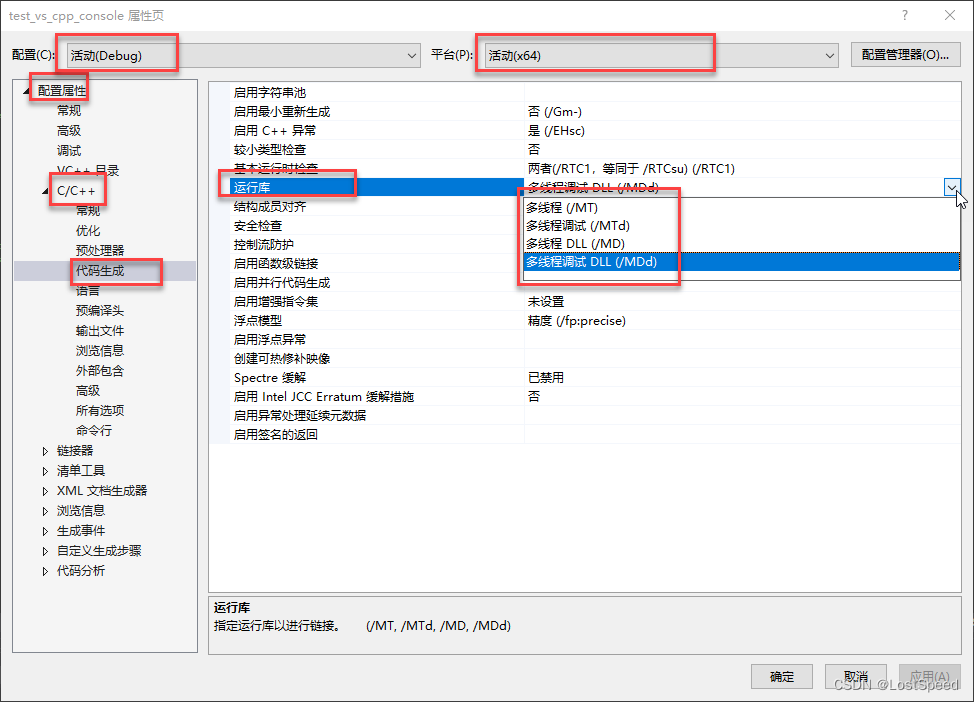
不过, 看到文档中有说, 如果OpenSSL的编译选用运行时库(忘了那个文档这么说, 反正是官方的), 要和应用程序选用的运行时库配套, 否则有问题.
所以不想采用快速编译步骤.
想再看看INSTALL.md, 看看编译参数怎么写. 编译出供VS2019用的debug版和release版的OpenSSL输出. 包含4种运行时库的版本. 我们平时主要用的运行时库就2种(/MD, /MDd), 因为都使用DLL版本的运行时库, 不静态包含运行时库.
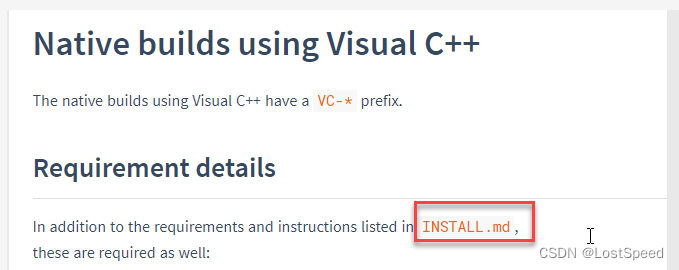
INSTALL.md写的挺详细的, 有编译选项怎么写, 我主要关注怎么选择不同的运行时库.
看了一圈没看到如何选择运行时库.
算了, 那就按照快速编译的文档, 将编译命令整理一下, 执行编译. 也许编译完, 安装后, 就有不同运行时库的版本.
编译 - Quick start

Install Perl
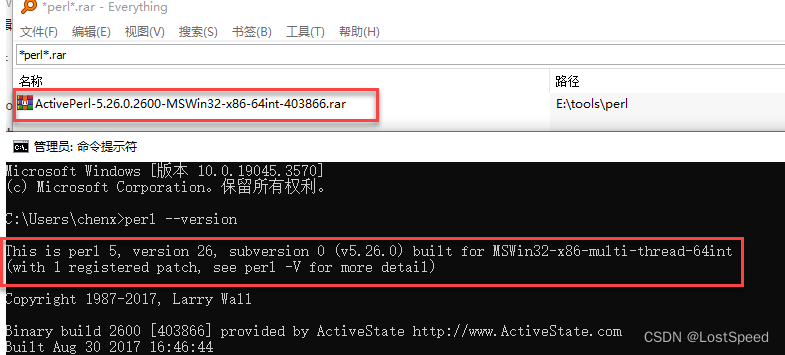
这步有了, 前面已经装了 ActivePerl-5.26.0.2600-MSWin32-x86-64int-403866.rar
且在命令行下可以直接访问到Perl
C:\Users\chenx>perl --version

This is perl 5, version 26, subversion 0 (v5.26.0) built for MSWin32-x86-multi-thread-64int
(with 1 registered patch, see perl -V for more detail)

Copyright 1987-2017, Larry Wall

Binary build 2600 [403866] provided by ActiveState http://www.ActiveState.com
Built Aug 30 2017 16:46:44

Perl may be copied only under the terms of either the Artistic License or the
GNU General Public License, which may be found in the Perl 5 source kit.

Complete documentation for Perl, including FAQ lists, should be found on
this system using "man perl" or "perldoc perl".  If you have access to the
Internet, point your browser at http://www.perl.org/, the Perl Home Page.
Install NASM
装了nasm-2.16.01-installer-x64.exe, 安装位置 c:\nasm
打开命令行, nasm.exe并不在PATH环境变量中.
因为nasm仅仅在编译时使用, 准备在命令行中临时加环境变量的方法, 可以减轻环境变量的污染.
Use Visual Studio Developer Command Prompt with administrative privileges
要编译x64版本, 打开vs2019x64本地命令行, 选择管理员身份运行.

设置临时变量, 加入nasm路径
**********************************************************************
** Visual Studio 2019 Developer Command Prompt v16.11.32
** Copyright (c) 2021 Microsoft Corporation
**********************************************************************
[vcvarsall.bat] Environment initialized for: 'x64'

C:\Program Files (x86)\Microsoft Visual Studio\2019\Enterprise>set path=c:\nasm;%path%
测试一下, nasm是否可以访问
C:\Program Files (x86)\Microsoft Visual Studio\2019\Enterprise>nasm -v
NASM version 2.16.01 compiled on Dec 21 2022
在vs2019命令行中也能访问到perl, 和普通命令行中一致.
From the root of the OpenSSL source directory enter
进入openssl源码包路径, 用perl配置openssl, 选择输出路径前缀, 选择VS x64版本

默认的安装路径要改一下, 不想用.
cd /d D:\3rd_prj\crypt\openssl-3.2.0
perl Configure VC-WIN64A --prefix=c:\openssl_3d2 --openssldir=c:\openssl_3d2\common
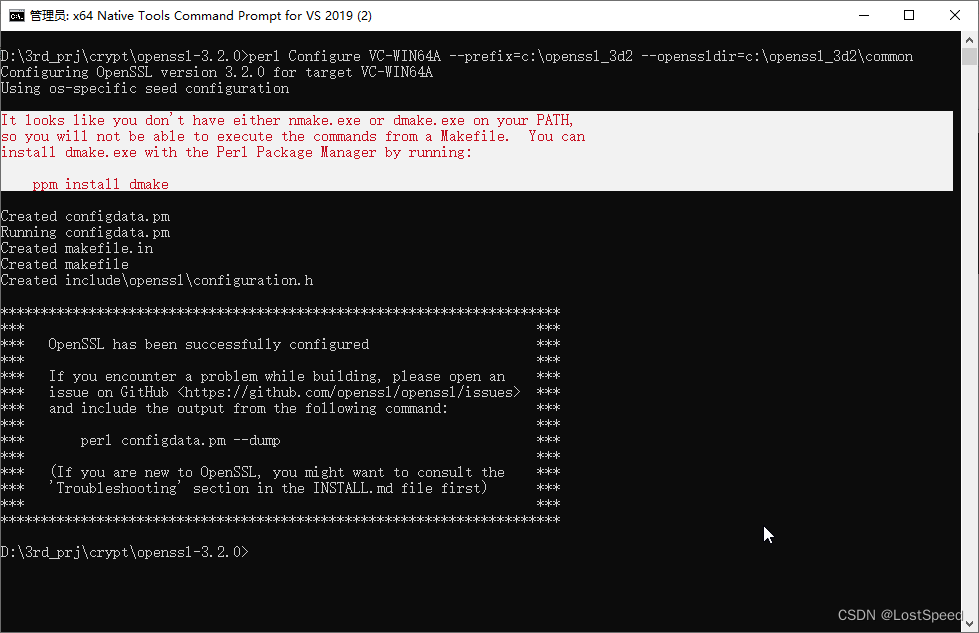
openssl提示, 说缺nmake.exe或者dmake.exe.
但是nmake是可以在当前命令行运行的.
如果在vs2019命令行中, 不能运行nmake, 那还了得…
应该是openssl搞错了, 不理这个错误提示.
nmake
编译的时间好长, 等编译完成.
nmake test
// 测试的时间也好长
All tests successful.
Files=294, Tests=3408, 867 wallclock secs ( 4.92 usr +  0.98 sys =  5.91 CPU)
Result: PASS
测试通过了, 从里面能看出有些特性没有, 以后如果需要, 可以在配置中加上, 重新编译, 如果没有特殊要求, 就用openSSL默认的编译输出.
01-test_fipsmodule_cnf.t ................ skipped: Test only supported in a fips build
01-test_symbol_presence.t ............... skipped: This is unsupported on platforms that don't have 'nm'
03-test_fipsinstall.t ................... skipped: Test only supported in a fips build
04-test_bio_tfo.t ....................... skipped: This test requires enable-tfo
05-test_rc5.t ........................... skipped: rc5 is not supported by this OpenSSL build
07-test_bio_comp.t ...................... skipped: No compression algorithms
20-test_cli_fips.t ...................... skipped: Test only supported in a fips build with security checks
30-test_acvp.t .......................... skipped: ACVP is not supported by this test
30-test_afalg.t ......................... skipped: test_afalg not supported for this build
30-test_pairwise_fail.t ................. skipped: These tests are unsupported in a non fips build
40-test_rehash.t ........................ skipped: test_rehash is not available on this platform
60-test_x509_store.t .................... skipped: test_rehash is not available on this platform
70-test_tls13certcomp.t ................. skipped: test_tls13certcomp needs compression and algorithms enabled
80-test_pkcs12.t ........................ skipped: Non-Greek system locale
82-test_tfo_cli.t ....................... skipped: test_tfo_cli needs tfo enabled
90-test_cert_comp.t ..................... skipped: Certificate compression is disabled in this OpenSSL build
90-test_fipsload.t ...................... skipped: Test is disabled with disabled fips
从测试结果来看, 缺的特性: fips, tfo, rc5, compression algorithms, ACVP, afalg, rehash,
安装
nmake install
安装后的目录结构
C:\openssl_3d2>tree
文件夹 PATH 列表
卷序列号为 BA70-59B2
C:.
├─bin
├─common
│  ├─certs
│  ├─misc
│  └─private
├─html
│  ├─man1
│  ├─man3
│  ├─man5
│  └─man7
│      └─img
├─include
│  └─openssl
└─lib
    ├─engines-3
    └─ossl-modules
安装后的html/manx目录中都是.html文件, 方便查资料.
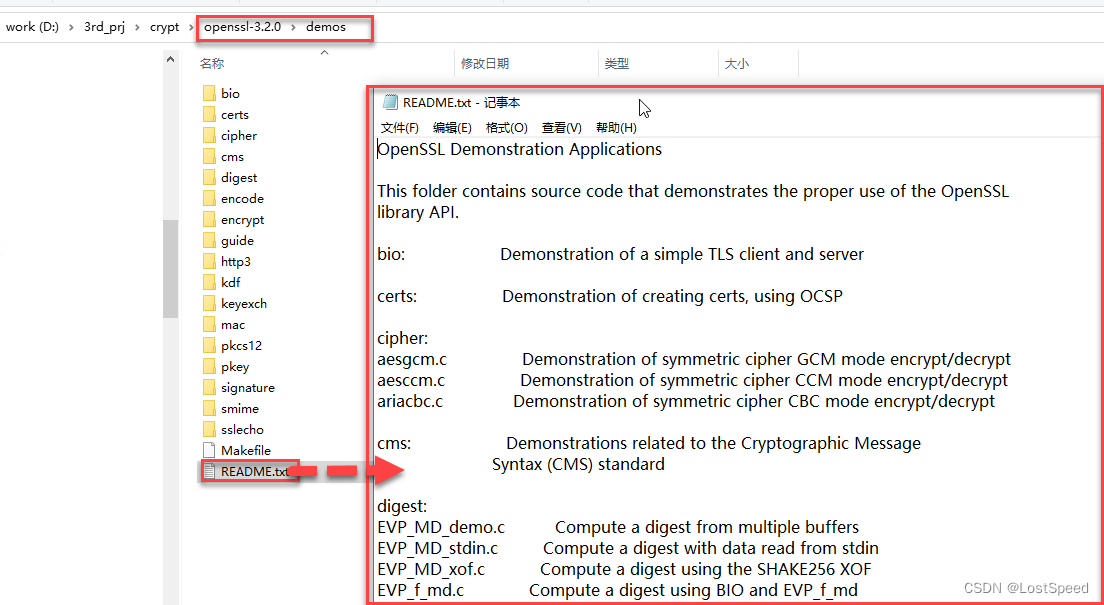
安装后的目录里面没有demo工程, 需要去看源码包内的demo.
END
本文来自互联网用户投稿,该文观点仅代表作者本人,不代表本站立场。本站仅提供信息存储空间服务,不拥有所有权,不承担相关法律责任。 如若内容造成侵权/违法违规/事实不符,请联系我的编程经验分享网邮箱:chenni525@qq.com进行投诉反馈,一经查实,立即删除!
- Python教程
- 深入理解 MySQL 中的 HAVING 关键字和聚合函数
- Qt之QChar编码(1)
- MyBatis入门基础篇
- 用Python脚本实现FFmpeg批量转换
- 使用requests库测试post请求 操作流程
- 【C语言】指针进阶
- 启用Hyper-V的三种方法,总有一种适合你
- 蕃茄田艺术×熊小米打造大电影,千名小作者海选启动
- c++学习:static在类中的空间分配+实战+单例设计模式
- Linux的基本指令和权限的知识
- 系统架构设计师教程(十二)信息系统架构设计理论与实践
- 基于深度学习的多目标跟踪算法
- 【驱动】TI AM437x(内核调试-02):dynamic 动态打印调试
- 超越传统终端:用 tmux 实现高效的远程会话管理