Mr_HJ / form-generator项目文档学习与记录(续2)
发布时间:2024年01月11日
更多ruoyi-nbcio功能请看演示系统
gitee源代码地址
前后端代码: https://gitee.com/nbacheng/ruoyi-nbcio
演示地址:RuoYi-Nbcio后台管理系统
更多nbcio-boot功能请看演示系统
gitee源代码地址
后端代码: https://gitee.com/nbacheng/nbcio-boot
前端代码:https://gitee.com/nbacheng/nbcio-vue.git
在线演示(包括H5) : http://122.227.135.243:9888
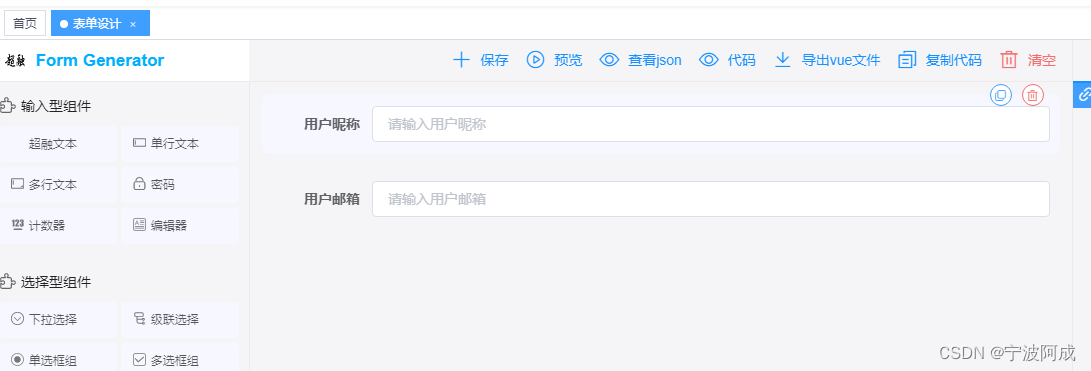
上面代码按钮显示相应的代码与界面
<el-button icon="el-icon-view" type="text" @click="Code">
          代码
        </el-button>
Code() {
this.operationType = 'Code'
let data = {
fileName: undefined,
type: 'file'
}
this.generate(data);
},generate(data) {
const func = this[`exec${titleCase(this.operationType)}`]
this.generateConf = data
func && func(data)
},上面实现是调用了下面的方法,就是execCode方法
? execCode(data) {
? ? ? this.AssembleFormData();
? ? ? this.drawerVisible = true;
? ? }
其中AssembleFormData就把配置信息与要显示的字段放进去
AssembleFormData() {
      this.formData = {
        ...this.formConf,
        fields: deepClone(this.drawingList)
      }
    },
通过开关显示这个下面的组件
<form-drawer
      :visible.sync="drawerVisible"
      :form-data="formData"
      size="100%"
      :generate-conf="generateConf"
    />
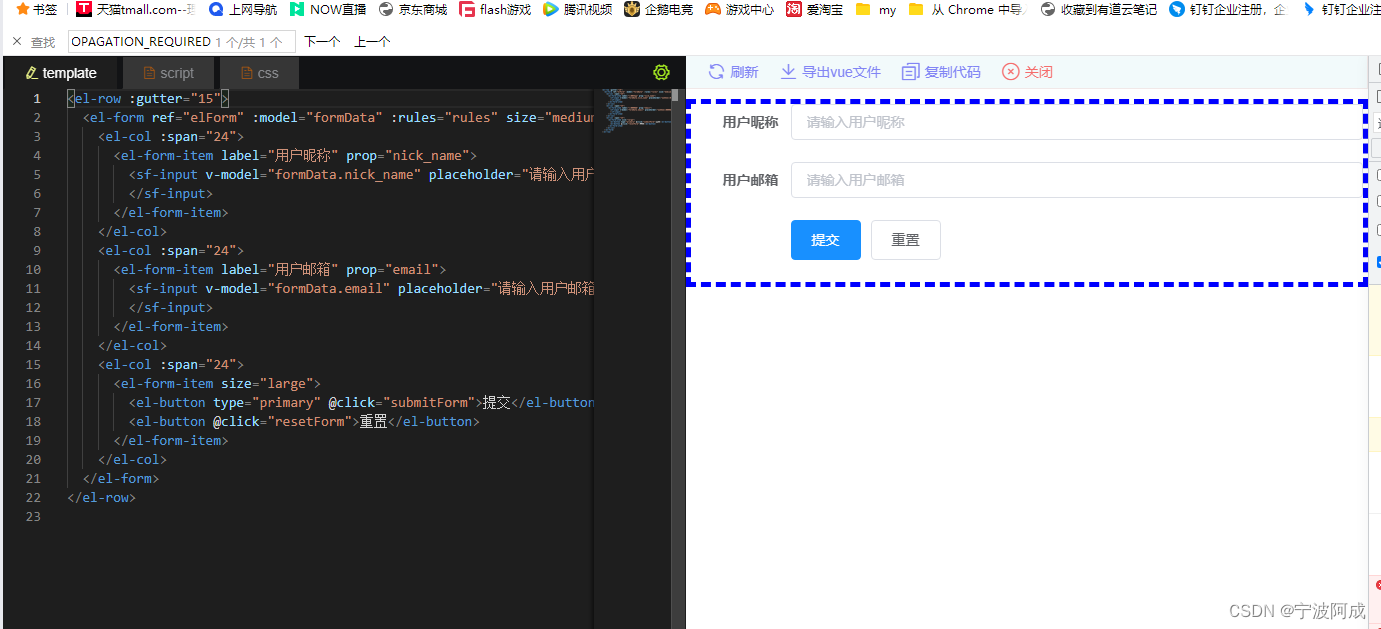
这个页面主要用到了两个组件,样式优化组件beautifier和显示组件monaco-editor,在打开el-drawer的时候就进行初始化了
onOpen() {
      const { type } = this.generateConf
      this.htmlCode = makeUpHtml(this.formData, type)
      this.jsCode = makeUpJs(this.formData, type)
      this.cssCode = makeUpCss(this.formData)
      this.key = +new Date()
      loadBeautifier(btf => {
        beautifier = btf
        this.htmlCode = beautifier.html(this.htmlCode, beautifierConf.html)
        this.jsCode = beautifier.js(this.jsCode, beautifierConf.js)
        this.cssCode = beautifier.css(this.cssCode, beautifierConf.html)

        loadMonaco(val => {
          monaco = val
          this.setEditorValue('editorHtml', 'html', this.htmlCode)
          this.setEditorValue('editorJs', 'js', this.jsCode)
          this.setEditorValue('editorCss', 'css', this.cssCode)
          if (!this.isInitcode) {
            this.isParser = true
            this.isParser && (this.isInitcode = true) && this.runCode()
          }
        })
      })
    },
对于左边代码显示部分,主要是下面部分处理,为了避免一些问题,下面注释了一些没用的信息
setEditorValue(id, type, codeStr) {
     // if (editorObj[type]) {
     //   editorObj[type].setValue(codeStr)
     // } else {
        editorObj[type] = monaco.editor.create(document.getElementById(id), {
          value: codeStr,
          theme: 'vs-dark',
          language: mode[type],
          automaticLayout: true
        })
      //}
      // ctrl + s 刷新
      editorObj[type].onKeyDown(e => {
        if (e.keyCode === 49 && (e.metaKey || e.ctrlKey)) {
          this.runCode()
        }
      })
    },
之前说过,原来模拟显示采用iframe 加载的是提前写好的 html,但这种方式对于新加的组件就不怎么友好了,所以修改成如下方式了
<div class="view-border">
              <parser v-show="isParser" :form-conf="formData" @submit="submitForm" :key="key" ref="previewForm" />
            </div>
效果图如下:

文章来源:https://blog.csdn.net/qq_40032778/article/details/135523065
本文来自互联网用户投稿,该文观点仅代表作者本人,不代表本站立场。本站仅提供信息存储空间服务,不拥有所有权,不承担相关法律责任。 如若内容造成侵权/违法违规/事实不符,请联系我的编程经验分享网邮箱:chenni525@qq.com进行投诉反馈,一经查实,立即删除!
本文来自互联网用户投稿,该文观点仅代表作者本人,不代表本站立场。本站仅提供信息存储空间服务,不拥有所有权,不承担相关法律责任。 如若内容造成侵权/违法违规/事实不符,请联系我的编程经验分享网邮箱:chenni525@qq.com进行投诉反馈,一经查实,立即删除!
最新文章
- Python教程
- 深入理解 MySQL 中的 HAVING 关键字和聚合函数
- Qt之QChar编码(1)
- MyBatis入门基础篇
- 用Python脚本实现FFmpeg批量转换
- 归并排序与逆序对
- 【操作系统】|浅谈IO模型
- Linux rmt命令教程:如何使用rmt命令进行远程备份(附实例教程和注意事项)
- BSC/平衡记分卡
- 华为OD机试 - 反射计数(Java & JS & Python & C)
- Java——前后端分离需求设计思路
- 鸿蒙开发笔记(二十六):交互事件--触摸,按键,鼠标,焦点
- css吸顶(position: sticky;)
- 自动化测试和人工测试分别有什么优缺点?
- log4j日志打印配置