KITTI数据集处理为COCO数据集格式
发布时间:2023年12月19日
KITTI作为自动驾驶常用数据集,被广泛的应用于自动驾驶目标检测等过程中。
首先是数据集类别合并,原始的KITTI数据集有九个类别,分别是:
Car
Van
Truck
Pedestrian
Person_sitting
Cyclist
Tram
Misc
而我们在使用过程中,通常会对某些类别进行合并,将Car,Van,Truck,Tram统一划分为Car,将Pedestrian与Person_setting统一设置为Pedestrian,保留Cyclist,去除Misc。
# modify_annotations_txt.py
import glob
import string
txt_list = glob.glob('./Labels/*.txt') # 存储Labels文件夹所有txt文件路径
def show_category(txt_list):
    category_list= []
    for item in txt_list:
        try:
            with open(item) as tdf:
                for each_line in tdf:
                    labeldata = each_line.strip().split(' ') # 去掉前后多余的字符并把其分开
                    category_list.append(labeldata[0]) # 只要第一个字段,即类别
        except IOError as ioerr:
            print('File error:'+str(ioerr))
    print(set(category_list)) # 输出集合

def merge(line):
    each_line=''
    for i in range(len(line)):
        if i!= (len(line)-1):
            each_line=each_line+line[i]+' '
        else:
            each_line=each_line+line[i] # 最后一条字段后面不加空格
    each_line=each_line+'\n'
    return (each_line)

print('before modify categories are:\n')
show_category(txt_list)

for item in txt_list:
    new_txt=[]
    try:
        with open(item, 'r') as r_tdf:
            for each_line in r_tdf:
                labeldata = each_line.strip().split(' ')
                if labeldata[0] in ['Truck','Van','Tram']: # 合并汽车类
                    labeldata[0] = labeldata[0].replace(labeldata[0],'Car')
                if labeldata[0] == 'Person_sitting': # 合并行人类
                    labeldata[0] = labeldata[0].replace(labeldata[0],'Pedestrian')
                if labeldata[0] == 'DontCare': # 忽略Dontcare类
                    continue
                if labeldata[0] == 'Misc': # 忽略Misc类
                    continue
                new_txt.append(merge(labeldata)) # 重新写入新的txt文件
        with open(item,'w+') as w_tdf: # w+是打开原文件将内容删除,另写新内容进去
            for temp in new_txt:
                w_tdf.write(temp)
    except IOError as ioerr:
        print('File error:'+str(ioerr))

print('\nafter modify categories are:\n')
show_category(txt_list)
最终生成的数据集格式为txt,标注为YOLO格式。

一个txt文件对应一张图像,内容如下,分别对应类别,中心点坐标xy,标注框宽高wh。
1 0.6221936274509804 0.6093513513513513 0.08033496732026148 0.4457297297297298
随后对数据集进行划分,总共有7481张图像,按照4:1的比例划分训练集与验证集。代码如下:
import os
import random
import shutil
def mvfile(path,topath):
    xmllist= os.listdir(path+"/annotations/")
    xmlpath=path+"/annotations/"
    imgpath=path+"/images/"
    xmltopath=topath+"/val_annotations/"
    if not os.path.exists(xmltopath):
        os.makedirs(xmltopath)
    imgtopath = topath + "val_images"
    if not os.path.exists(imgtopath):
        os.makedirs(imgtopath)
    xmls = random.sample(xmllist, 1496)
    for xml in xmls:
        with open(topath+"抽取的标签.txt", "a") as f:
            f.write(xml+"\n")
        xmlfile=xmlpath+xml
        print(xmlfile)
        shutil.move(xmlfile,xmltopath)
        imgfile=imgpath+xml.replace("txt","png")
        print(imgfile)
        shutil.move(imgfile,imgtopath)

if __name__ == '__main__':
    path="D:\graduate\datasets\detection\kitti/"
    mvfile(path,path+"val_images/")
通过上述程序会将验证集图像与标注文件提取出来。
数据集划分完成后需要将YOLO格式转换为COCO格式(JSON),即需要生成一个类别文件,里面标注的是类别名称,记得要与YOLO的类别编号一致。如下Car在YOLO中标注类别为0,Pedestrian为1,Cyclist为2。
Car
Pedestrian
Cyclist
随后将txt文件转换为COCO的json格式,在生成JSON文件时,需要原标注文件以及图像,因为要读取图像的大小等信息
import os
import json
import cv2
import random
import time
from PIL import Image

coco_format_save_path='D:\graduate\datasets\detection\kitti\coco_annotations/val/'                      #要生成的标准coco格式标签所在文件夹
yolo_format_classes_path='D:\graduate/figures\images\Tools\Kitti2Coco\kitti.names'     #类别文件,一行一个类
yolo_format_annotation_path='D:\graduate\datasets\detection\kitti\yolo_annotations/val'        #yolo格式标签所在文件夹
img_pathDir='D:\graduate\datasets\detection\kitti/val\images/'                        #图片所在文件夹

with open(yolo_format_classes_path,'r') as fr:                               #打开并读取类别文件
    lines1=fr.readlines()
# print(lines1)
categories=[]                                                                 #存储类别的列表
for j,label in enumerate(lines1):
    label=label.strip()
    categories.append({'id':j,'name':label,'supercategory':'None'})         #将类别信息添加到categories中
# print(categories)

write_json_context=dict()                                                      #写入.json文件的大字典
write_json_context['info']= {'description': '', 'url': '', 'version': '', 'year': 2023, 'contributor': '', 'date_created': '2021-12-15'}
write_json_context['licenses']=[{'id':1,'name':None,'url':None}]
write_json_context['categories']=categories
write_json_context['images']=[]
write_json_context['annotations']=[]

#接下来的代码主要添加'images'和'annotations'的key值
imageFileList=os.listdir(img_pathDir)                                           #遍历该文件夹下的所有文件,并将所有文件名添加到列表中
for i,imageFile in enumerate(imageFileList):
    imagePath = os.path.join(img_pathDir,imageFile)                             #获取图片的绝对路径
    image = Image.open(imagePath)                                               #读取图片,然后获取图片的宽和高
    W, H = image.size

    img_context={}                                                              #使用一个字典存储该图片信息
    #img_name=os.path.basename(imagePath)                                       #返回path最后的文件名。如果path以/或\结尾,那么就会返回空值
    img_context['file_name']=imageFile
    img_context['height']=H
    img_context['width']=W
    img_context['date_captured']='2023-12-15'
    img_context['id']=i                                                         #该图片的id
    img_context['license']=1
    img_context['color_url']=''
    img_context['flickr_url']=''
    write_json_context['images'].append(img_context)                            #将该图片信息添加到'image'列表中


    txtFile=imageFile[:6]+'.txt'                                               #获取该图片获取的txt文件
    with open(os.path.join(yolo_format_annotation_path,txtFile),'r') as fr:
        lines=fr.readlines()                                                   #读取txt文件的每一行数据,lines2是一个列表,包含了一个图片的所有标注信息
    for j,line in enumerate(lines):

        bbox_dict = {}                                                          #将每一个bounding box信息存储在该字典中
        # line = line.strip().split()
        # print(line.strip().split(' '))

        class_id,x,y,w,h=line.strip().split(' ')                                          #获取每一个标注框的详细信息
        class_id,x, y, w, h = int(class_id), float(x), float(y), float(w), float(h)       #将字符串类型转为可计算的int和float类型

        xmin=(x-w/2)*W                                                                    #坐标转换
        ymin=(y-h/2)*H
        xmax=(x+w/2)*W
        ymax=(y+h/2)*H
        w=w*W
        h=h*H

        bbox_dict['id']=i*10000+j                                                         #bounding box的坐标信息
        bbox_dict['image_id']=i
        bbox_dict['category_id']=class_id                                              #注意目标类别要加一
        bbox_dict['iscrowd']=0
        height,width=abs(ymax-ymin),abs(xmax-xmin)
        bbox_dict['area']=height*width
        bbox_dict['bbox']=[xmin,ymin,w,h]
        bbox_dict['segmentation']=[[xmin,ymin,xmax,ymin,xmax,ymax,xmin,ymax]]
        write_json_context['annotations'].append(bbox_dict)                               #将每一个由字典存储的bounding box信息添加到'annotations'列表中

name = os.path.join(coco_format_save_path,"train"+ '.json')
with open(name,'w') as fw:                                                                #将字典信息写入.json文件中
    json.dump(write_json_context,fw,indent=2)
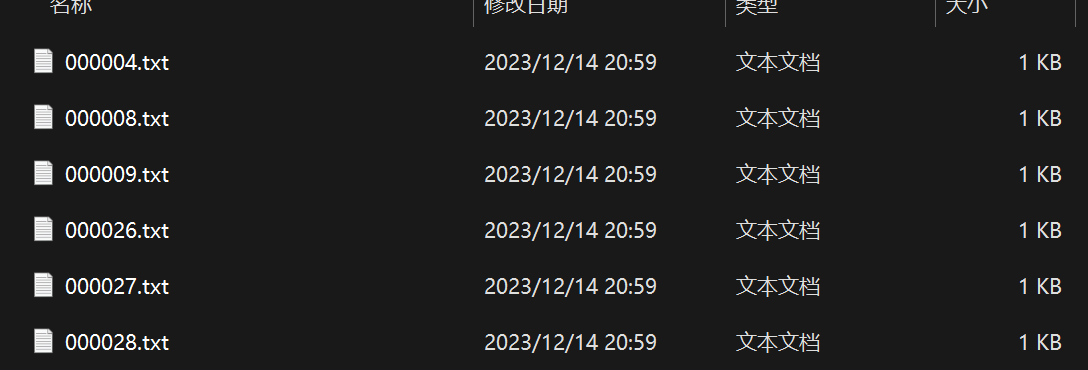
生成的文件如下:

至此,KITTI数据集转换为COCO格式的数据集。
在运行时报错:
OSError: [WinError 1455] 页面文件太小,无法完成操作。 Error loading "D:\softwares\Anconda\envs\detr\lib\site-packages\torch\lib\cusparse64_11.dll" or one of its dependencies.
这是由于虚拟内存不足导致的,看到有人说修改num_workers=0可以解决问题,但这是一种治标不治本的方法,正确方法是增大虚拟内存:
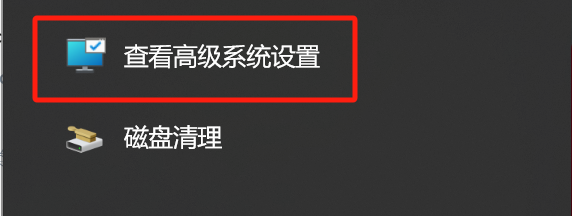
搜索 查看高级系统设置
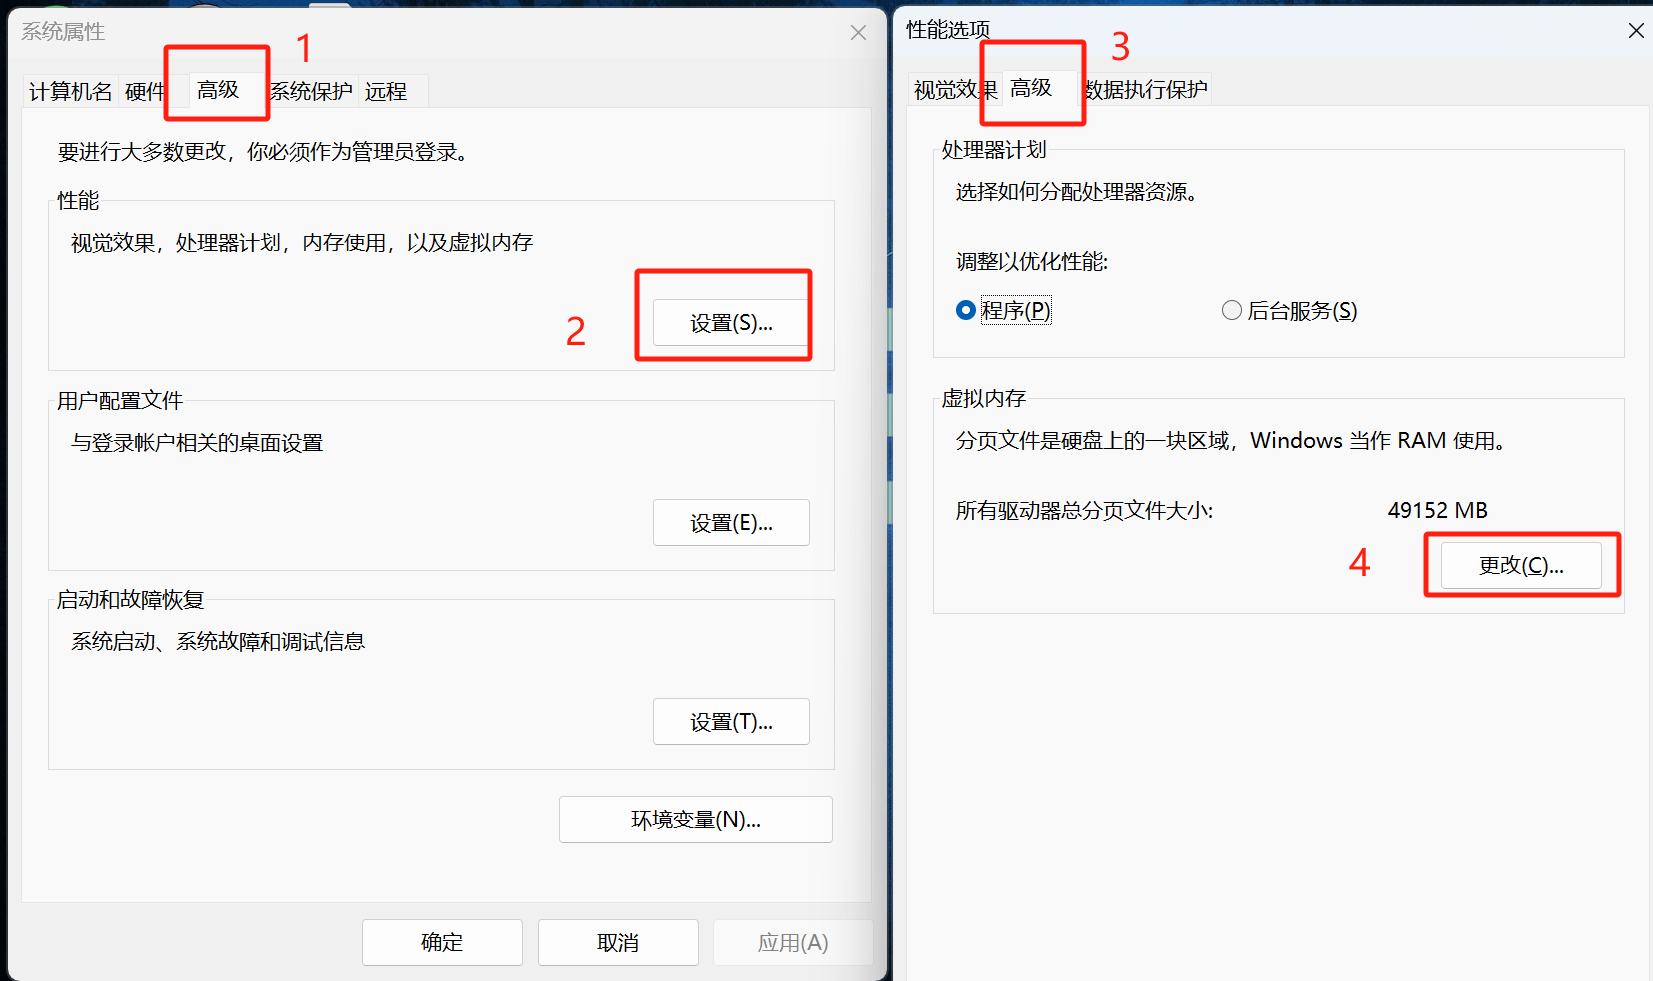
找到虚拟内存
python安装在哪就修改哪个盘的分页文件大小。
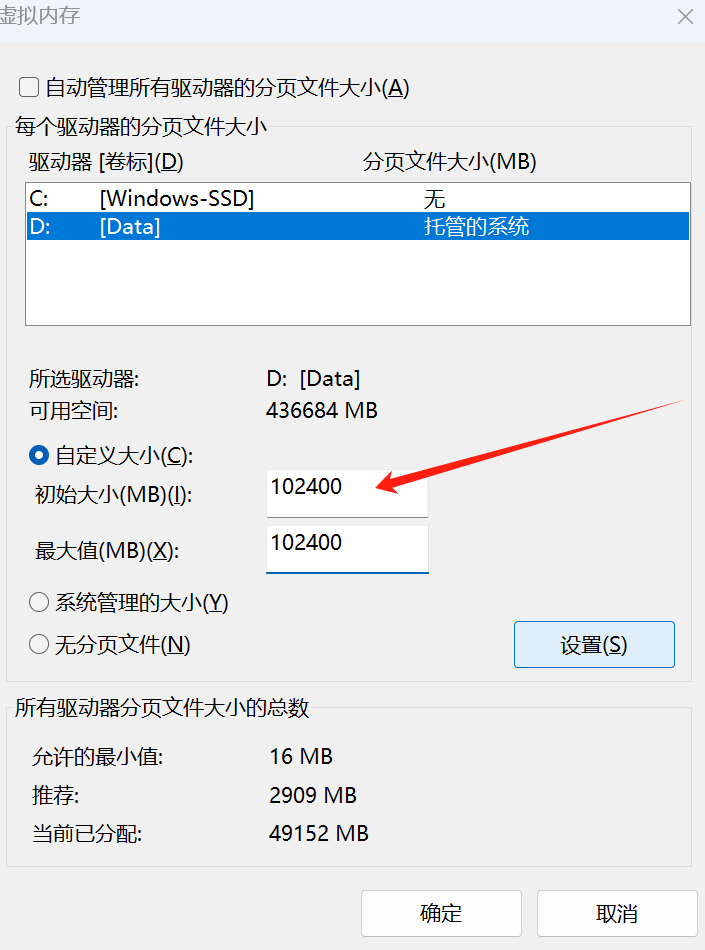
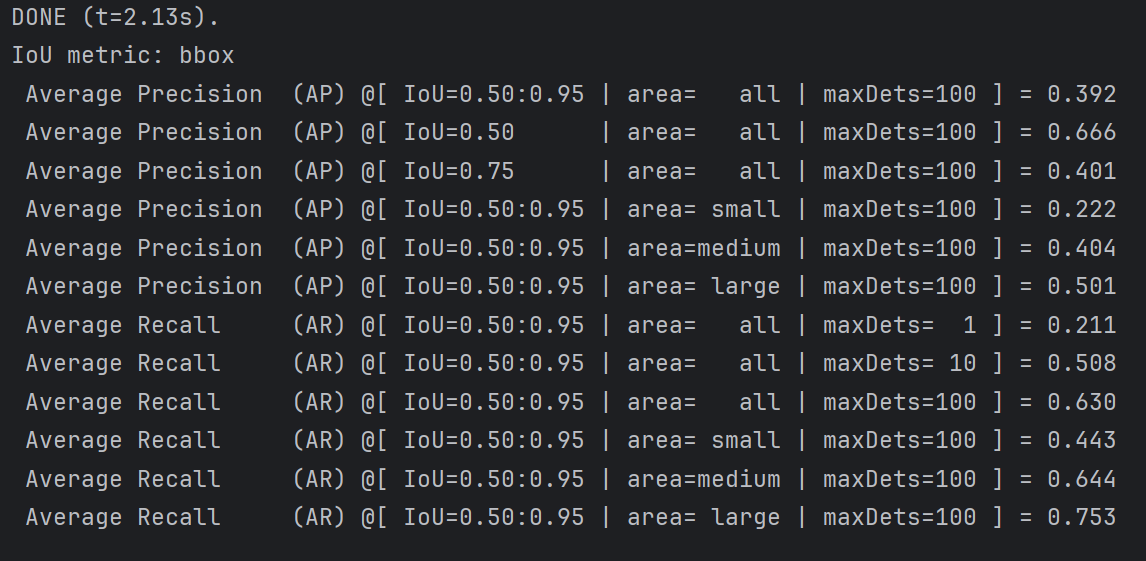
修改完内存后需要重启电脑才可以,重启后运行成功。
文章来源:https://blog.csdn.net/pengxiang1998/article/details/135003509
本文来自互联网用户投稿,该文观点仅代表作者本人,不代表本站立场。本站仅提供信息存储空间服务,不拥有所有权,不承担相关法律责任。 如若内容造成侵权/违法违规/事实不符,请联系我的编程经验分享网邮箱:chenni525@qq.com进行投诉反馈,一经查实,立即删除!
本文来自互联网用户投稿,该文观点仅代表作者本人,不代表本站立场。本站仅提供信息存储空间服务,不拥有所有权,不承担相关法律责任。 如若内容造成侵权/违法违规/事实不符,请联系我的编程经验分享网邮箱:chenni525@qq.com进行投诉反馈,一经查实,立即删除!
最新文章
- Python教程
- 深入理解 MySQL 中的 HAVING 关键字和聚合函数
- Qt之QChar编码(1)
- MyBatis入门基础篇
- 用Python脚本实现FFmpeg批量转换
- HTTPS证书有免费的吗?
- 许战海矩阵战略洞察 | 露露如何打造第二招牌实现突破增长
- docker - 常用容器部署命令大全(MySQL、Redis、RabbitMQ、ES、Kibana、Nacos、Sentinel)
- 百度POI分类 20231227记录
- 云架构师学习------腾讯云通识-网络与安全
- python入门小程序-账单管理系统
- Python 开源扫雷游戏 PyMine 发布介绍视频
- 5G阅信应用场景有哪些?
- 对象克隆学习
- SD-WAN网络建设:设备、服务与综合解决方案