rk3566-Android11 从驱动到 app 第一章添加驱动程序
发布时间:2024年01月19日
作者: baron
????由于一直从事驱动开发, 一直想对整体流程有个了解, 刚好看到这篇文章 AndroidQ 从app到驱动 第一章 编写Linux内核驱动程序. 于是参考这篇文章在 rk3566 上面完成了从驱动到 app 的实验验证. 文章记录用到的知识点以及遇到的问题和解决方法.
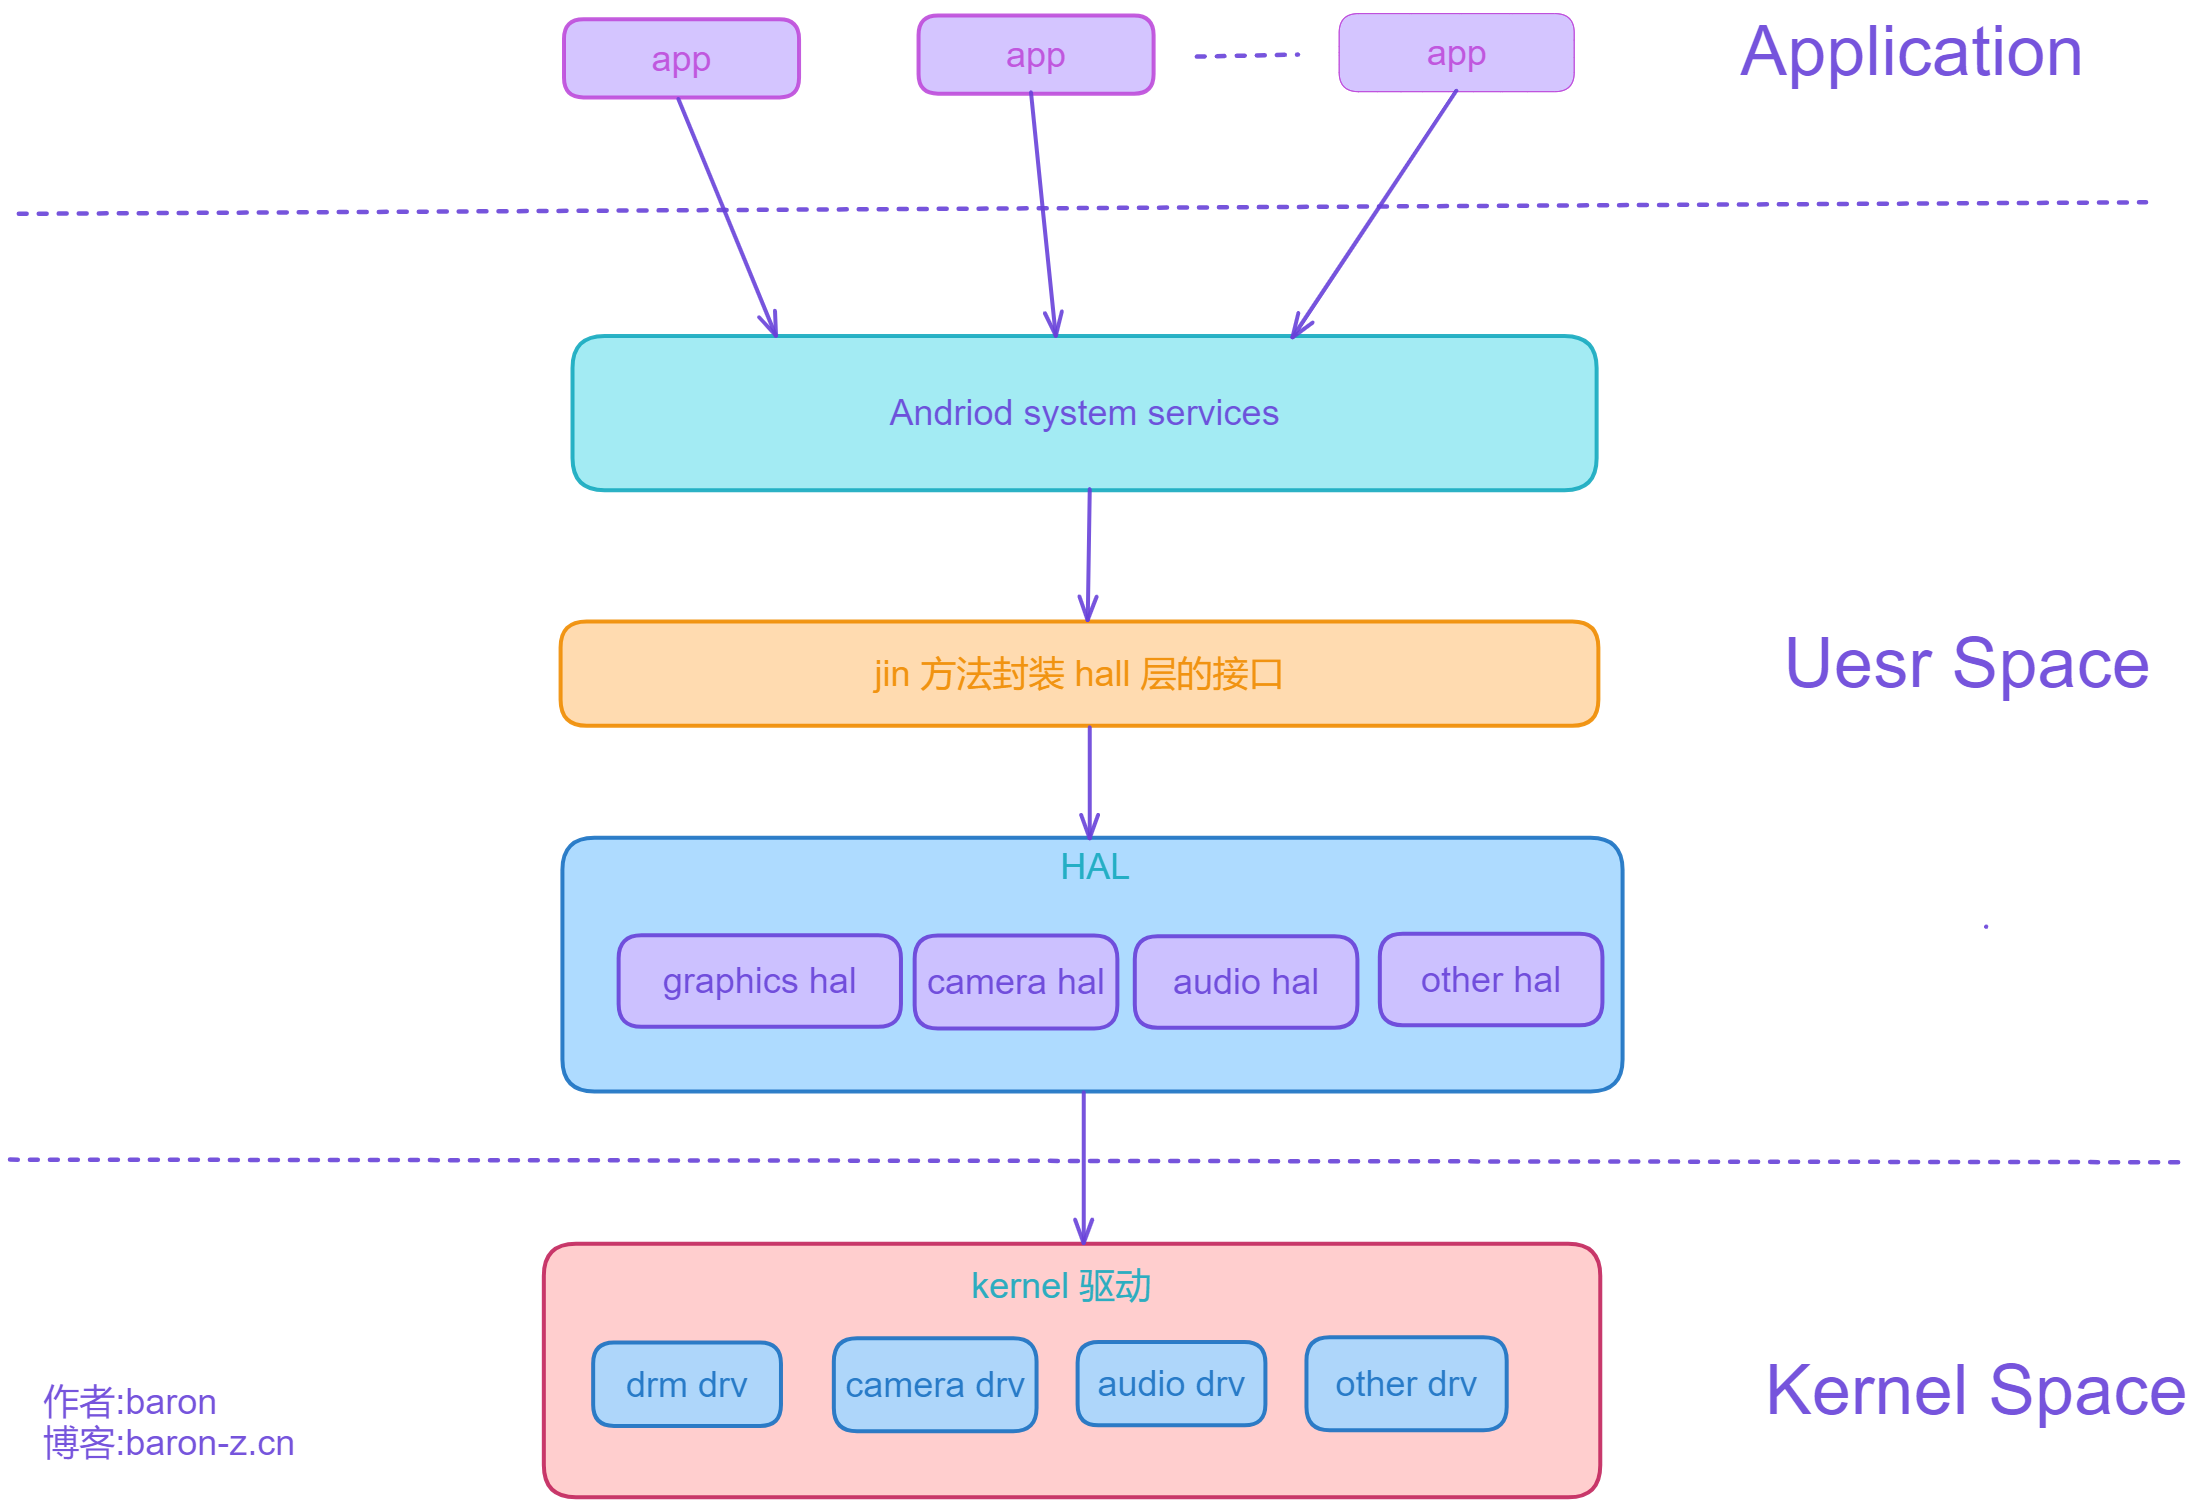
???? 整体框架大致分为如下 5 层.

一、添加 kernel 驱动
1. 驱动编写
????驱动部分写一个 misc 设备就行了, 提供简单的读写功能. 由于只是简单的验证功能所以没有越界处理和错误处理.
#include <linux/fs.h>
#include <linux/miscdevice.h>
#include <linux/module.h>
#include <linux/uaccess.h>

#define DEVICE_NAME "hello"
static char my_data[100] = "Hello, this is my_misc_device!\n";

static ssize_t my_read(struct file *file, char __user *buf, size_t count, loff_t *ppos)
{
    if (copy_to_user(buf, my_data, count))
        return -EFAULT;

    return count;
}

static ssize_t my_write(struct file *file, const char __user *buf, size_t count, loff_t *ppos)
{
    if (copy_from_user(my_data, buf, count))
        return -EFAULT;

    return count;
}

static const struct file_operations my_fops = {
    .owner = THIS_MODULE,
    .read = my_read,
    .write = my_write,
};

static struct miscdevice my_misc_device = {
    .minor = MISC_DYNAMIC_MINOR,
    .name = DEVICE_NAME,
    .fops = &my_fops,
};

static int __init my_init(void)
{
    int ret = misc_register(&my_misc_device);
    if (ret) {
        pr_err("Failed to register misc device\n");
        return ret;
    }

    return 0;
}

static void __exit my_exit(void)
{
    misc_deregister(&my_misc_device);
}

module_init(my_init);
module_exit(my_exit);
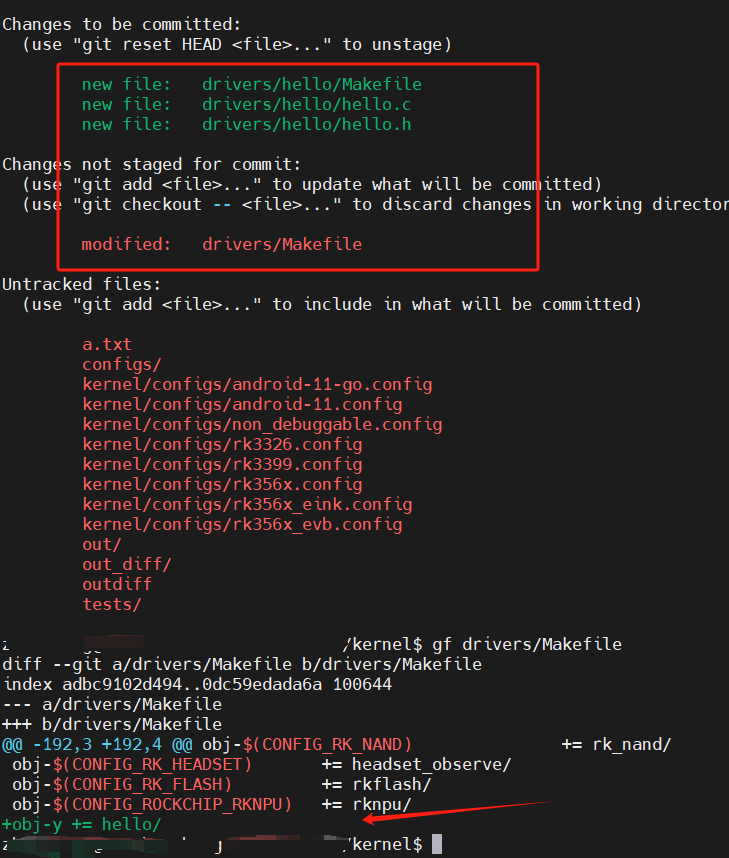
对应的 makefile 部分直接将驱动编进内核.
obj-y += hello.o
修改的文件如下所示

编译下载查看成功创建节点
rk3566_rgo:/ # ls /dev/hello
/dev/hello
2. 验证驱动
编写一个简单的应用程序验证驱动是 ok 的, 创建 external/test/test.c, 应用程序的内容如下.
#include <stdio.h>
#include <sys/ioctl.h>
#include <fcntl.h>
#include <sys/types.h>
#include <unistd.h>
#include <malloc.h>
#include <string.h>

int main(int argc, char* argv[])
{

    char* buff = (char*)malloc(100);
    int fd = -1;

    buff[99] = '\0';

    if(argc < 2)
        return 0;

    fd = open("/dev/hello", O_RDWR);
    if(fd < 0){
        printf("open /dev/mycdev err\n");
        return -1;
    }

    if(!strcmp("write", argv[1])){
        write(fd, argv[2], strlen(argv[2]));
        printf("write %s to /dev/hello buf\n\n", argv[2]);
    }else if(!strcmp("read", argv[1])){
        read(fd, buff, 99);
        printf("read data form /dev/hello : %s\n\n", buff);
    }else {
        printf("please use write or read cmd\n");
    }

    close(fd);

    return 0;
}
添加 external/test/Android.bp内容如下, 用来编译 bin 文件.
cc_binary {
    name: "mytest",
    srcs: ["test.c"],
    shared_libs: [
        "libbase",
        "libcutils",
        "liblog",
        "libutils",
    ],
}
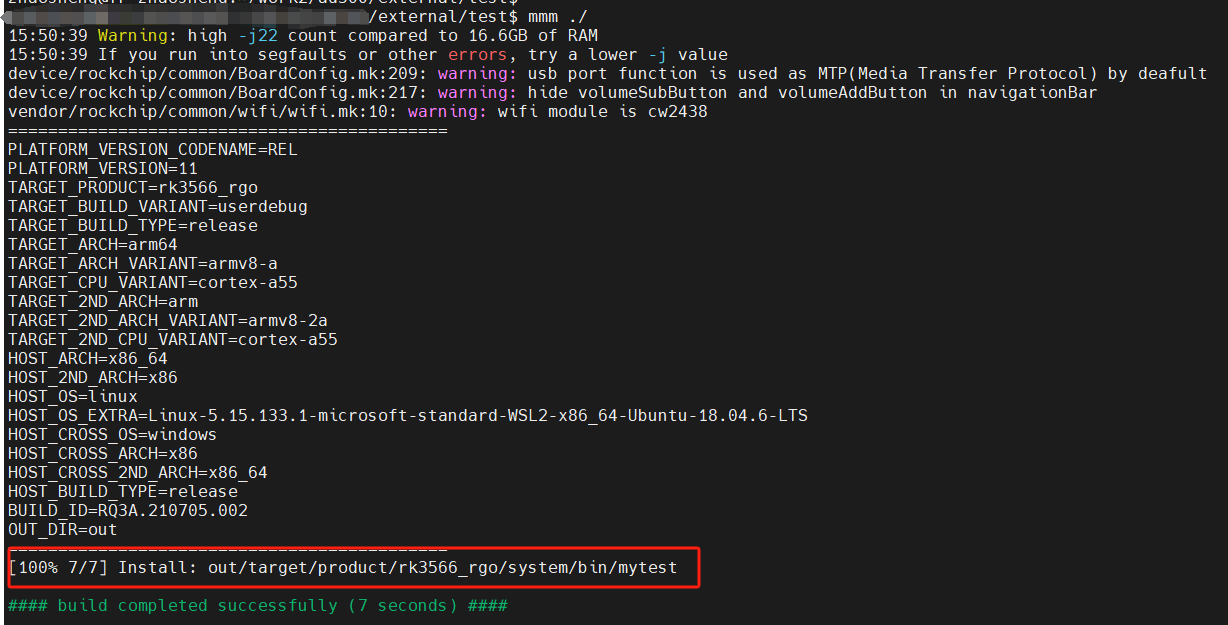
添加完成之后进入 external/test/运行 mmm .编译. 编译完成之后如图, 得到 my_test

将其 push 到机器的 cache/目录. 验证结果如图所示, 驱动正常运行.

文章来源:https://blog.csdn.net/sty01z/article/details/135677199
本文来自互联网用户投稿,该文观点仅代表作者本人,不代表本站立场。本站仅提供信息存储空间服务,不拥有所有权,不承担相关法律责任。 如若内容造成侵权/违法违规/事实不符,请联系我的编程经验分享网邮箱:chenni525@qq.com进行投诉反馈,一经查实,立即删除!
本文来自互联网用户投稿,该文观点仅代表作者本人,不代表本站立场。本站仅提供信息存储空间服务,不拥有所有权,不承担相关法律责任。 如若内容造成侵权/违法违规/事实不符,请联系我的编程经验分享网邮箱:chenni525@qq.com进行投诉反馈,一经查实,立即删除!
最新文章
- Python教程
- 深入理解 MySQL 中的 HAVING 关键字和聚合函数
- Qt之QChar编码(1)
- MyBatis入门基础篇
- 用Python脚本实现FFmpeg批量转换
- java常见面试题:什么是抽象类?什么是接口?它们之间的区别是什么?
- Yolov4重大的更新,结构组件
- 【运维日常】nginx 413 Request Entity Too Large
- 那些与SHOPFA商城系统对接好用の客服软件
- C++ 类的定义和访问修饰符
- 群晖开启多网卡 DS918+ 920 923 720 系统突破两个网卡限制 双网口限制 多网口限制
- android studio 将含有jni c++ 的library项目封装成jar并调用
- 《程序员的自我修养--链接,装载与库》
- 黑皮诺、白皮诺与灰皮诺各自的特点?
- centos 7.9 升级系统默认的python2.7到python 2.7.18