Flume 之自定义 Source
发布时间:2024年01月17日
1、简介
? ? ? ? Flume 自带 Source 有 Avro、Thrift、Netcat、Taildir、Kafka、Http等,有些场合比如我们指定访问接口获取数据当做 Flume 的 Source,像这种定制化的 Source 需要我们自己实现,下面我将介绍如何自定义实现 Source。
2、自定义实现 Flume 的 Source?
? ? ? ? 使用自定义 Source ,访问自身的web 服务,并且发送至 logger 的 Sink。
2.1、引入依赖
<dependencies>
	<dependency>
		<groupId>org.apache.flume</groupId>
		<artifactId>flume-ng-core</artifactId>
		<version>1.11.0</version>
	</dependency>
</dependencies>

 <build>
	<plugins>

	   <plugin>
		   <groupId>org.springframework.boot</groupId>
		   <artifactId>spring-boot-maven-plugin</artifactId>
		   <version>3.2.1</version>
		   <configuration>
			   <skip>true</skip>
		   </configuration>
	   </plugin>
	</plugins>
</build>
2.2、自定义Source
import org.apache.flume.Context;
import org.apache.flume.Event;
import org.apache.flume.EventDeliveryException;
import org.apache.flume.PollableSource;
import org.apache.flume.conf.Configurable;
import org.apache.flume.event.EventBuilder;
import org.apache.flume.source.AbstractSource;
import org.slf4j.Logger;
import org.slf4j.LoggerFactory;

import java.io.BufferedReader;
import java.io.InputStream;
import java.io.InputStreamReader;
import java.net.HttpURLConnection;
import java.net.URL;

public class MySource extends AbstractSource implements Configurable, PollableSource {
     private String path;

     private final static Logger log = LoggerFactory.getLogger(MySource.class);

    @Override
    public Status process() throws EventDeliveryException {
        Status status = null;
        try{
            URL url = new URL(this.path);
            HttpURLConnection connection = (HttpURLConnection) url.openConnection();
            connection.setRequestMethod("GET");
            connection.connect();

            InputStream is = connection.getInputStream();
            BufferedReader bufferedReader = new BufferedReader(new InputStreamReader(is, "utf-8"));
            StringBuffer stringBuffer = new StringBuffer();

            String line = null;
            while ((line = bufferedReader.readLine()) != null){
                stringBuffer.append(line);
                stringBuffer.append("\t");
            }
            log.info("test =======================: {}" , stringBuffer.toString());
            Event event = EventBuilder.withBody(stringBuffer.toString().getBytes());
            getChannelProcessor().processEvent(event);
            status = Status.READY;
            // 2s调用一次
            Thread.sleep(2000);
        }catch (Exception ex){
            log.info("出错了!, {}", ex.getMessage());
            status = Status.BACKOFF;
        }
        return status;
    }
    @Override
    public long getBackOffSleepIncrement() {
        return 0;
    }
    @Override
    public long getMaxBackOffSleepInterval() {
        return 0;
    }
    @Override
    public void configure(Context context) {
        // 从配置文件中读取
        String path = context.getString("path", "http://baidu.com");
        log.info("path ==========================: {}", path);
        this.path = path;
    }
}
2.3、将自定义Source 打包放到 flume 的 lib目录下

2.4、flume 的配置文件编写?
? ? ? ? vim flume-self-source.conf
a1.sources = r1
a1.channels = c1
a1.sinks=k1
# source
a1.sources.r1.type = com.weilong.flumeselfdefinition.MySource # 自定义 Source 的全限定类名
a1.sources.r1.path = http://192.168.30.33:8088/hello # 自定义参数
# channel
a1.channels.c1.type = memory
a1.channels.c1.capacity = 1000
a1.channels.c1.transactionCapacity = 100
# Sink
a1.sinks.k1.type = logger
# bind
a1.sources.r1.channels = c1
a1.sinks.k1.channel = c1
2.5、测试
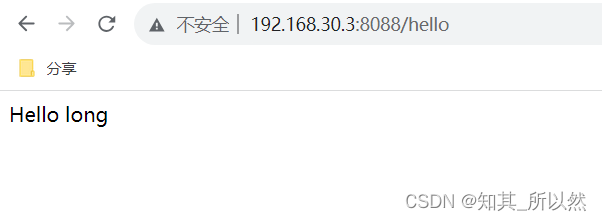
2.5.1、启动web服务

2.5.2、启动flume
bin/flume-ng agent -c conf/ -n a1 -f testconf/flume-self-source.conf -Dflume.root.logger=INFO,console2.5.3、结果?
 ?
?
3、总结
? ? ? ? 本文详细介绍 Flume 如何实现自定义 Source,帮助大家进一步了解Flume的使用。
????????本人是一个从小白自学计算机技术,对运维、后端、各种中间件技术、大数据等有一定的学习心得,想获取自学总结资料(pdf版本)或者希望共同学习,关注微信公众号:it自学社团。后台回复相应技术名称/技术点即可获得。(本人学习宗旨:学会了就要免费分享)

?
文章来源:https://blog.csdn.net/zwl2220943286/article/details/135633120
本文来自互联网用户投稿,该文观点仅代表作者本人,不代表本站立场。本站仅提供信息存储空间服务,不拥有所有权,不承担相关法律责任。 如若内容造成侵权/违法违规/事实不符,请联系我的编程经验分享网邮箱:chenni525@qq.com进行投诉反馈,一经查实,立即删除!
本文来自互联网用户投稿,该文观点仅代表作者本人,不代表本站立场。本站仅提供信息存储空间服务,不拥有所有权,不承担相关法律责任。 如若内容造成侵权/违法违规/事实不符,请联系我的编程经验分享网邮箱:chenni525@qq.com进行投诉反馈,一经查实,立即删除!
最新文章
- Python教程
- 深入理解 MySQL 中的 HAVING 关键字和聚合函数
- Qt之QChar编码(1)
- MyBatis入门基础篇
- 用Python脚本实现FFmpeg批量转换
- 数据库原理及其应用_1
- Core Web Vitals 是排名因素吗?
- 亚马逊云科技加速大语言模型的创新应用
- 哈希表基础
- Java Map集合
- R语言【paleobioDB】——pbdb_occurrences():从PBDB获取多个化石记录号的基本信息
- Python学习之路-Redis基础
- 海思3559 yolov5模型转wk详细笔记
- Alzet胶囊泵朝上用还是朝下用
- Gemini与GPT-4的巅峰对决:AI界的双壁之战