【OpenCV学习笔记07】- 【彩蛋】实现轨迹条控制画笔颜色和笔刷半径,并可以正常绘画
发布时间:2024年01月10日
彩蛋
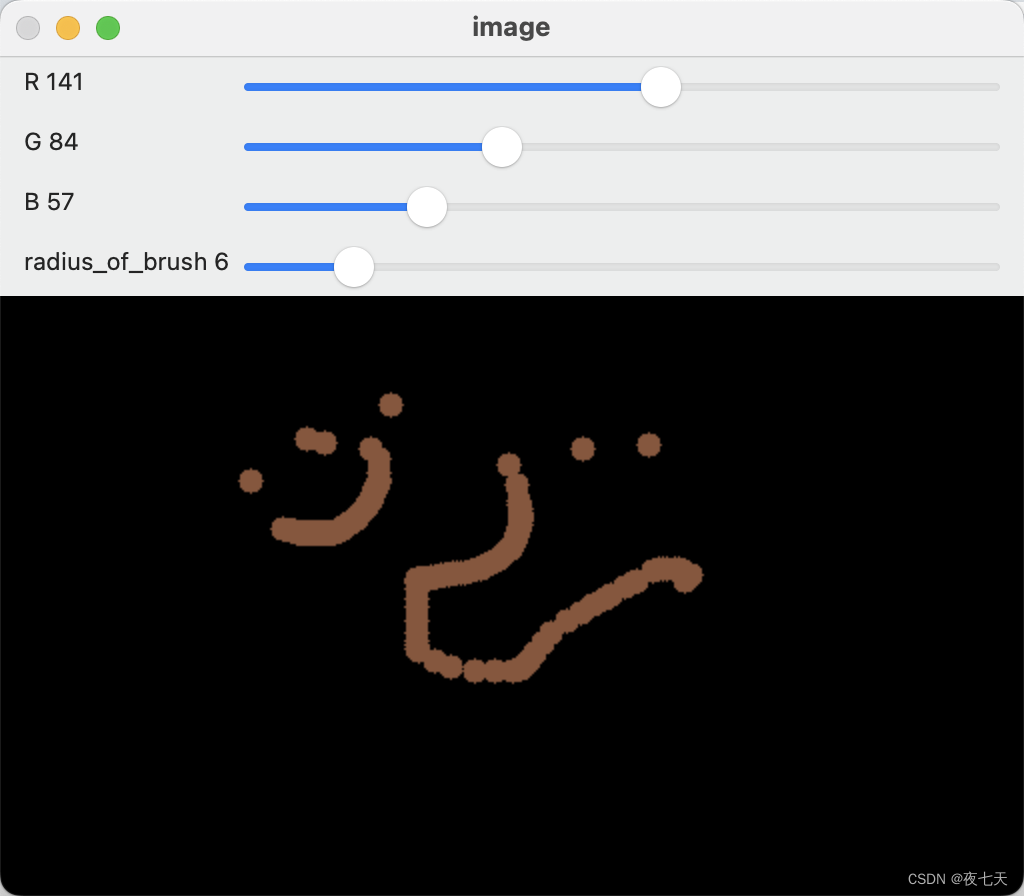
实现轨迹条控制画笔颜色和笔刷半径,并可以正常绘画。
直接上彩蛋代码
示例代码:
# 彩蛋,创建一个可以调节颜色和笔刷半径的轨迹栏,并且可以通过鼠标进行绘画
import numpy as np
import cv2 as cv


# 定义全局变量
# 如果 True 是鼠标按下
drawing = True
# 如果 True,画矩形,按下‘m’切换到曲线
mode = True
# 笔刷半径,默认是1
radius_of_brush = 1
# 笔刷颜色
b, g, r = 0, 0, 0


def nothing(x):
    pass


# 鼠标回调函数
def draw_circle(event, x, y, flags, param):
    global ix, iy, drawing, mode, radius_of_brush, b, g, r
    if event == cv.EVENT_LBUTTONDOWN:
        drawing = True
    elif event == cv.EVENT_MOUSEMOVE:
        if drawing:
            cv.circle(img, (x, y), radius_of_brush, (b, g, r), -1)
    elif event == cv.EVENT_LBUTTONUP:
        drawing = False


# 创建一个黑色图像,一个窗口
img = np.zeros((300, 512, 3), np.uint8)
cv.namedWindow('image')
# 绑定鼠标回调函数
cv.setMouseCallback('image', draw_circle)

# 创建一个改变颜色的轨迹栏
cv.createTrackbar('R', 'image', 0, 255, nothing)
cv.createTrackbar('G', 'image', 0, 255, nothing)
cv.createTrackbar('B', 'image', 0, 255, nothing)
# 创建一个用来调整笔刷半径的轨迹栏
switch2 = 'radius_of_brush'
cv.createTrackbar(switch2, 'image', 1, 50, nothing)
while 1:
    cv.imshow('image', img)
    k = cv.waitKey(1) & 0xFF
    if k == 27:
        break
    # get current positions of four trackbars
    r = cv.getTrackbarPos('R', 'image')
    g = cv.getTrackbarPos('G', 'image')
    b = cv.getTrackbarPos('B', 'image')
    radius_of_brush = cv.getTrackbarPos(switch2, 'image')

cv.destroyAllWindows()
效果图:

文章来源:https://blog.csdn.net/q664243624/article/details/135509993
本文来自互联网用户投稿,该文观点仅代表作者本人,不代表本站立场。本站仅提供信息存储空间服务,不拥有所有权,不承担相关法律责任。 如若内容造成侵权/违法违规/事实不符,请联系我的编程经验分享网邮箱:chenni525@qq.com进行投诉反馈,一经查实,立即删除!
本文来自互联网用户投稿,该文观点仅代表作者本人,不代表本站立场。本站仅提供信息存储空间服务,不拥有所有权,不承担相关法律责任。 如若内容造成侵权/违法违规/事实不符,请联系我的编程经验分享网邮箱:chenni525@qq.com进行投诉反馈,一经查实,立即删除!
最新文章
- Python教程
- 深入理解 MySQL 中的 HAVING 关键字和聚合函数
- Qt之QChar编码(1)
- MyBatis入门基础篇
- 用Python脚本实现FFmpeg批量转换
- 使用Vue3开发学生管理系统模板1
- 系统学习Python——警告信息的控制模块warnings:常用函数-[warnings.formatwarning]
- springcloud微服务篇--5.Nacos注册中心
- 【leetcode234】回文链表Java代码讲解
- I/O流的相关内容
- Python FastAPI框架与gRPC框架对比(Python FastAPI框架与Python Flask框架对比)
- MySQL执行流程_执行一条select语句,期间发生了什么
- 《SPSS统计学基础与实证研究应用精解》视频讲解:假设检验
- 云计算任务调度仿真04
- 翻译: 如何分析你的工作是否被AI替代 比如程序员、律师 Additional job analysis examples