利用VSCod完成c++项目工程搭建
一、VSCod简介
VSCode是由微软开发的跨平台、免费且开源的代码编辑器。它支持多种编程语言和框架,包括JavaScript、TypeScript、Node.js、React、Angular等。VSCode具有智能代码补全、语法高亮、版本控制、实时错误检测和调试器等丰富的功能。此外,VSCode还拥有大量的插件和扩展,可以进一步增强编辑器的功能,满足不同开发者的需求。同时,它支持多种操作系统,例如Windows、macOS和Linux等。VSCode易于使用可扩展的特性使得它成为许多软件开发者的首选编辑器之一。
二、VSCod安装
2.1、VSCod的下载
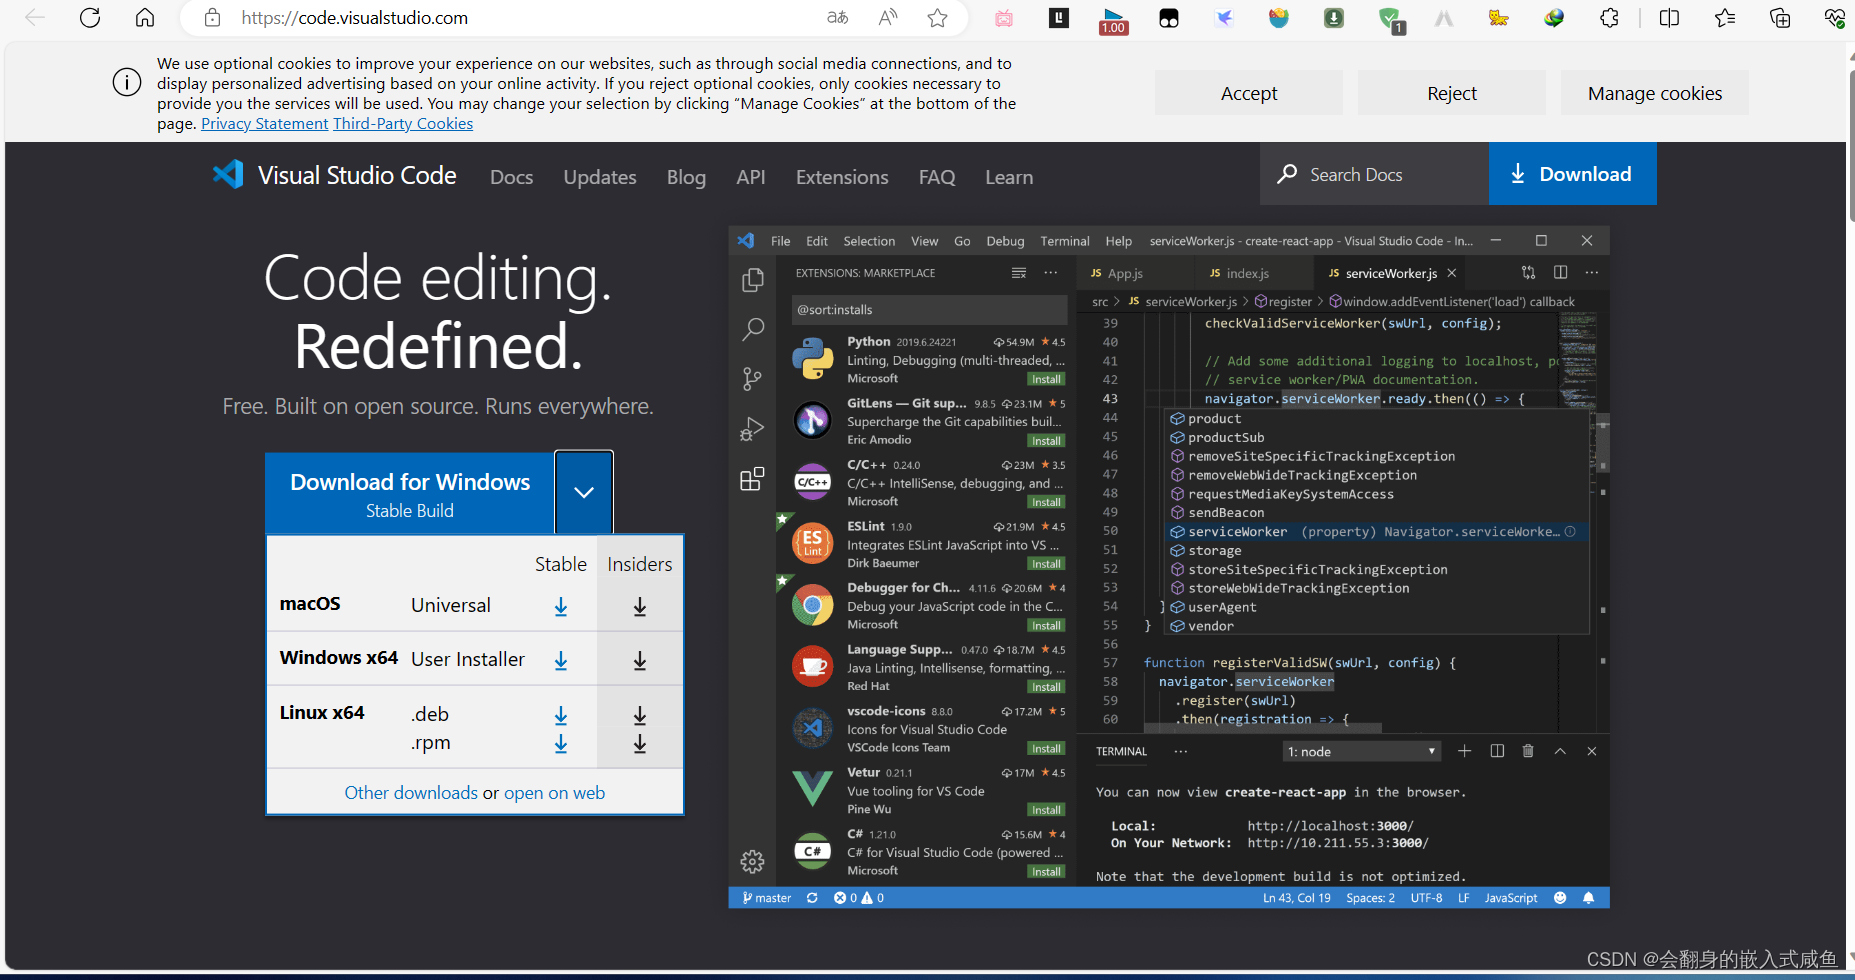
在 Visual Studio Code 官方网站上下载 VSCod。请访问 官方网站,然后选择适合你操作系统的版本进行下载。//一般下载Stable版本即可
2.2、VSCod的安装
三、C/C++环境配置
在 VSCod 上配置 C/C++ 环境,需要安装并配置以下工具:
安装 C/C++ 编译器,如 GCC 或 Clang。
安装 C/C++ 调试器,如 GDB。
安装 C/C++ 插件,如 C/C++、Code Runner 等。
配置C/C++环境。
3.1、安装 C/C++ 编译器
3.1.1、下载MinGW-w64 工具集
在 Windows 上,你可以下载并安装 MinGW-w64 工具集。官方网站:https://sourceforge.net/projects/mingw-w64/files/latest/download
在 macOS 上,你可以通过 Homebrew 安装 GCC:
brew install gcc
在 Linux 上,你可以通过包管理器安装 GCC 或 Clang:
sudo apt-get install build-essential
sudo apt-get install clang
笔者这里使用Windows
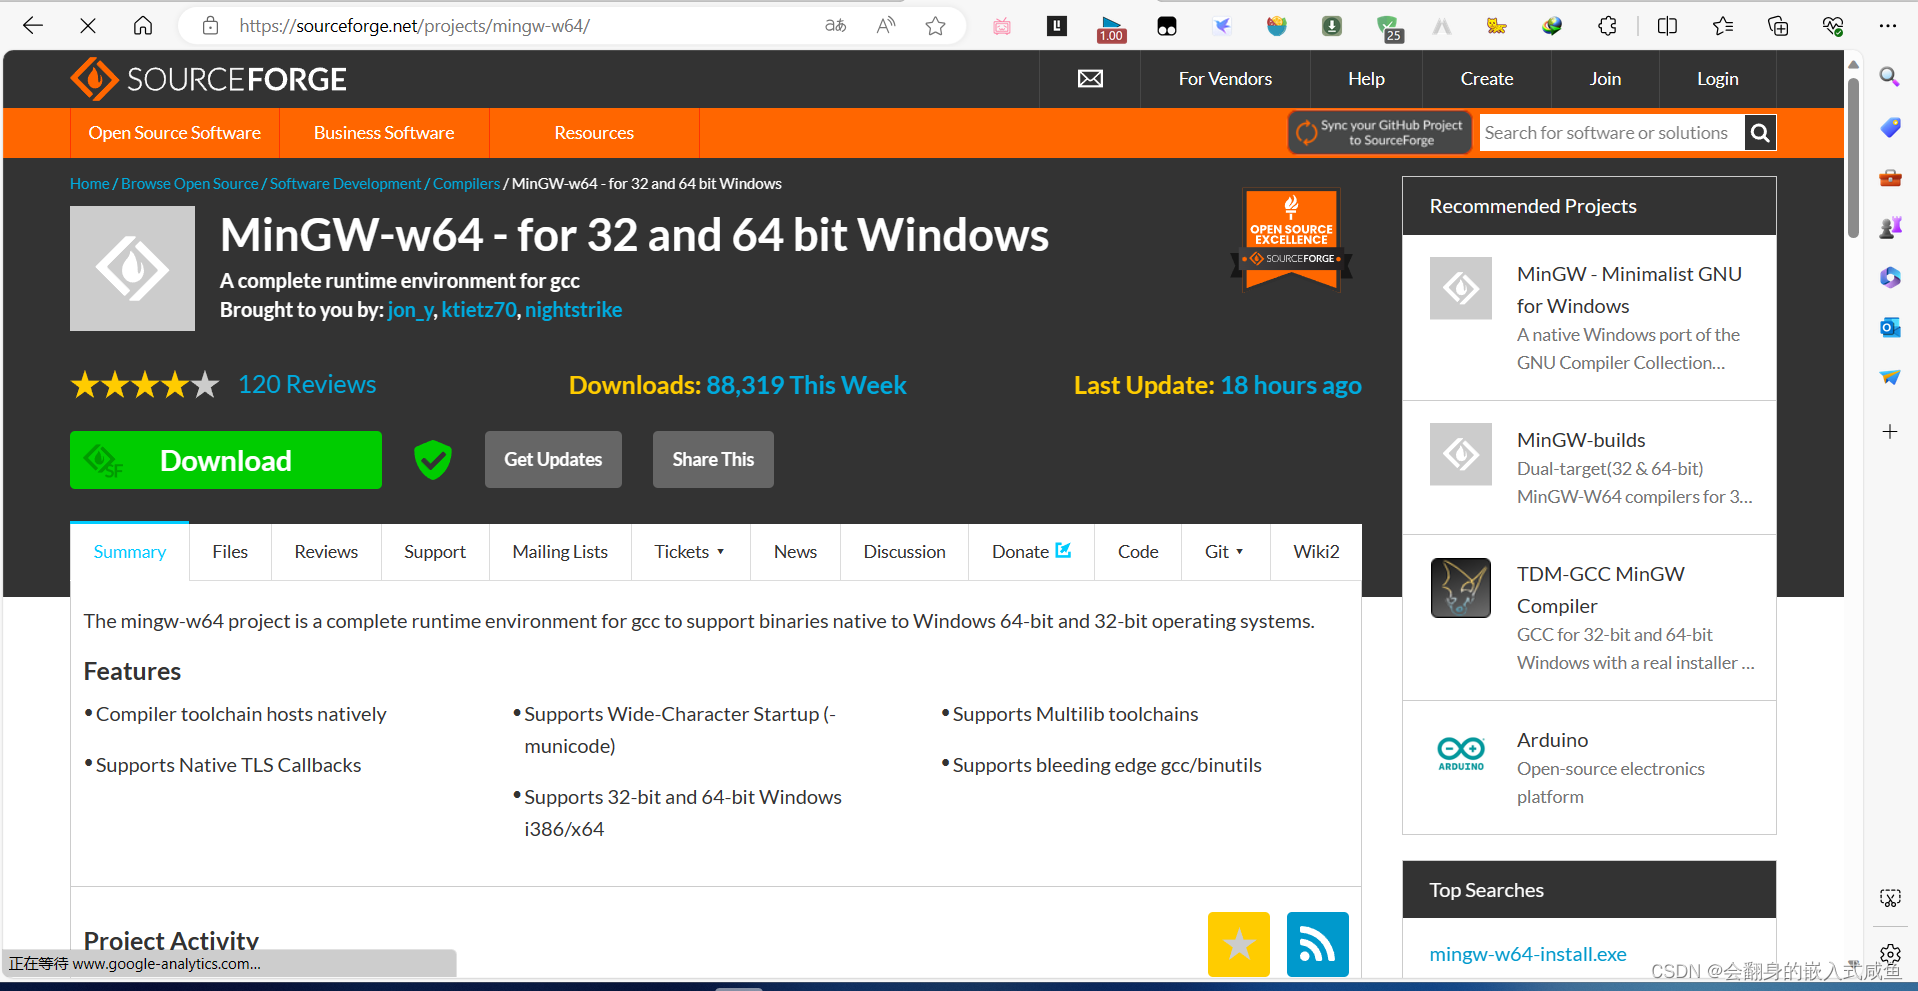
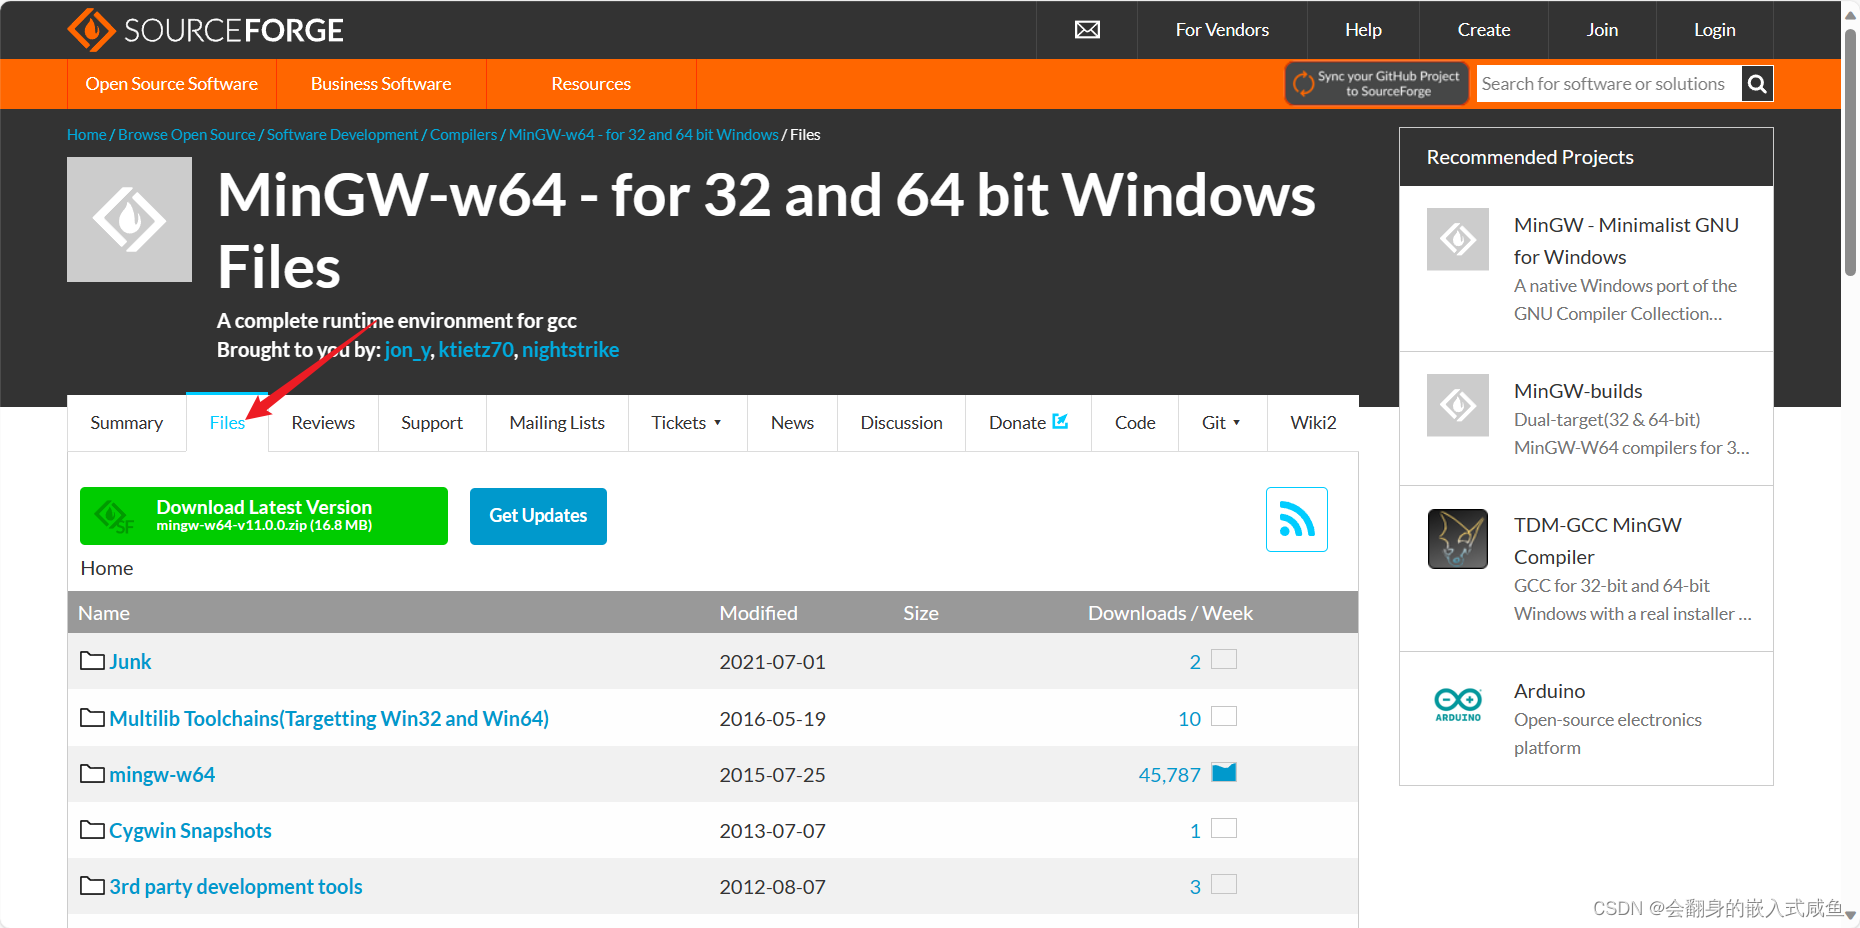
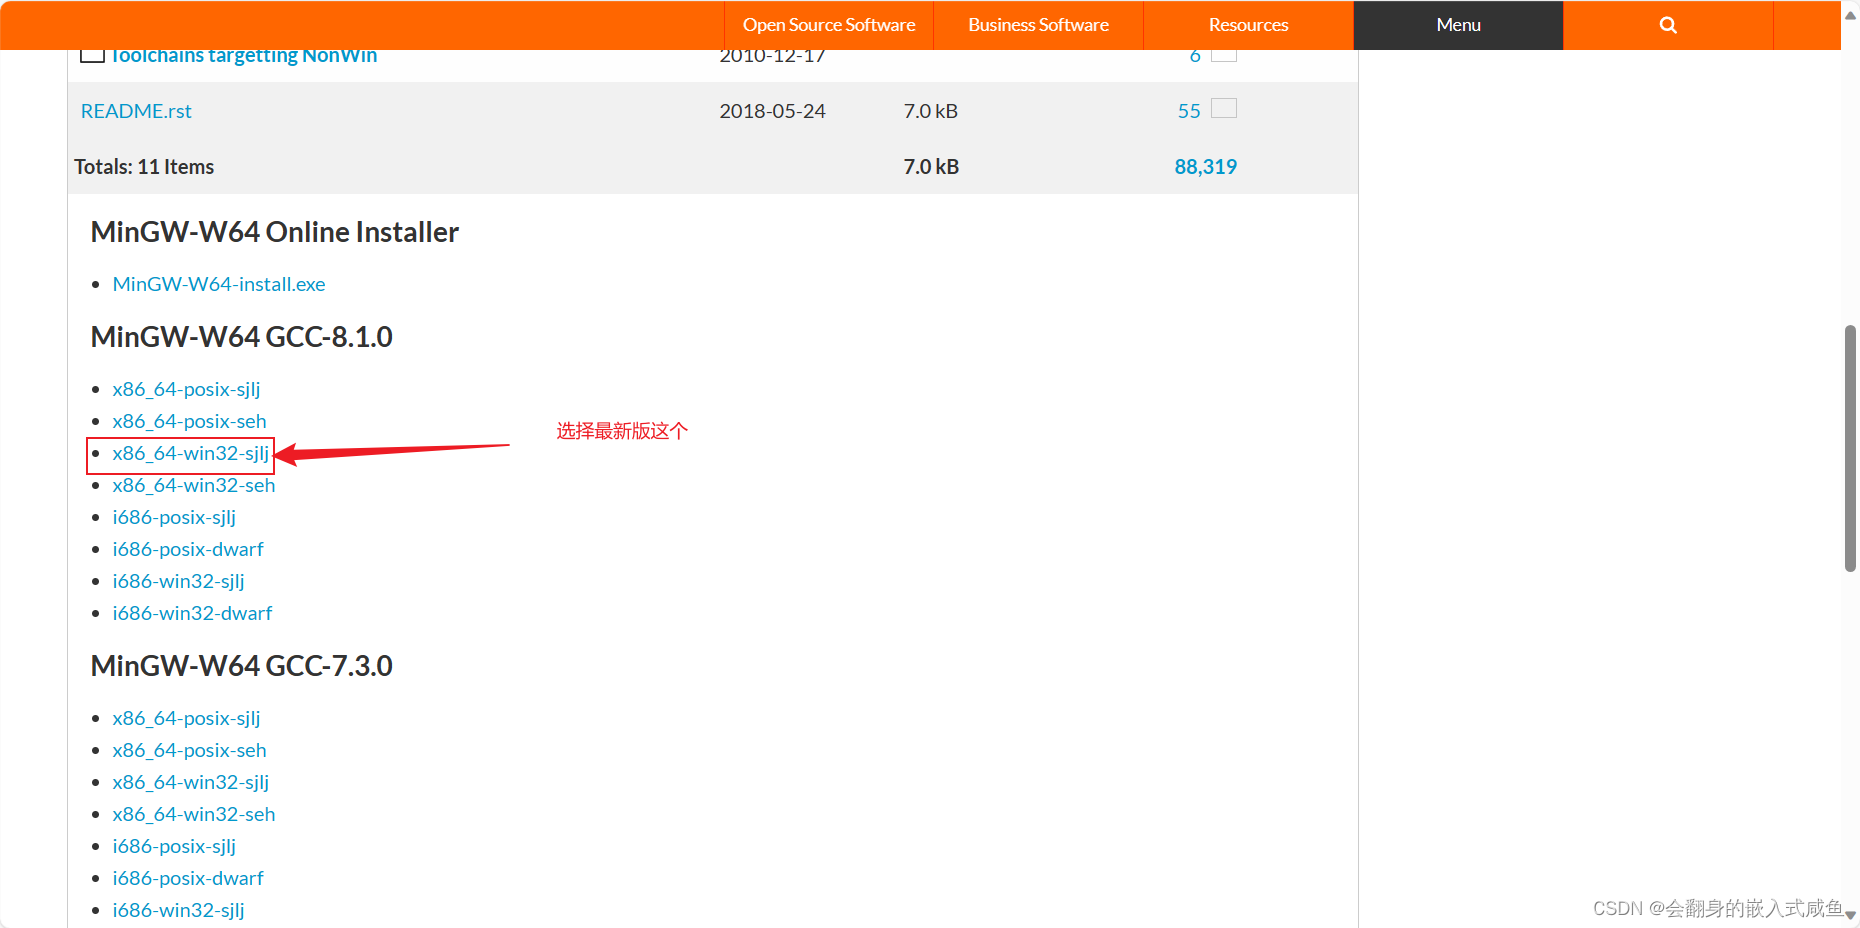
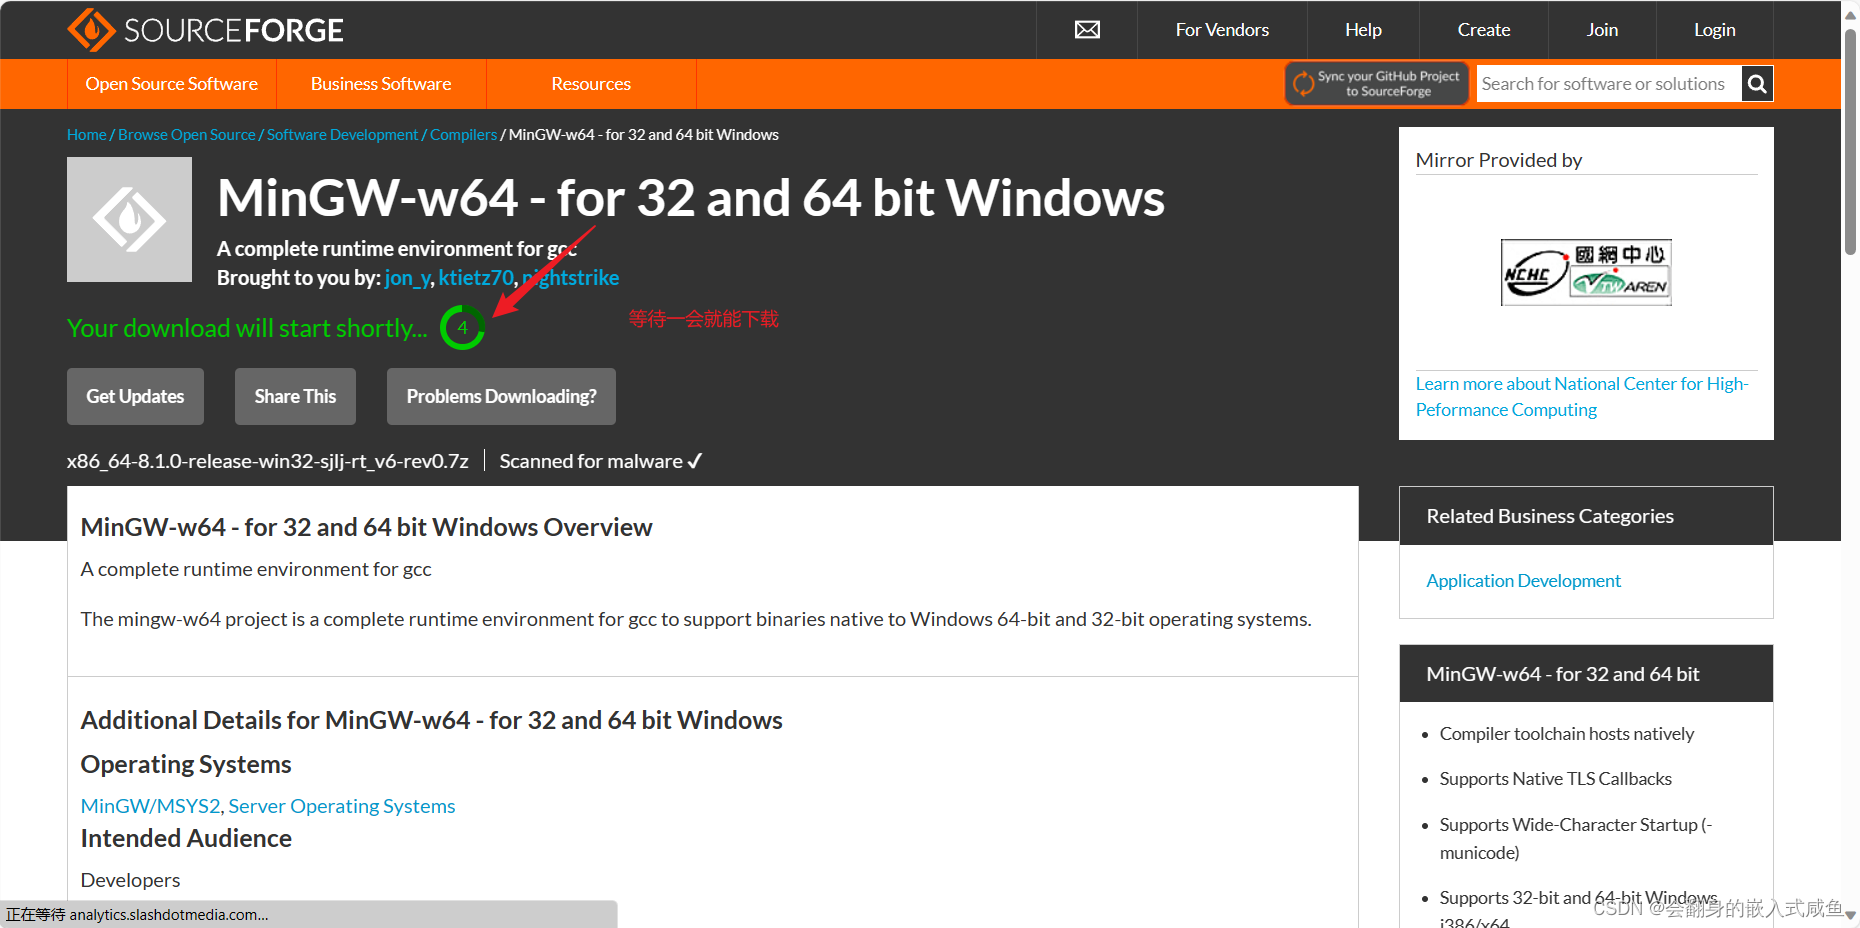
这是提示下载,还没有下载,自己点击下载,下载有点慢,等待一段时间
3.1.2、安装 MinGW-w64 工具集
打开刚刚下载的文件加夹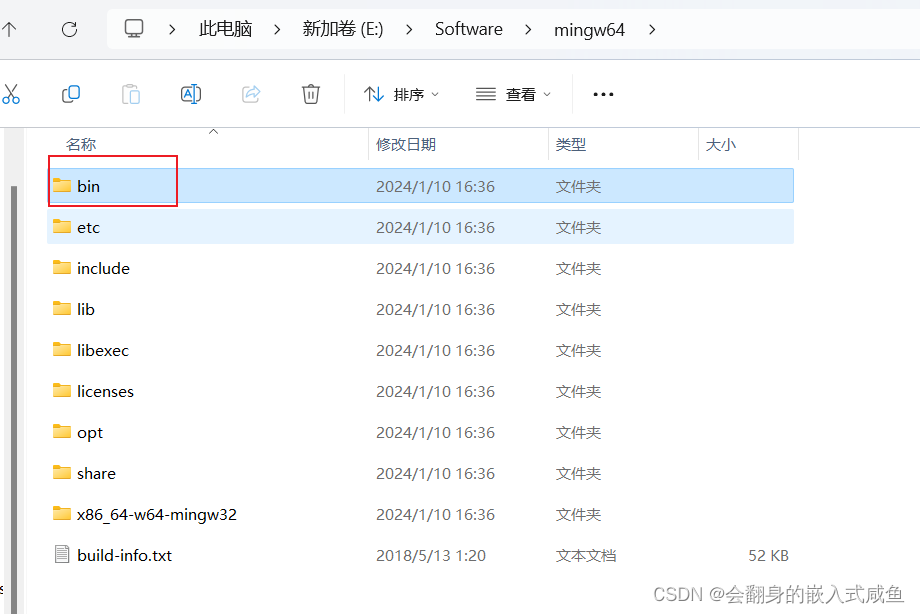
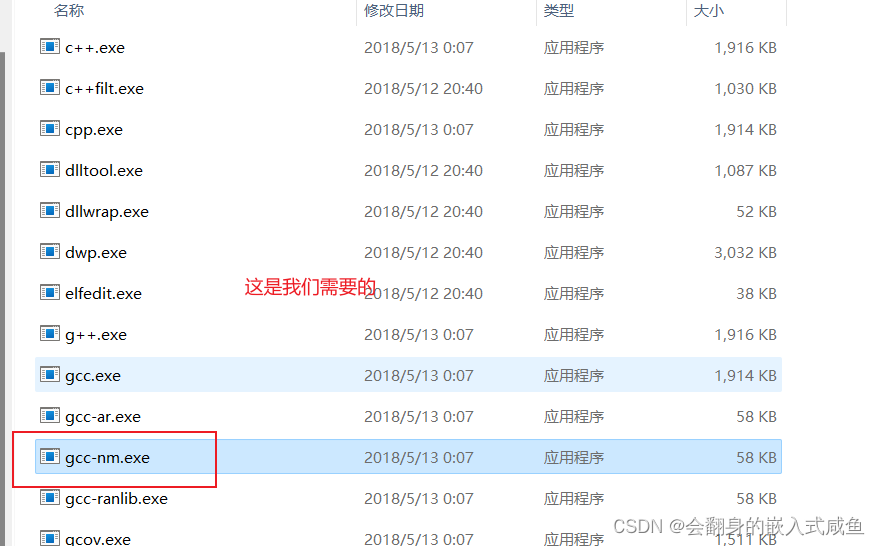
3.1.3、环境变量配置
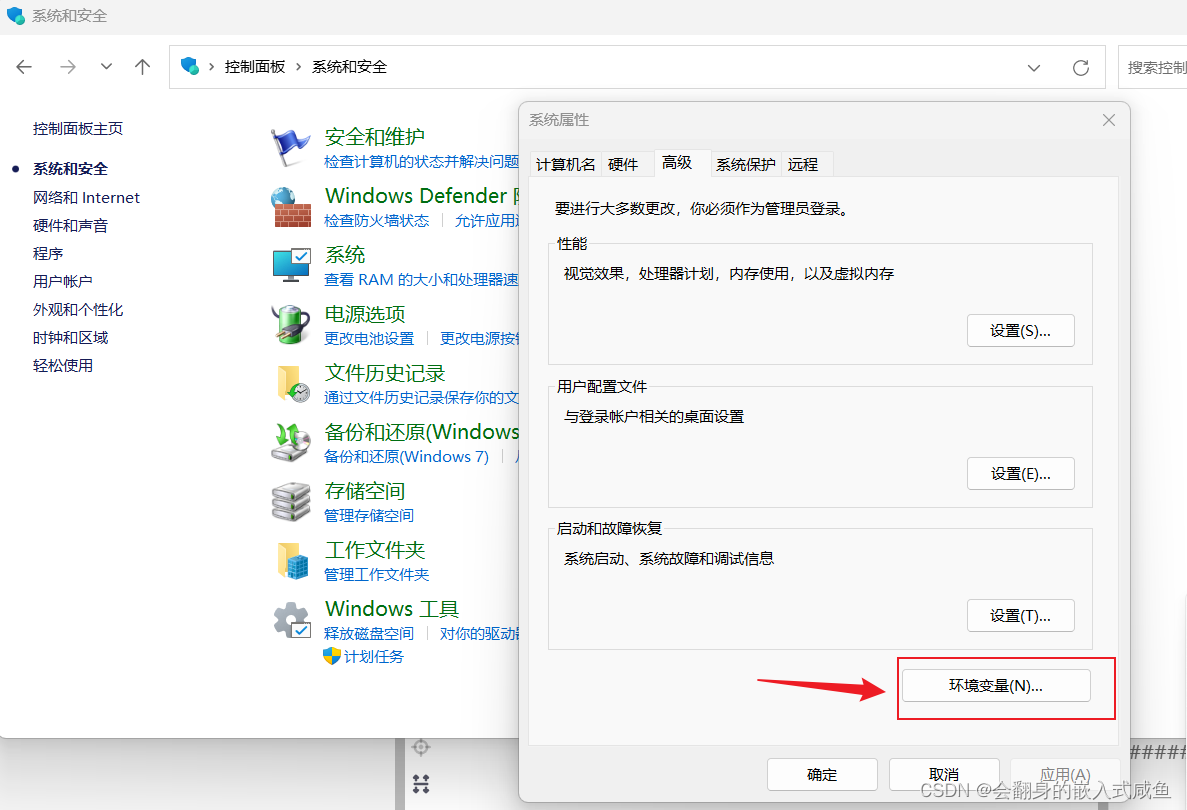
通过打开控制面板—>系统的安全—>系统属性(或者右击“我的电脑”—>属性)找到“环境变量”
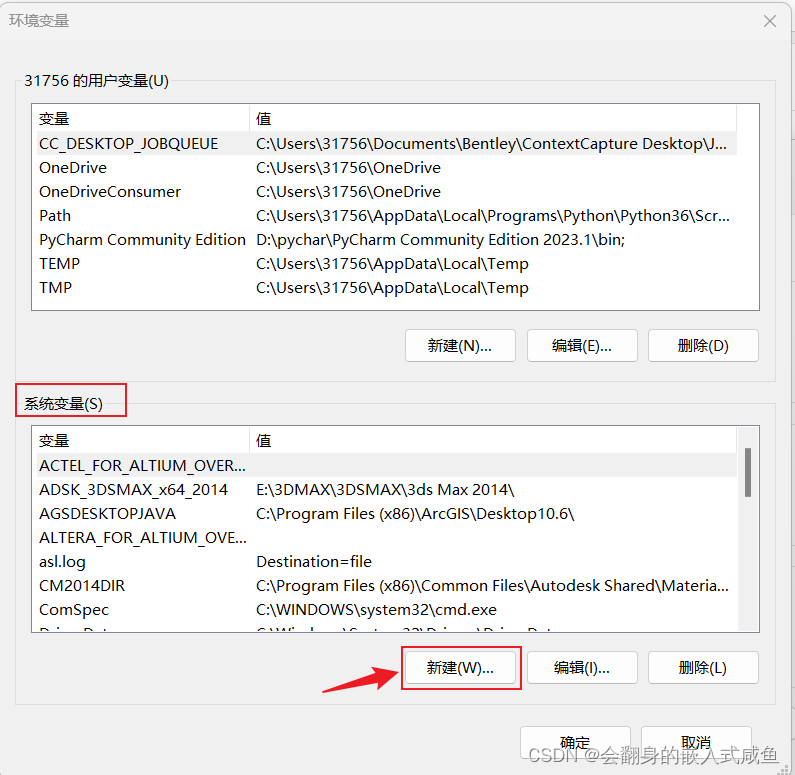
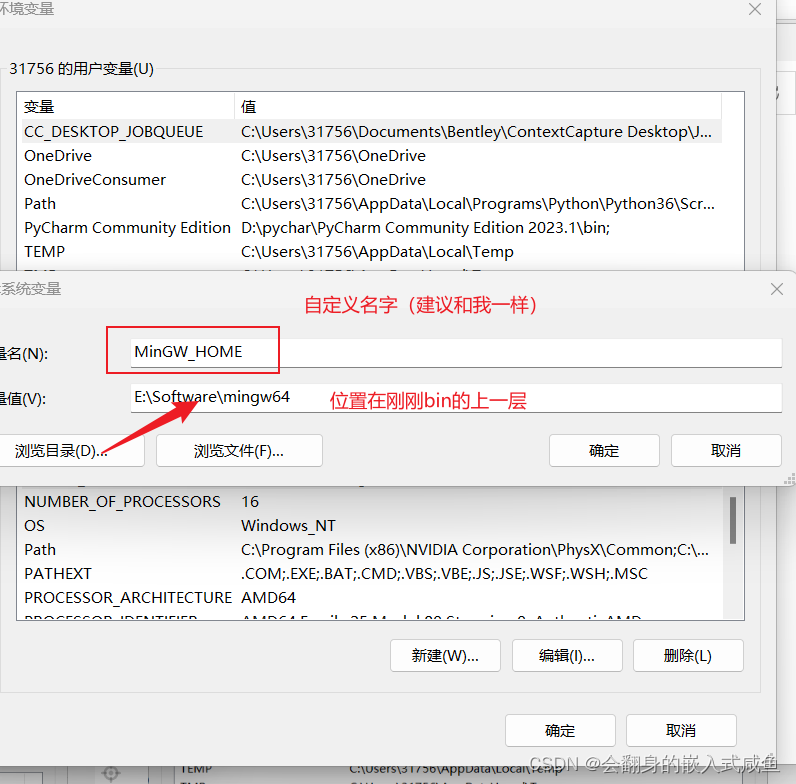

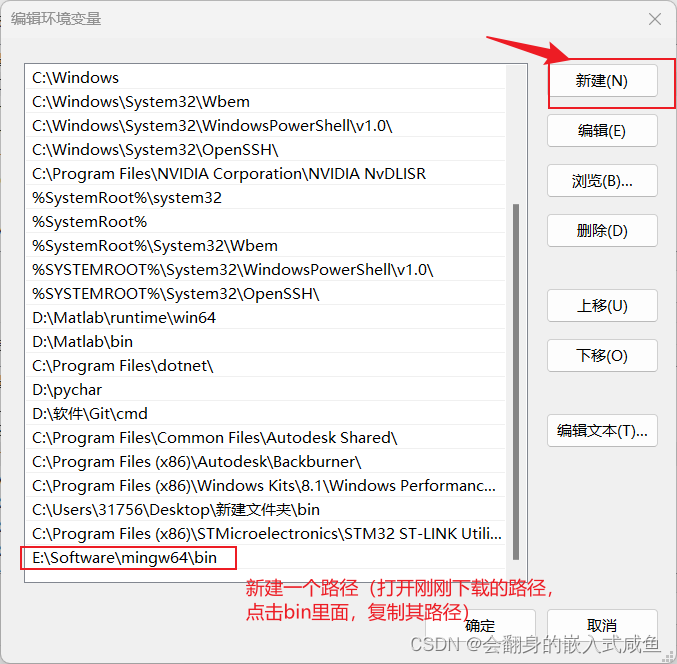
3.1.4验证MinGW是否安装成功
windows+r打开命令行管理器并且输入cmd
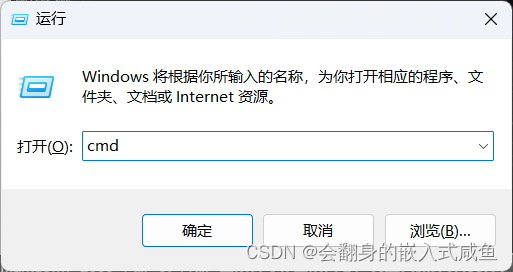
然后输入gcc -v,验证成功!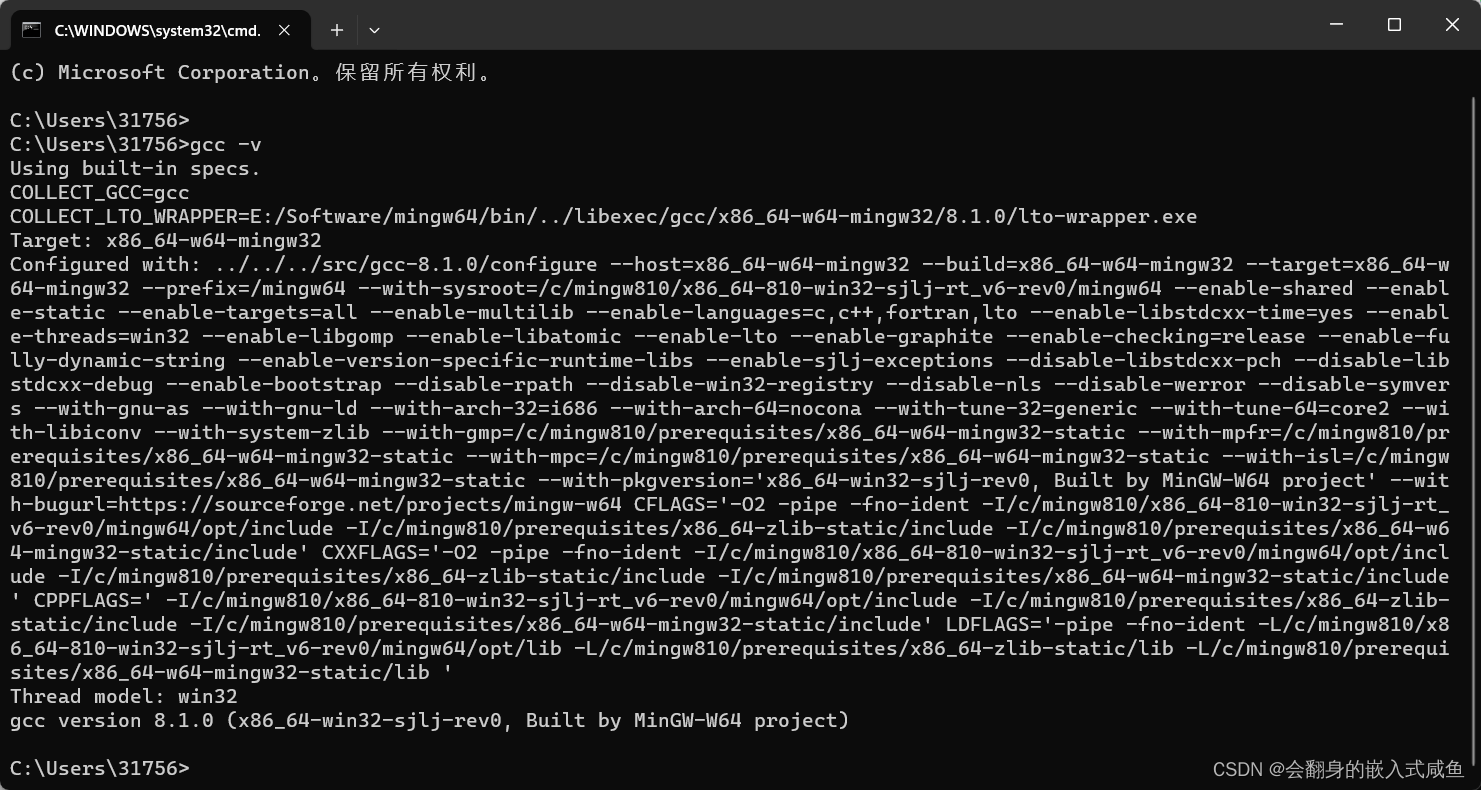
3.2、安装 C/C++ 调试器
MinGW-w64 工具集,它包含了 GDB 调试器
3.3、安装 C/C++ 插件
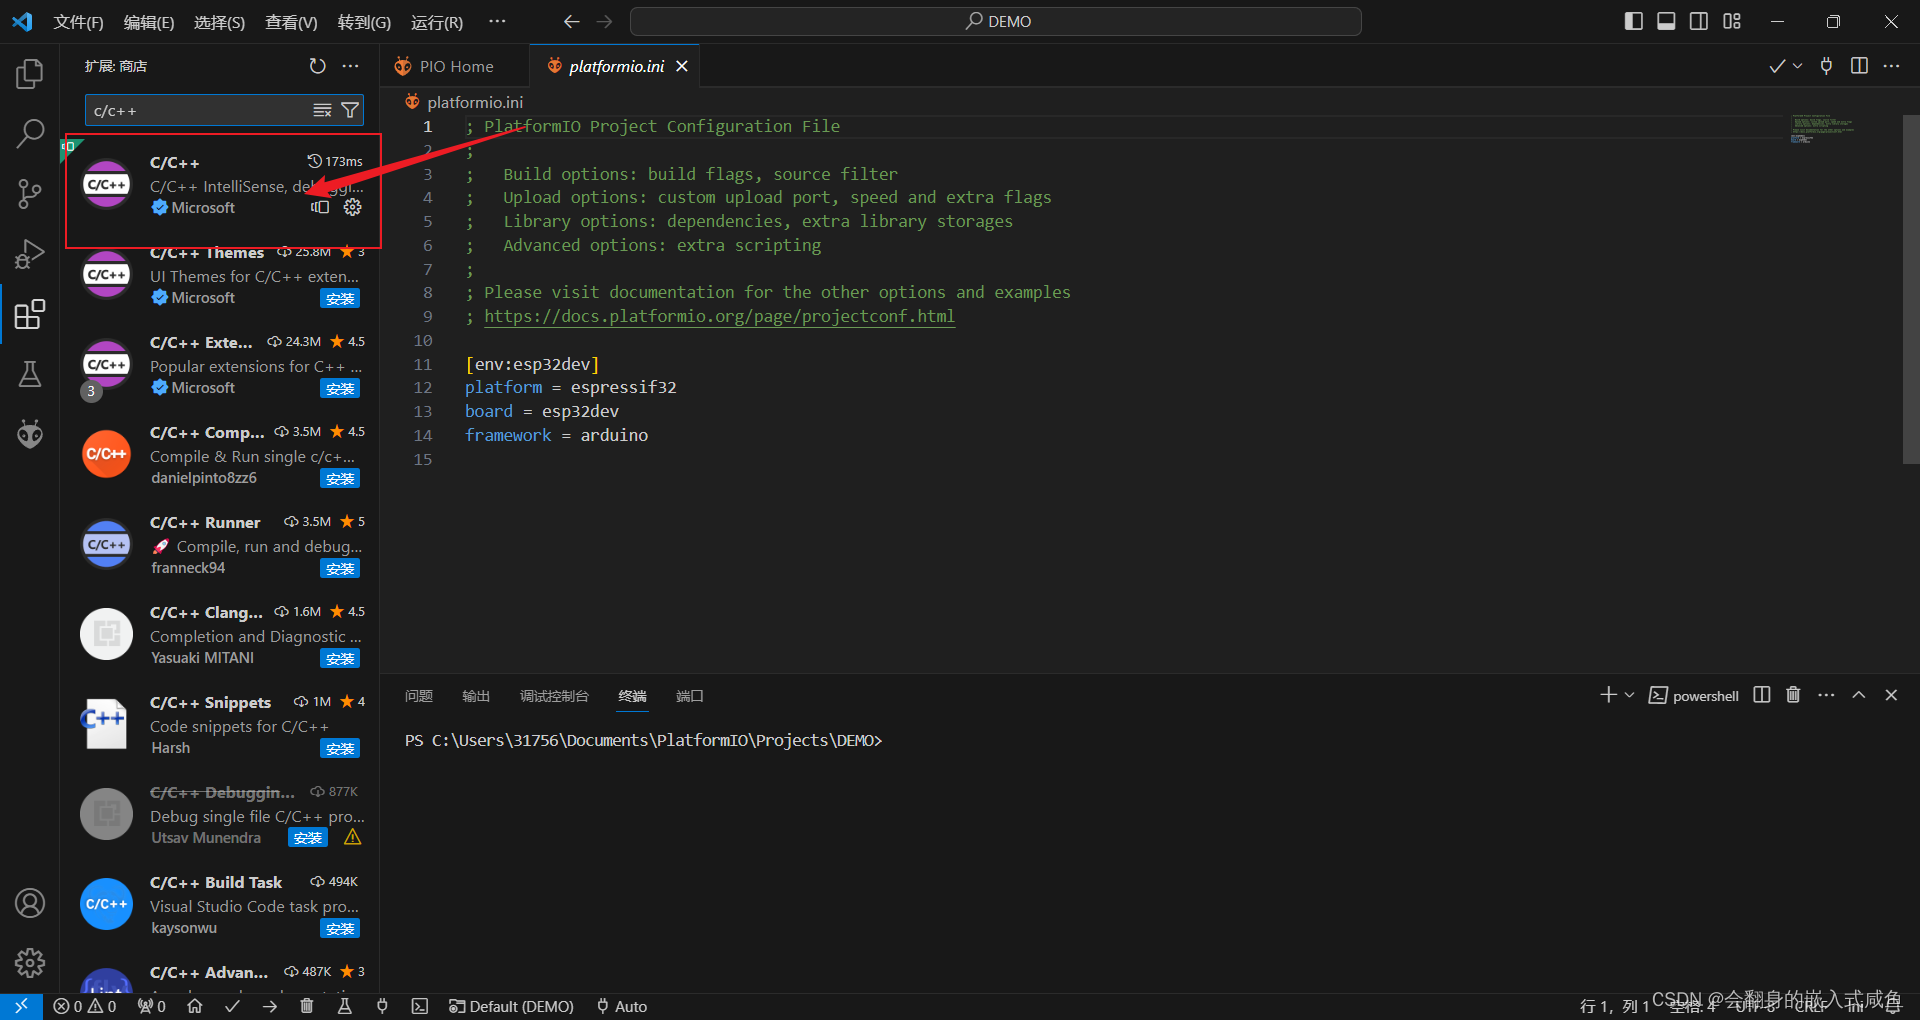
打开VSCode,新建一个文件夹,在扩展栏搜索c/c++,安装第一个插件即可
3.4、配置C/C++环境
3.4.1、新建一个c文件
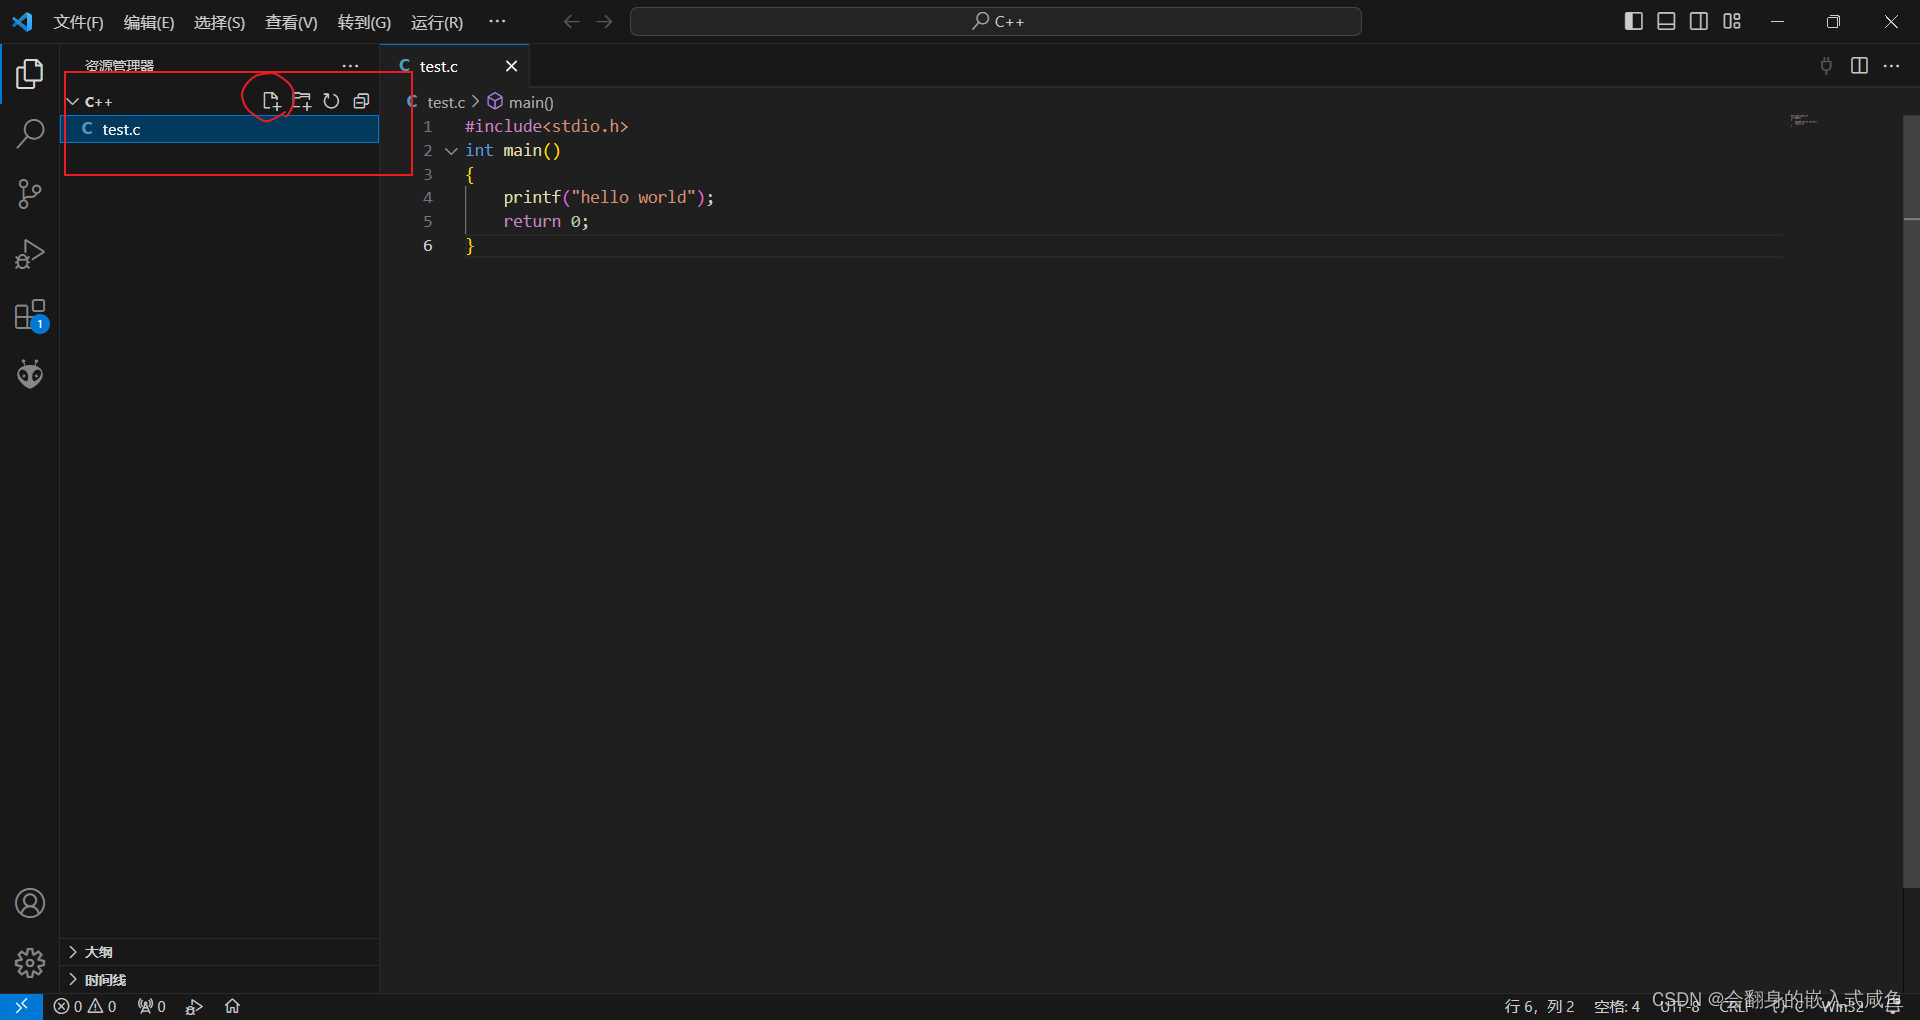
#include<stdio.h>
int main()
{
    printf("hello world");
    return 0;
}
3.4.2、配置编译器
快捷键Ctrl+Shift+P调出命令面板,输入C/C++,选择图中选项进入配置
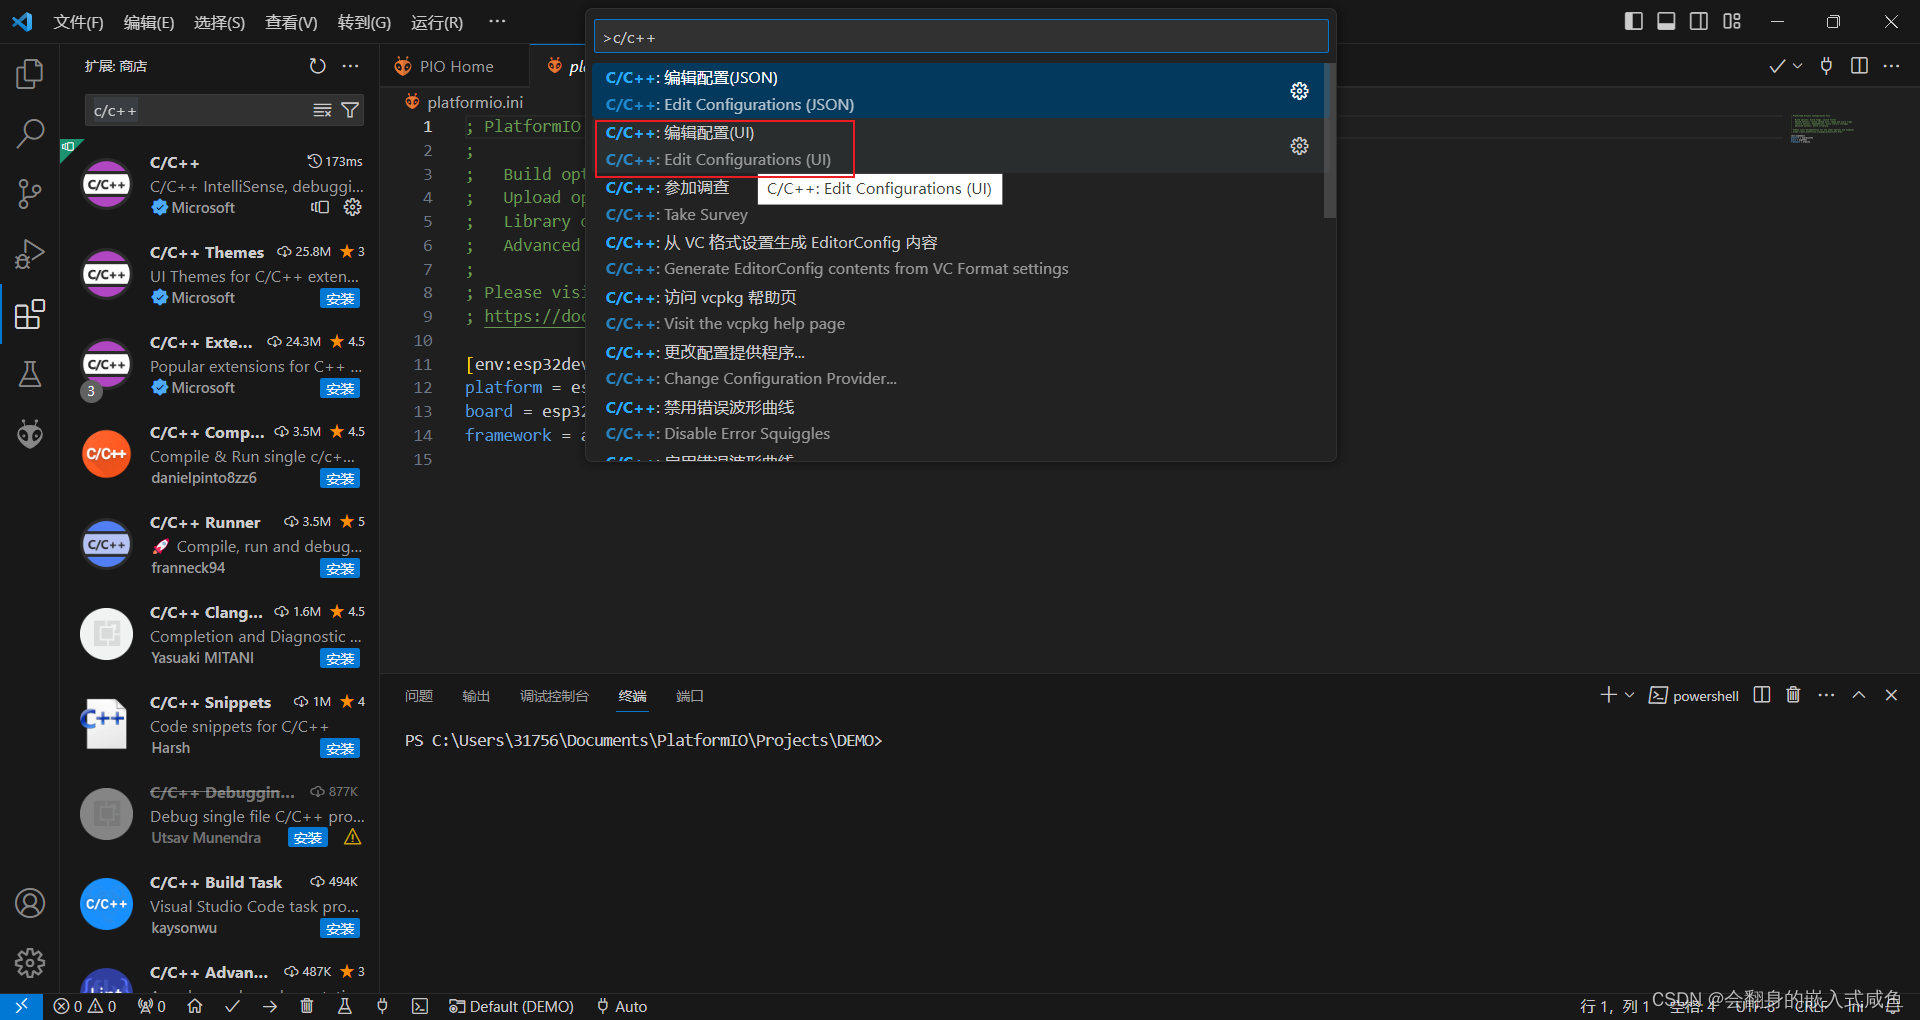
这里路径根据自己安装的Mingw编译器位置和配置环境变量位置所决定

IntelliSense 模式:gcc-x86
配置完成文件夹栏会多了一个.vscode文件夹,并且里面有一个c_cpp_properties.json文件夹
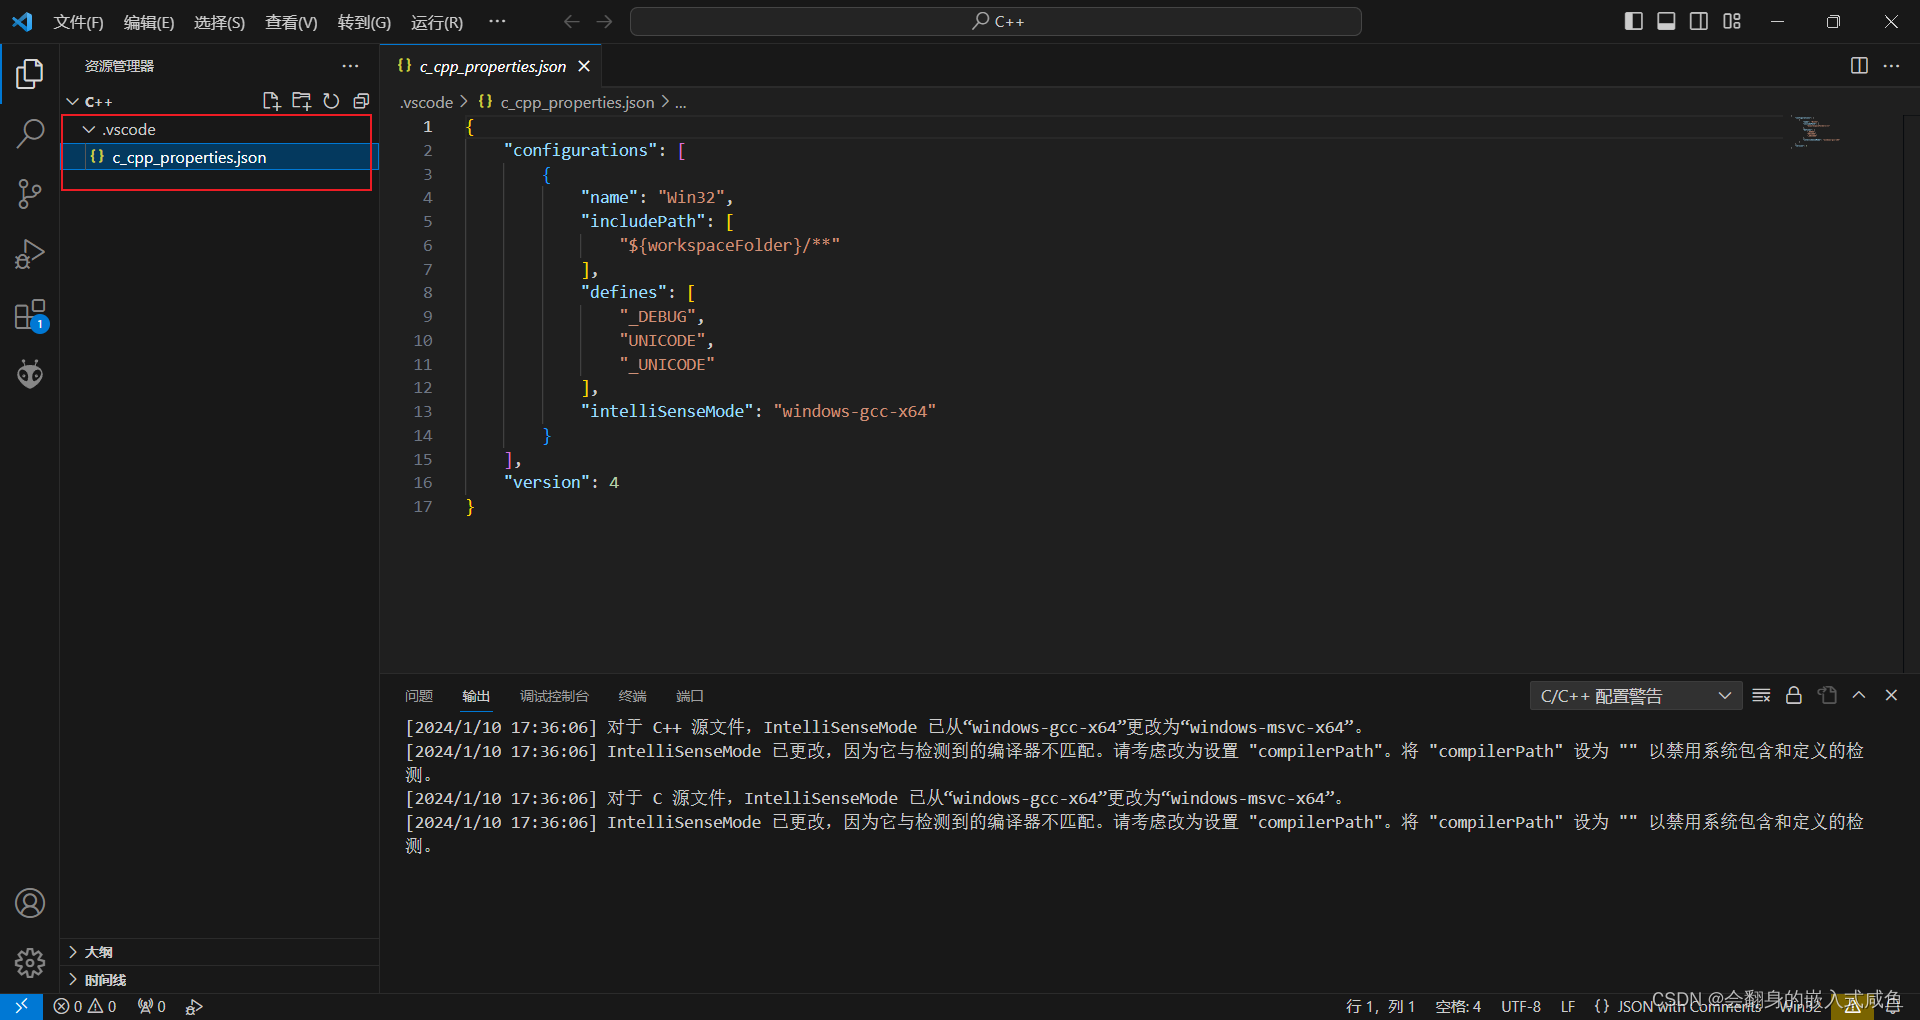
点击json文件,内容如下:
{
    "configurations": [
        {
            "name": "Win32",
            "includePath": [
                "${workspaceFolder}/**"
            ],
            "defines": [
                "_DEBUG",
                "UNICODE",
                "_UNICODE"
            ],
            "intelliSenseMode": "windows-gcc-x86"
        }
    ],
    "version": 4
}
3.4.3配置构建任务task.json
快捷键Ctrl+Shift+P调出命令面板,输入tasks,选择图中选项进入配置

选择下列框选
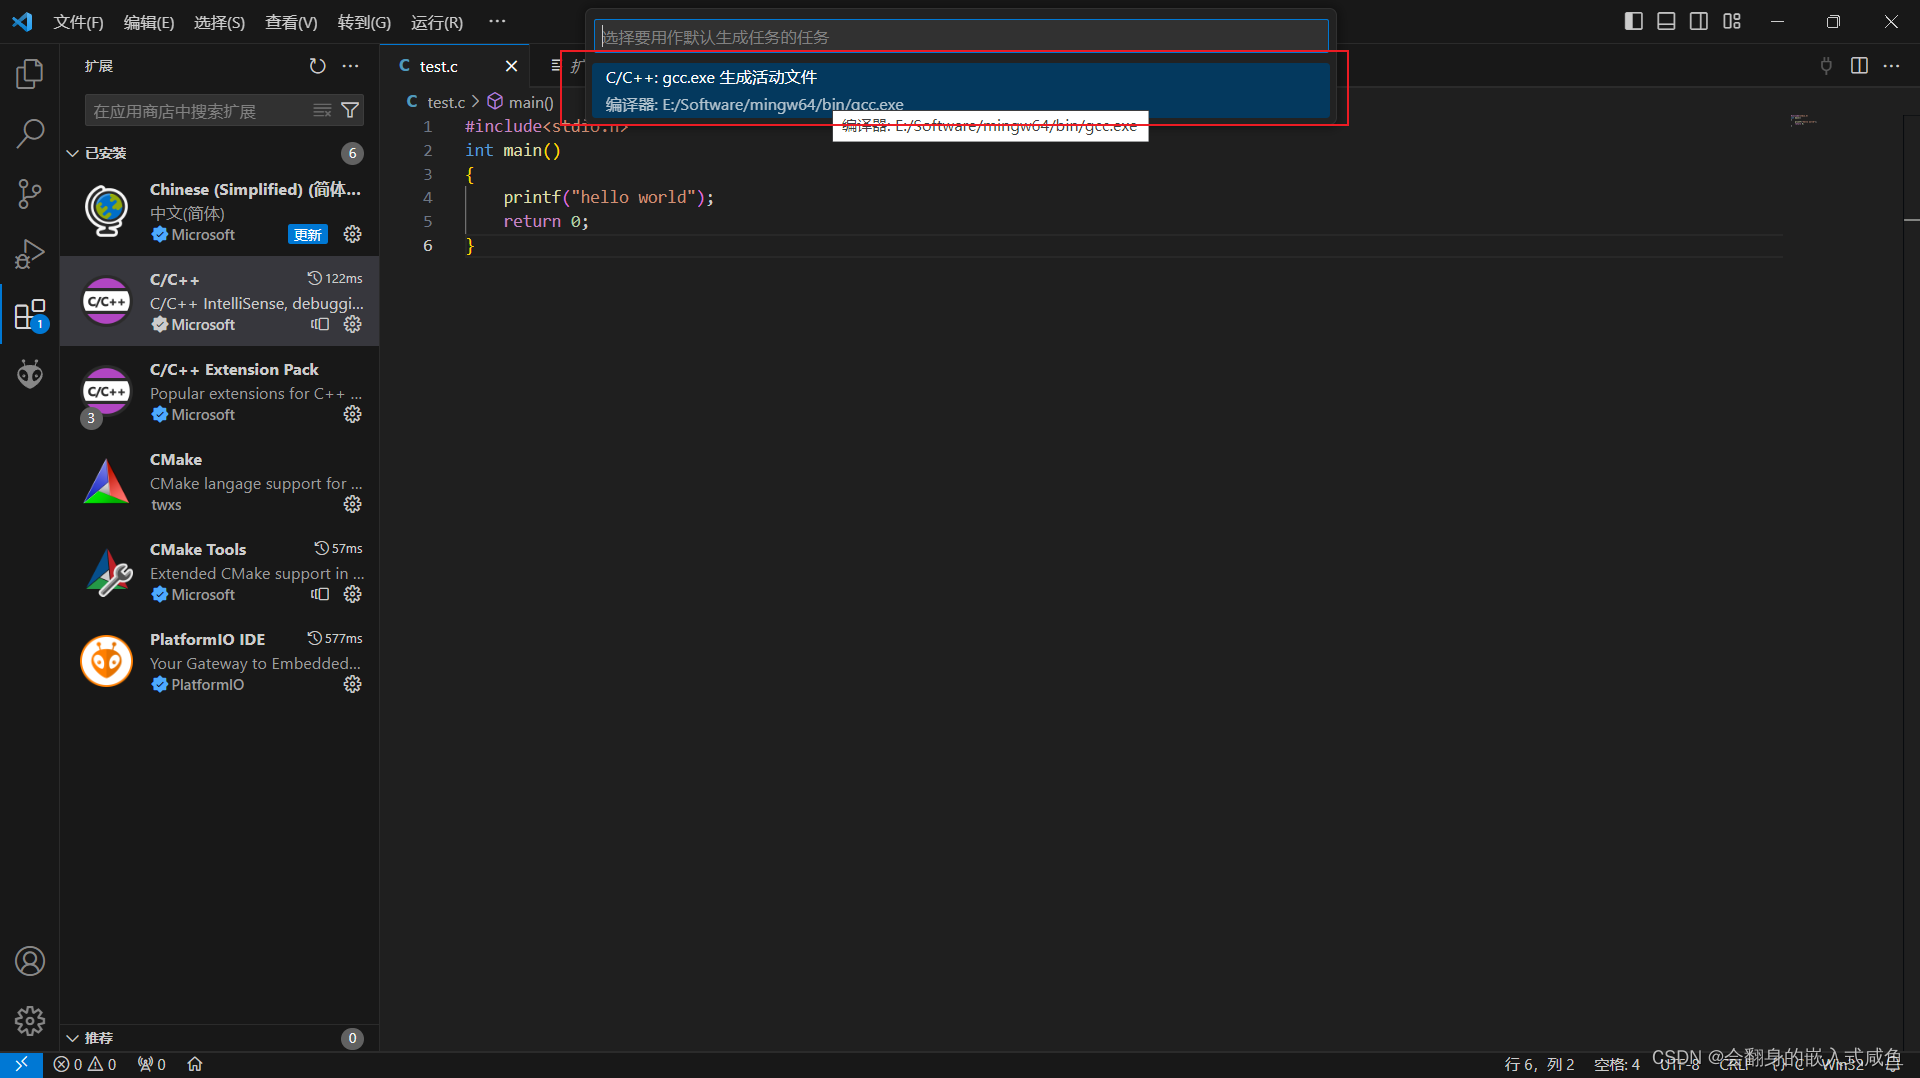
出现一个tasks.json的配置文件,内容如下:
{
	"version": "2.0.0",
	"tasks": [
		{
			"type": "cppbuild",
			"label": "C/C++: gcc.exe 生成活动文件",
			"command": "E:/Software/mingw64/bin/gcc.exe",
			"args": [
				"-fdiagnostics-color=always",
				"-g",
				"${file}",
				"-o",
				"${fileDirname}\\${fileBasenameNoExtension}.exe"
			],
			"options": {
				"cwd": "E:/Software/mingw64/bin"
			},
			"problemMatcher": [
				"$gcc"
			],
			"group": {
				"kind": "build",
				"isDefault": true
			},
			"detail": "编译器: E:/Software/mingw64/bin/gcc.exe"
		}
	]
}
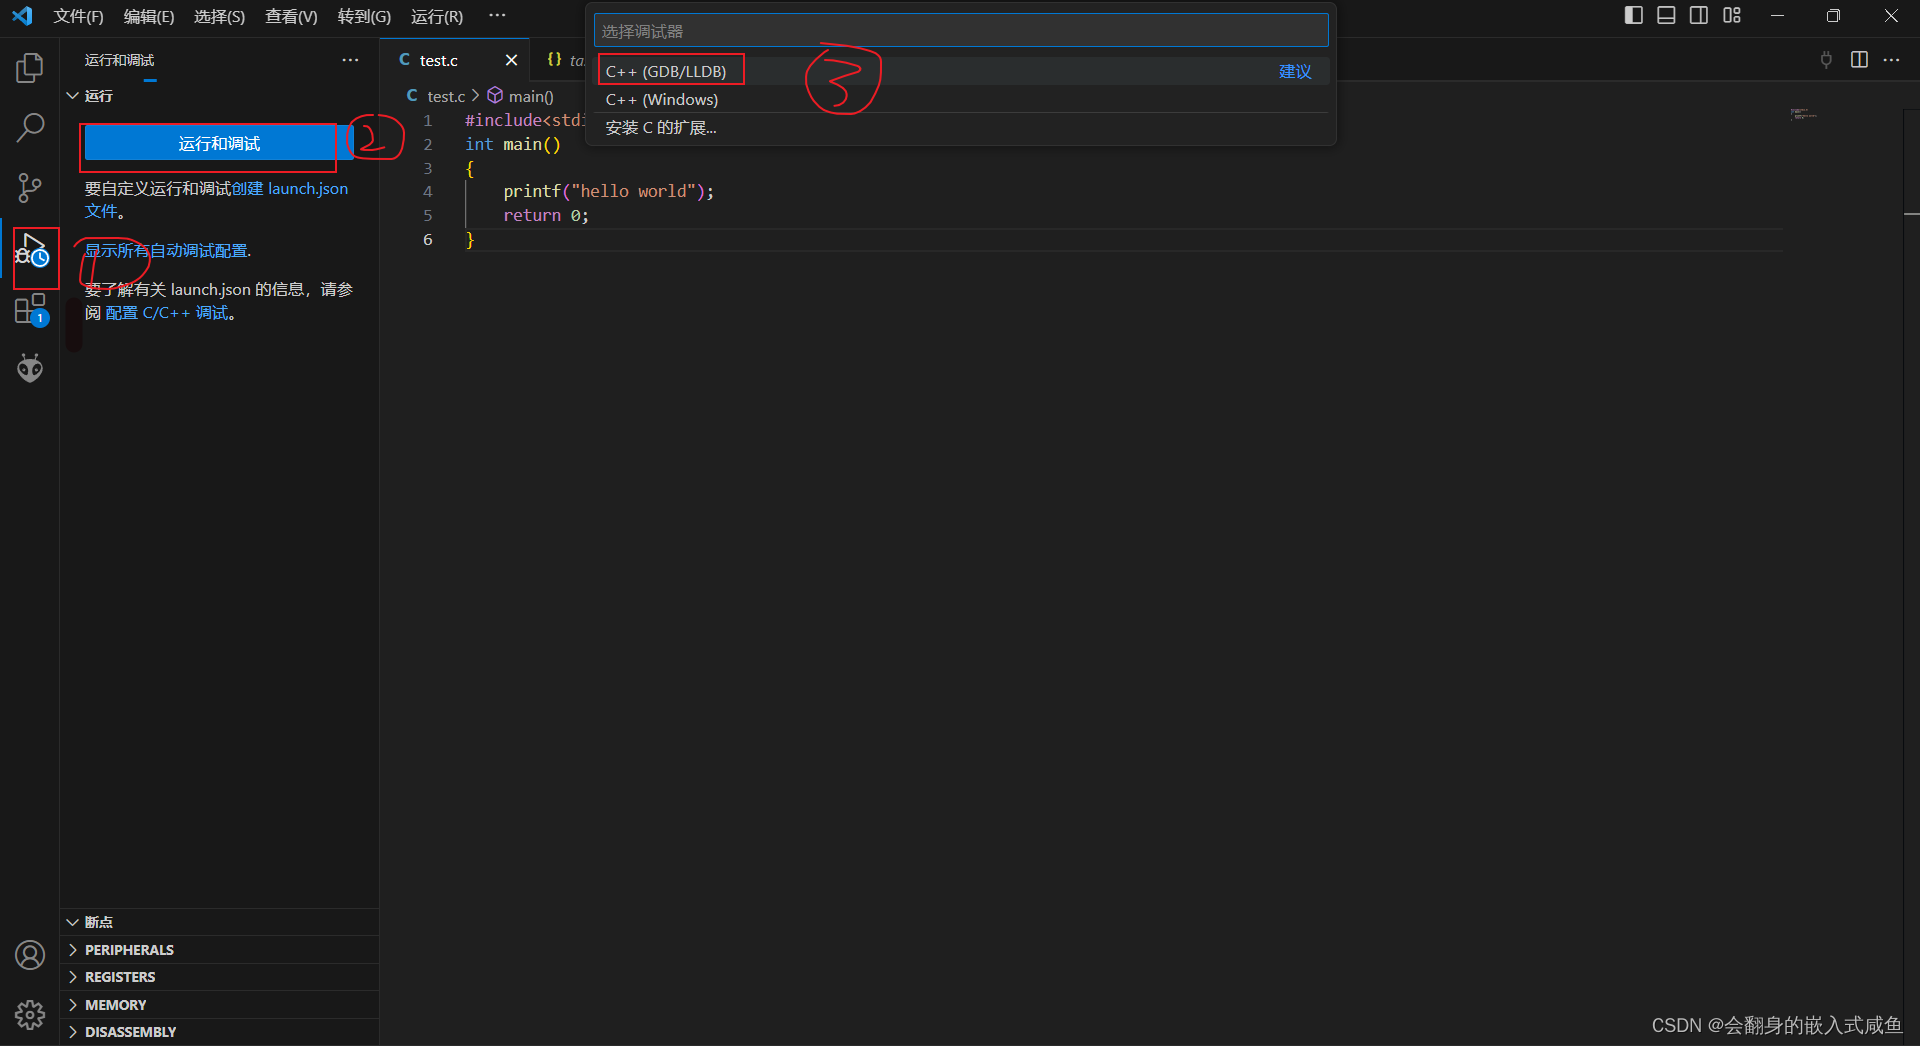
创建launch.json文件

{
    // 使用 IntelliSense 了解相关属性。
    // 悬停以查看现有属性的描述。
    // 欲了解更多信息,请访问: https://go.microsoft.com/fwlink/?linkid=830387
    "version": "0.2.0",
    "configurations": []
}
添加配置:选择c/c++:(gdb)启动

跳转到launch.json文件,默认信息为:
{
    // 使用 IntelliSense 了解相关属性。
    // 悬停以查看现有属性的描述。
    // 欲了解更多信息,请访问: https://go.microsoft.com/fwlink/?linkid=830387
    "version": "0.2.0",
    "configurations": [
        {
            "name": "(gdb) 启动",
            "type": "cppdbg",
            "request": "launch",
            "program": "输入程序名称,例如 ${workspaceFolder}/a.exe",
            "args": [],
            "stopAtEntry": false,
            "cwd": "${fileDirname}",
            "environment": [],
            "externalConsole": false,
            "MIMode": "gdb",
            "miDebuggerPath": "/path/to/gdb",
            "setupCommands": [
                {
                    "description": "为 gdb 启用整齐打印",
                    "text": "-enable-pretty-printing",
                    "ignoreFailures": true
                },
                {
                    "description": "将反汇编风格设置为 Intel",
                    "text": "-gdb-set disassembly-flavor intel",
                    "ignoreFailures": true
                }
            ]
        }


    ]
}
在这里改两个地方:
1.复制下面内容
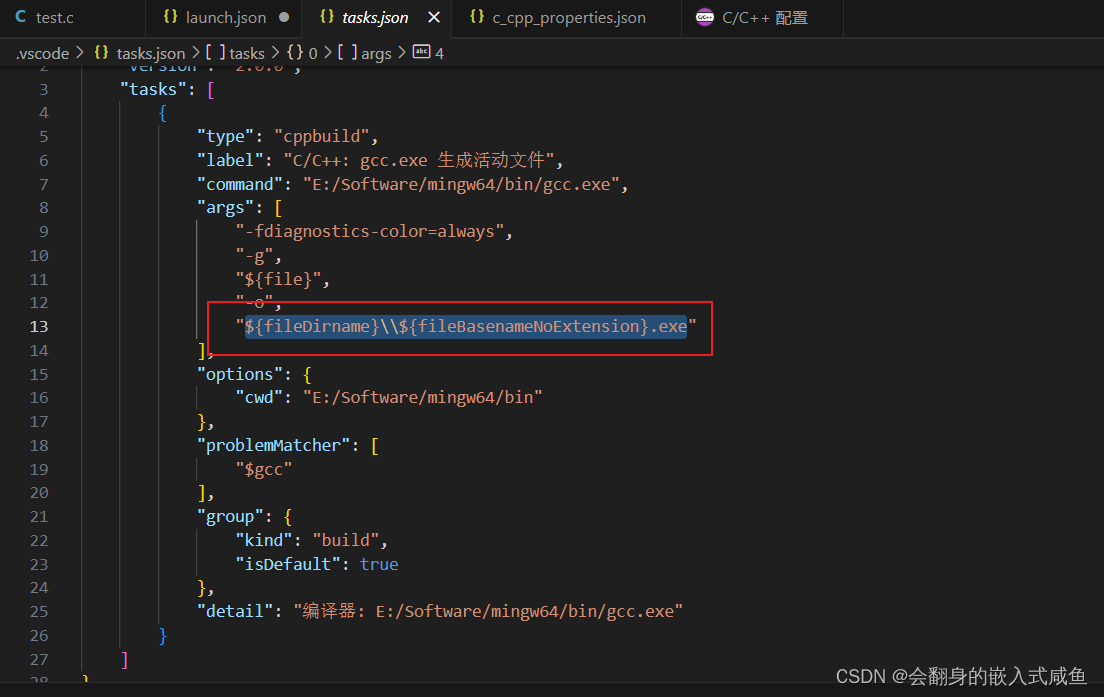
拷贝到这里
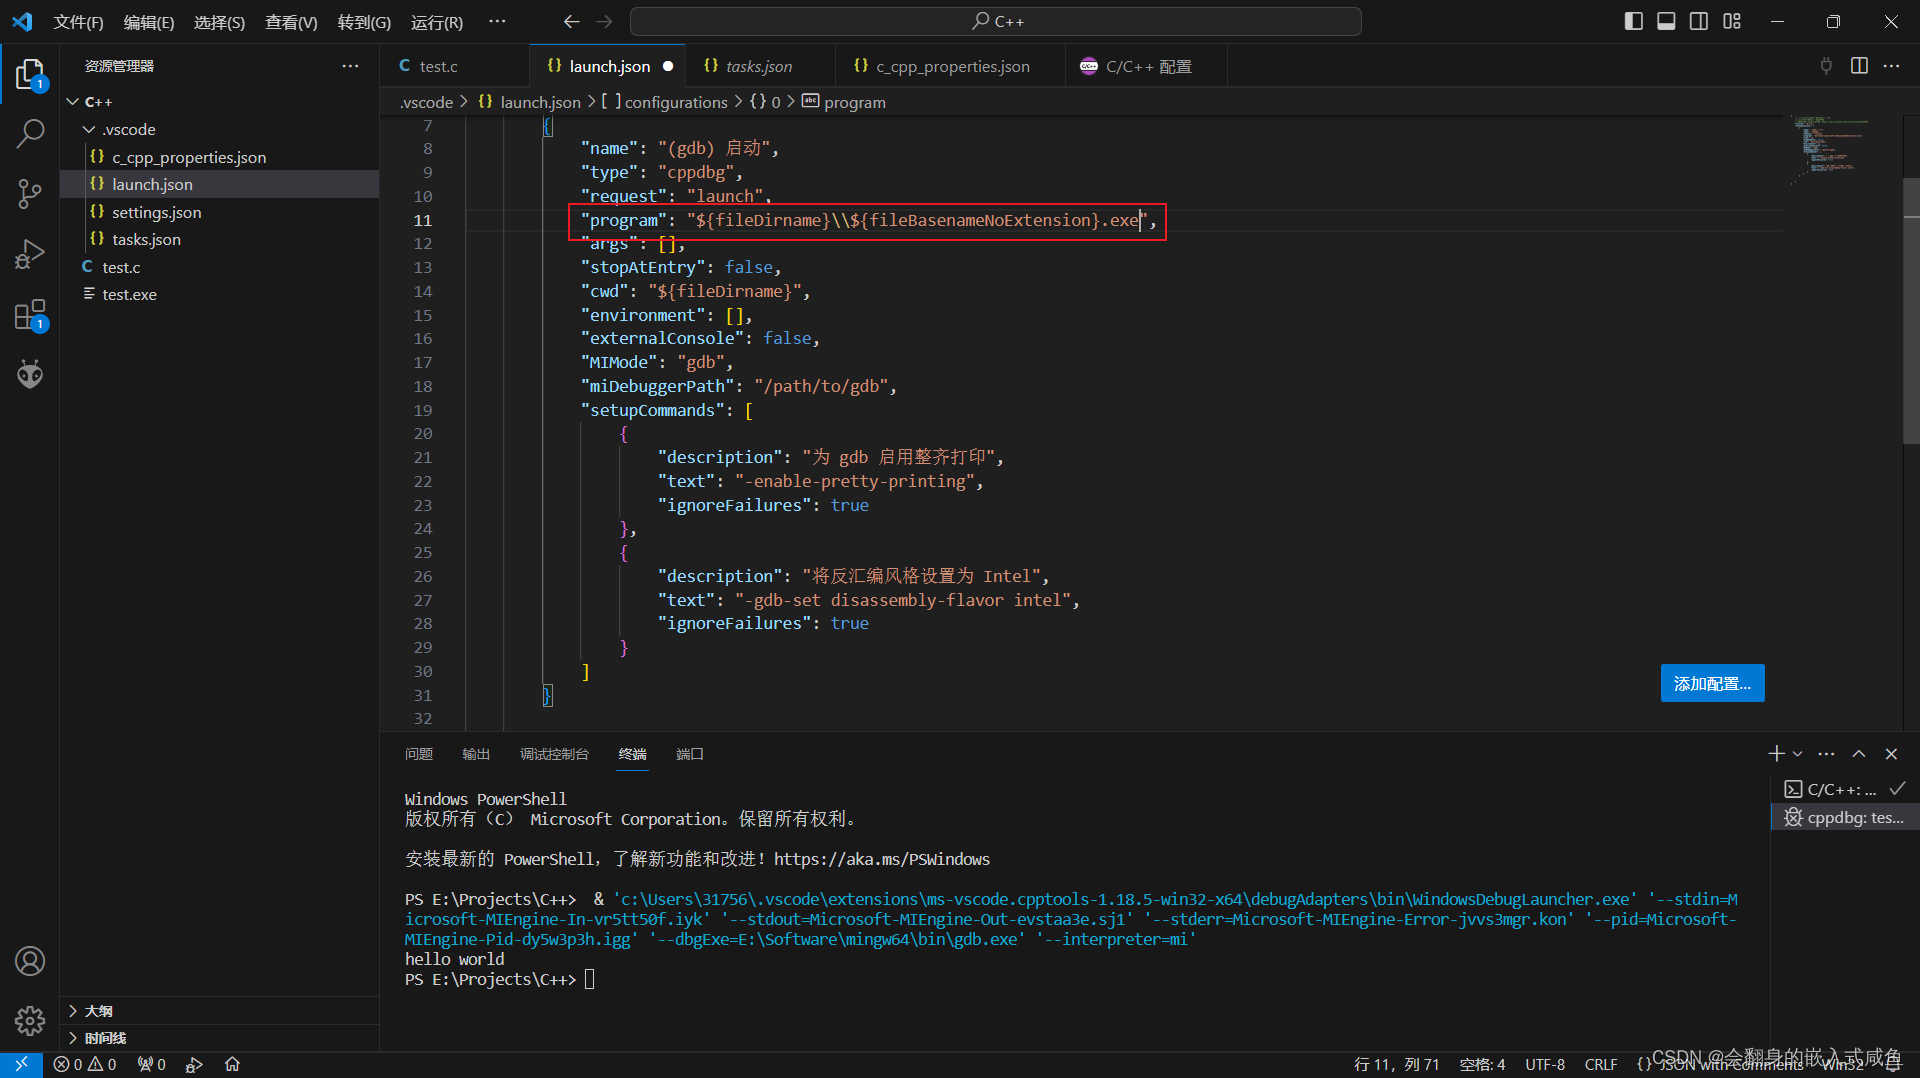
2.将这个路径改成下载模具路径中的gdb.exe(路径中有明显红的将单斜杠改成双斜杠)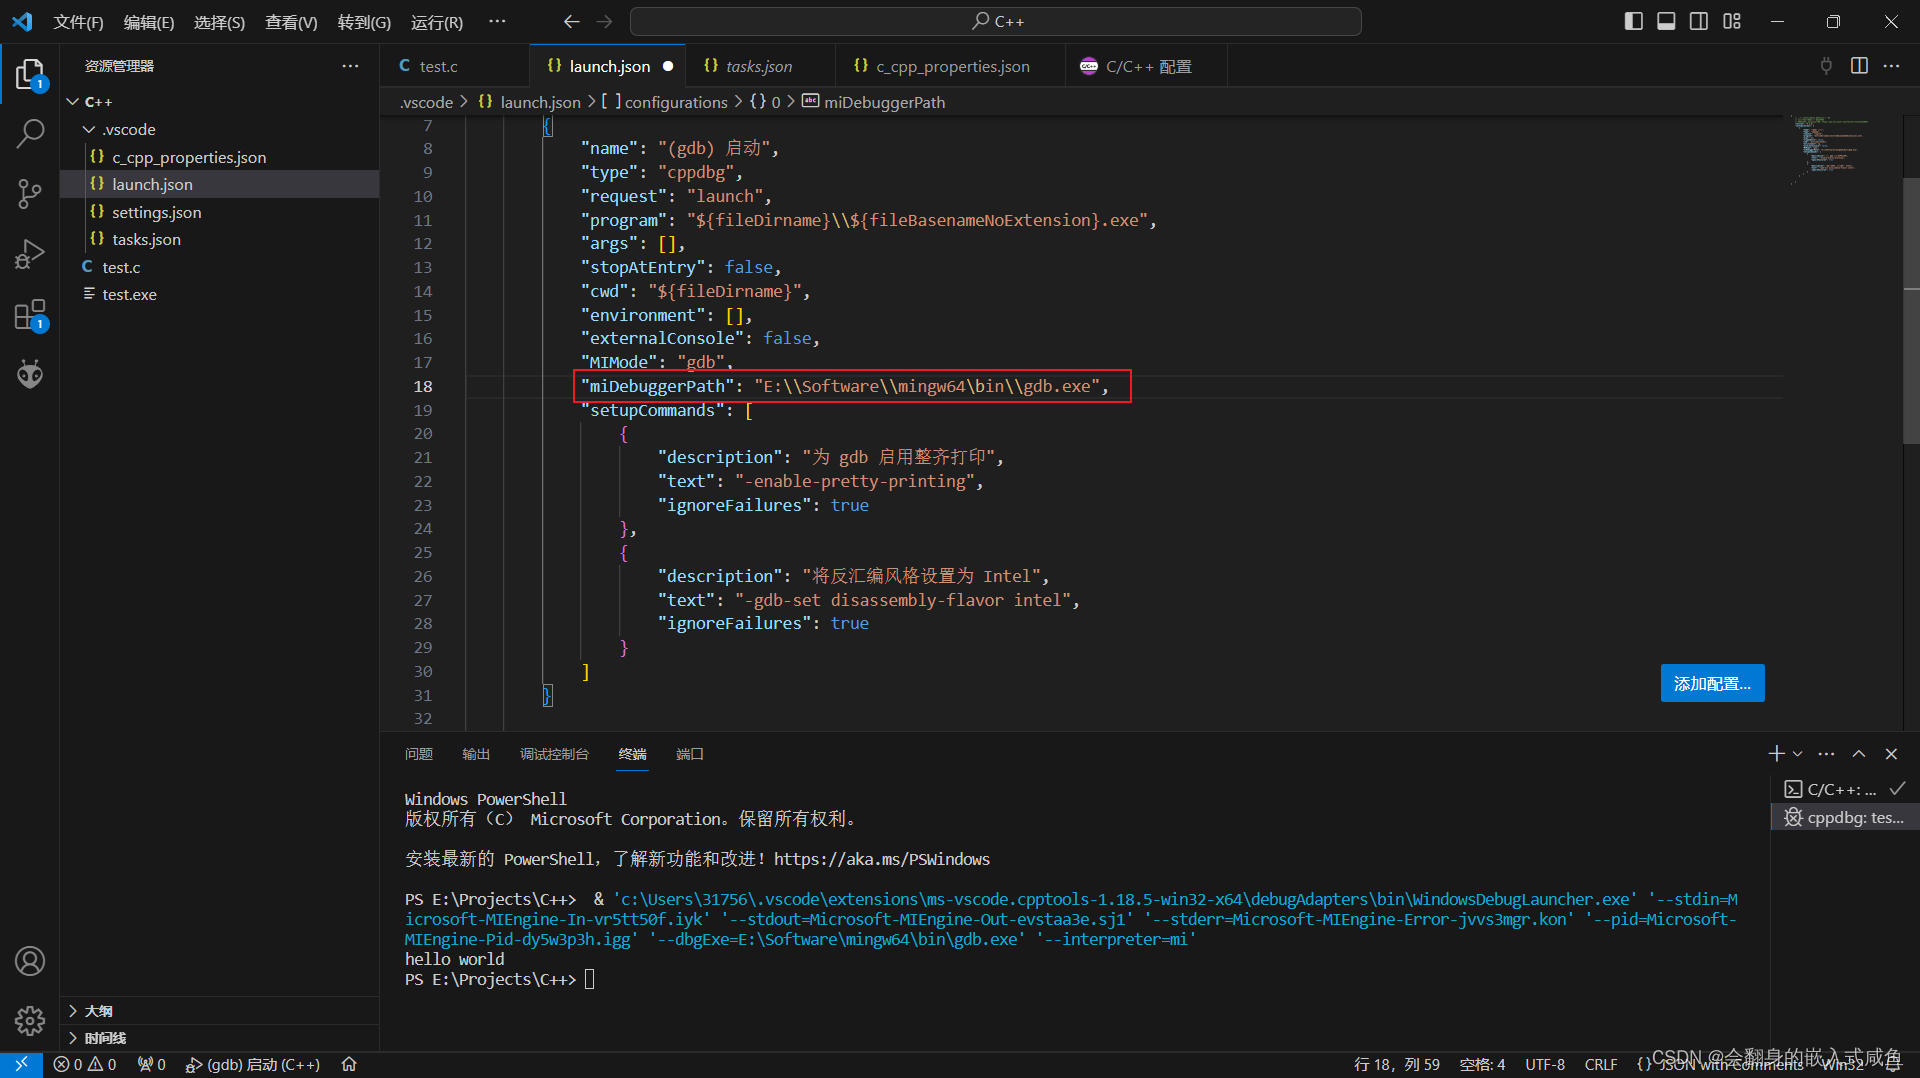
修改完之后内容:
{
    // 使用 IntelliSense 了解相关属性。
    // 悬停以查看现有属性的描述。
    // 欲了解更多信息,请访问: https://go.microsoft.com/fwlink/?linkid=830387
    "version": "0.2.0",
    "configurations": [
        {
            "name": "(gdb) 启动",
            "type": "cppdbg",
            "request": "launch",
            "program": "${fileDirname}\\${fileBasenameNoExtension}.exe",
            "args": [],
            "stopAtEntry": false,
            "cwd": "${fileDirname}",
            "environment": [],
            "externalConsole": false,
            "MIMode": "gdb",
            "miDebuggerPath": "E:\\Software\\mingw64\bin\\gdb.exe",
            "setupCommands": [
                {
                    "description": "为 gdb 启用整齐打印",
                    "text": "-enable-pretty-printing",
                    "ignoreFailures": true
                },
                {
                    "description": "将反汇编风格设置为 Intel",
                    "text": "-gdb-set disassembly-flavor intel",
                    "ignoreFailures": true
                }
            ]
        }


    ]
}
调试成功!!!
本文来自互联网用户投稿,该文观点仅代表作者本人,不代表本站立场。本站仅提供信息存储空间服务,不拥有所有权,不承担相关法律责任。 如若内容造成侵权/违法违规/事实不符,请联系我的编程经验分享网邮箱:chenni525@qq.com进行投诉反馈,一经查实,立即删除!
- Python教程
- 深入理解 MySQL 中的 HAVING 关键字和聚合函数
- Qt之QChar编码(1)
- MyBatis入门基础篇
- 用Python脚本实现FFmpeg批量转换
- Vue学习计划-Vue3--核心语法(七)pinia
- 人工智能在老年痴呆症治疗中的影响与展望
- DDD系列 - 第8讲 仓库Repository - JPA篇(二)
- 【Java】IDE集成开发环境工具IntelliJ安装和使用
- C++的内存模型,动态内存和智能指针相关总结
- week02day03(集合、 字符串、字符编码)
- Rainbond v5.17 版本发布,统一管理离线镜像和私有仓库
- PC9094可调电流限制OVP过压过流保护IC超小体积封装
- MySQL job 定时任务
- 前端 position定位