C# WPF上位机开发(MVVM模式开发)
【 声明:版权所有,欢迎转载,请勿用于商业用途。 联系信箱:feixiaoxing @163.com】
? ? ? ? 学习过vue的同学都知道mvvm这个名词。从字面上理解,可能有点拗口,但是我们可以去理解一下它的优点是什么。mvc相信大家都明白,m就是model,v就是view,c就是control。model的话,一般就是数据,目前大多数就是数据库里面的data;v就是view,可以是网页,可以是前端;c的话,就是control,简单的看就是控件的各个回调函数。
? ? ? ? 当然,这是mvc。现在又出了一个mvvm。本质上,mvvm相当于提供了一种双向绑定的模式。即界面中的显示和实际的数据bind在一起。这样数据发生任何的改变,用户不需要重新渲染界面了。这对开发的同学来说,是十分方便的。为了说明双向绑定是怎么使用的,我们可以写一个简单的demo说明一下。
1、设计MainWindow.xaml文件
<Window x:Class="WpfApp.MainWindow"
        xmlns="http://schemas.microsoft.com/winfx/2006/xaml/presentation"
        xmlns:x="http://schemas.microsoft.com/winfx/2006/xaml"
        xmlns:d="http://schemas.microsoft.com/expression/blend/2008"
        xmlns:mc="http://schemas.openxmlformats.org/markup-compatibility/2006"
        mc:Ignorable="d"
        xmlns:local="clr-namespace:WpfApp"
        Title="MVVMDemo" Height="300" Width="300">

    <Window.DataContext>
        <local:PersonViewModel/>
    </Window.DataContext>

    <Grid>
        <StackPanel Margin="10">
            <TextBlock Text="First Name:"/>
            <TextBox   Text="{Binding FirstName, Mode=TwoWay}" Margin="0,0,0,10"/>
            <TextBlock Text="Last Name:"/>
            <TextBox   Text="{Binding LastName, Mode=TwoWay}" Margin="0,0,0,10"/>

            <!-- New Labels to Display FirstName and LastName -->
            <TextBlock Text="First Name Displayed:"/>
            <Label Content="{Binding FirstName}" Margin="0,0,0,10"/>
            <TextBlock Text="Last Name Displayed:"/>
            <Label Content="{Binding LastName}" Margin="0,0,0,10"/>
            <Button Content="Button" Click="Button_Click"/>
        </StackPanel>
    </Grid>
</Window>
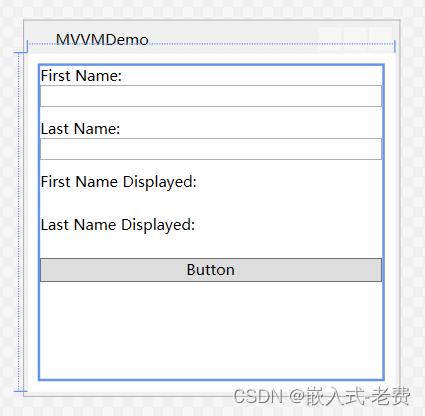
? ? ? ? 整个界面和之前相比较,最大的不同就是多了一个DataContext。里面有一个类,就是后面要实现的PersonViewModel。另外,在Grid里面,我们看到有四个Binding,其实是两组。每一组都有一个FirstName,一个LastName。除此之外呢,还有一个Button,它主要是演示怎么从外面给界面发数据。而里面的输入呢,相当于从界面发给数据。
? ? ? ? 出来的效果应该是这样的,
2、设计MainWindow.xaml.cs文件
? ? ? ? 主窗口中有一个按钮,需要设计一个回调函数。它的主要目的就是利用DataContext给FirstName和LastName传值。按钮按下去之后呢,不管是txt中的内容,还是label中的内容,都会发生改变。
using System;
using System.Collections.Generic;
using System.Linq;
using System.Text;
using System.Threading.Tasks;
using System.Windows;
using System.Windows.Controls;
using System.Windows.Data;
using System.Windows.Documents;
using System.Windows.Input;
using System.Windows.Media;
using System.Windows.Media.Imaging;
using System.Windows.Navigation;
using System.Windows.Shapes;

namespace WpfApp
{
    /// <summary>
    /// MainWindow.xaml 的交互逻辑
    /// </summary>
    public partial class MainWindow : Window
    {
        public MainWindow()
        {
            InitializeComponent();
        }

        private void Button_Click(object sender, RoutedEventArgs e)
        {
            var model = this.DataContext as PersonViewModel;
            model.FirstName = "Tom";
            model.LastName = "Cruise";
        }
    }
}
3、设计PersonViewModel.cs
? ? ? ? 整个代码中,最重要的部分就是INotifyPropertyChanged的实现。xaml中我们看到了PersonViewModel这个类,到时候系统会创建一个实例。数据发生改变的时候,就会调用对应的set函数。在set函数中,我们会进一步调用子函数OnPropertyChanged,通知所有关注这个property的函数。
using System;
using System.Collections.Generic;
using System.ComponentModel;
using System.Linq;
using System.Text;
using System.Threading.Tasks;

namespace WpfApp
{
    public class PersonViewModel : INotifyPropertyChanged
    {
        public static PersonModel _person;
        private static int flag = 0;

        public PersonViewModel()
        {
            if (flag == 0)
            {
                flag = 1;
                _person = new PersonModel();
            }
        }

        public string FirstName
        {
            get { return _person.FirstName; }
            set
            {
                if (_person.FirstName != value)
                {
                    _person.FirstName = value;
                    OnPropertyChanged(nameof(FirstName)); // invoke here
                }
            }
        }

        public string LastName
        {
            get { return _person.LastName; }
            set
            {
                if (_person.LastName != value)
                {
                    _person.LastName = value;
                    OnPropertyChanged(nameof(LastName)); // invoke here
                }
            }
        }

        public event PropertyChangedEventHandler PropertyChanged;

        // invoke after value was set
        protected virtual void OnPropertyChanged(string propertyName)
        {
            PropertyChanged?.Invoke(this, new PropertyChangedEventArgs(propertyName));
        }
    }

    public class PersonModel
    {
        public string FirstName { get; set; }
        public string LastName { get; set; }
    }

}
? ? ? ? 总结一下,前面我们说过双向绑定,它的意思就界面的修改和传递给变量,那么变量的修改也可以传递给界面。MainWindows中实现的是变量传给界面,而PersonViewModel实现的相当于界面传给变量。
4、编译和测试
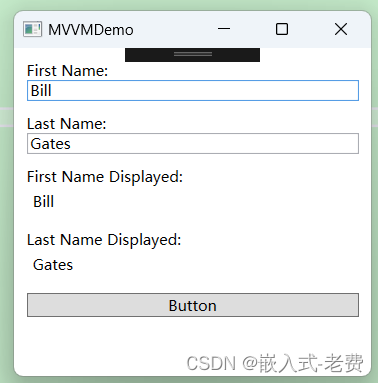
? ? ? ? 编译没有问题的话,就可以开始测试了。测试的时候,我们可以在txt中输入不同的数据,下面的label也会做同步的显示。这一步测试之后,我们就可以单机一下按钮,看txt中的内容有没有同步改变。如果两者都没有问题,那么就代表mvvm测试ok了。
? ? ? ? 一开始测试的情景,
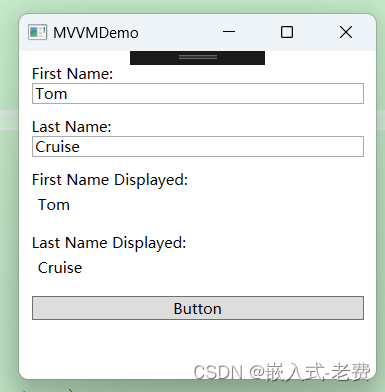
? ? ? ? 这个时候,如果我们设置一下Button,就会变成这样,
本文来自互联网用户投稿,该文观点仅代表作者本人,不代表本站立场。本站仅提供信息存储空间服务,不拥有所有权,不承担相关法律责任。 如若内容造成侵权/违法违规/事实不符,请联系我的编程经验分享网邮箱:chenni525@qq.com进行投诉反馈,一经查实,立即删除!
- Python教程
- 深入理解 MySQL 中的 HAVING 关键字和聚合函数
- Qt之QChar编码(1)
- MyBatis入门基础篇
- 用Python脚本实现FFmpeg批量转换
- springboot+mysql马拉松赛事志愿者管理系统-计算机毕业设计源码93439
- Redis过期淘汰策略
- 金和 OA C6/Control/GetSqlData.aspx/.ashx SQL 注入漏洞复现
- 达梦报错:无效IP,设置达梦访问IP白名单
- 【测试用例】10个用等价类编写用例的测试场景
- 22/76-池化
- [c++笔记]class,构造函数
- C++ Template
- 西北工业大学计算机组成原理实验报告——verilog前两次
- 达梦数据库Windows安装教程:从准备到完成