6.项目中key扫描的好方案之一
发布时间:2023年12月20日
前言:
? ? ? ? 本来想着按键扫描比较简单不想写的,但是考虑到项目中按键是用的非常多的,而且对按键检测可靠性要求比较高,所以还是写了这个博客记录一下~按键检测不是单单读io,发现按键按下就行了,还需要考虑多久去检测一次按键,检测到了怎么去通知对应的任务去执行,并且不互相干扰。
????????我没有采用正点原子的按键检测(检测--消抖--检测--返回键值),而是用之前比赛常用的一套按键检测代码,具体思路是:在滴答定时器中每nms设置一次按键检测标志位以及按键检测(检测频率可控),将检测到的键值存到一个全局变量中(g_nButton)。
????????由于按键检测是在滴答定时器中断里完成的,所以不能使用延时的函数来消抖(这个的实现是个难点),此代码里用了别的方法。当然正点原子的按键检测也挺好,只是有两个缺点:1.按键检测实时性比较差 2.用到了delay_ms,而它的延时函数是用滴答定时器写的,和程序节拍冲突了。
代码编写流程:
硬件连接:

初始化为下拉 WK_UP PA0
初始化为上拉KEY0 KEY1 KEY2 PE4 PE3 PE2
头文件:
位带操作读按键IO值:
#define KEY0 ?? ??? ?PEin(4) ? ?? ?//PE4
#define KEY1 ?? ??? ?PEin(3)?? ??? ?//PE3?
#define KEY2 ?? ??? ?PEin(2)?? ??? ?//P32
#define WK_UP ?? ??? ?PAin(0)?? ??? ?//PA0?
键值定义:
#define KEY0_PRES ?? ?1?? ?//KEY0按下
#define KEY1_PRES?? ?2?? ?//KEY1按下
#define KEY2_PRES?? ?3?? ?//KEY2按下
#define WKUP_PRES ? 4?? ?//KEY_UP按下(即WK_UP)
初始化所有GPIO:
void KEY_Init(void)//输出类型和输出速度可以不填
{
	RCC->AHB1ENR|=1<<0;     //使能PORTA时钟
	RCC->AHB1ENR|=1<<4;     //使能PORTE时钟
	GPIO_Set(GPIOE,PIN2|PIN3|PIN4,GPIO_MODE_IN,0,0,GPIO_PUPD_PU);	//PE2~4设置上拉输入
	GPIO_Set(GPIOA,PIN0,GPIO_MODE_IN,0,0,GPIO_PUPD_PD); 			//PA0设置为下拉输入
}
按键检测相关:
这个是读IO,返回键值:
u8 KEY_Scan(void)   //检测有无按键按下 检查哪个按键按下
{
	if(WK_UP==1)       return WKUP_PRES;      //如果是用if  else if  则越前面的优先级越高
    else if(KEY0==0)  return KEY0_PRES;
	else if(KEY1==0)  return KEY1_PRES;

    else if(KEY2==0)  return KEY2_PRES;


	return 0;   //无按键按下
}
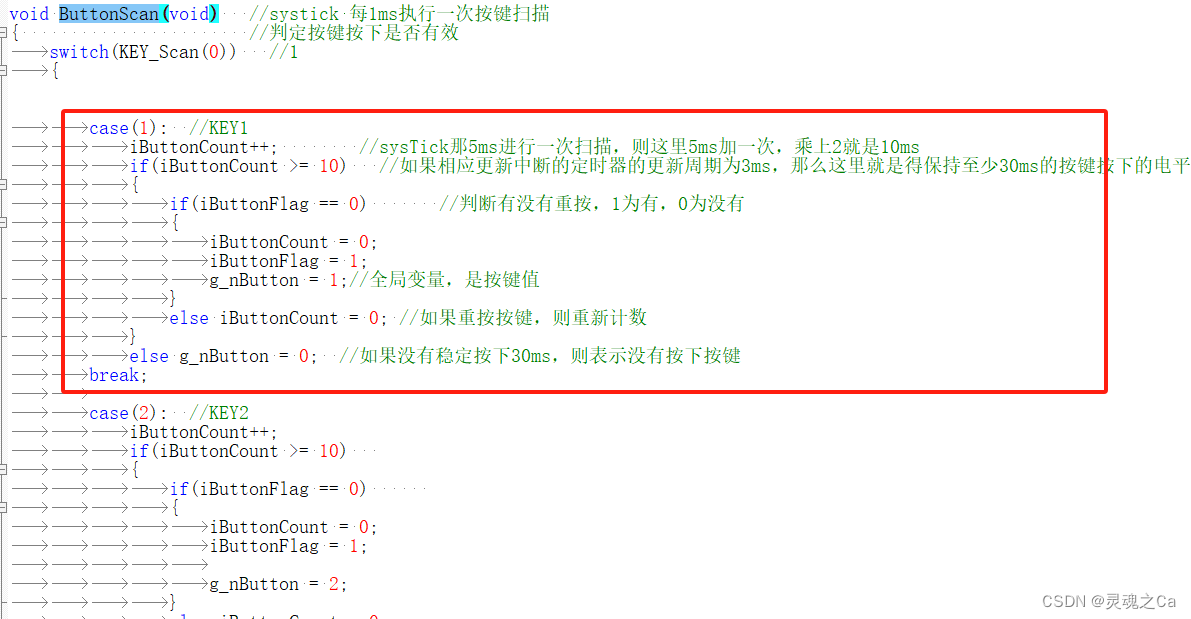
这个则是根据键值,确定g_nButton,同时包含了消抖的操作,比较复杂,自行研究一下:
void ButtonScan(void)   //systick 每1ms执行一次按键扫描
{
	switch(KEY_Scan())   //1
	{


		case(1):  //KEY1
			iButtonCount++;        //sysTick那5ms进行一次扫描,则这里5ms加一次,乘上2就是10ms
			if(iButtonCount >= 10)
			{
				if(iButtonFlag == 0)       //判断有没有重按,1为有,0为没有
				{
					iButtonCount = 0;
					iButtonFlag = 1;
					g_nButton = 1;//全局变量,是按键值
				}
				else iButtonCount = 0; //如果重按按键,则重新计数
			}
			else g_nButton = 0;  //如果没有稳定按下50ms,则表示没有按下按键
		break;

		case(2):  //KEY2
			iButtonCount++;
			if(iButtonCount >= 10)
			{
				if(iButtonFlag == 0)
				{
					iButtonCount = 0;
					iButtonFlag = 1;

					g_nButton = 2;
				}
				else iButtonCount = 0;
			}
			else g_nButton = 0;
		break;

		case(3):  //K3
			iButtonCount++;
			if(iButtonCount >= 10)
			{
				if(iButtonFlag == 0)
				{
					iButtonCount = 0;
					iButtonFlag = 1;

					g_nButton = 3;
				}
				else iButtonCount = 0;
			}
			else g_nButton = 0;
		break;
		case(4):  //WKUP_PRESS
			iButtonCount++;
			if(iButtonCount >= 10)
			{
				if(iButtonFlag == 0)
				{
					iButtonCount = 0;
					iButtonFlag = 1;

					g_nButton = 4;
				}
				else iButtonCount = 0;
			}
			else g_nButton = 0;
		break;
		default:
			iButtonCount = 0;
			iButtonFlag = 0;
		   g_nButton = 0;
		break;
	}

}
main.c函数:
在需要键值的文件中#include "key.h",就可以实时获取键值g_nButton了
#include "sys.h"
#include "usart.h"
#include "delay.h"
#include "led.h"
#include "beep.h"
#include "key.h"

u8 keyscan_flag;//按键扫描完成的标志
u16 myconut;


//systick中断服务函数
void SysTick_Handler(void)
{
    myconut++;
    if(myconut>=5){//每5ms扫描一次按键
        myconut=0;

        ButtonScan();
        keyscan_flag=1;
    }
}

int main(void)
{
	u8 key;
	Stm32_Clock_Init(336,8,2,7);//设置时钟,168Mhz
	delay_init(168);		//延时初始化

     NVIC_SetPriorityGrouping(2);
    SysTick_Config(168000);//1ms中断一次
    NVIC_EnableIRQ(SysTick_IRQn);

	LED_Init();		  		//初始化与LED连接的硬件接口
	BEEP_Init();		 	//初始化蜂鸣器IO
	KEY_Init();         	//初始化与按键连接的硬件接口
    uart_init(84,115200);	//串口初始化为115200
	LED0=0;					//先点亮红灯
	while(1)
	{

        if(keyscan_flag==1)
        {
            keyscan_flag=0;

            switch(g_nButton)
            {
            case WKUP_PRES:	//控制蜂鸣器
                printf("WKUP_PRES\r\n");
                break;
            case KEY2_PRES:	//控制LED0翻转
                printf("KEY2_PRES\r\n");
                break;
            case KEY1_PRES:	//控制LED1翻转
                printf("KEY1_PRES\r\n");
                break;
            case KEY0_PRES:	//同时控制LED0,LED1翻转
                printf("KEY0_PRES\r\n");

                break;
            }
        }


	}
}
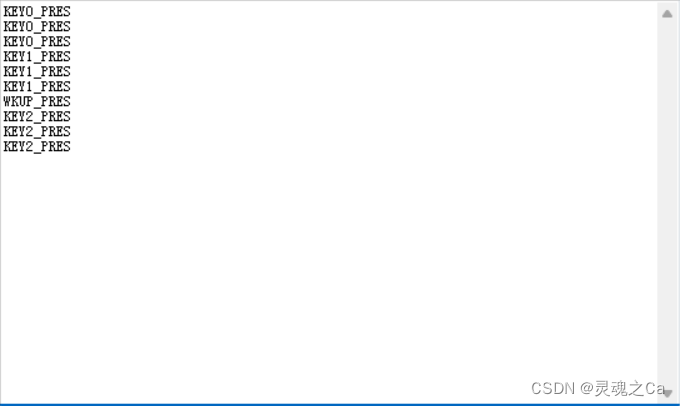
这样就能完美地检测按键了:

下面放出key.h和key.c的所有代码:
key.h
#ifndef __KEY_H
#define __KEY_H
#include "sys.h"

extern char g_nButton;//这样其他文件引入key.h就能使用这个变量了

#define KEY0 		PEin(4)   	//PE4
#define KEY1 		PEin(3)		//PE3
#define KEY2 		PEin(2)		//P32
#define WK_UP 		PAin(0)		//PA0

#define KEY0_PRES 	1	//KEY0按下
#define KEY1_PRES	2	//KEY1按下
#define KEY2_PRES	3	//KEY2按下
#define WKUP_PRES   4	//KEY_UP按下(即WK_UP)

void KEY_Init(void);	//IO初始化
u8 KEY_Scan();  		//按键扫描函数
void ButtonScan(void);
#endif
key.c
#include "key.h"
#include "delay.h"

int iButtonCount;
int iButtonFlag;
char g_nButton;     //声明外部变量,方便其他地方引用。当使用定时器消抖的时候用这个,这个记录了有效按下了什么键

//按键初始化函数
void KEY_Init(void)
{
	RCC->AHB1ENR|=1<<0;     //使能PORTA时钟
	RCC->AHB1ENR|=1<<4;     //使能PORTE时钟
	GPIO_Set(GPIOE,PIN2|PIN3|PIN4,GPIO_MODE_IN,0,0,GPIO_PUPD_PU);	//PE2~4设置上拉输入
	GPIO_Set(GPIOA,PIN0,GPIO_MODE_IN,0,0,GPIO_PUPD_PD); 			//PA0设置为下拉输入
}

u8 KEY_Scan()   //检测有无按键按下 检查哪个按键按下
{
	if(WK_UP==1)       return WKUP_PRES;      //如果是用if  else if  则越前面的优先级越高
    else if(KEY0==0)  return KEY0_PRES;
	else if(KEY1==0)  return KEY1_PRES;

    else if(KEY2==0)  return KEY2_PRES;


	return 0;   //无按键按下
}

void ButtonScan(void)   //systick 每1ms执行一次按键扫描
{                       //判定按键按下是否有效
	switch(KEY_Scan(0))   //1
	{


		case(1):  //KEY1
			iButtonCount++;        //sysTick那5ms进行一次扫描,则这里5ms加一次,乘上2就是10ms
			if(iButtonCount >= 10)   //如果相应更新中断的定时器的更新周期为3ms,那么这里就是得保持至少30ms的按键按下的电平
			{
				if(iButtonFlag == 0)       //判断有没有重按,1为有,0为没有
				{
					iButtonCount = 0;
					iButtonFlag = 1;
					g_nButton = 1;//全局变量,是按键值
				}
				else iButtonCount = 0; //如果重按按键,则重新计数
			}
			else g_nButton = 0;  //如果没有稳定按下30ms,则表示没有按下按键
		break;

		case(2):  //KEY2
			iButtonCount++;
			if(iButtonCount >= 10)
			{
				if(iButtonFlag == 0)
				{
					iButtonCount = 0;
					iButtonFlag = 1;

					g_nButton = 2;
				}
				else iButtonCount = 0;
			}
			else g_nButton = 0;
		break;

		case(3):  //K3
			iButtonCount++;
			if(iButtonCount >= 10)
			{
				if(iButtonFlag == 0)
				{
					iButtonCount = 0;
					iButtonFlag = 1;

					g_nButton = 3;
				}
				else iButtonCount = 0;
			}
			else g_nButton = 0;
		break;
		case(4):  //WKUP_PRESS
			iButtonCount++;
			if(iButtonCount >= 10)
			{
				if(iButtonFlag == 0)
				{
					iButtonCount = 0;
					iButtonFlag = 1;

					g_nButton = 4;
				}
				else iButtonCount = 0;
			}
			else g_nButton = 0;
		break;
		default:
			iButtonCount = 0;
			iButtonFlag = 0;
		   g_nButton = 0;
		break;
	}

}
拓展其他按键:
要加其他按键也很方便,只需要按如下步骤,仿照原有的代码去改即可~
1.key.h中,新增按键对应IO的位带操作代码以及键值定义

2.key.c中,在KEY_Init()新增新按键的IO初始化
根据新按键的硬件连接选择上拉或者下拉,别忘了初始化时钟

3.key.c中,在KEY_Scan()新增按键检测及键值返回

4.key.c中,在ButtonScan()新增按键消抖及键值确定

通通是阔批的操作,抄一抄!就拓展完成啦!完~
文章来源:https://blog.csdn.net/weixin_62622990/article/details/135111128
本文来自互联网用户投稿,该文观点仅代表作者本人,不代表本站立场。本站仅提供信息存储空间服务,不拥有所有权,不承担相关法律责任。 如若内容造成侵权/违法违规/事实不符,请联系我的编程经验分享网邮箱:chenni525@qq.com进行投诉反馈,一经查实,立即删除!
本文来自互联网用户投稿,该文观点仅代表作者本人,不代表本站立场。本站仅提供信息存储空间服务,不拥有所有权,不承担相关法律责任。 如若内容造成侵权/违法违规/事实不符,请联系我的编程经验分享网邮箱:chenni525@qq.com进行投诉反馈,一经查实,立即删除!
最新文章
- Python教程
- 深入理解 MySQL 中的 HAVING 关键字和聚合函数
- Qt之QChar编码(1)
- MyBatis入门基础篇
- 用Python脚本实现FFmpeg批量转换
- 数学逻辑与EDA设计 广工期末复习
- thymeleaf的个人总结
- Python爬取租房数据
- 深入理解pytest.ini文件的配置与使用
- echarts 提示框设置自定义样式
- 【Avue】树形结构表格,删除子表格数据,页面刷新无反应
- 【CSAPP】探究BombLab奥秘:Phase_1的解密与实战
- 【CISSP学习笔记】5. 安全架构和工程
- 空间转录组 多样本整合分析—stlearn
- python学习笔记-高级运算计算器