多级缓存架构(二)Caffeine进程缓存
发布时间:2024年01月13日
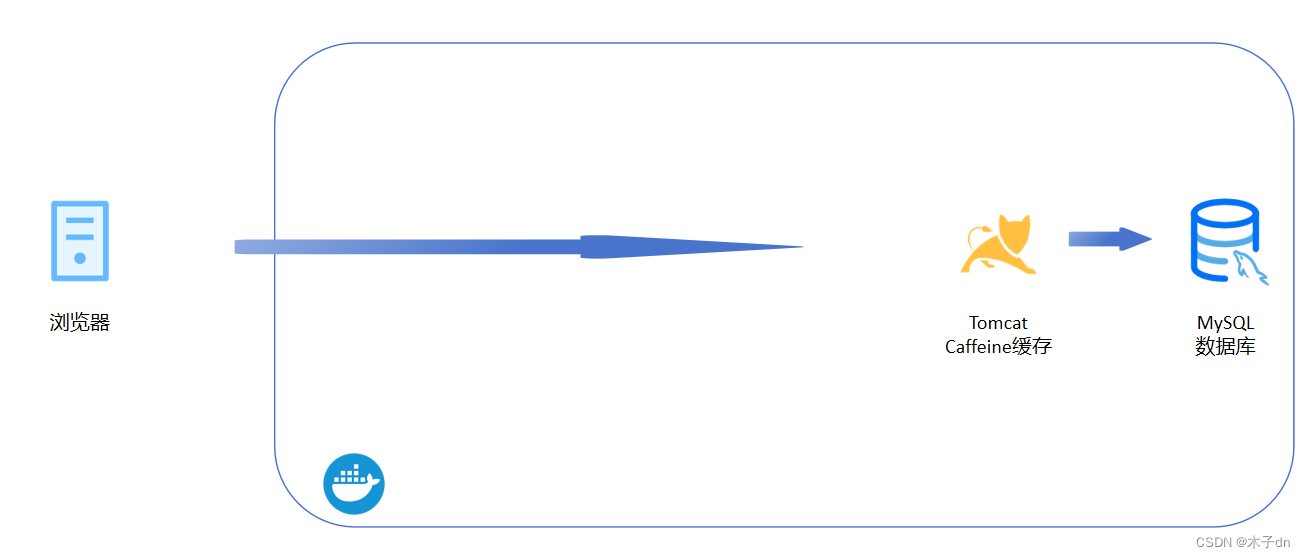
通过本文章,可以完成多级缓存架构中的进程缓存。


一、引入依赖
在item-service中引入caffeine依赖
		<dependency>
            <groupId>com.github.ben-manes.caffeine</groupId>
            <artifactId>caffeine</artifactId>
        </dependency>
二、实现进程缓存
1. 配置Config类
创建config.CaffeineConfig类
@Configuration
public class CaffeineConfig {
    @Bean
    public Cache<Long, Item> itemCache(){
        return Caffeine.newBuilder()
                .initialCapacity(100)
                .maximumSize(10_000)
                .build();
    }

    @Bean
    public Cache<Long, ItemStock> stockCache(){
        return Caffeine.newBuilder()
                .initialCapacity(100)
                .maximumSize(10_000)
                .build();
    }
}
2. 修改controller
在ItemController中注入两个Cache对象,并修改业务逻辑
@RestController
@RequestMapping("item")
public class ItemController {

    @Autowired
    private IItemService itemService;
    @Autowired
    private IItemStockService stockService;
    @Autowired
    private Cache<Long, Item> itemCache;
    @Autowired
    private Cache<Long, ItemStock> stockCache;

    @GetMapping("/{id}")
    public Item findById(@PathVariable("id") Long id){
        return itemCache.get(id, key->
            itemService.query()
                    .ne("status", 3).eq("id", id)
                    .one()
        );
//        return itemService.query()
//                .ne("status", 3).eq("id", id)
//                .one();
    }

    @GetMapping("/stock/{id}")
    public ItemStock findStockById(@PathVariable("id") Long id){
        return stockCache.get(id, key->
                stockService.getById(id)
        );
//        return stockService.getById(id);
    }
}
三、运行
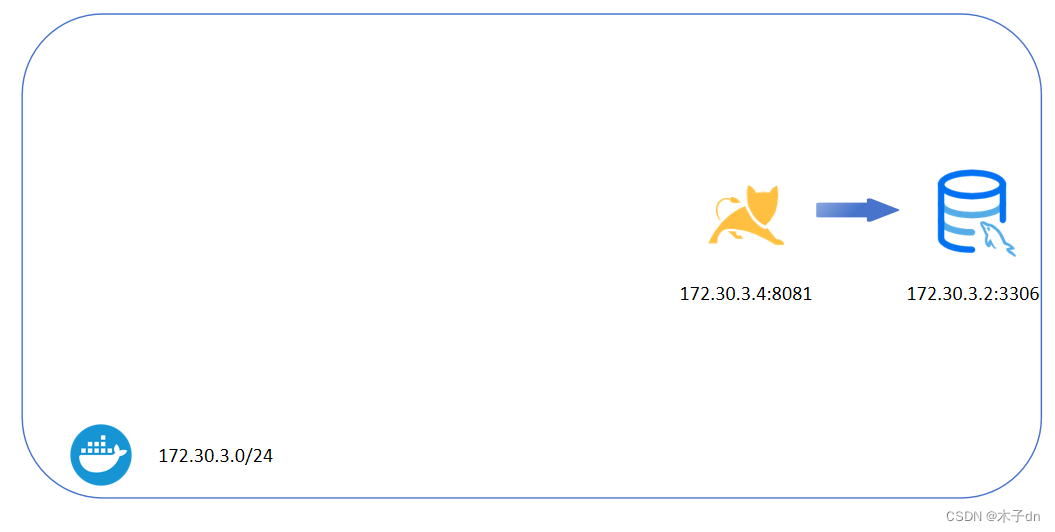
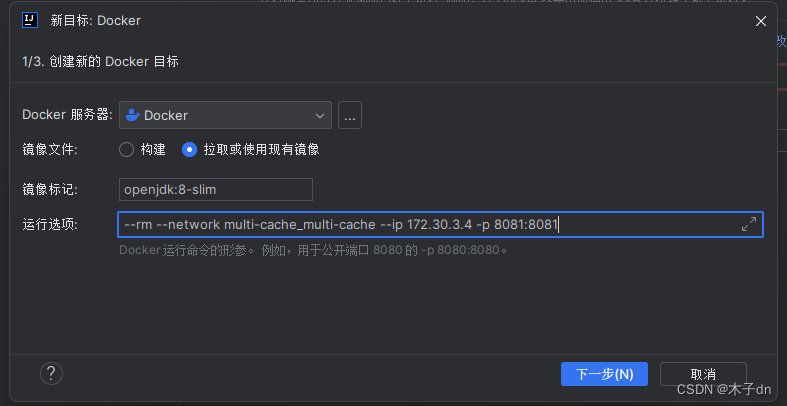
Idea结合Docker将springboot放入docker容器中运行,并指定使用multi-cache_multi-cache网络,以及固定172.30.3.4地址。
详细参考如下文章
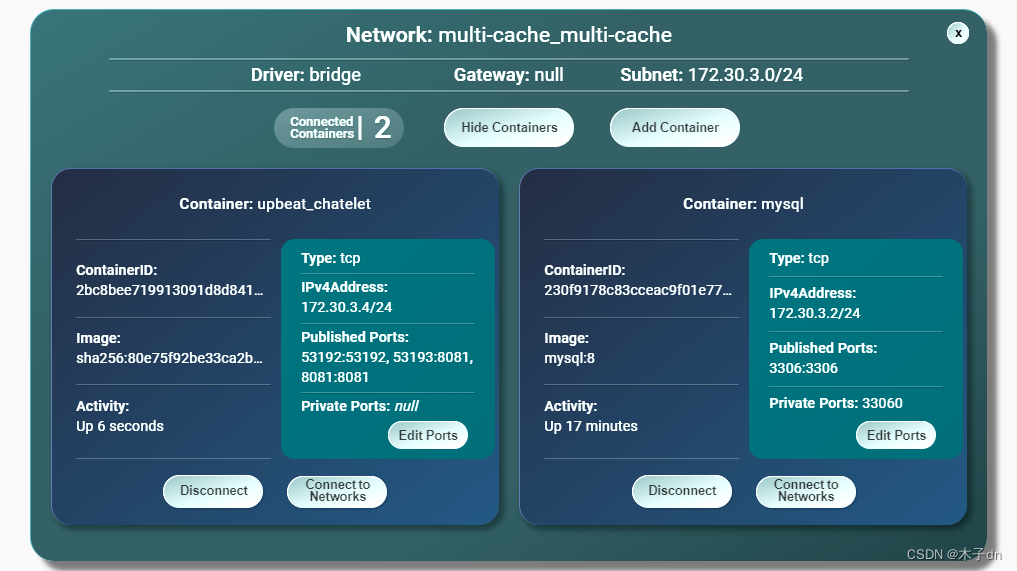
启动好后,可以看到springboot容器和mysql容器处于同一网络下。(Docker Desktop for Windows插件PortNavigator)

四、测试
访问http://localhost:8081/item/10001可以看到springboot日志输出如下
02:45:58:841 DEBUG 1 --- [nio-8081-exec-1] c.h.item.mapper.ItemMapper.selectOne     : ==>  Preparing: SELECT id,name,title,price,image,category,brand,spec,status,create_time,update_time FROM tb_item WHERE (status <> ? AND id = ?)
02:45:58:889 DEBUG 1 --- [nio-8081-exec-1] c.h.item.mapper.ItemMapper.selectOne     : ==> Parameters: 3(Integer), 10001(Long)
02:45:58:951 DEBUG 1 --- [nio-8081-exec-1] c.h.item.mapper.ItemMapper.selectOne     : <==      Total: 1
当我们二次访问此网址,强制刷新+禁用浏览器缓存+更换浏览器,springboot日志都没有新的查询记录,说明使用了Caffeine缓存。
文章来源:https://blog.csdn.net/m0_51390969/article/details/135545430
本文来自互联网用户投稿,该文观点仅代表作者本人,不代表本站立场。本站仅提供信息存储空间服务,不拥有所有权,不承担相关法律责任。 如若内容造成侵权/违法违规/事实不符,请联系我的编程经验分享网邮箱:chenni525@qq.com进行投诉反馈,一经查实,立即删除!
本文来自互联网用户投稿,该文观点仅代表作者本人,不代表本站立场。本站仅提供信息存储空间服务,不拥有所有权,不承担相关法律责任。 如若内容造成侵权/违法违规/事实不符,请联系我的编程经验分享网邮箱:chenni525@qq.com进行投诉反馈,一经查实,立即删除!
最新文章
- Python教程
- 深入理解 MySQL 中的 HAVING 关键字和聚合函数
- Qt之QChar编码(1)
- MyBatis入门基础篇
- 用Python脚本实现FFmpeg批量转换
- java-面向对象
- 牛客(JZ36 二叉搜索树与双向链表)
- 基于51单片机的家用可燃气体报警器设计与实现
- 解决jmeter测试计划无法保存、另存为的问题
- 杭电网课笔记
- 【Unity】【CSharp(C#)基础】学习总结1——变量 数据类型
- Wafer晶圆封装工艺介绍
- 四. 基于环视Camera的BEV感知算法-BEVDet
- 2024年最新的人工智能工程师证书 已经开始报名了
- 示例说明 Makefile 中的 $(@F),及其用法示例$$dir $@ $< $^ %.c
