Angular系列教程之父子组件通信详解
文章目录
前言
在Angular应用程序开发中,父子组件通信是一项非常重要的功能。它允许不同层次的组件之间传递数据和进行交流。本文将详细介绍在Angular中实现父子组件通信的各种方法,并提供示例代码进行解释说明。
组件通信方法
在Angular中,有多种方法可以实现父子组件通信。
以下是几种常用的方法:
1. 输入属性(Input Properties)
输入属性是一种用于从父组件向子组件传递数据的方法。通过使用@Input()装饰器,我们可以在子组件中定义一个公共属性来接收来自父组件的数据。
示例代码如下:
import { Component, Input } from '@angular/core';

@Component({
  selector: 'app-child',
  template: '<p>{{ message }}</p>'
})
export class ChildComponent {
  @Input() message: string;
}
在上述代码中,我们使用@Input()装饰器来定义了一个名为message的输入属性。在子组件的模板中,我们使用插值表达式{{ message }}来展示接收到的消息。

2. 输出属性(Output Properties)
输出属性允许子组件向父组件传递信息。通过使用事件触发器和@Output()装饰器,我们可以在子组件中定义一个事件,并在适当的时候将数据作为事件参数发送给父组件。
示例代码如下:
import { Component, Output, EventEmitter } from '@angular/core';

@Component({
  selector: 'app-child',
  template: '<button (click)="sendMessage()">Send Message</button>'
})
export class ChildComponent {
  @Output() messageEvent = new EventEmitter<string>();

  sendMessage() {
    this.messageEvent.emit('Hello from child component');
  }
}
在上述代码中,我们定义了一个名为messageEvent的输出属性,并使用EventEmitter来创建一个新的事件。在子组件中,当用户点击按钮时,我们通过调用sendMessage()方法并使用emit()方法来触发messageEvent事件,并将一个字符串作为参数传递给父组件。
3. 服务(Services)
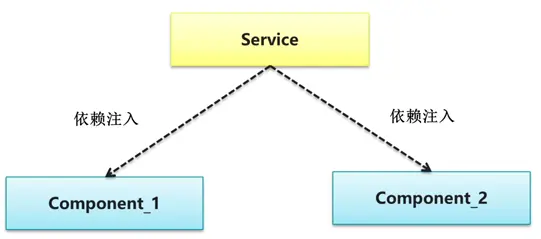
服务是一种共享数据和状态的有效方式。通过创建一个共享的服务,我们可以在任何组件之间传递数据和共享状态。组件可以通过依赖注入服务,并使用服务提供的方法和属性进行通信。

示例代码如下:
import { Injectable } from '@angular/core';

@Injectable()
export class DataService {
  private message: string;

  setMessage(message: string) {
    this.message = message;
  }

  getMessage() {
    return this.message;
  }
}
在上述代码中,我们创建了一个名为DataService的服务,并在其中定义了一个私有的message属性和相应的设置和获取方法。通过在需要访问该数据的组件中注入DataService,我们可以在组件之间共享数据。
4. ViewChild与ContentChild
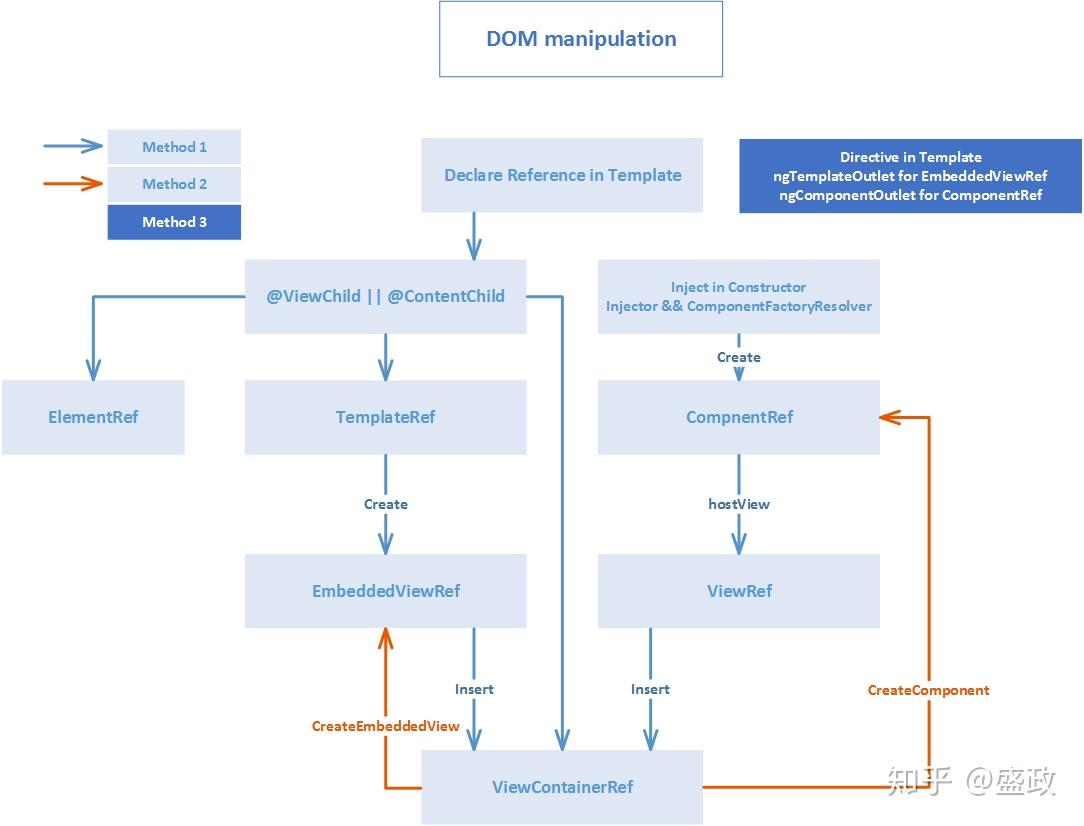
通过使用ViewChild和ContentChild装饰器,我们可以在父组件中获取对子组件的引用,并直接调用子组件的方法或访问其属性。这种方法适用于需要直接与子组件进行交互的情况。

示例代码如下:
import { Component, ViewChild } from '@angular/core';
import { ChildComponent } from './child.component';

@Component({
  selector: 'app-parent',
  template: `
    <app-child></app-child>
    <button (click)="callChildMethod()">Call Child Method</button>
  `
})
export class ParentComponent {
  @ViewChild(ChildComponent) childComponent: ChildComponent;

  callChildMethod() {
    this.childComponent.childMethod();
  }
}
在上述代码中,我们使用@ViewChild()装饰器来获取对ChildComponent的引用,并将其赋值给childComponent属性。然后,在父组件的模板中,我们使用一个按钮来触发callChildMethod()方法,该方法会调用子组件中的childMethod()方法。
示例代码说明
现在,我们来看一个结合使用输入属性和输出属性的完整示例代码,以展示父子组件通信的实际应用。
首先,创建一个父组件ParentComponent,代码如下:
import { Component } from '@angular/core';

@Component({
  selector: 'app-parent',
  template: `
    <app-child [message]="parentMessage" (messageEvent)="receiveMessage($event)"></app-child>
    <p>{{ childMessage }}</p>
  `
})
export class ParentComponent {
  parentMessage = 'Hello from parent component';
  childMessage: string;

  receiveMessage($event) {
    this.childMessage = $event;
  }
}
在上述代码中,我们通过方括号语法[message]="parentMessage"将parentMessage数据绑定到子组件的输入属性上。同时,我们还使用事件绑定器(messageEvent)="receiveMessage($event)"来监听子组件发出的messageEvent事件,并调用receiveMessage($event)方法来接收子组件传递过来的消息。
然后,创建一个子组件ChildComponent,代码如下:
import { Component, Input, Output, EventEmitter } from '@angular/core';

@Component({
  selector: 'app-child',
  template: `
    <button (click)="sendMessage()">Send Message</button>
  `
})
export class ChildComponent {
  @Input() message: string;
  @Output() messageEvent = new EventEmitter<string>();

  sendMessage() {
    this.messageEvent.emit('Hello from child component');
  }
}
在上述代码中,我们定义了一个名为message的输入属性,用于接收父组件传递的消息。并且,我们也定义了一个名为messageEvent的输出属性,用于向父组件发送消息。当用户点击按钮时,我们通过调用sendMessage()方法触发messageEvent事件,并将一条消息作为参数传递给父组件。
最后,在主模块中引入父组件和子组件:
import { NgModule } from '@angular/core';
import { BrowserModule } from '@angular/platform-browser';

import { AppComponent } from './app.component';
import { ParentComponent } from './parent.component';
import { ChildComponent } from './child.component';

@NgModule({
  declarations: [AppComponent, ParentComponent, ChildComponent],
  imports: [BrowserModule],
  providers: [],
  bootstrap: [AppComponent]
})
export class AppModule {}
通过以上示例代码,我们展示了使用输入属性和输出属性进行父子组件通信的实例。父组件向子组件传递数据,子组件将其显示在页面上,并且子组件可以通过事件触发器将消息发送回父组件。
结论
在Angular应用程序中,父子组件通信是一项重要的功能。本文详细介绍了几种常用的父子组件通信方法,包括输入属性、输出属性、服务和ViewChild与ContentChild。通过示例代码的解释说明,读者可以更好地理解如何在Angular中实现父子组件之间的通信。希望本文对您的学习有所帮助。
本文来自互联网用户投稿,该文观点仅代表作者本人,不代表本站立场。本站仅提供信息存储空间服务,不拥有所有权,不承担相关法律责任。 如若内容造成侵权/违法违规/事实不符,请联系我的编程经验分享网邮箱:chenni525@qq.com进行投诉反馈,一经查实,立即删除!
- Python教程
- 深入理解 MySQL 中的 HAVING 关键字和聚合函数
- Qt之QChar编码(1)
- MyBatis入门基础篇
- 用Python脚本实现FFmpeg批量转换
- DMX512输出协议详解
- MNIST内置手写数字数据集的实现
- 【卡梅德生物】蛋白表达之酵母表达载体
- 英语学习: think well of think highy of
- SAP-PM:创建订单失败,AUFTRAG对象缺失
- 【SpringBoot开发】之商城项目案例(购物车相关操作)
- 03进程基础-学习笔记
- c++算法之贪心
- Shell脚本与计划任务
- Windows系统缺失api-ms-win-crt-runtime-l1-1-0.dll的修复方法