ELK之集群安全认证设置
一、生成ca证书(p12文件)
进入/usr/share/elasticsearch/bin 安装路径中,执行./elasticsearch-certutil ca 一路回车
[root@sg bin]# pwd
/usr/share/elasticsearch/bin
[root@sg bin]# ls
elasticsearch           elasticsearch-croneval       elasticsearch-keystore  elasticsearch-saml-metadata    elasticsearch-sql-cli             systemd-entrypoint
elasticsearch-certgen   elasticsearch-env            elasticsearch-migrate   elasticsearch-service-tokens   elasticsearch-sql-cli-7.17.4.jar  x-pack-env
elasticsearch-certutil  elasticsearch-env-from-file  elasticsearch-node      elasticsearch-setup-passwords  elasticsearch-syskeygen           x-pack-security-env
elasticsearch-cli       elasticsearch-geoip          elasticsearch-plugin    elasticsearch-shard            elasticsearch-users               x-pack-watcher-env
[root@sg bin]# ./elasticsearch-certutil ca
warning: usage of JAVA_HOME is deprecated, use ES_JAVA_HOME
Future versions of Elasticsearch will require Java 11; your Java version from [/usr/local/jdk1.8.0_171/jre] does not meet this requirement. Consider switching to a distribution of Elasticsearch with a bundled JDK. If you are already using a distribution with a bundled JDK, ensure the JAVA_HOME environment variable is not set.
This tool assists you in the generation of X.509 certificates and certificate
signing requests for use with SSL/TLS in the Elastic stack.

The 'ca' mode generates a new 'certificate authority'
This will create a new X.509 certificate and private key that can be used
to sign certificate when running in 'cert' mode.

Use the 'ca-dn' option if you wish to configure the 'distinguished name'
of the certificate authority

By default the 'ca' mode produces a single PKCS#12 output file which holds:
    * The CA certificate
    * The CA's private key

If you elect to generate PEM format certificates (the -pem option), then the output will
be a zip file containing individual files for the CA certificate and private key

Please enter the desired output file [elastic-stack-ca.p12]:
Enter password for elastic-stack-ca.p12 :
[root@sg bin]#
在bin同级目录生成了elastic-stack-ca.p12 文件:

二、生成私钥
进入bin目录,执行 ./elasticsearch-certutil cert --ca elastic-stack-ca.p12 一路回车:
[root@sg elasticsearch]# cd bin/
[root@sg bin]# ./elasticsearch-certutil cert --ca elastic-stack-ca.p12
warning: usage of JAVA_HOME is deprecated, use ES_JAVA_HOME
Future versions of Elasticsearch will require Java 11; your Java version from [/usr/local/jdk1.8.0_171/jre] does not meet this requirement. Consider switching to a distribution of Elasticsearch with a bundled JDK. If you are already using a distribution with a bundled JDK, ensure the JAVA_HOME environment variable is not set.
This tool assists you in the generation of X.509 certificates and certificate
signing requests for use with SSL/TLS in the Elastic stack.

The 'cert' mode generates X.509 certificate and private keys.
    * By default, this generates a single certificate and key for use
       on a single instance.
    * The '-multiple' option will prompt you to enter details for multiple
       instances and will generate a certificate and key for each one
    * The '-in' option allows for the certificate generation to be automated by describing
       the details of each instance in a YAML file

    * An instance is any piece of the Elastic Stack that requires an SSL certificate.
      Depending on your configuration, Elasticsearch, Logstash, Kibana, and Beats
      may all require a certificate and private key.
    * The minimum required value for each instance is a name. This can simply be the
      hostname, which will be used as the Common Name of the certificate. A full
      distinguished name may also be used.
    * A filename value may be required for each instance. This is necessary when the
      name would result in an invalid file or directory name. The name provided here
      is used as the directory name (within the zip) and the prefix for the key and
      certificate files. The filename is required if you are prompted and the name
      is not displayed in the prompt.
    * IP addresses and DNS names are optional. Multiple values can be specified as a
      comma separated string. If no IP addresses or DNS names are provided, you may
      disable hostname verification in your SSL configuration.

    * All certificates generated by this tool will be signed by a certificate authority (CA)
      unless the --self-signed command line option is specified.
      The tool can automatically generate a new CA for you, or you can provide your own with
      the --ca or --ca-cert command line options.

By default the 'cert' mode produces a single PKCS#12 output file which holds:
    * The instance certificate
    * The private key for the instance certificate
    * The CA certificate

If you specify any of the following options:
    * -pem (PEM formatted output)
    * -keep-ca-key (retain generated CA key)
    * -multiple (generate multiple certificates)
    * -in (generate certificates from an input file)
then the output will be be a zip file containing individual certificate/key files

Enter password for CA (elastic-stack-ca.p12) :
Please enter the desired output file [elastic-certificates.p12]:
Enter password for elastic-certificates.p12 :

Certificates written to /usr/share/elasticsearch/elastic-certificates.p12

This file should be properly secured as it contains the private key for
your instance.

This file is a self contained file and can be copied and used 'as is'
For each Elastic product that you wish to configure, you should copy
this '.p12' file to the relevant configuration directory
and then follow the SSL configuration instructions in the product guide.

For client applications, you may only need to copy the CA certificate and
configure the client to trust this certificate.
在bin同级目录生成了elastic-certificates.p12 文件:

三、拷贝秘钥到所有node节点
在所有node节点下,在 /etc/elasticsearch 目录中创建 certs 文件夹
将elastic-certificates.p12 文件拷贝到certs 目录下(注:是所有的node节点对应的/etc/elasticsearch/certs)
四、编辑配置文件
集群各个节点都执行:
编辑配置文件/etc/elasticsearch/elasticsearch.yml
添加如下内容:
# ---------------------------------- Security ----------------------------------
# 开启对外访问安全认证
xpack.security.enabled: true
xpack.license.self_generated.type: basic

# 开启集群内部通信安全认证
xpack.security.transport.ssl.enabled: true
xpack.security.transport.ssl.verification_mode: certificate
xpack.security.transport.ssl.keystore.path: certs/elastic-certificates.p12
xpack.security.transport.ssl.truststore.path: certs/elastic-certificates.p12
certs/elastic-certificates.p12为刚拷贝的秘钥文件相对路径
五、重启集群各个节点
systemctl restart elasticsearch.service
重新启动时,报错:Caused by: org.elasticsearch.ElasticsearchException: failed to initialize SSL TrustManager - not permitted to read truststore file [/etc/elasticsearch/certs/elastic-certificates.p12]
是说秘钥文件无需权限读取。

我们加入读权限:
chmod +r elastic-certificates.p12
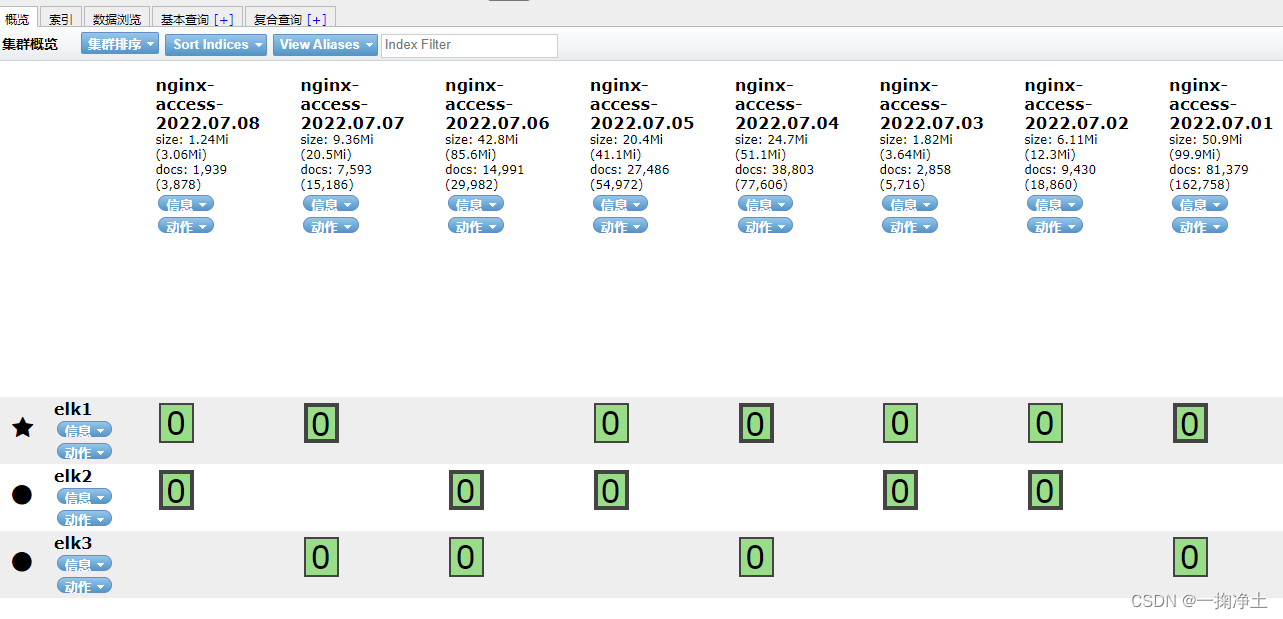
启动成功,如下图:

六、访问测试
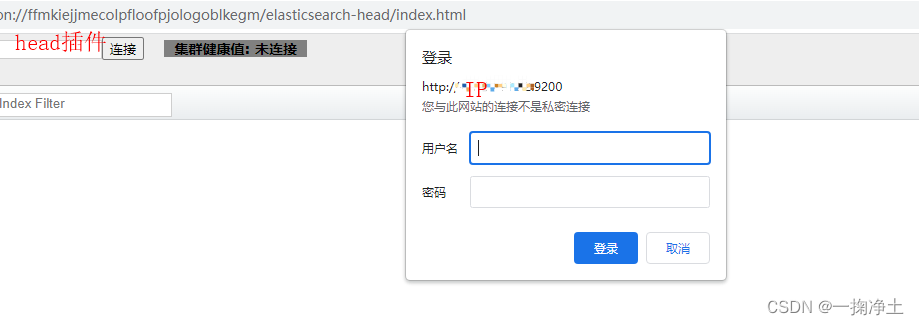
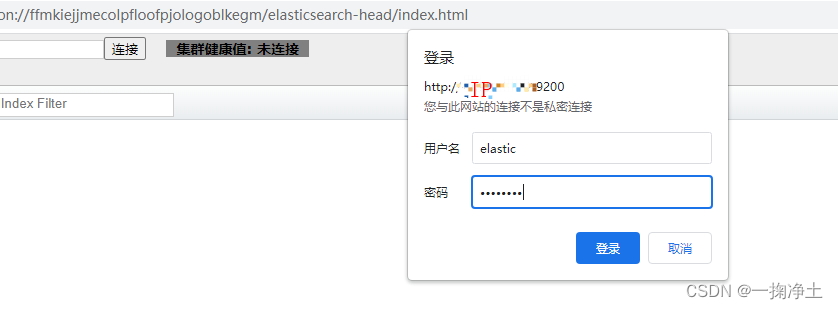
等所有节点都启动完毕后,访问ip:9200查看效果:

此时,我们还不知道密码是多少,之前都是一路回车的。故,需要在任意节点上配置密码:
elasticsearch-setup-passwords interactive
如下,按照提示,依次输入和确认密码即可。
[root@nb002 bin]# elasticsearch-setup-passwords interactive
-bash: elasticsearch-setup-passwords: 未找到命令
[root@nb002 bin]# ./elasticsearch-setup-passwords interactive
warning: usage of JAVA_HOME is deprecated, use ES_JAVA_HOME
Future versions of Elasticsearch will require Java 11; your Java version from [/usr/local/jdk1.8.0_331/jre] does not meet this requirement. Consider switching to a distribution of Elasticsearch with a bundled JDK. If you are already using a distribution with a bundled JDK, ensure the JAVA_HOME environment variable is not set.
Initiating the setup of passwords for reserved users elastic,apm_system,kibana,kibana_system,logstash_system,beats_system,remote_monitoring_user.
You will be prompted to enter passwords as the process progresses.
Please confirm that you would like to continue [y/N]y


Enter password for [elastic]:
Reenter password for [elastic]:
Enter password for [apm_system]:
Reenter password for [apm_system]:
Enter password for [kibana_system]:
Reenter password for [kibana_system]:
Enter password for [logstash_system]:
Reenter password for [logstash_system]:
Enter password for [beats_system]:
Reenter password for [beats_system]:
Enter password for [remote_monitoring_user]:
Reenter password for [remote_monitoring_user]:
Changed password for user [apm_system]
Changed password for user [kibana_system]
Changed password for user [kibana]
Changed password for user [logstash_system]
Changed password for user [beats_system]
Changed password for user [remote_monitoring_user]
Changed password for user [elastic]
七、密码测试


访问:Kibana,查看认证情况:
需要先编辑Kinaba的配置文件(/data/kibana-7.17.4/config/kibana.yml),设置elasticsearch的密码后,重启kibana
elasticsearch.username: "kibana_system"
elasticsearch.password: "你在上面设置的密码"

重启kibana后,访问http://YourIP:5601/ :

之前是不用登录的,现在必须登录啦:输入用户名elastic和上面你设置的密码登录,登录成功后,如下图:

END
本文来自互联网用户投稿,该文观点仅代表作者本人,不代表本站立场。本站仅提供信息存储空间服务,不拥有所有权,不承担相关法律责任。 如若内容造成侵权/违法违规/事实不符,请联系我的编程经验分享网邮箱:chenni525@qq.com进行投诉反馈,一经查实,立即删除!
- Python教程
- 深入理解 MySQL 中的 HAVING 关键字和聚合函数
- Qt之QChar编码(1)
- MyBatis入门基础篇
- 用Python脚本实现FFmpeg批量转换
- 神经网络——卷积层和池化层
- 【SSM】MyBatis
- Huffman树实现文件压缩
- Unity与Android交互通信系列(4)
- Linux世界的奇妙之旅:开源之道的探索与分享
- Lazada、阿里国际站测评,卖家如何通过自养号提高店铺商品的吸引力?
- 阿里云ingress配置时间超时的参数
- HarmonyOS应用开发者基础(初级)认证题库
- 20231217在Canonical 官网下载ubuntu-20.04.6以及通过rufus-4.3p写入U盘作为安装盘
- 提高Stable Diffusion渲染速度的技巧,来学习一下