springboot学习笔记(一)
发布时间:2023年12月20日
本期内容:
1.springboot安装
2.springboot Hello world
1.springboot安装:
参考:
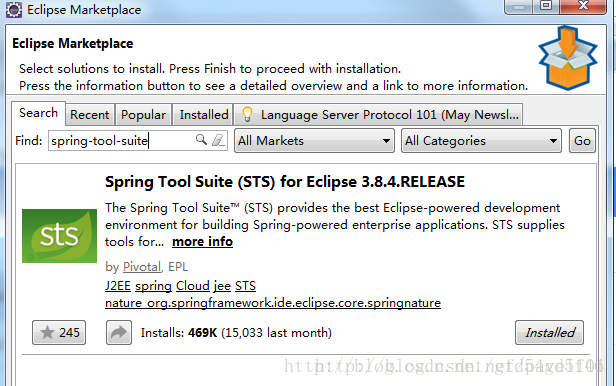
a. eclipse中打开help-->Eclipse Marketplace
b. 在search栏目下,输入:spring-tool-suite 或者 springboot
c. 找到Spring tool suite(STS) for Eclipse,点击installed安装即可安装好springboot插件。
这种方法可能会比较慢,可以通过下面的方法安装
?2.springboot Hello world
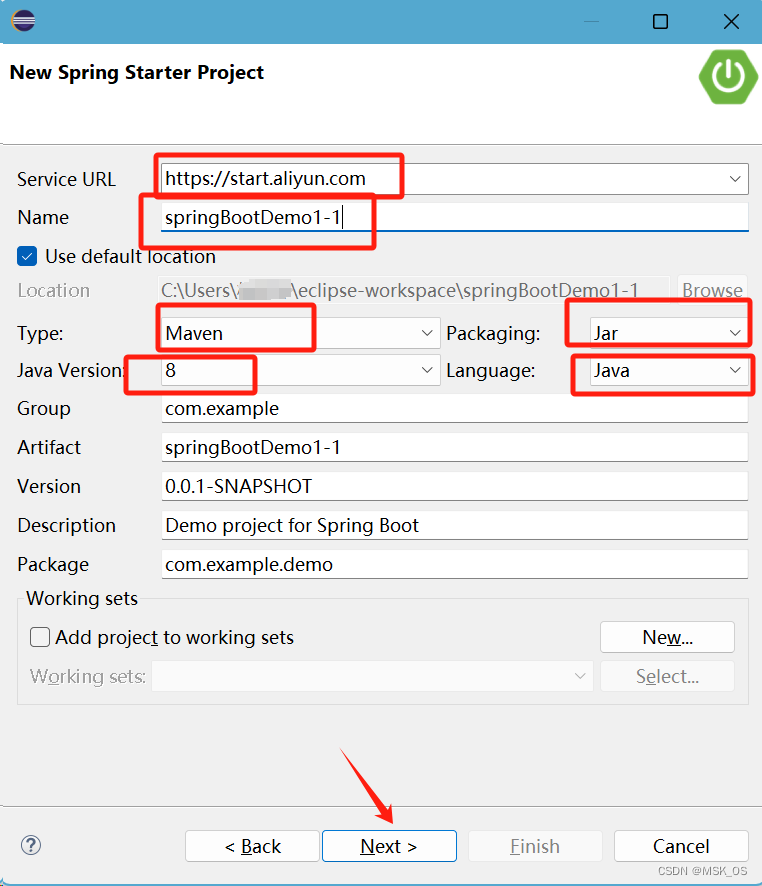
a.new Project 选择Spring Starter Project

b.填写对应项目信息
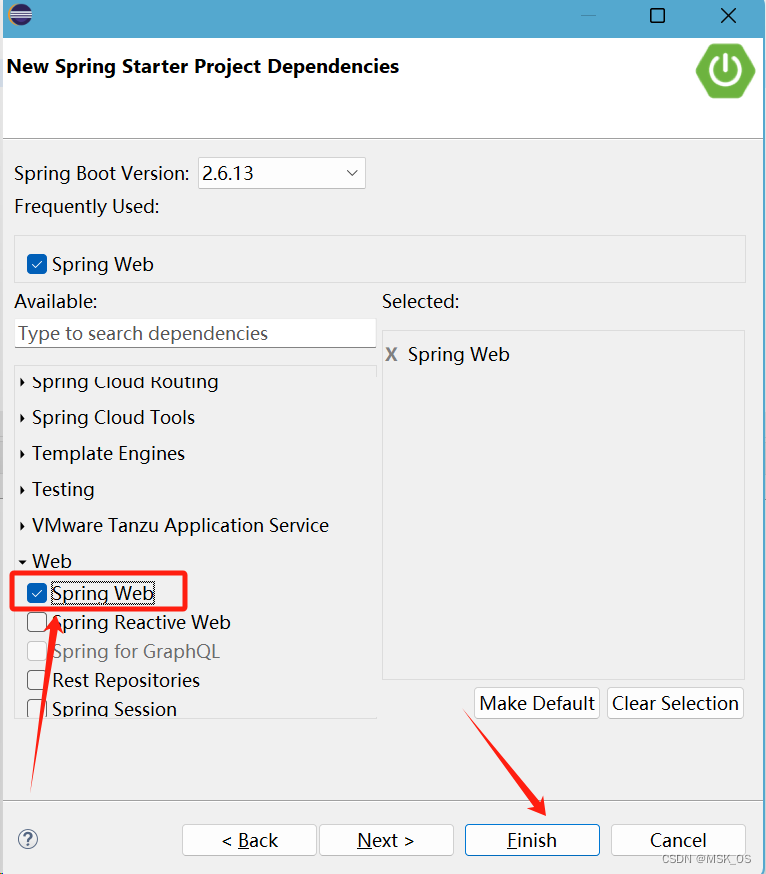
c.选择对应springboot版本和SpringWeb项目,点击完成
d.编写BasicController.java
 * Copyright 2013-2018 the original author or authors.
 *
 * Licensed under the Apache License, Version 2.0 (the "License");
 * you may not use this file except in compliance with the License.
 * You may obtain a copy of the License at
 *
 *      https://www.apache.org/licenses/LICENSE-2.0
 *
 * Unless required by applicable law or agreed to in writing, software
 * distributed under the License is distributed on an "AS IS" BASIS,
 * WITHOUT WARRANTIES OR CONDITIONS OF ANY KIND, either express or implied.
 * See the License for the specific language governing permissions and
 * limitations under the License.
 */

package com.example.demo.demos.web;

import org.springframework.stereotype.Controller;
import org.springframework.web.bind.annotation.ModelAttribute;
import org.springframework.web.bind.annotation.RequestMapping;
import org.springframework.web.bind.annotation.RequestParam;
import org.springframework.web.bind.annotation.ResponseBody;

@Controller
public class BasicController {

    // http://127.0.0.1:8080/hello?name=lisi
    @RequestMapping("/hello")
    @ResponseBody
    public String hello(@RequestParam(name = "name", defaultValue = "unknown user") String name) {
        return "Hello " + name;
    }


}
e.运行Springboot项目

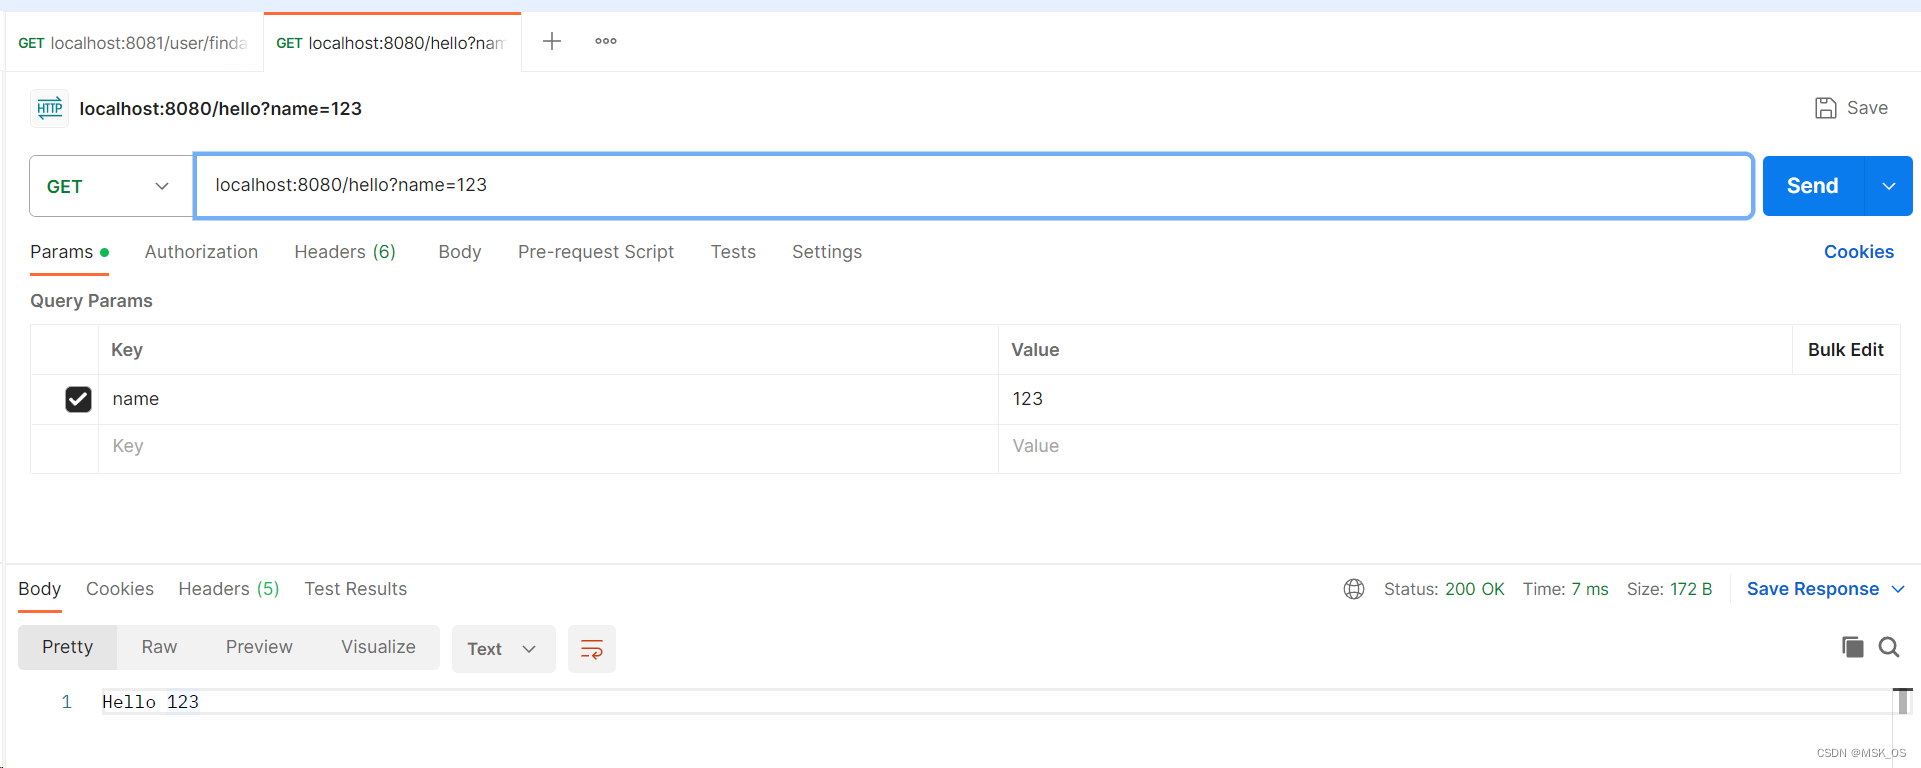
f. hello world
访问??localhost:8080/hello
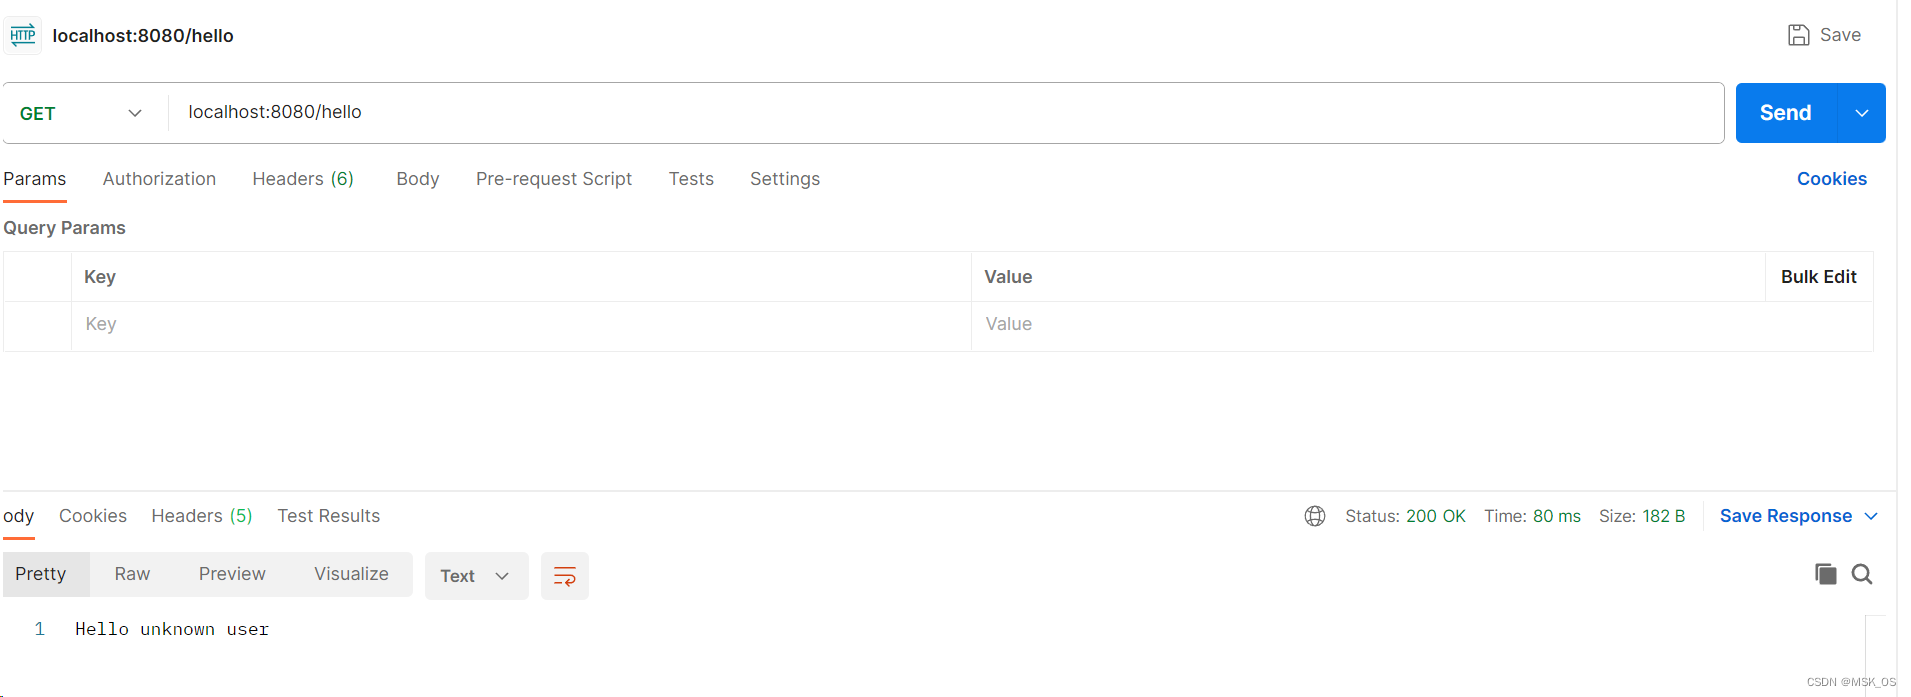
访问?localhost:8080/hello?name=123
文章来源:https://blog.csdn.net/qq_40377374/article/details/135078877
本文来自互联网用户投稿,该文观点仅代表作者本人,不代表本站立场。本站仅提供信息存储空间服务,不拥有所有权,不承担相关法律责任。 如若内容造成侵权/违法违规/事实不符,请联系我的编程经验分享网邮箱:chenni525@qq.com进行投诉反馈,一经查实,立即删除!
本文来自互联网用户投稿,该文观点仅代表作者本人,不代表本站立场。本站仅提供信息存储空间服务,不拥有所有权,不承担相关法律责任。 如若内容造成侵权/违法违规/事实不符,请联系我的编程经验分享网邮箱:chenni525@qq.com进行投诉反馈,一经查实,立即删除!
最新文章
- Python教程
- 深入理解 MySQL 中的 HAVING 关键字和聚合函数
- Qt之QChar编码(1)
- MyBatis入门基础篇
- 用Python脚本实现FFmpeg批量转换
- [bat]0基础实现自动化办公-新建bat脚本文件
- 【C++】约数
- 记一次金蝶云星空二次开发的基础资料,插入了150万数据后,业务单据操作后台创建基础资料保存报错
- redhat 9.0 制作openssh 9.6p1 rpm包(含ssh-copy-id) —— 筑梦之路
- YOLOv5改进 | 二次创新篇 | 结合iRMB和EMA形成全新的iEMA机制(全网独家创新)
- 基于51单片机的电子密码锁
- Neo4j 5建库
- 《微信小程序开发从入门到实战》学习七十九
- stable diffusion 进阶教程-controlnet详解(持续更新中)
- [MySQL binlog实战] 增量同步与数据搜索~从入门到精通