linux的安装与使用
虚拟机配置
pc服务器: redHat ,centos
移动端: ubuntu —-andriod/鸿蒙
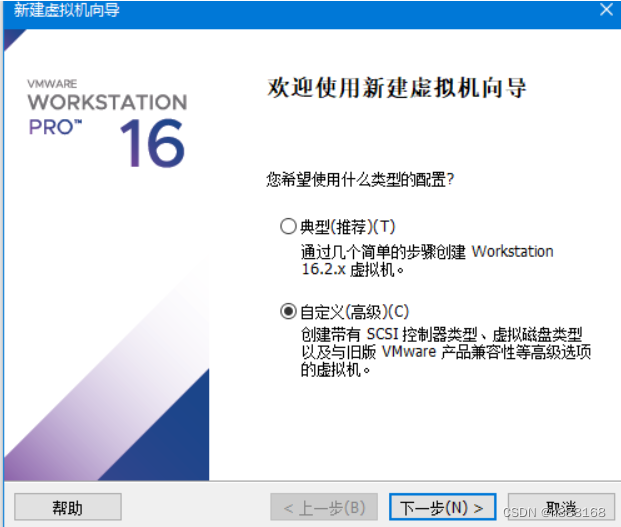
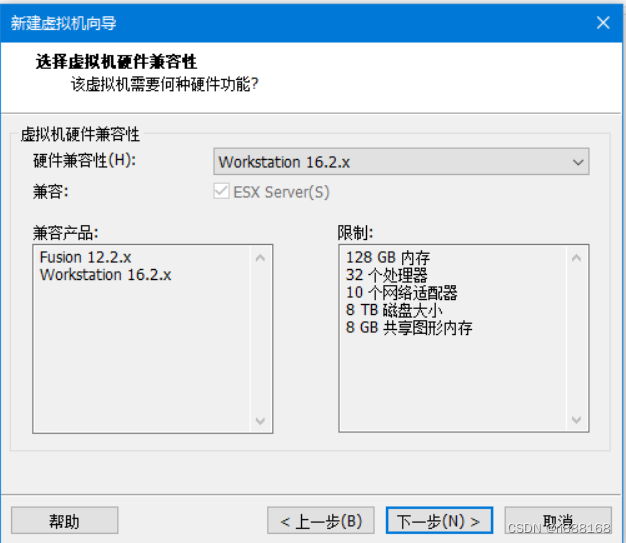
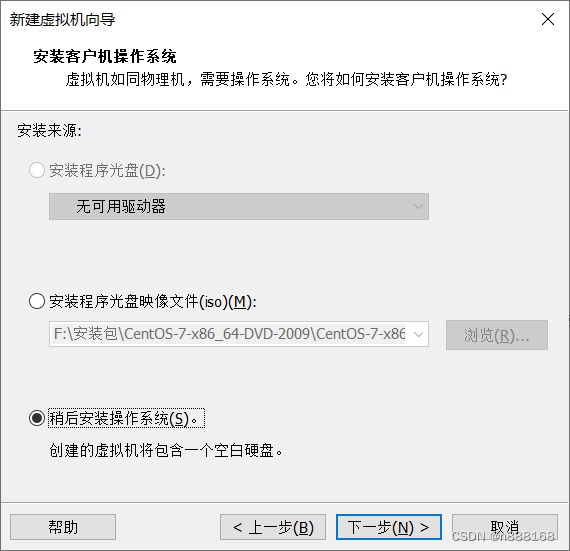
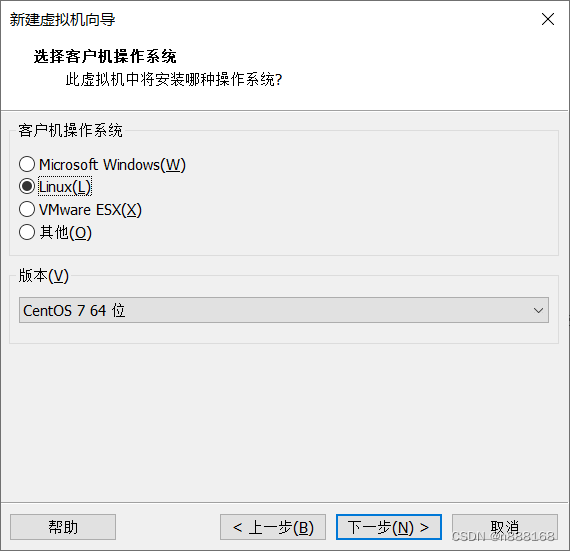
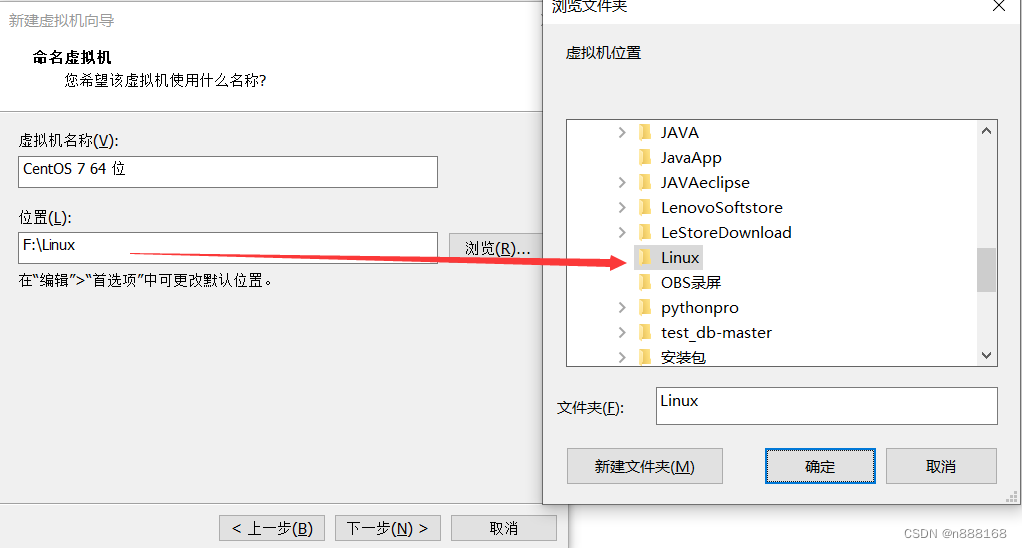
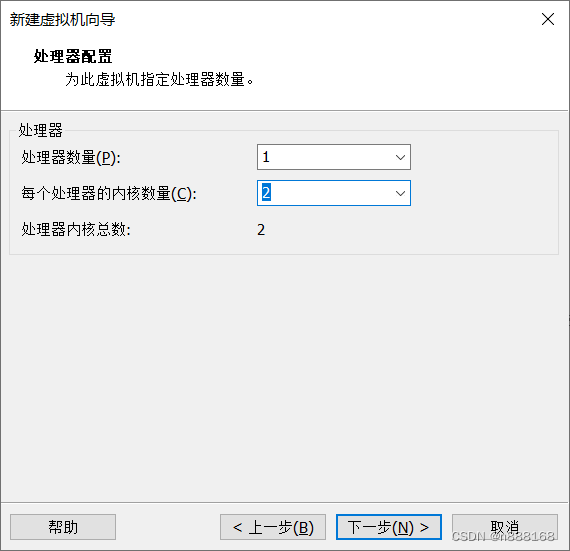
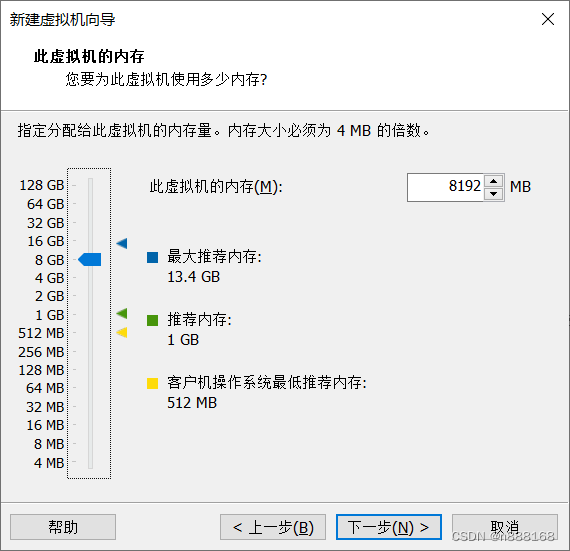
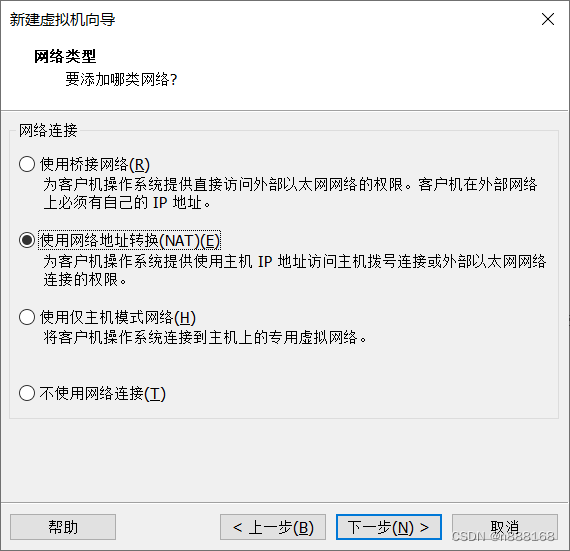
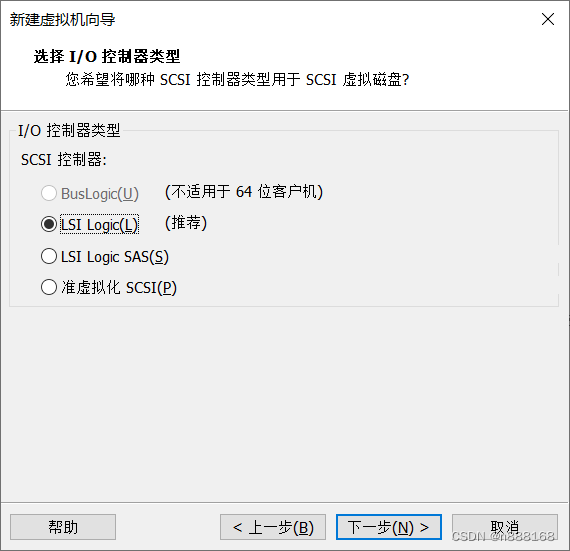
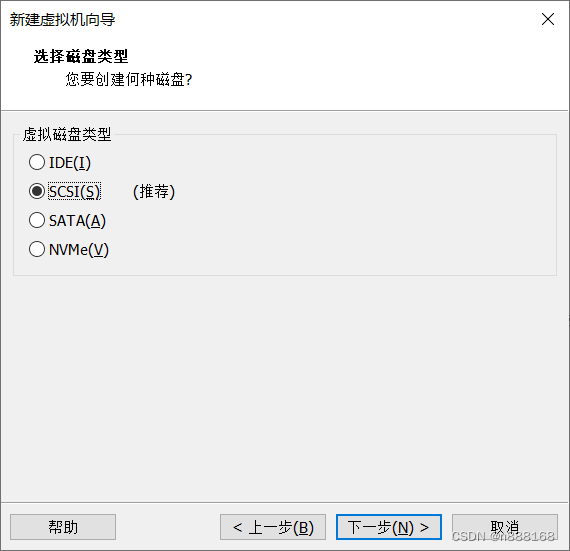
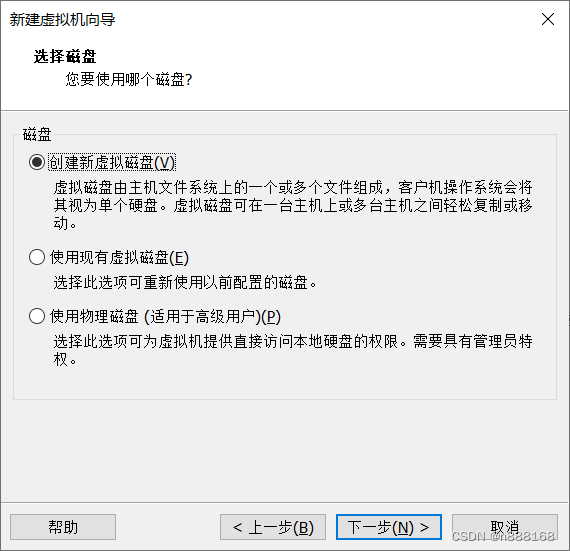
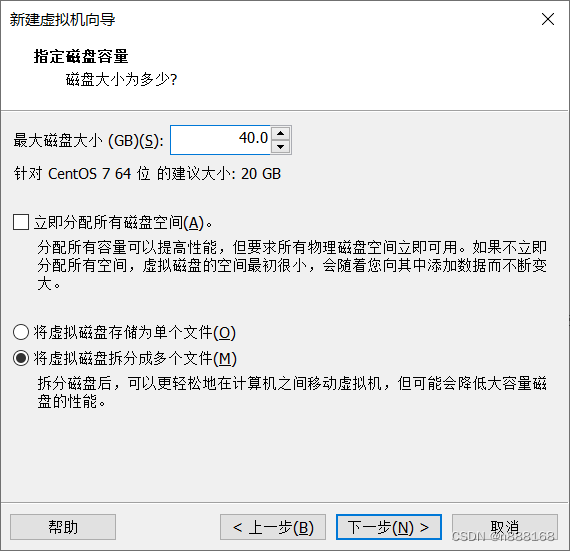
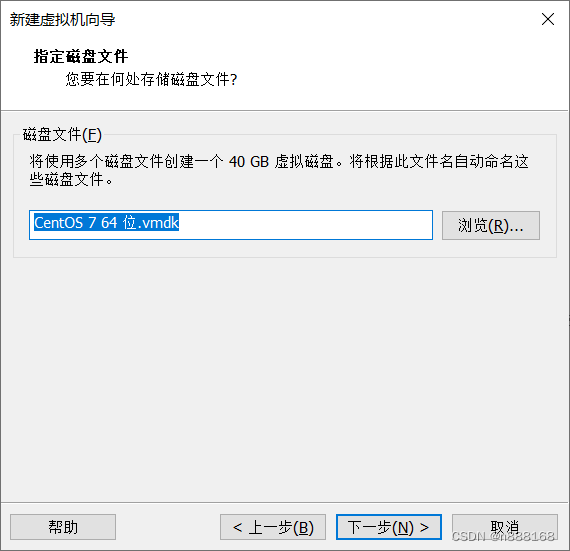
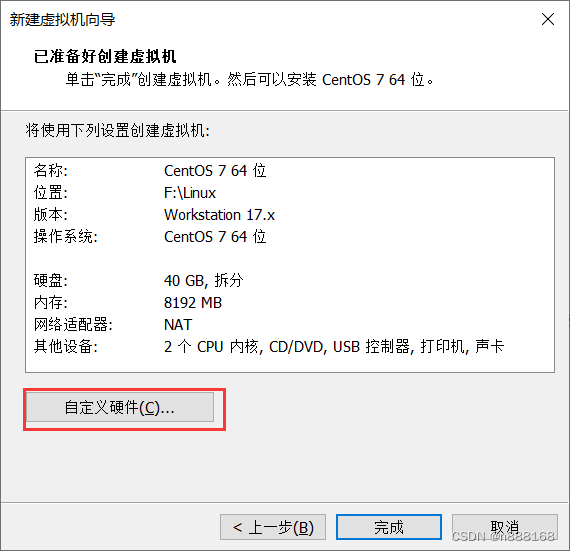
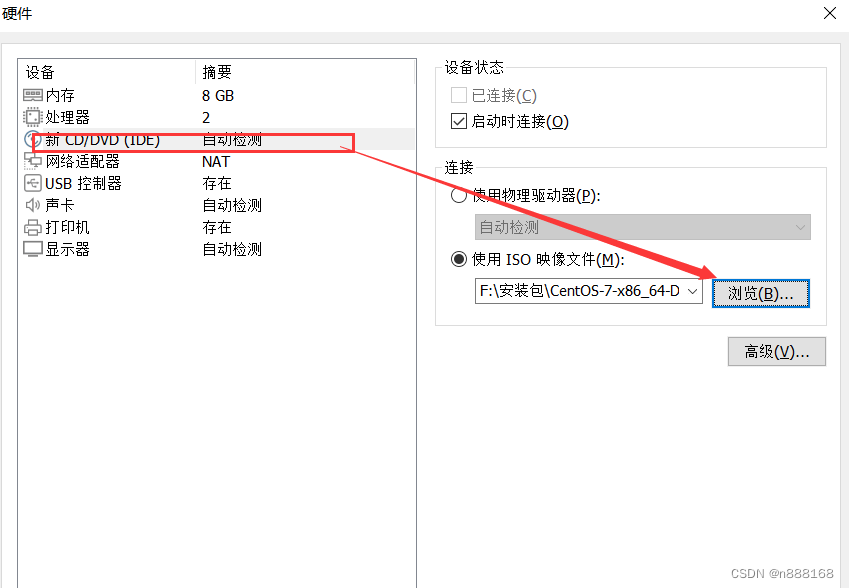
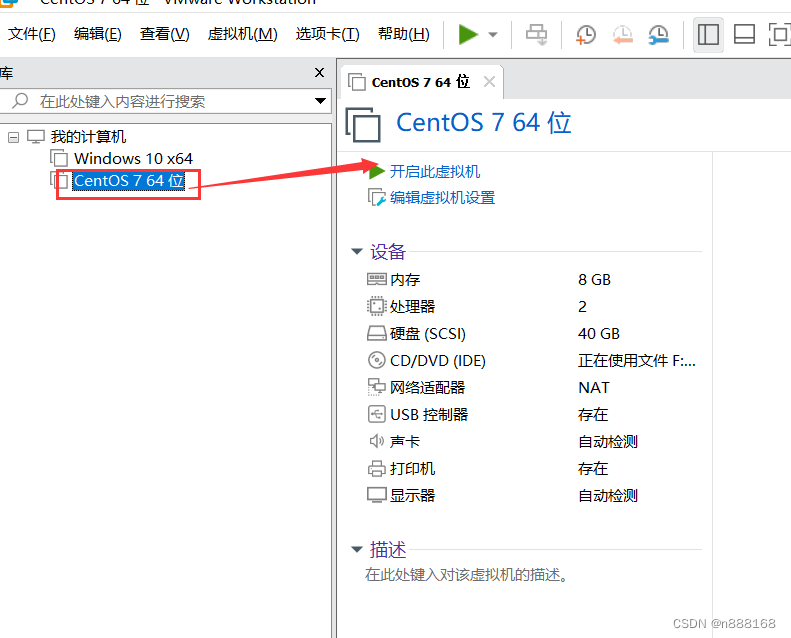
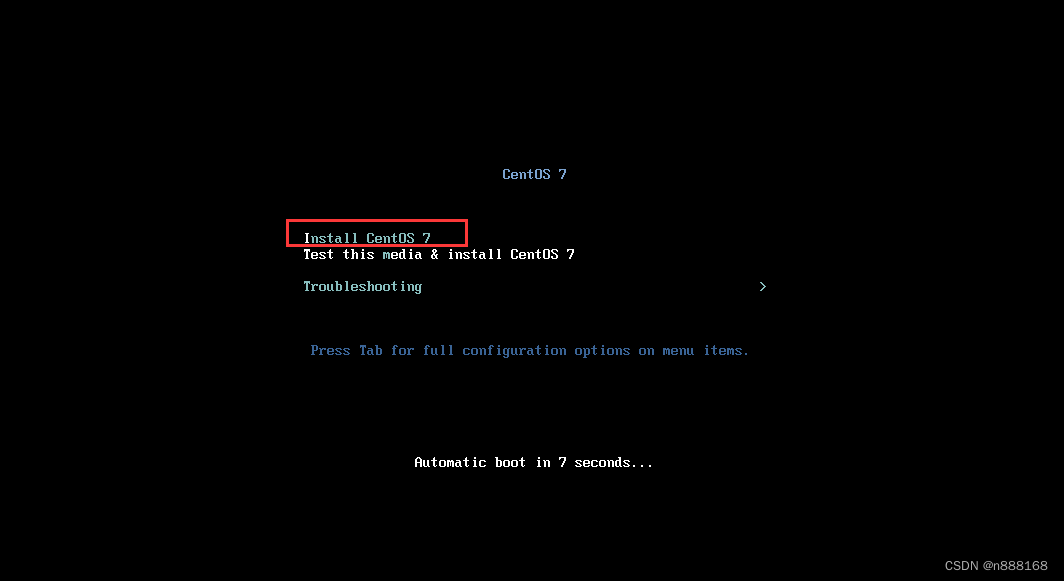
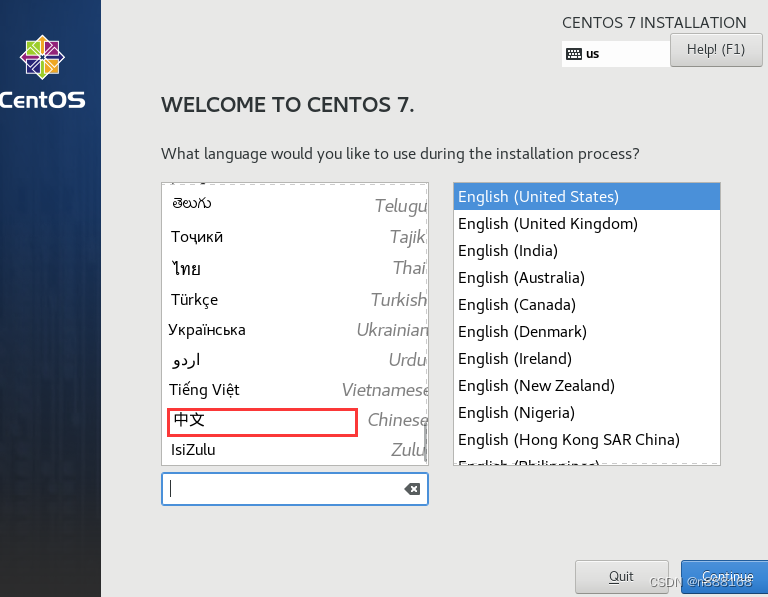
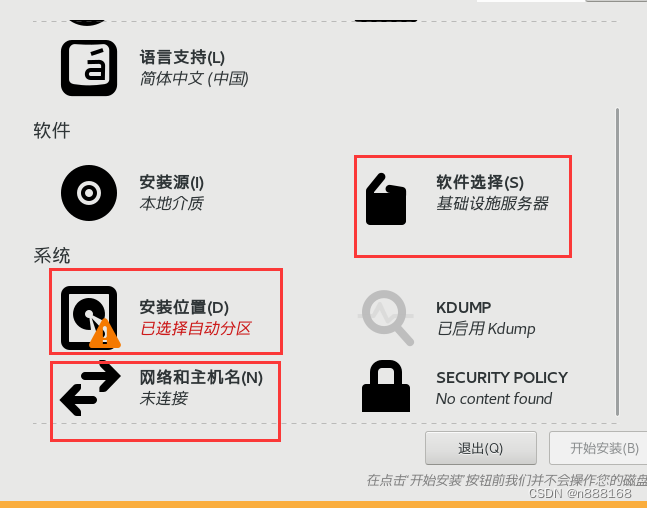
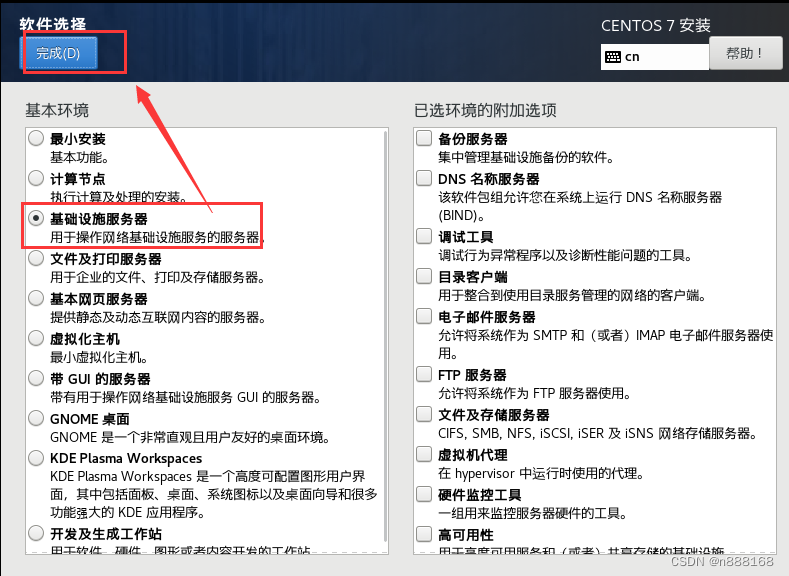
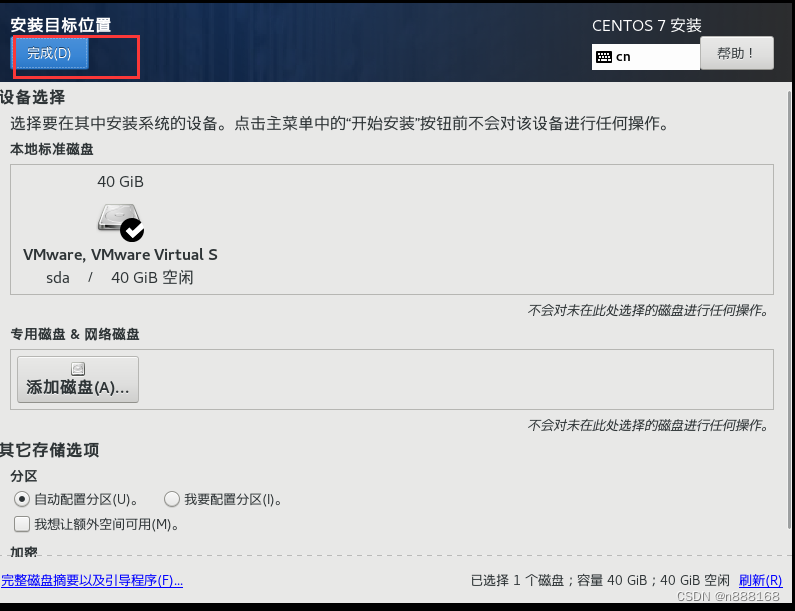
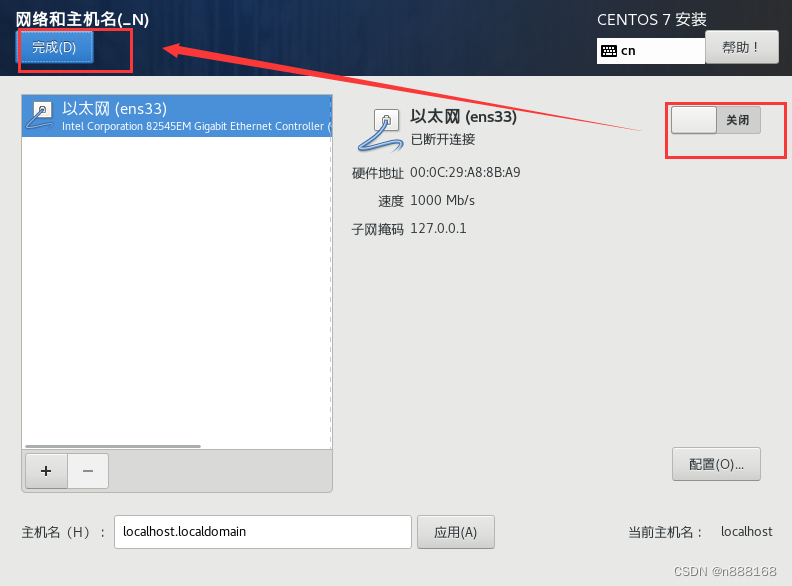
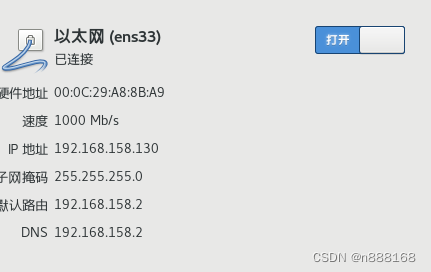
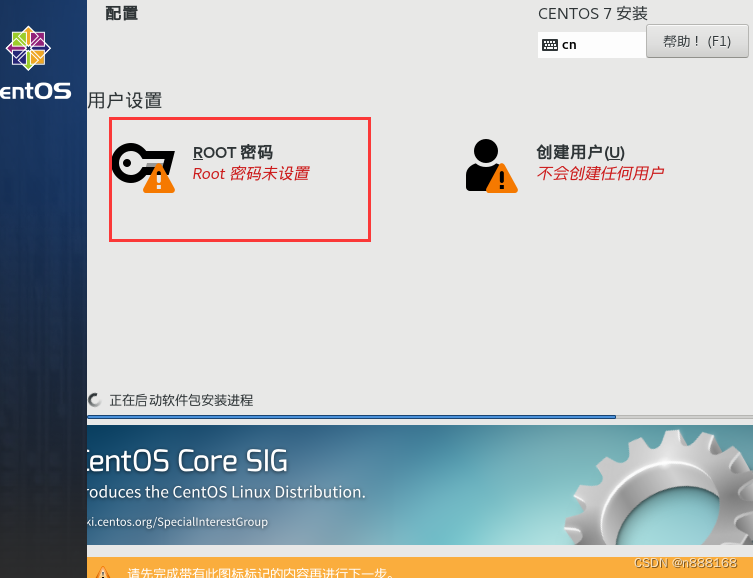
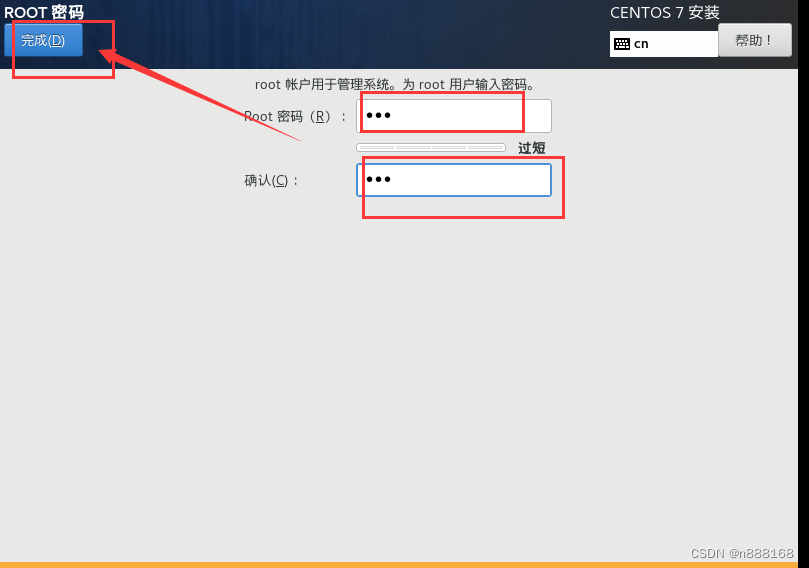
完成后重启
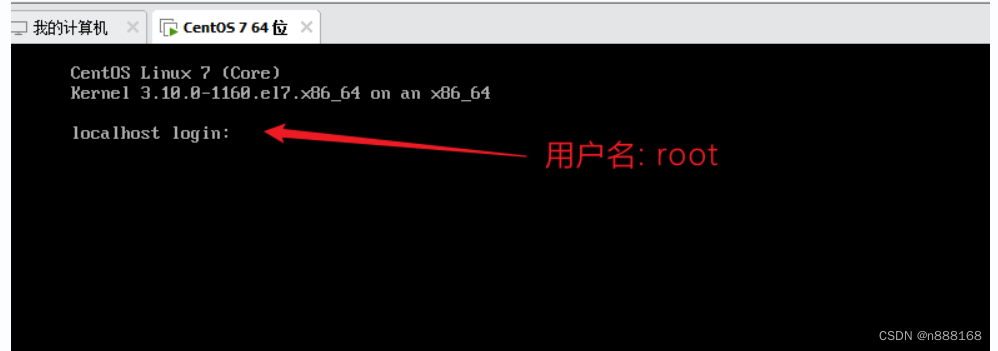

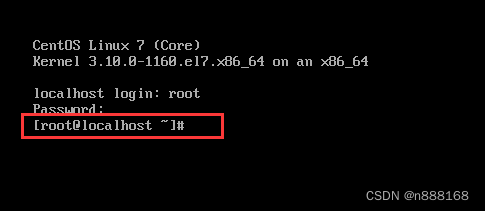
出现如下情况即为成功
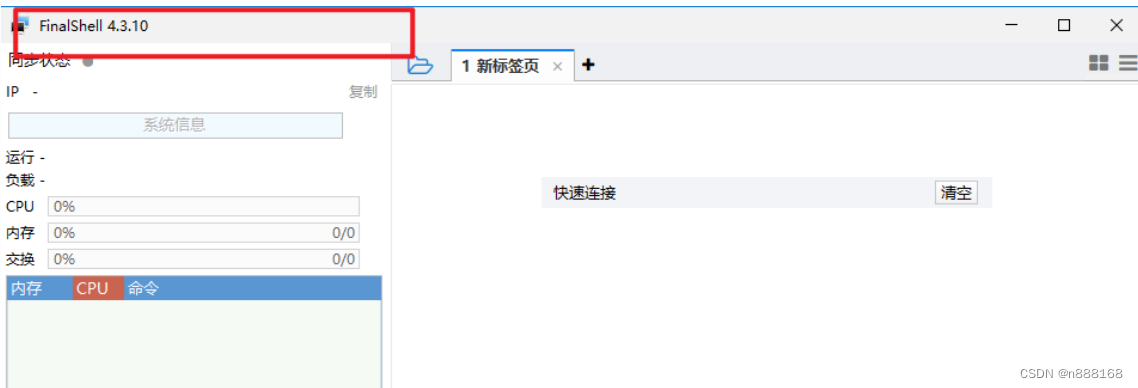
远程连接linux

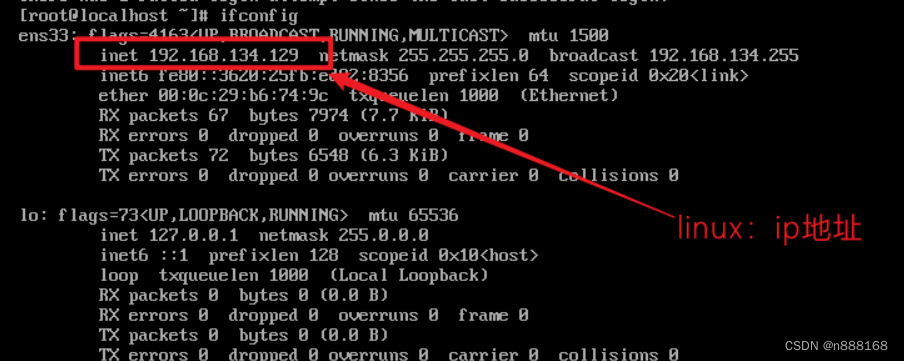
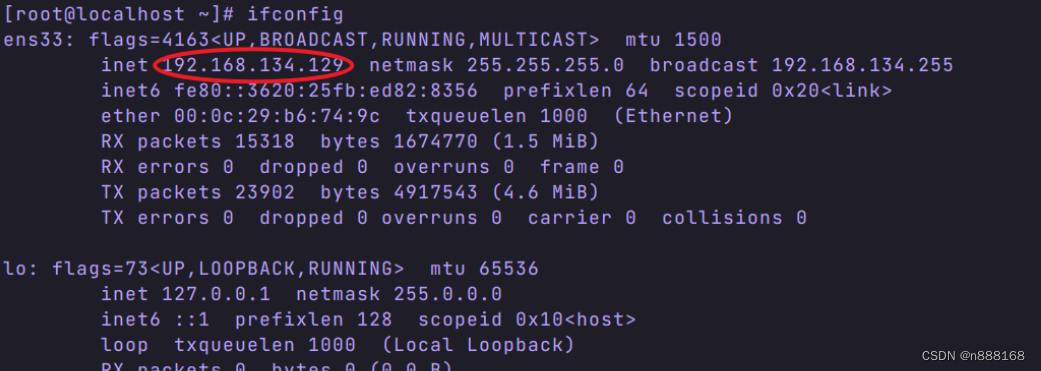
在linux输入ifconfig命令,得到linux的ip地址
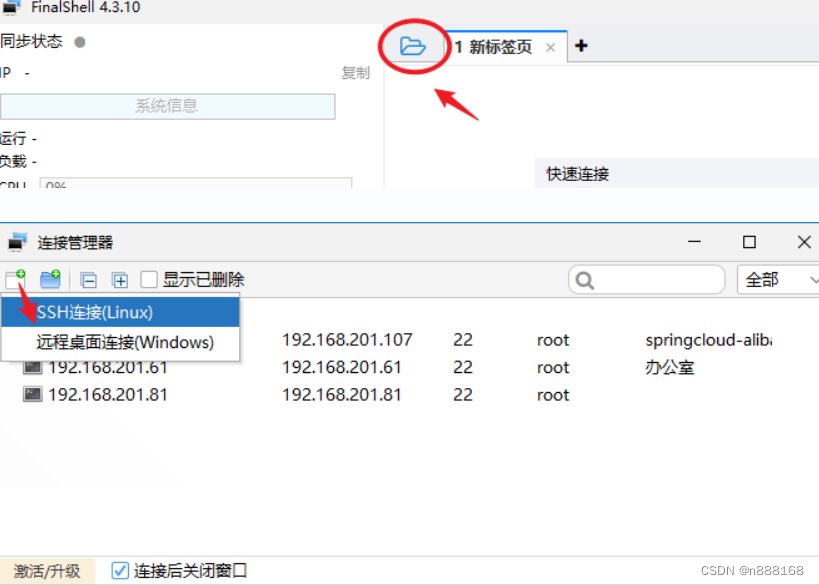
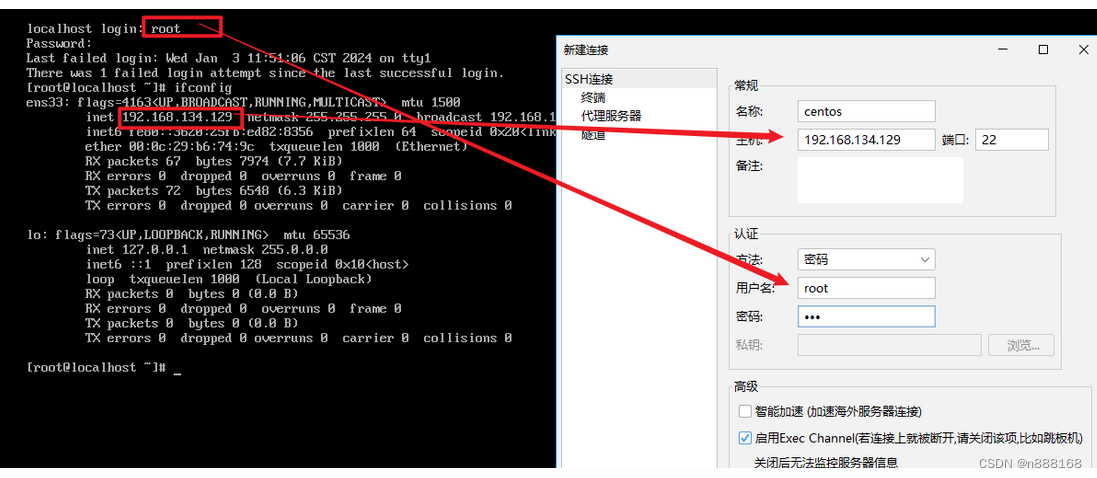
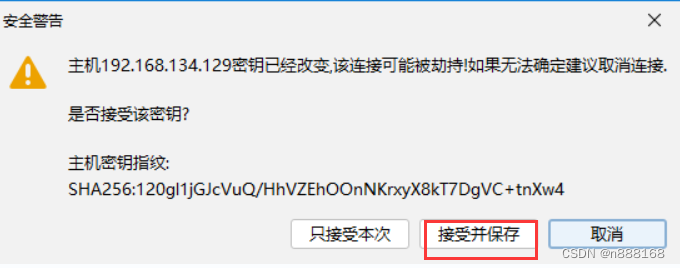
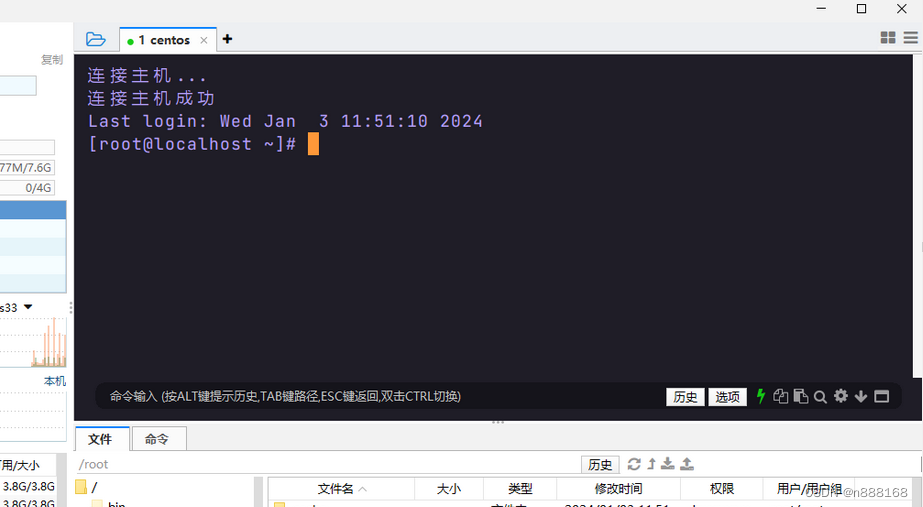
双击打开contos

链接成功,则如下显示
VM高级配置
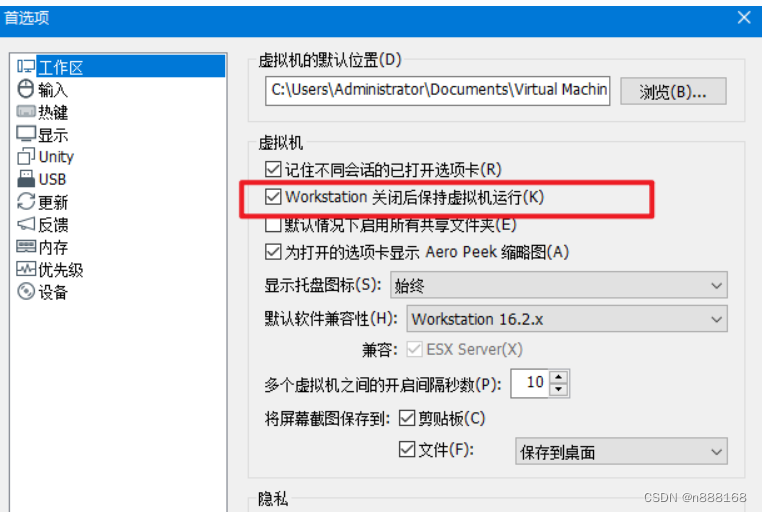
虚拟机后台运行

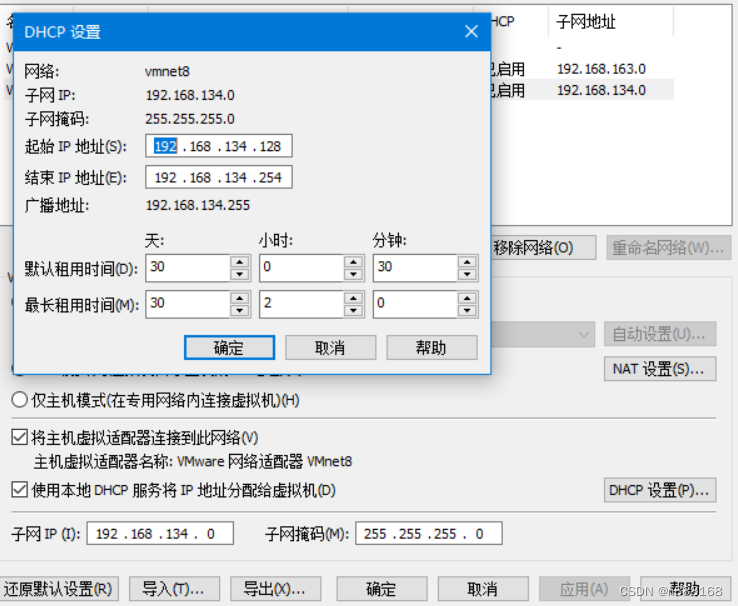
虚拟机租用服务

linux测试
ifconfig(L)/ipconfig(w)
windows

linux
ping
linux访问windows

windows —>linux

测试是否能够访问外网 ping 外网ip

docker的基本概念
什么是docker?
Docker is an open platform for developing, shipping, and running applications. Docker enables you to separate your applications from your infrastructure so you can deliver software quickly. With Docker, you can manage your infrastructure in the same ways you manage your applications. By taking advantage of Docker’s methodologies for shipping, testing, and deploying code, you can significantly reduce the delay between writing code and running it in production.

docker vs VM
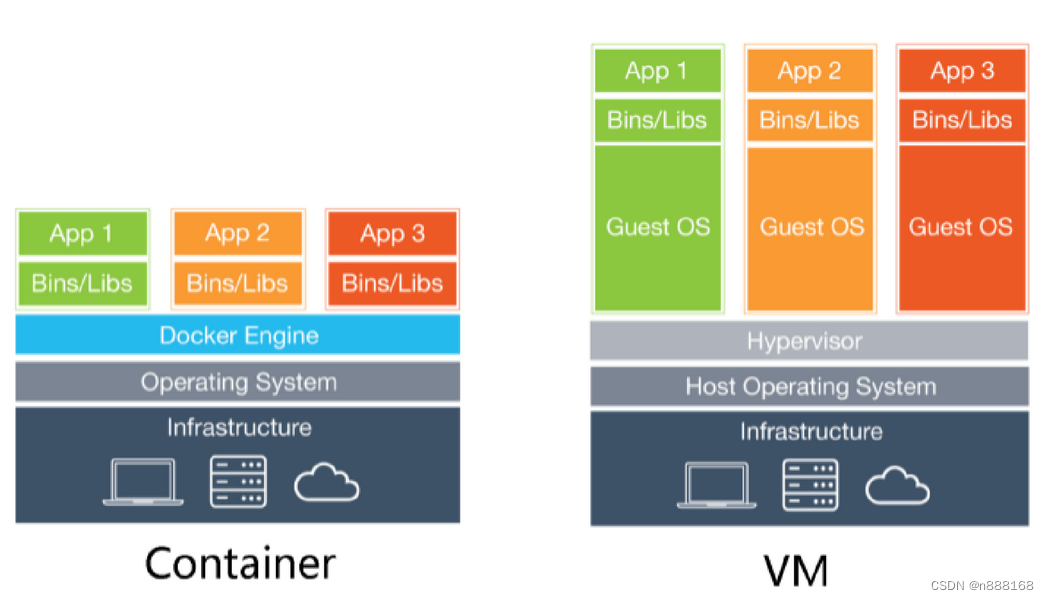
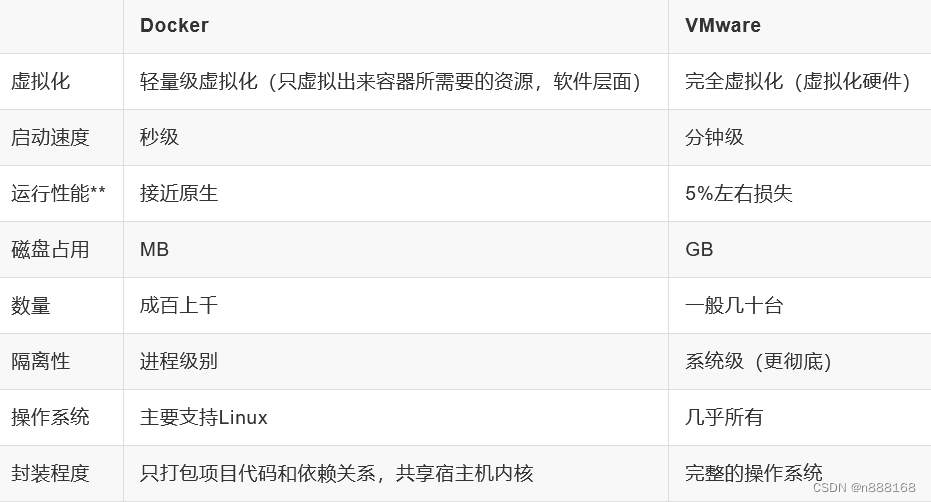
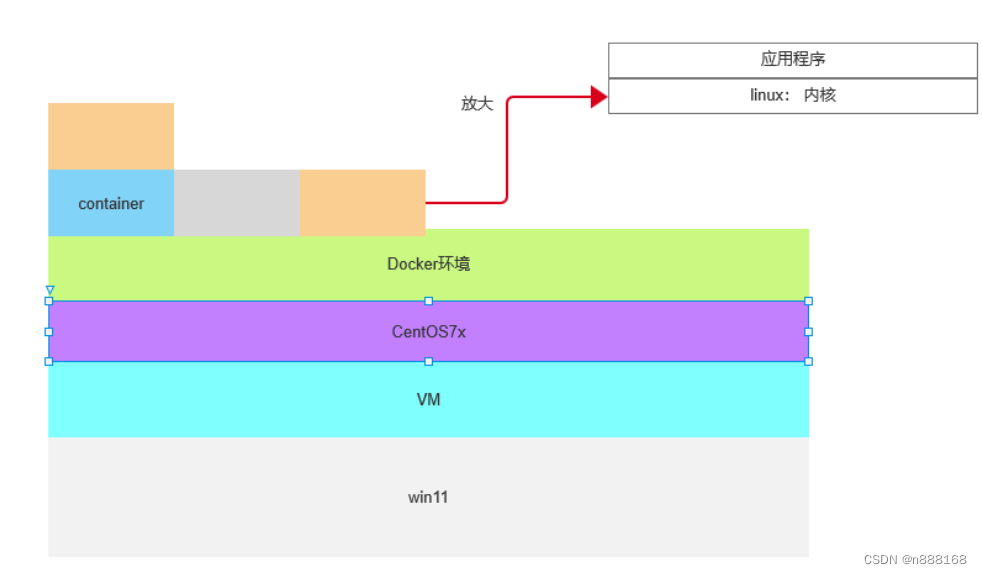
docker架构
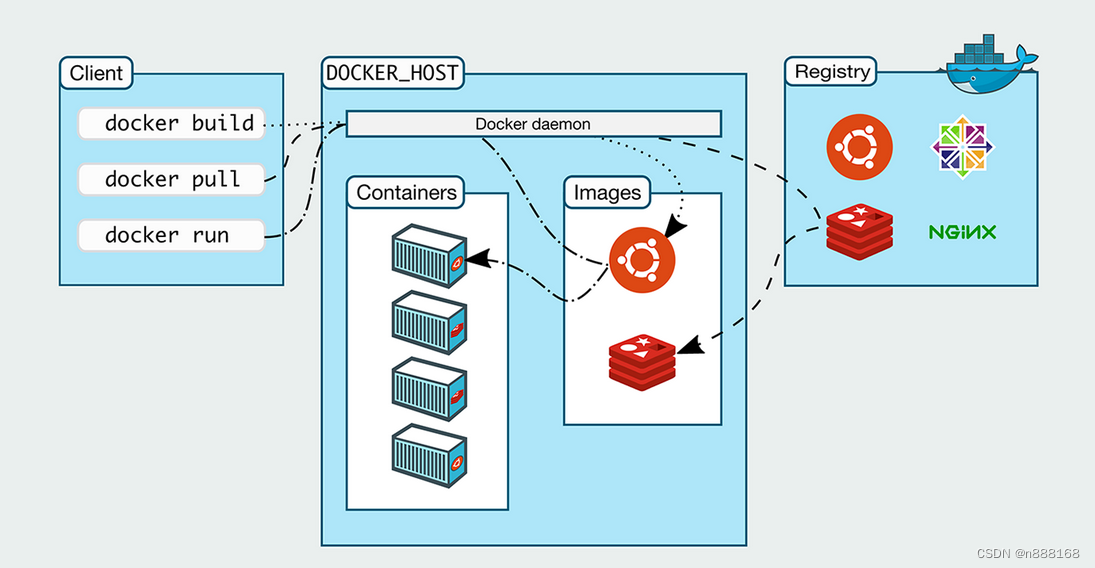
docker使用客户端-服务器架构。 Docker客户端(client) 与 守护进程(Docker daemon)进行对话,该守护进程 完成了构建、运行和分发 Docker 容器的繁重工作。
安装docker
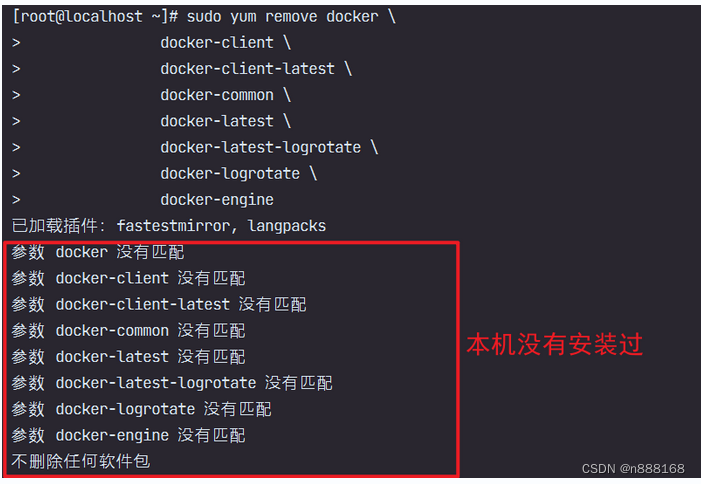
检查卸载之前docker
检查之前是否安装过docker,如果有使用: yum remove docker 卸载.
yum remove docker \docker-client \docker-client-latest \docker-common \docker-latest \docker-latest-logrotate \docker-logrotate \docker-engine
安装yum-utils
yum install -y yum-utils
Tips: yum install -y 命令 ,使用此命令安装其它工具。
[root@localhost ~]# yum install -y yum-utils已加载插件:fastestmirror, langpacksLoading mirror speeds from cached hostfile* base: mirrors.nju.edu.cn* extras: mirrors.nju.edu.cn* updates: mirrors.aliyun.combase | 3.6 kB 00:00:00extras | 2.9 kB 00:00:00updates | 2.9 kB 00:00:00软件包 yum-utils-1.1.31-54.el7_8.noarch 已安装并且是最新版本无须任何处理

配置阿里云镜像
[root@localhost ~]# yum-config-manager --add-repo http://mirrors.aliyun.com/docker-ce/linux/centos/docker-ce.repo已加载插件:fastestmirror, langpacksadding repo from: http://mirrors.aliyun.com/docker-ce/linux/centos/docker-ce.repograbbing file http://mirrors.aliyun.com/docker-ce/linux/centos/docker-ce.repo to /etc/yum.repos.d/docker-ce.reporepo saved to /etc/yum.repos.d/docker-ce.repo
更新CentOS
yum update

注:如有选择,全部选择y
列出docker源(如果需要指定docker源)
yum list docker-ce —showduplicates | sort -r

安装最新docker
yum install docker-ce docker-ce-cli containerd.io docker-compose-plugin

检查docker 版本号
[root@localhost ~]# docker -vDocker version 24.0.7, build cb74dfc
启动docker
运行docker systemctl start docker
,在系统启动时运行 systemctl enable docker。
[root@localhost ~]# systemctl start docker[root@localhost ~]# systemctl enable dockerCreated symlink from /etc/systemd/system/multi-user.target.wants/docker.service to /usr/lib/systemd/system/docker.service.

Doker容器配置
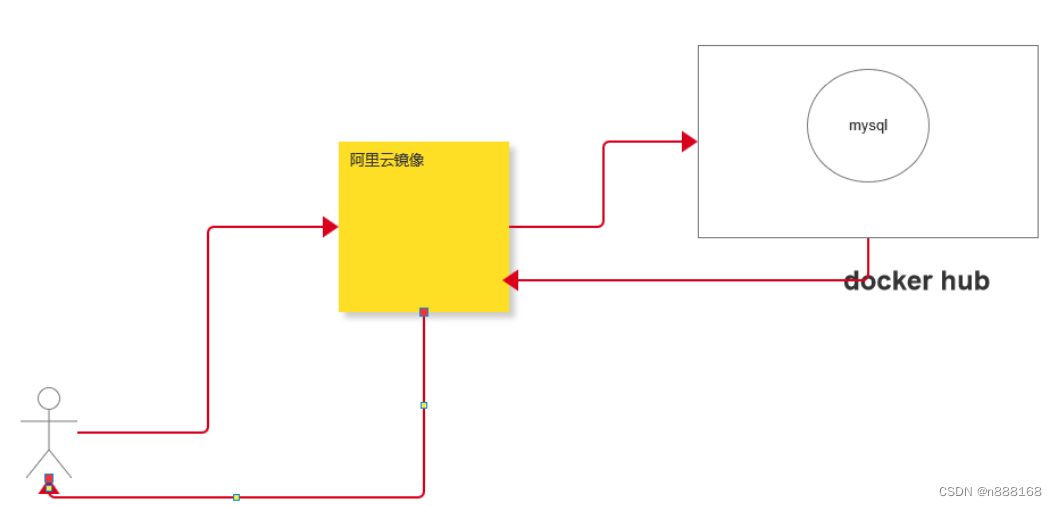
配置本地镜像库
从网络获取docker镜像太慢,设置阿里云的镜像库。
修改:/etc/docker/daemon.json文件
执行语句:vim /etc/docker/daemon.json
按 i 转换为插入模式
输入下面的内容:
{"registry-mirrors":["https://ung2thfc.mirror.aliyuncs.com"]}
输入完后按Esc,返回阅读模式
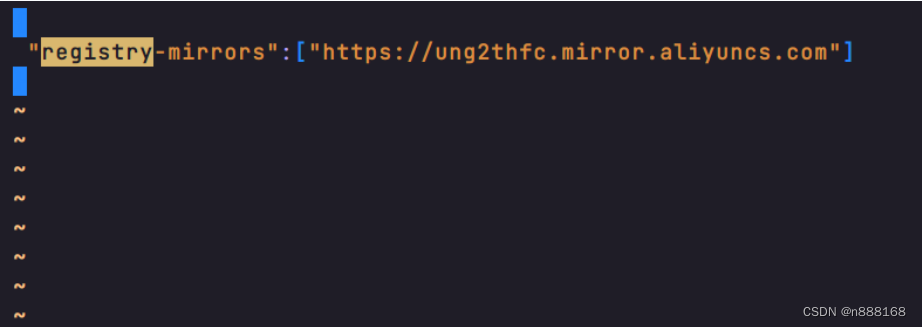
然后按shift+;(也就是:键),然后输入wq命令,按回车

结束后按如下操作:

配置完成后重启docker
[root@localhost ~]# systemctl restart docker
docker常见问题及解决方案
问题:IPv4 forwarding disabled
问题描述
IPv4 forwarding is disabled。网络不能联通。

解决方案
设置:net.ipv4.ip_forward = 1
vim /etc/sysctl.confnet.ipv4.ip_forward=1
保存&退出(:wq)
重启网络
systemctl restart network查看ipv4重定向值
[root@localhost ~]# sysctl net.ipv4.ip_forwardnet.ipv4.ip_forward = 1
问题: 容器中没有linux命令
问题描述

解决方案
更新容器中linux
apt-get update
root@1aba593b6c47:/etc/mysql# apt-get update
安装程序
apt-get install 命令
root@130dddbf14ee:/# apt-get install vim
初始linux

网络
ifconfig: 查询本机网络状态
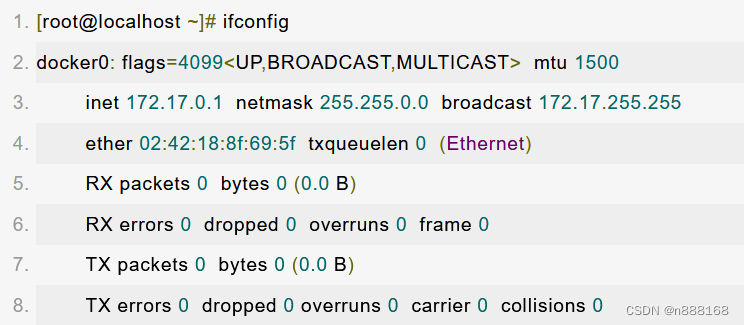
ping: 查询连接
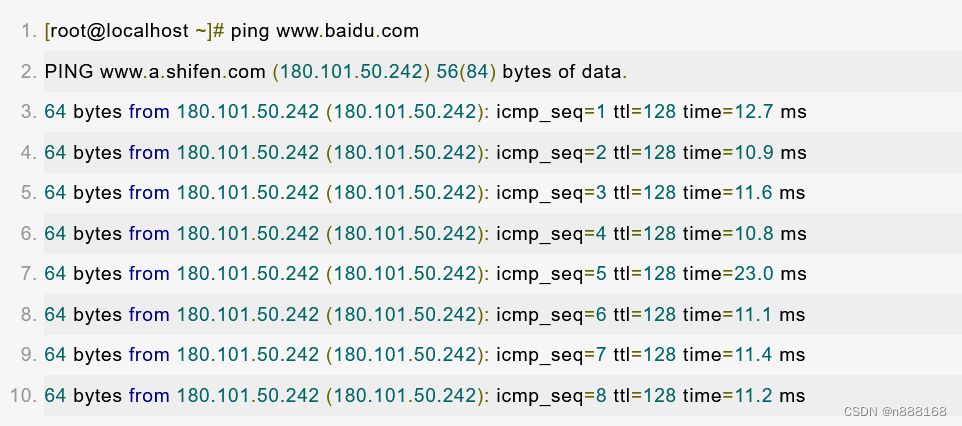
列出目录、文件
ls: list文件或文件夹
有困难找”man”。
windows的目录结构

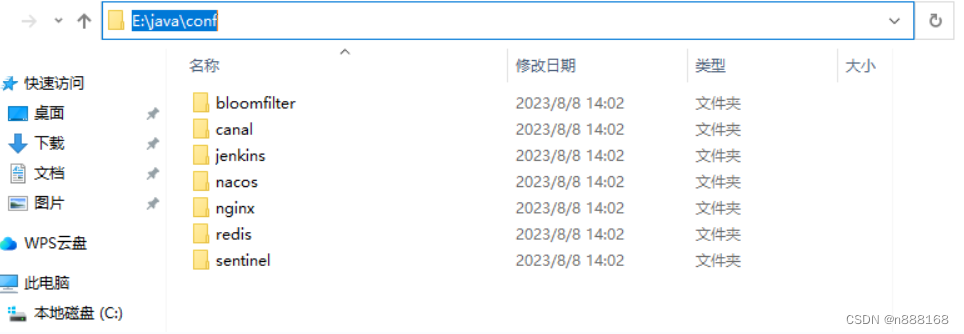
linux
ls
参数 -l —->ll查询文件的状态

绝对路径
/: 作为linux的绝对路径

cd
目录(文件夹)切换
pwd
查询当前的路径
[root@localhost bin]# pwd
whoami
[root@localhost bin]# whoami
创建一个文件夹
mkdir: make directory
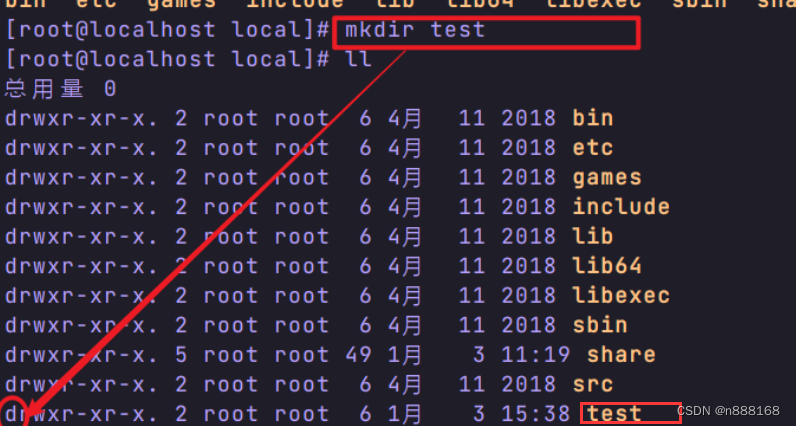
创建一个文件
touch 文件名.后缀

重命名
mv 原文件名 新文件名
vim
文本编辑器
创建文本
touch 文件名.后缀
打开文件
vim 文件名.后缀
编辑
进入编辑模式
使用键盘”i”键,或者”Insert”


进入命令模式
-
esc键,退出编辑状态
-
按键: shift+; 实际是冒号”:”

控制指令
- wq: 存储并退出
- q!: 强制退出
- : set number:显示行号
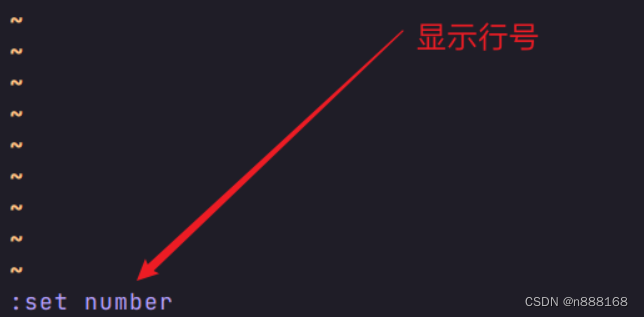
安装linux下的jdk
上传jdk到linux
/usr/local/software

解压jdk压缩包

配置
vim /etc/profile
JAVA_HOME
PATH
CLASSPATH
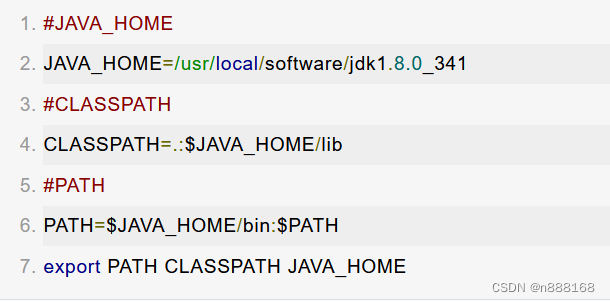
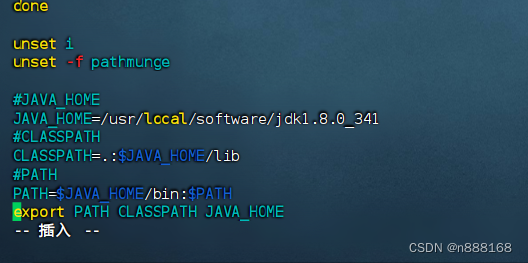
更新配置
source /etc/profile
springboot项目部署linux
如何开放linux端口
[root@localhost software]# firewall-cmd --add-port=11111/tcp --permanentsuccess[root@localhost software]# firewall-cmd --reloadsuccess

项目打包
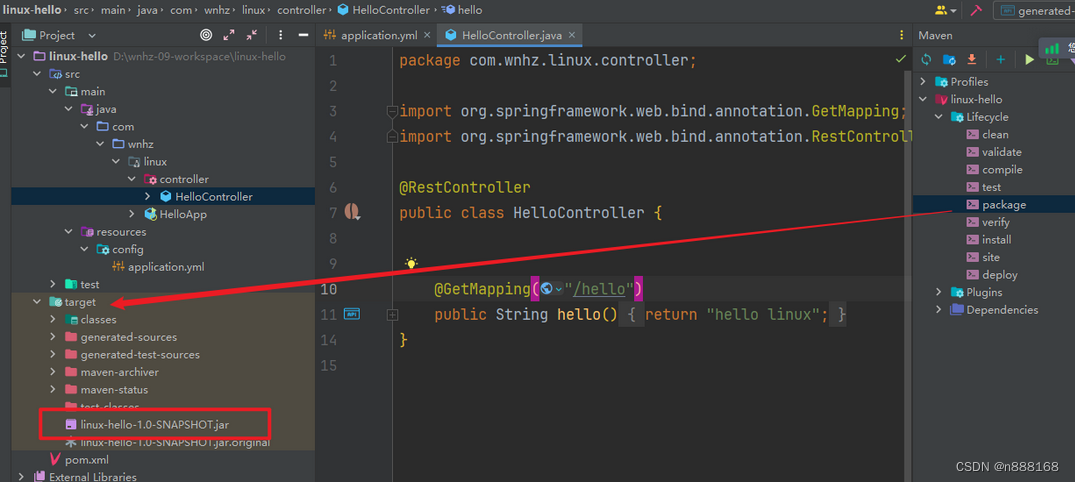
java -jar linux-hello-1.0-SNAPSHOT.jar
本文来自互联网用户投稿,该文观点仅代表作者本人,不代表本站立场。本站仅提供信息存储空间服务,不拥有所有权,不承担相关法律责任。 如若内容造成侵权/违法违规/事实不符,请联系我的编程经验分享网邮箱:chenni525@qq.com进行投诉反馈,一经查实,立即删除!
- Python教程
- 深入理解 MySQL 中的 HAVING 关键字和聚合函数
- Qt之QChar编码(1)
- MyBatis入门基础篇
- 用Python脚本实现FFmpeg批量转换
- FlagData 2.0:全面、高效的大模型训练数据治理工具集
- leetcode-hot100双指针专题
- Figma发展历程:从初创到设计行业巨头的演变与创新
- uniapp中uni-data-select下拉框组件如何去除边框?
- 基于ssm小区物业管理系统设计的论文
- 我发现了一个还行的生成图片的网站(新人登录可领30金币)
- 助力工业焊缝质量检测,YOLOv3开发构建工业焊接场景下钢材管道焊缝质量检测识别分析系统
- 【MATLAB】CEEMDAN_LSTM神经网络时序预测算法
- python 异常处理
- YOLO格式转VOC格式