ESP32-WROVER-DEV连接W5500实现有线网络
目的:ESP32-WROVER-DEV相机模块连接W5500模块,实现有线网络的连接。
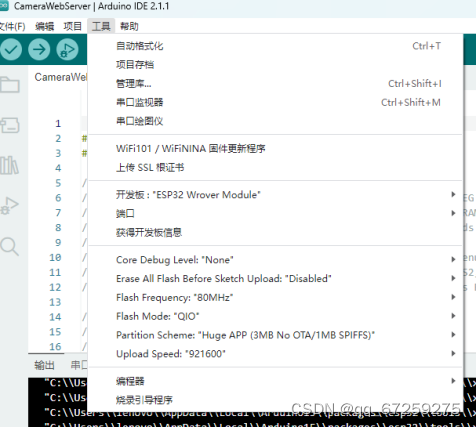
开发环境:Arduino 2.1.1
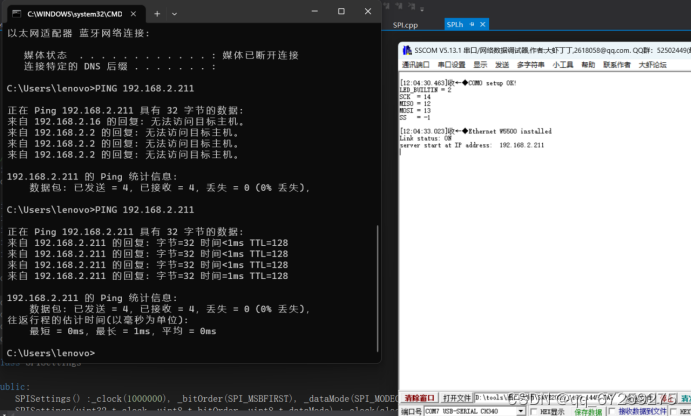
可以实现的功能:可以使用web的ping访问,ESP32的LED IO2闪烁。
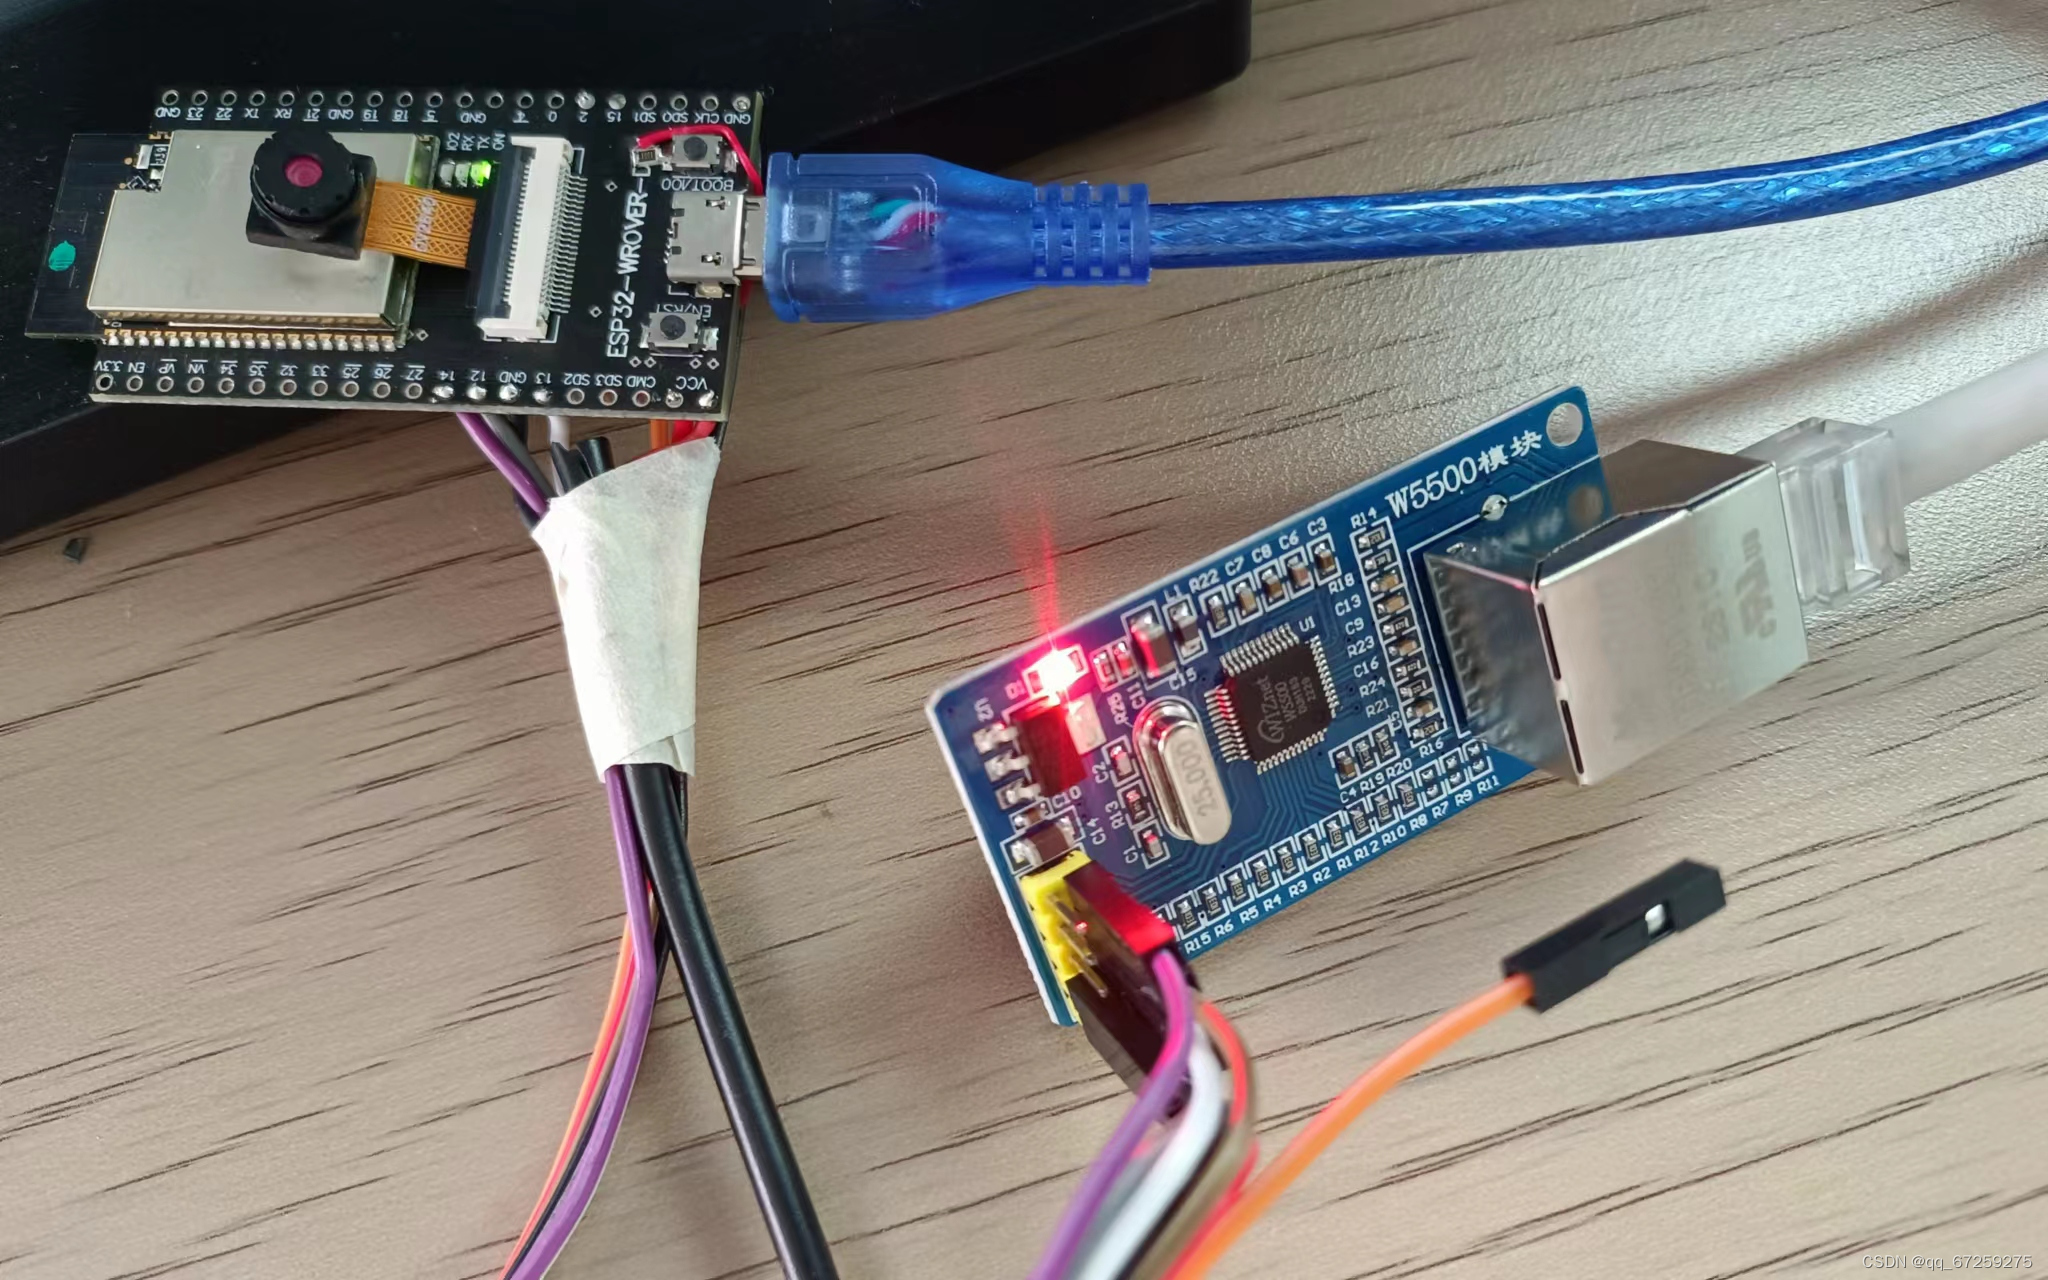
硬件连接如下图:

模块硬件的导线连接
| W5500 | ESP32-WROVER | 导线颜色 | |
| W5500-5V | 连接5V-USB | 红 | |
| W5500-GND | 连接GND-USB | 黑 | |
| W5500-MISO | 12灰 | 灰 | |
| W5500-MOSI | 13白 | 白 | |
| W5500-SCS | 15褐 | 褐 | |
| W5500-SCLK | 14紫 | 紫 | |
| 2 橙 | 橙 |
Arduino的设置

第一步:修改server代码,
修改文件:
C:\Users\lenovo\AppData\Local\Arduino15\packages\esp32\hardware\esp32\2.0.9\cores\esp32\server.h.
class Server: public Print
{
public:
????//virtual void begin(uint16_t port=0) =0;//20240123 yzp
virtual void begin() = 0;
};
以上修改只能使用于使用ESP32和W5500实现有线以太网通讯。
第二步:针对硬件连接,匹配ESP32的IO,修改内容如下:
#define SCK 14
#define MISO 12
#define MOSI 13
#define SS 15
将上面的4行定义直接添加在SPI.H文件开始部分,文件位置查看编译过程中出现的:“使用缓存库文件依赖项:
C:\Users\lenovo\AppData\Local\Arduino15\packages\esp32\hardware\esp32\2.0.9\libraries\SPI\src\SPI.h”
第三步:主程序代码如下:
#include <Ethernet.h>
#define LED_BUILTIN 2
//#define SCK 14
//#define MISO 12
//#define MOSI 13
//#define SS 15
IPAddress ip(192,168,2,211);
EthernetServer server(80);
byte mac[] = {0xDE, 0xAD, 0xBE, 0xEF, 0xFE, 0xED};
boolean alreadyConnected = false; // whether or not the client was connected previously
uint16_t xi = 0;
void setup()
{
? delay(4000);
? ? //Ethernet.init(SS);
? ? Serial.begin(115200);
? ? while (!Serial)
? ? {
? ? ; // wait for serial port to connect. Needed for Leonardo only
? ? }
? ? delay(2000);
? ? Serial.println("COM0 setup OK!");
? ? pinMode(LED_BUILTIN, OUTPUT);
? ? Serial.println("LED_BUILTIN = " + String(LED_BUILTIN));
? ? Serial.println("SCK ?= " + String(SCK)); ? ?
? ? Serial.println("MISO = " + String(MISO));
? ? Serial.println("MOSI = " + String(MOSI));
? ? Serial.println("SS ? = " + String(SS));//Serial.println("SS ? = " + String(SPI.pinSS()));//
? ? Ethernet.init(SS);
? ? delay(2000);
? ? Ethernet.begin(mac, ip);
? ? // start the server
? ? auto hwStatus = Ethernet.hardwareStatus();
? ? switch (hwStatus)
? ? {
? ? ? ? case EthernetNoHardware:
? ? ? ? ? Serial.println("No Ethernet hardware");
? ? ? ? ? break;
? ? ? ? case EthernetW5100:
? ? ? ? ? Serial.println("Ethernet W5100 installed");
? ? ? ? ? break;
? ? ? ? case EthernetW5200:
? ? ? ? ? Serial.println("Ethernet W5200 installed");
? ? ? ? ? break;
? ? ? ? case EthernetW5500:
? ? ? ? ? Serial.println("Ethernet W5500 installed");
? ? ? ? ? break; ? ? ? ? ?
? ? }
? ? auto link = Ethernet.linkStatus();
? ? Serial.print("Link status: ");
? ? switch (link)
? ? {
? ? ? case Unknown:
? ? ? ? Serial.println("Unknown");
? ? ? ? break;
? ? ? case LinkON:
? ? ? ? Serial.println("ON");
? ? ? ? break;
? ? ? case LinkOFF:
? ? ? ? Serial.println("OFF");
? ? ? ? break;
? ? }
? ? server.begin();
? ? Serial.print("server start at IP address: ?");
? ? Serial.println(Ethernet.localIP());
}
void loop()
{
? ? // wait for a new client:
? ? EthernetClient client = server.available();
? ? xi++;
? ? if (xi > 40000)
? ? {
? ? ? ? xi = 0;
? ? ? ? digitalWrite(LED_BUILTIN, !digitalRead(LED_BUILTIN));
? ? }
? ? // when the client sends the first byte, say hello:
? ? if (client)
? ? {
? ? ? if (!alreadyConnected)
? ? ? {
? ? ? ? // clear out the input buffer:
? ? ? ? client.flush();
? ? ? ? Serial.println("We have a new client");
? ? ? ? client.println("Hello, client!");
? ? ? ? alreadyConnected = true;
? ? ? }
? ? ? if (client.available() > 0)
? ? ? {
? ? ? ? // read the bytes incoming from the client:
? ? ? ? char thisChar = client.read();
? ? ? ? // echo the bytes back to the client:
? ? ? ? server.write(thisChar);
? ? ? ? // echo the bytes to the server as well:
? ? ? ? Serial.write(thisChar);
? ? ? }
? ? }
}
第四步:编译上传成功后,串口可以看到网络启动,网络ping有响应。观察结果如下:

本文来自互联网用户投稿,该文观点仅代表作者本人,不代表本站立场。本站仅提供信息存储空间服务,不拥有所有权,不承担相关法律责任。 如若内容造成侵权/违法违规/事实不符,请联系我的编程经验分享网邮箱:chenni525@qq.com进行投诉反馈,一经查实,立即删除!
- Python教程
- 深入理解 MySQL 中的 HAVING 关键字和聚合函数
- Qt之QChar编码(1)
- MyBatis入门基础篇
- 用Python脚本实现FFmpeg批量转换
- 【五】【C语言\动态规划】删除并获得点数、粉刷房子、买卖股票的最佳时机含冷冻期,三道题目深度解析
- c++基础:什么是链表,该如何创建链表
- Cesium介绍及3DTiles数据加载时添加光照效果对比
- 机器学习(三) -- 特征工程(更新中)
- 上传图片-限制尺寸大小
- Java版本spring cloud + spring boot企业电子招投标系统源代码
- vue-router 路由钩?函数是什么执?顺序是什么
- uniapp——自定义导航栏的封装
- Python中常用网络编程模块
- CountDownLatch实战应用——实现异步多线程业务处理,异常情况回滚全部子线程