鸿蒙开发系列教程(七)--ArkTS语言:状态管理
发布时间:2024年01月20日
如果希望构建一个动态的、有交互的界面,就需要引入“状态”的概念
状态管理机制:在声明式UI编程框架中,UI是程序状态的运行结果,用户构建了一个UI模型,其中应用的运行时的状态是参数。当参数改变时,UI作为返回结果,也将进行对应的改变。这些运行时的状态变化所带来的UI的重新渲染,在ArkUI中统称为状态管理机制。
自定义组件拥有变量,变量必须被装饰器装饰才可以成为状态变量,状态变量的改变会引起UI的渲染刷新。如果不使用状态变量,UI只能在初始化时渲染,后续将不会再刷新。

-
View(UI):UI渲染,指将build方法内的UI描述和@Builder装饰的方法内的UI描述映射到界面。
-
State:状态,指驱动UI更新的数据。用户通过触发组件的事件方法,改变状态数据。状态数据的改变,引起UI的重新渲染。
Components级别的状态管理
- @State:@State装饰的变量拥有其所属组件的状态,可以作为其子组件单向和双向同步的数据源。当其数值改变时,会引起相关组件的渲染刷新。
- @Prop:@Prop装饰的变量可以和父组件建立单向同步关系,@Prop装饰的变量是可变的,但修改不会同步回父组件。
- @Link:@Link装饰的变量和父组件构建双向同步关系的状态变量,父组件会接受来自@Link装饰的变量的修改的同步,父组件的更新也会同步给@Link装饰的变量。
- @Provide/@Consume:@Provide/@Consume装饰的变量用于跨组件层级(多层组件)同步状态变量,可以不需要通过参数命名机制传递,通过alias(别名)或者属性名绑定。
- @Observed:@Observed装饰class,需要观察多层嵌套场景的class需要被@Observed装饰。单独使用@Observed没有任何作用,需要和@ObjectLink、@Prop连用。
- @ObjectLink:@ObjectLink装饰的变量接收@Observed装饰的class的实例,应用于观察多层嵌套场景,和父组件的数据源构建双向同步。
@State装饰器
组件内状态
@State是最基础的,使变量拥有状态属性的装饰器,它也是大部分状态变量的数据源
@State装饰的变量,与声明式范式中的其他被装饰变量一样,是私有的,只能从组件内部访问,在声明时必须指定其类型和本地初始化。初始化也可选择使用命名参数机制从父组件完成初始化。
@State装饰的变量拥有以下特点:
- @State装饰的变量与子组件中的@Prop装饰变量之间建立单向数据同步,与@Link、@ObjectLink装饰变量之间建立双向数据同步。
- @State装饰的变量生命周期与其所属自定义组件的生命周期相同。
举例1:
点击按钮,数字跟着变化,如没有@state,数字始终为0

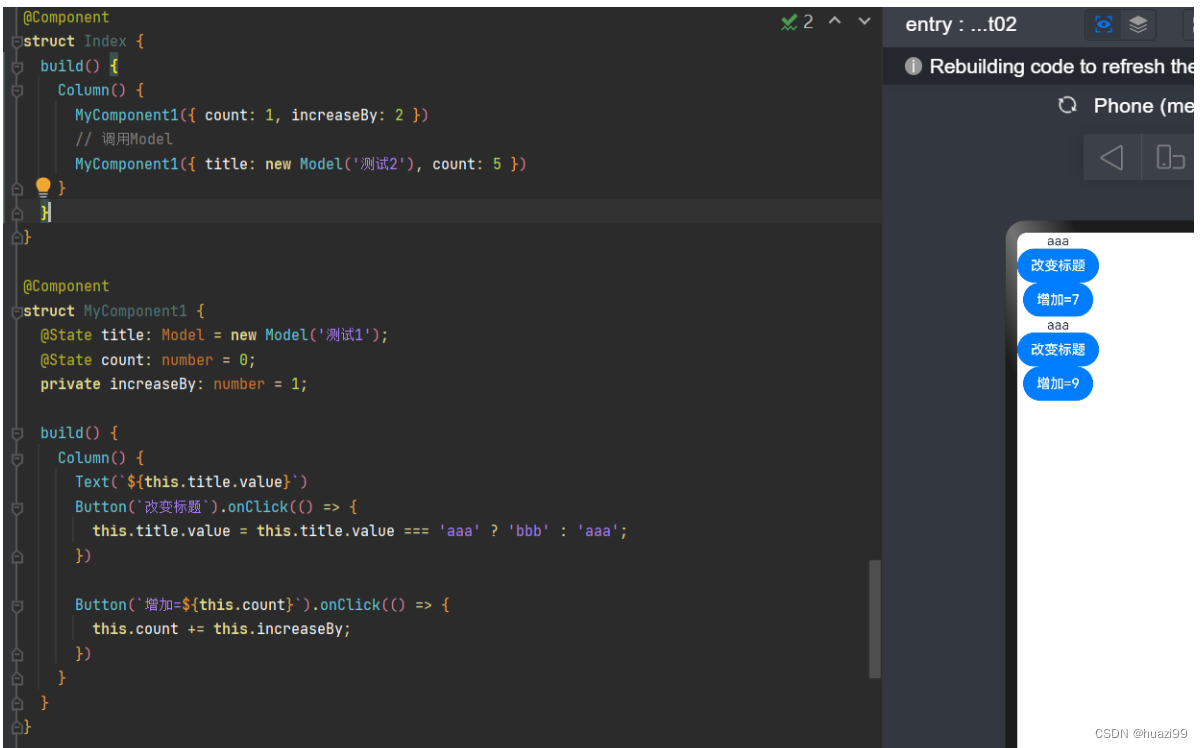
举例2:

代码:
class Model {
  public value: string;
  constructor(value: string) {
    this.value = value;
  }
}

@Entry
@Component
struct Index {
  build() {
    Column() {
      MyComponent1({ count: 1, increaseBy: 2 })
      // 调用Model
      MyComponent1({ title: new Model('测试2'), count: 5 })
    }
  }
}

@Component
struct MyComponent1 {
  @State title: Model = new Model('测试1');
  @State count: number = 0;
  private increaseBy: number = 1;

  build() {
    Column() {
      Text(`${this.title.value}`)
      Button(`改变标题`).onClick(() => {
        this.title.value = this.title.value === 'aaa' ? 'bbb' : 'aaa';
      })

      Button(`增加=${this.count}`).onClick(() => {
        this.count += this.increaseBy;
      })
    }
  }
}
@Link装饰器
父子双向同步
子组件中被@Link装饰的变量与其父组件中对应的数据源建立双向数据绑定
@Link装饰的变量与其父组件中的数据源共享相同的值。
@Link装饰器不能在@Entry装饰的自定义组件中使用。
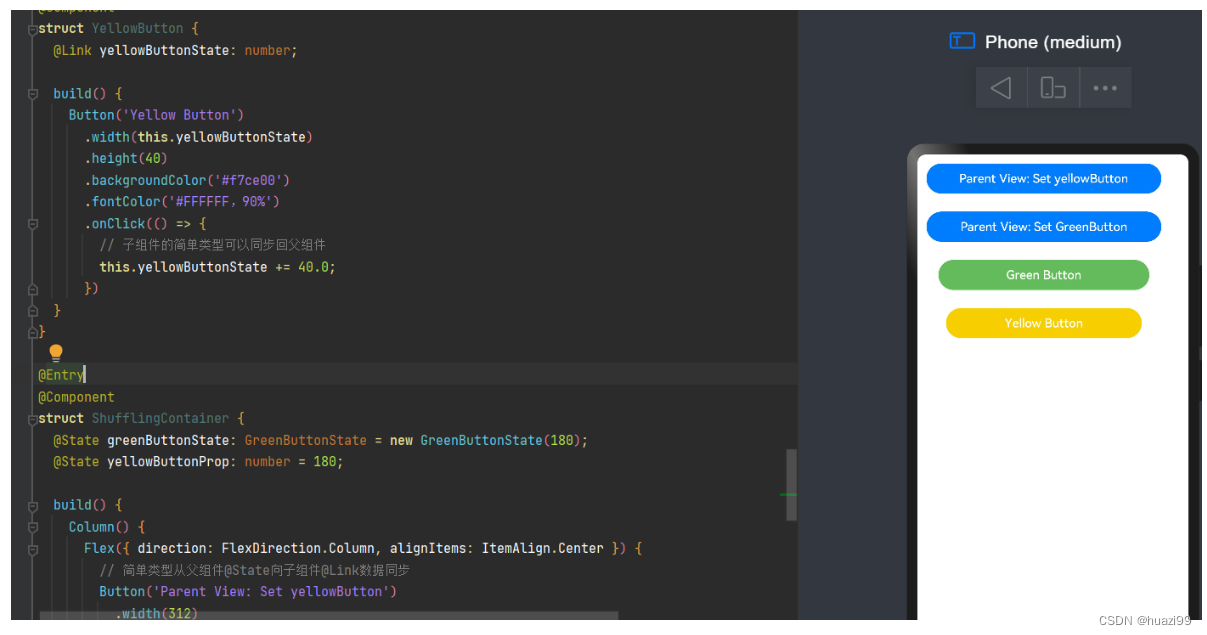
举例1:

代码:
class GreenButtonState {
  width: number = 0;

  constructor(width: number) {
    this.width = width;
  }
}

@Component
struct GreenButton {
  @Link greenButtonState: GreenButtonState;

  build() {
    Button('Green Button')
      .width(this.greenButtonState.width)
      .height(40)
      .backgroundColor('#64bb5c')
      .fontColor('#FFFFFF,90%')
      .onClick(() => {
        if (this.greenButtonState.width < 700) {
          // 更新class的属性,变化可以被观察到同步回父组件
          this.greenButtonState.width += 60;
        } else {
          // 更新class,变化可以被观察到同步回父组件
          this.greenButtonState = new GreenButtonState(180);
        }
      })
  }
}

@Component
struct YellowButton {
  @Link yellowButtonState: number;

  build() {
    Button('Yellow Button')
      .width(this.yellowButtonState)
      .height(40)
      .backgroundColor('#f7ce00')
      .fontColor('#FFFFFF,90%')
      .onClick(() => {
        // 子组件的简单类型可以同步回父组件
        this.yellowButtonState += 40.0;
      })
  }
}

@Entry
@Component
struct ShufflingContainer {
  @State greenButtonState: GreenButtonState = new GreenButtonState(180);
  @State yellowButtonProp: number = 180;

  build() {
    Column() {
      Flex({ direction: FlexDirection.Column, alignItems: ItemAlign.Center }) {
        // 简单类型从父组件@State向子组件@Link数据同步
        Button('Parent View: Set yellowButton')
          .width(312)
          .height(40)
          .margin(12)
          .fontColor('#FFFFFF,90%')
          .onClick(() => {
            this.yellowButtonProp = (this.yellowButtonProp < 700) ? this.yellowButtonProp + 40 : 100;
          })
        // class类型从父组件@State向子组件@Link数据同步
        Button('Parent View: Set GreenButton')
          .width(312)
          .height(40)
          .margin(12)
          .fontColor('#FFFFFF,90%')
          .onClick(() => {
            this.greenButtonState.width = (this.greenButtonState.width < 700) ? this.greenButtonState.width + 100 : 100;
          })
        // class类型初始化@Link
        GreenButton({ greenButtonState: $greenButtonState }).margin(12)
        // 简单类型初始化@Link
        YellowButton({ yellowButtonState: $yellowButtonProp }).margin(12)
      }
    }
  }
}
以上内容参考“官方文档”
文章来源:https://blog.csdn.net/huazi99/article/details/135699315
本文来自互联网用户投稿,该文观点仅代表作者本人,不代表本站立场。本站仅提供信息存储空间服务,不拥有所有权,不承担相关法律责任。 如若内容造成侵权/违法违规/事实不符,请联系我的编程经验分享网邮箱:chenni525@qq.com进行投诉反馈,一经查实,立即删除!
本文来自互联网用户投稿,该文观点仅代表作者本人,不代表本站立场。本站仅提供信息存储空间服务,不拥有所有权,不承担相关法律责任。 如若内容造成侵权/违法违规/事实不符,请联系我的编程经验分享网邮箱:chenni525@qq.com进行投诉反馈,一经查实,立即删除!
最新文章
- Python教程
- 深入理解 MySQL 中的 HAVING 关键字和聚合函数
- Qt之QChar编码(1)
- MyBatis入门基础篇
- 用Python脚本实现FFmpeg批量转换
- python logging 日志模块保证输出不踩踏
- Java ThreadLocal 是什么?有哪些使用场景?
- 智能标志桩:防盗防外物入侵_图像监测_态势感知_深圳鼎信
- c语言学生管理系统
- 实时流协议---RTSP【详解】
- 【Python小游戏】某程序员自制《苹果大赛》,赶紧来抢~“免费的平安夜苹果,你说是不是最甜的鸭?”(附源码)
- AI工具的使用和分析
- 【PTA-C语言】编程练习6 - 结构体与共用体 - 函数题
- 外包干了4个月,技术退步明显.......
- Windows 文件清理脚本