Superset二次开发之环境部署(Windows版)
本地环境版本介绍:
| 编号 | 名称 | 版本 |
|---|---|---|
| 1 | superset | v3.0.0rc3 |
| 2 | Python | v3.10.12 |
| 3 | Node | v16.20.2 |
| 4 | npm | v8.19.4 |
| 5 | Anaconda | v3 |
1.下载源码
#下载源码
git clone?https://github.com/apache/superset.git? ##速度慢可替换为?https://gitclone.com/github.com/apache/superset.git
#进入项目目录
cd superset
#切换到目标版本,按需自行修改
git checkout 3.0.0rc3
#为superset创建一个3.10的python虚拟环境
conda create --name superset3 python=3.10
#激活环境
conda activate superset3 (win10 直接用activate superset3)
建议更新以下包
#升级pip
python -m pip install --upgrade pip
#安装以下包
pip install pillow
pip install wheel
pip install requests
pip install flask
pip install?flask_cors
pip install psycopg2
pip install paramiko
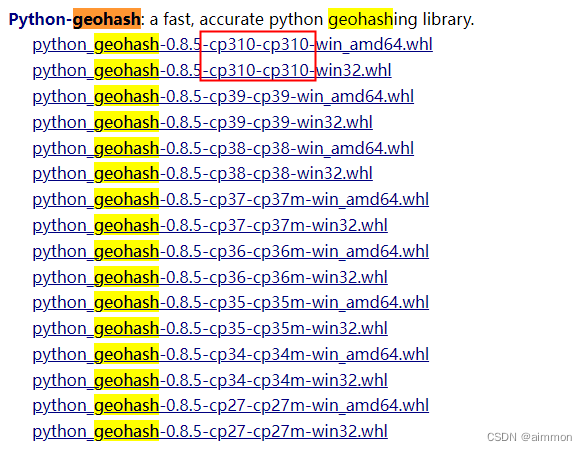
#安装geohash whl文件( 下载路径?www.lfd.uci.edu/~gohlke/pythonlibs/ 选择对应python版本的whl 文件 )
pip instal? 路径 python_geohash?0.8.5?cp310?cp310?win_amd64.whl?
2.安装依赖
在superset项目的根目录
#设置国内pip源 或阿里云源?Simple Index?--trusted-host?mirrors.aliyun.com
pip config set global.index-url?Simple Index
#安装superset 本地测试依赖
pip install -e . (注意最后有个点 .)
?配置superset_config.py?
? ? 路径: 虚拟环境下的Lib目录(例如 E:\conda\envs\superset4\Lib\superset_config.py)
#
# Unless required by applicable law or agreed to in writing, software
# distributed under the License is distributed on an "AS IS" BASIS,
# WITHOUT WARRANTIES OR CONDITIONS OF ANY KIND, either express or implied.
# See the License for the specific language governing permissions and
# limitations under the License.
#

#
# This is an example "local" configuration file. In order to set/override config
# options that ONLY apply to your local environment, simply copy/rename this file
# to docker/pythonpath/superset_config_docker.py
# It ends up being imported by docker/superset_config.py which is loaded by
# superset/config.py
#

# SUPERSET_WEBSERVER_PORT = 80

ROW_LIMIT = 2000

SECRET_KEY = ' ' #必填

SQLALCHEMY_DATABASE_URI = " "?#必填
SQLALCHEMY_ECHO = True

# 选填

REDIS_HOST = " ip"
REDIS_PORT = port

# WTF_CSRF_ENABLED = True

BABEL_DEFAULT_LOCALE = "zh"
LANGUAGES = {
? ? "en": {"flag": "us", "name": "English"},
? ? "zh": {"flag": "cn", "name": "Chinese"},
}

#开启dashboard 的embed dashboard 功能
FEATURE_FLAGS = {
"EMBEDDED_SUPERSET": True
}

#启用CORS
ENABLE_CORS = True

#解决跨域问题
WTF_CSRF_ENABLED = False
OVERRIDE_HTTP_HEADERS = {'X-Frame-Options': 'ALLOWALL'}

TALISMAN_ENABLED = False
3.初始化数据库
设置FLASK_APP(非常重要)
#在虚拟环境下,每次运行superset前都需要设置FLASK_APP,否则会报错
set FLASK_APP=superset
#初始化数据库
superset db upgrade
4.创建用户
注意:username , firstname , lastname?必须不不同,如果配置同一个会报权限错误!!!
superset fab create-admin
5.初始化
superset init
6.配置前端项目
# 进入前端目录
cd superset-frontend
# 下载依赖
npm install 如果异常可用 cnpm install 试试
7.运行后端项目
superset run -p 8088 --with-threads --reload --debugger
启动成功后,在浏览器中通过http://localhost:8088即可访问superset系统
或者Pycharm 启动项目 查看?
本文来自互联网用户投稿,该文观点仅代表作者本人,不代表本站立场。本站仅提供信息存储空间服务,不拥有所有权,不承担相关法律责任。 如若内容造成侵权/违法违规/事实不符,请联系我的编程经验分享网邮箱:chenni525@qq.com进行投诉反馈,一经查实,立即删除!
- Python教程
- 深入理解 MySQL 中的 HAVING 关键字和聚合函数
- Qt之QChar编码(1)
- MyBatis入门基础篇
- 用Python脚本实现FFmpeg批量转换
- NFC9180 LED三防平台灯50W
- jar to dmg app/windows .exe可执行文件打包方法
- 2024年视频号下载工具支持高清视频下载,多平台下载!
- Unity-小工具-LookAt
- stat模块--python
- Halcon算子精讲:形态学操作(圆形操作)
- 6.2 声音编辑工具GoldWave5简介(10)
- Linux 命令:cd
- 笨蛋学设计模式创建者模式-单例模式【2】
- leetcode136. 只出现一次的数字