MariaDB数据库安装的配置、使用、授权、增删改查以及备份与恢复
发布时间:2024年01月10日
一 MariaDB 安装
1.1 MariaDB 源配置
vim /etc/yum.repos.d/mariadb.repo
添加下面内容👇
[mariadb]
name=mariadb
baseurl=https://mirrors.ustc.edu.cn/mariadb/yum/10.10/centos7-amd64
gpgkey=https://mirrors.ustc.edu.cn/mariadb/yum/RPM-GPG-KEY-MariaDB
gpgcheck=1
[mariadb]
xx库的名称
name=库
baseurl=下载库的地址
gpgkey=密钥
gpgcheck=1开启校验
1.2 清空缓存
yum celan all # 清空缓存
yum makecache # 建立缓存
1.3 安装MariaDB
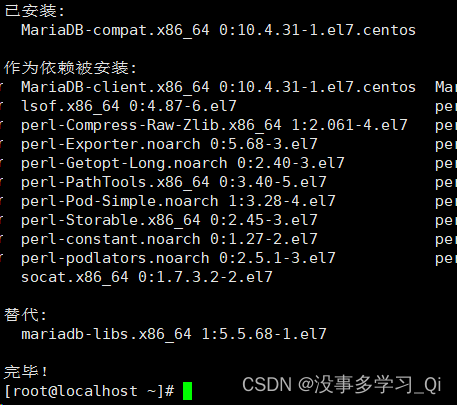
yum -y install mariadb-server mariadb-client

二 MariaDB 基本配置
2.1 启动MariaDB
systemctl start mariadb # 启动
systemctl enable mariadb # 开机自启
2.2 MariaDB 进程查看
yum -y instal net-tools # 安装net工具
netstat -ntlp | grep 3306


2.3 MariDB 数据库初始化
为了数据库的安全性和正常运行,初始化操作涉及
5个步骤
1.设置root管理员在数据中的密码(默认为空,直接回车)
2.设置root管理员在数据库中的专有密码
3.删除匿名用户,使用root管理员远程登录数据库,确保安全性
4.删除默认的测试数据库,取消测试数据库的全部访问权限
5.刷新授权列联表,让初始化立即生效
2.3.1 数据库初始化
mysql_secure_installation
Enter current password for root (enter for none):     #初次运行直接回车设置密码
Switch to unix_socket authentication [Y/n]            #输入y并回车
Change the root password? [Y/n]                       #输入y并回车
New password:                                         #设置root用户密码
Re-enter new password:                                #再次输入密码
Remove anonymous users? [Y/n]                         #是否删除匿名用户,输入y回车
Disallow root login remotely? [Y/n]               #是否禁止root远程登录,这里我们输入n
Remove test database and access to it? [Y/n]      #是否删除test数据库,输入y回车
Reload privilege tables now? [Y/n]                #是否重新加载表权限,输入y回车

查看详细版
NOTE: RUNNING ALL PARTS OF THIS SCRIPT IS RECOMMENDED FOR ALL MariaDB
      SERVERS IN PRODUCTION USE!  PLEASE READ EACH STEP CAREFULLY!

In order to log into MariaDB to secure it, we'll need the current
password for the root user. If you've just installed MariaDB, and
haven't set the root password yet, you should just press enter here.

Enter current password for root (enter for none):
OK, successfully used password, moving on...

Setting the root password or using the unix_socket ensures that nobody
can log into the MariaDB root user without the proper authorisation.

You already have your root account protected, so you can safely answer 'n'.

Switch to unix_socket authentication [Y/n] y
Enabled successfully!
Reloading privilege tables..
 ... Success!


You already have your root account protected, so you can safely answer 'n'.

Change the root password? [Y/n] y
New password:
Re-enter new password:
Password updated successfully!
Reloading privilege tables..
 ... Success!


By default, a MariaDB installation has an anonymous user, allowing anyone
to log into MariaDB without having to have a user account created for
them.  This is intended only for testing, and to make the installation
go a bit smoother.  You should remove them before moving into a
production environment.

Remove anonymous users? [Y/n] y
 ... Success!

Normally, root should only be allowed to connect from 'localhost'.  This
ensures that someone cannot guess at the root password from the network.

Disallow root login remotely? [Y/n] n
 ... skipping.

By default, MariaDB comes with a database named 'test' that anyone can
access.  This is also intended only for testing, and should be removed
before moving into a production environment.

Remove test database and access to it? [Y/n] y
 - Dropping test database...
 ... Success!
 - Removing privileges on test database...
 ... Success!

Reloading the privilege tables will ensure that all changes made so far
will take effect immediately.

Reload privilege tables now? [Y/n] y
 ... Success!

Cleaning up...

All done!  If you've completed all of the above steps, your MariaDB
installation should now be secure.

Thanks for using MariaDB!
2.3.2 初始化测试登录
mysql -uroot -p'刚才设置的密码'
三 MariaDB 使用
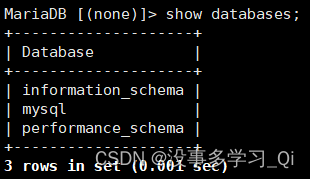
3.1 查看数据库
show databases;

3.2 修改密码
set password = PASSWORD(‘新密码’)
3.3 创建数据库test
create database test;

3.4 进入数据库
use test;

3.5 创建mortal数据表
create table mortal(id int,name char(32));

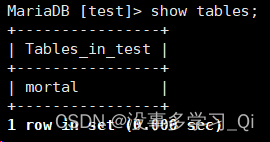
3.6 查看数据表
show tables;

3.7 查看表结构
desc motral;

3.8 退出数据库
\q
quit
exit
四 MariaDB 增删改查
4.1 增
给motral表增加两条数据
insert into mortal(id,name) values(1,"zero"),(2,"one");
4.2 查
查看id name字段mortal表的数据
select id,name from mortal;
4.3 删
删除motral表中id = 2的数据
delete from mortal where id=2;
验证
select id,name from mortal;
4.4 改
更改id = 1的字段name = yi
update mortal set name="yi" where id=1;
验证
select * from mortal;
五 授权
grant 权限 on 数据库.表名 to 账户@主机名        	#对特定数据库的特定表授权
grant 权限 on 数据库.* to 账户@主机名        	   #对特定数据库的所有表给予授权
grant 权限一,权限2,权限3 on *.* to 账户@主机名    #对所有数据库中的所有表给予多个权限
grant all privileges on *.* to 账户@主机名      #对所有数据库和表授权所有权限
5.1 创建用户zero和密码zero
create user zero@’localhost’ identified by ‘zero’;
5.2 授予用户所有权限
grant all privileges on *.* to username@’localhost’ identified by ‘password’;
5.3 授予zero用户创建test数据库的权限
grant create on test.* to zero@’localhost’ identified by ‘zero’;
5.4 查看zero用户的数据库
mysql -uzero -pzero
5.5 授予one创建的权限,对所有库和表生效
grant create on *.* to one@’localhost’ identified by ‘one’;
5.6 删除one用户
drop user one;
5.7 刷新权限
flush privileges;
六 备份与回复
6.1 备份
6.1.1 准备
删除/tmp目录下所有内容
cd /tmp/
rm -rf *
6.1.2 备份所有数据库
mysqldump -uroot -p --all-databases > /tmp/db.dump
出现Enter password时输入数据库密码回车即可

6.1.3 单独备份test库
mysqldump -uroot -p test > /tmp/test.sql

6.2 恢复
6.2.1 准备
进入数据库并删除数据库
drop database test;

验证
show databases;

6.2.2 恢复
mysql -uroot -p < /tmp/db.dump

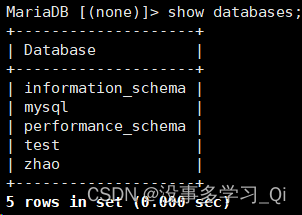
6.2.3 查看
show databases;

文章来源:https://blog.csdn.net/apple_51319648/article/details/135428279
本文来自互联网用户投稿,该文观点仅代表作者本人,不代表本站立场。本站仅提供信息存储空间服务,不拥有所有权,不承担相关法律责任。 如若内容造成侵权/违法违规/事实不符,请联系我的编程经验分享网邮箱:chenni525@qq.com进行投诉反馈,一经查实,立即删除!
本文来自互联网用户投稿,该文观点仅代表作者本人,不代表本站立场。本站仅提供信息存储空间服务,不拥有所有权,不承担相关法律责任。 如若内容造成侵权/违法违规/事实不符,请联系我的编程经验分享网邮箱:chenni525@qq.com进行投诉反馈,一经查实,立即删除!