微信小程序封装vant 下拉框select 多选组件
发布时间:2024年01月03日
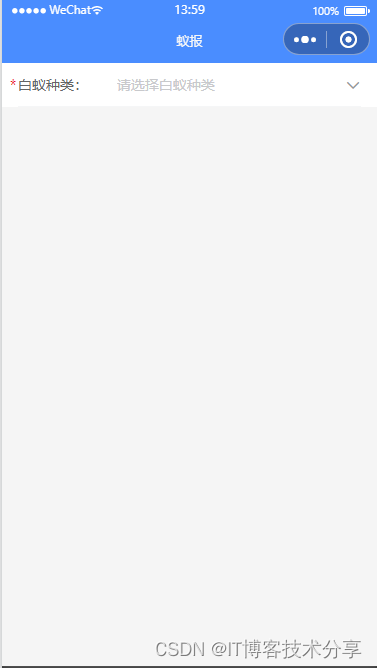
老规矩先上效果图:


本组件主要由小程序vant ui组件,vant 小程序ui网址:vant-weapp
主要代码如下:
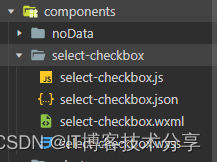
先封装子组件:?select-checkbox? 放在?components?文件夹里面

?select-checkbox.wxml:
<view>
    <van-field label="{{label}}" model:value="{{ checkSelected }}" required placeholder="{{ place }}" border="{{ true }}" readonly
        right-icon="{{icon}}" bindtap="showPopup" />

    <van-popup show="{{ show }}" bind:close="onClose" position="bottom" custom-style="height: 60%;overflow:hidden;padding:10rpx 0rpx;">
        <!-- 取消、确定按钮 -->
        <view class="cityheader">
            <view bindtap="cancel" class="city-cancel">取消</view>
            <view bindtap="confirm" class="city-true">确定</view>
        </view>

        <!-- 内容区域 -->
        <van-checkbox-group value="{{ result }}" bind:change="onChange">
            <van-cell-group>
                <van-cell
                    wx:for="{{ list }}"
                    wx:key="index"
                    title="{{ item }}"
                    value-class="value-class"
                    clickable
                    data-index="{{ index }}"
                    title-width="94%"
                    center
                    bind:click="toggle"
                >
                <van-checkbox
                    catch:tap="noop"
                    label-position="right"
                    class="checkboxes-{{ index }}"
                    name="{{ item }}"
                />
                </van-cell>
            </van-cell-group>
        </van-checkbox-group>
    </van-popup>
</view>
select-checkbox.wxss:
/* pages/select-checkbox/select-checkbox.wxss */
.van-cell__value {
  text-align: left !important;
}
.cityheader {
  width: 100%;
  z-index: 5;
}
.city-cancel {
  float: left;
  margin: 20rpx;
  color: #969799;
  z-index: 11;
  position: relative;
}
.city-true {
  float: right;
  margin: 20rpx;
  color: #576b95;
  z-index: 11;
  position: relative;
}
select-checkbox.js:
// pages/select-checkbox/select-checkbox.js
Component({
    /**
     * 组件的属性列表
     */
    properties: {
        label: String, // 输入框标签
        place: String, // 输入框提示
        list: Array, // 选择器 选项
        checkSelected: { // 选择器 选项数组中 对象的value的默认key
            type: String,
            value: 'text'
        }
    },
    // 监听传入的变量,当传入的值发生变化时,触发方法
    // observers: {
    //     'checkSelected': function (val) {
    //         // val=> 就是父组件传入组件中的 tabsList 数据
    //         console.log('???:', val)
    //     }
    // },
    /**
     * 页面的初始数据
     */
    data: {
        icon:'arrow-down',  // 下拉箭头
        show: false,
        result: [],
    },
    /**
    * 组件的方法列表
    */
    methods: {
       // 取消
        cancel() {
            this.setData({ show: false })
        },
        // 确定
        confirm() {
            this.setData({ show: false })
            this.triggerEvent('sync', {  // 传递到组件外事件 , 返回当前选中项 对象
                value: this.data.checkSelected
            })
        },

        showPopup() {
            this.setData({ show: true })
        },
        onClose() {
            this.setData({ show: false })
        },
        onChange(event) {
            // console.log('event:', event)
            this.setData({
                result: event.detail,
                checkSelected: event.detail.join(',')
            })
            // console.log('this.data.checkSelected:', this.data.checkSelected)
        },
        toggle(event) {
            const { index } = event.currentTarget.dataset
            const checkbox = this.selectComponent(`.checkboxes-${index}`)
            checkbox.toggle()
        },
        noop() {},
    },
    attached: function () {
        console.log("父组件传过来:", this.properties.checkSelected) // 可以获取父组件传过来的值
    },
})
select-checkbox.json:
{
    "component": true,
    "usingComponents": {
        "van-field": "@vant/weapp/field/index",
        "van-popup": "@vant/weapp/popup/index",
        "van-cell": "@vant/weapp/cell/index",
        "van-cell-group": "@vant/weapp/cell-group/index",
        "van-checkbox": "@vant/weapp/checkbox/index",
        "van-checkbox-group": "@vant/weapp/checkbox-group/index"
    }
}
父组件调用:
<view>
    <select-checkbox style="width:100%" label="白蚁种类:" title-width="70" place="请选择白蚁种类" list="{{ list }}" bind:sync="getSelectBox" checkSelected=""></select-checkbox>
</view>
data: {
checkSelected: '',
list: ['黑翅土白蚁', '黄翅大白蚁', '台湾乳白蚁', '黑胸散白蚁' ],
},
// 获取选中的值
getSelectBox: function(e) {
// 打印选中项
console.log("11111111:", e.detail.value)
this.setData({
checkSelected: e.detail.value
})
},{
"usingComponents": {
"select-checkbox": "/components/select-checkbox/select-checkbox"
}
}本组件只要用 vant-checkbox? 组件,外套用了 点击弹出vant-popup 弹层,然后封装成组件的模板,全局调用。
文章来源:https://blog.csdn.net/qq_41646249/article/details/135362160
本文来自互联网用户投稿,该文观点仅代表作者本人,不代表本站立场。本站仅提供信息存储空间服务,不拥有所有权,不承担相关法律责任。 如若内容造成侵权/违法违规/事实不符,请联系我的编程经验分享网邮箱:chenni525@qq.com进行投诉反馈,一经查实,立即删除!
本文来自互联网用户投稿,该文观点仅代表作者本人,不代表本站立场。本站仅提供信息存储空间服务,不拥有所有权,不承担相关法律责任。 如若内容造成侵权/违法违规/事实不符,请联系我的编程经验分享网邮箱:chenni525@qq.com进行投诉反馈,一经查实,立即删除!
最新文章
- Python教程
- 深入理解 MySQL 中的 HAVING 关键字和聚合函数
- Qt之QChar编码(1)
- MyBatis入门基础篇
- 用Python脚本实现FFmpeg批量转换
- 2024年【北京市安全员-C3证】考试题及北京市安全员-C3证考试试卷
- CVE-2023-49898 Apache incubator-streampark 远程命令执行漏洞
- 比起 Pandas, 你更需要 Polars:详细指南
- 电商要怎么学?企业如何进行数字化转型打破市场僵局?
- VS 2022 控制台程序运行时不显示控制台
- js获取当前设备的唯一标识
- ES elasticsearch-analysis-dynamic-synonym连接数据库动态更新synonym近义词
- 并发是什么意思
- java-插值排序的简单理解
- Linux本地部署Mosquitto MQTT协议消息服务端并实现远程访问【内网穿透】