掌握使用CXF快速开发webservice服务和生成client端技能
发布时间:2024年01月19日
文章目录
前言
本文主要通过示例详细介绍了如何使用CXF进行webservice服务服务端的开发和服务发布,以及如何通过CXF为已经发布的webservice服务生成客户端代码,并详细演示了通过生成的客户端代码进行服务的调用,希望对有需要的小伙伴们有所帮助!
1.安装和配置cxf环境
我是直接在cxf官网下载的apache-cxf-3.6.2版本的压缩包,大家直接去官网下载即可,这里需要注意的点是要配置CXF_HOME环境变量并将cxf的bin目录添加到PATH中
注意: 如果不清楚是否配置成功cxf工具,可以在命令行中直接执行wsdl2java进行验证

2.创建一个通过maven管理的java项目并引入相关cxf依赖
cxf相关依赖如下(这里我使用的版本较新,为4.0.3)
    <dependency>
      <groupId>org.apache.cxf</groupId>
      <artifactId>cxf-rt-frontend-jaxws</artifactId>
      <version>4.0.3</version>
  </dependency>


  <dependency>
      <groupId>org.apache.cxf</groupId>
      <artifactId>cxf-rt-transports-http</artifactId>
      <version>4.0.3</version>
  </dependency>
  <!-- Jetty is needed if you're using the CXFServlet -->
  <dependency>
      <groupId>org.apache.cxf</groupId>
      <artifactId>cxf-rt-transports-http-jetty</artifactId>
      <version>4.0.3</version>
  </dependency>
3.使用cxf提供的类编写webservice服务端并发布服务
3.1 定义一个webservice服务接口HelloWorld
package server;

import jakarta.jws.WebParam;
import jakarta.jws.WebService;

@WebService
public interface HelloWorld {
String sayHi(@WebParam(name = "text") String text);
}
3.2 编写HelloWorld实现类
package server;

public class HelloWorldImpl implements HelloWorld {

  public String sayHi(String text) {
      return "Hello " + text;
  }
}
3.3 通过JaxWsServerFactoryBean发布webservice服务
package server;

import org.apache.cxf.jaxws.JaxWsServerFactoryBean;

public class Server {

  protected Server() throws Exception {
      System.out.println("Starting Server");
      HelloWorldImpl implementor = new HelloWorldImpl();
      JaxWsServerFactoryBean svrFactory = new JaxWsServerFactoryBean();
      svrFactory.setServiceClass(HelloWorld.class);
      svrFactory.setAddress("http://localhost:9000/helloWorld");
      svrFactory.setServiceBean(implementor);
      svrFactory.create();
  }

  public static void main(String[] args) throws Exception {
      new Server();
      System.out.println("Server ready...");

      Thread.sleep(5 * 60 * 1000);
      System.out.println("Server exiting");
      System.exit(0);
  }
}
3.4 在浏览器中通过发布的地址查看webservice服务是否发布成功
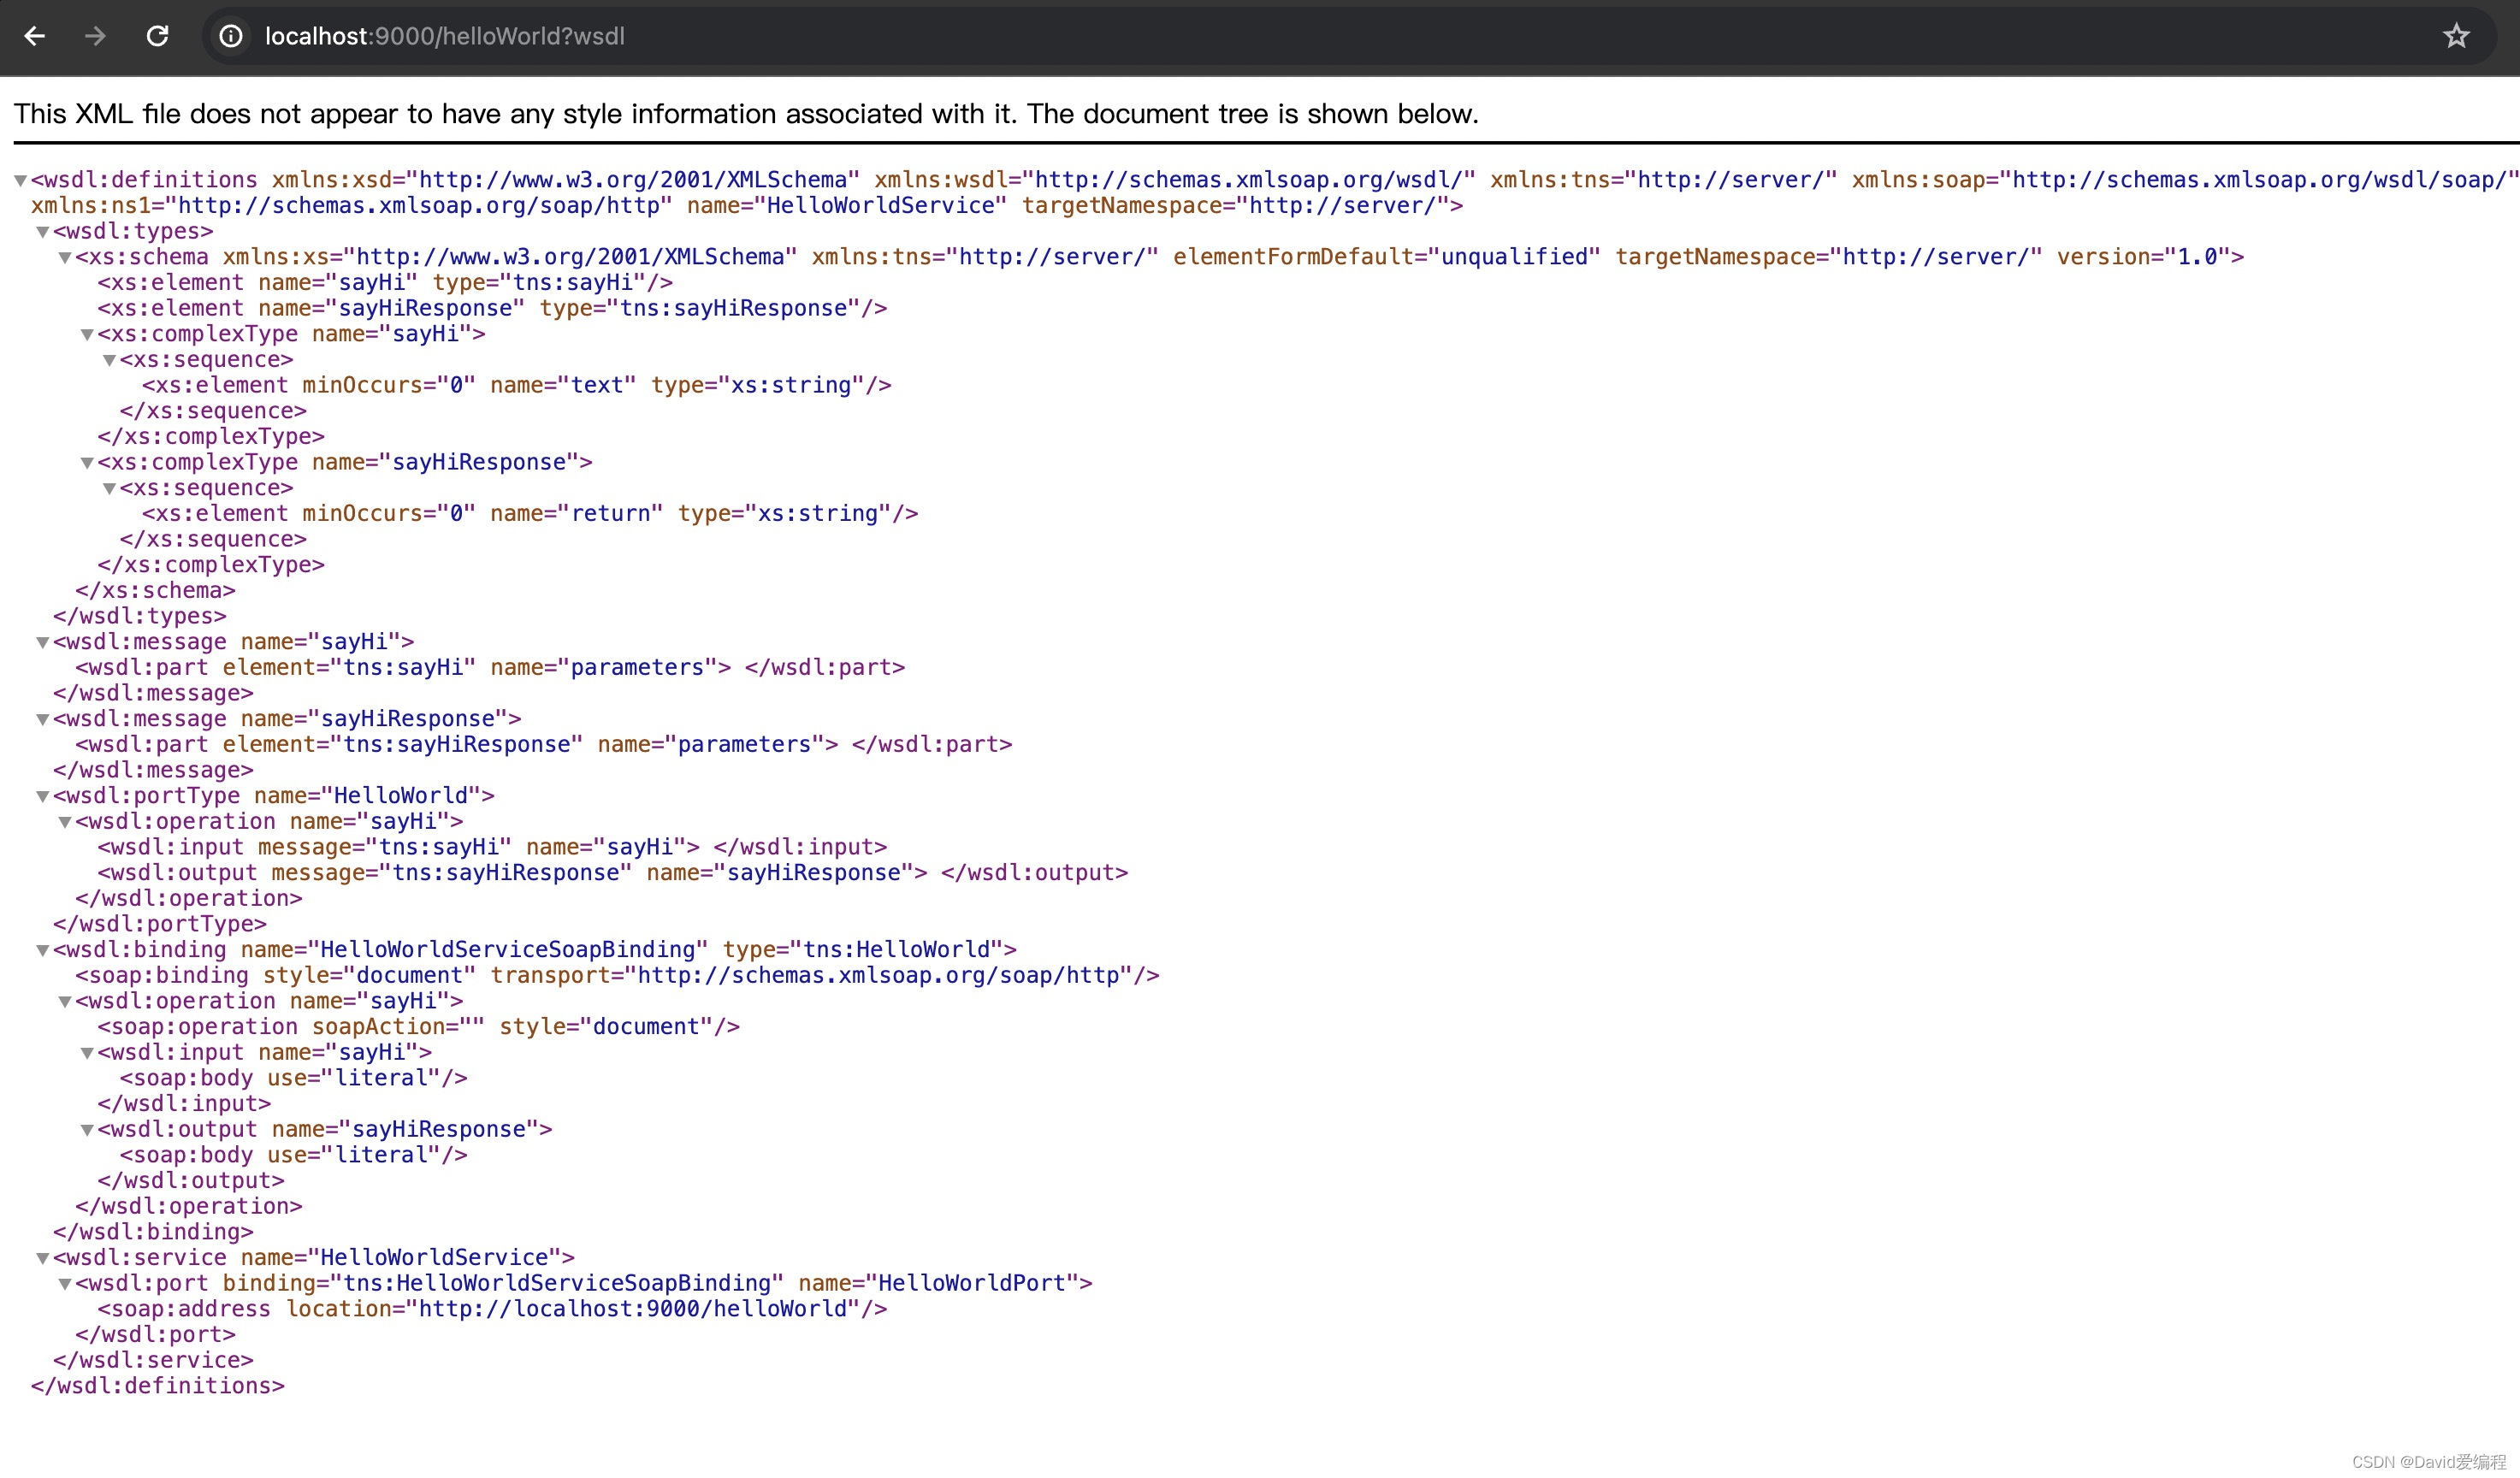
4.通过webservice客户端调用webservice服务
这里通常有2种方式可以访问webservice服务端
4.1 有webservice服务端接口的jar
如果有webservice服务端接口的jar,那么可以直接通过JaxWsProxyFactoryBean创建代理的方式访问webservice服务
package client;


import org.apache.cxf.ext.logging.LoggingFeature;
import org.apache.cxf.jaxws.JaxWsProxyFactoryBean;
import server.HelloWorld;


public final class Client {

  private Client() {
  }

  public static void main(String[] args) throws Exception {
      JaxWsProxyFactoryBean factory = new JaxWsProxyFactoryBean();
      factory.getFeatures().add(new LoggingFeature());
      factory.setAddress("http://localhost:9000/helloWorld");
      HelloWorld client = factory.create(HelloWorld.class);
      System.out.println(client.sayHi("World"));
  }

}
4.2 没有webservice服务端接口的jar
如果没有webservice服务端接口的jar,可以通过cxf提供的wsdl2java工具生成webservice客户端
4.2.1 执行如下命令:
wsdl2java -p ws.demo.client -d /Users/apple/Documents/idea/jaxws_factory_bean_client/src/main/java/  -client http://localhost:9000/helloWorld?wsdl
(1) -p  指定其wsdl的命名空间,也就是要生成代码的包名.
(2) -d  指定要产生代码所在目录.
(3) -client 生成客户端测试web service的代码.
4.2.2 生成的代码如下:

4.2.3 将代码导入IDEA编辑器(如果没有项目,记得先创建客户端项目,再将代码整合到项目中)
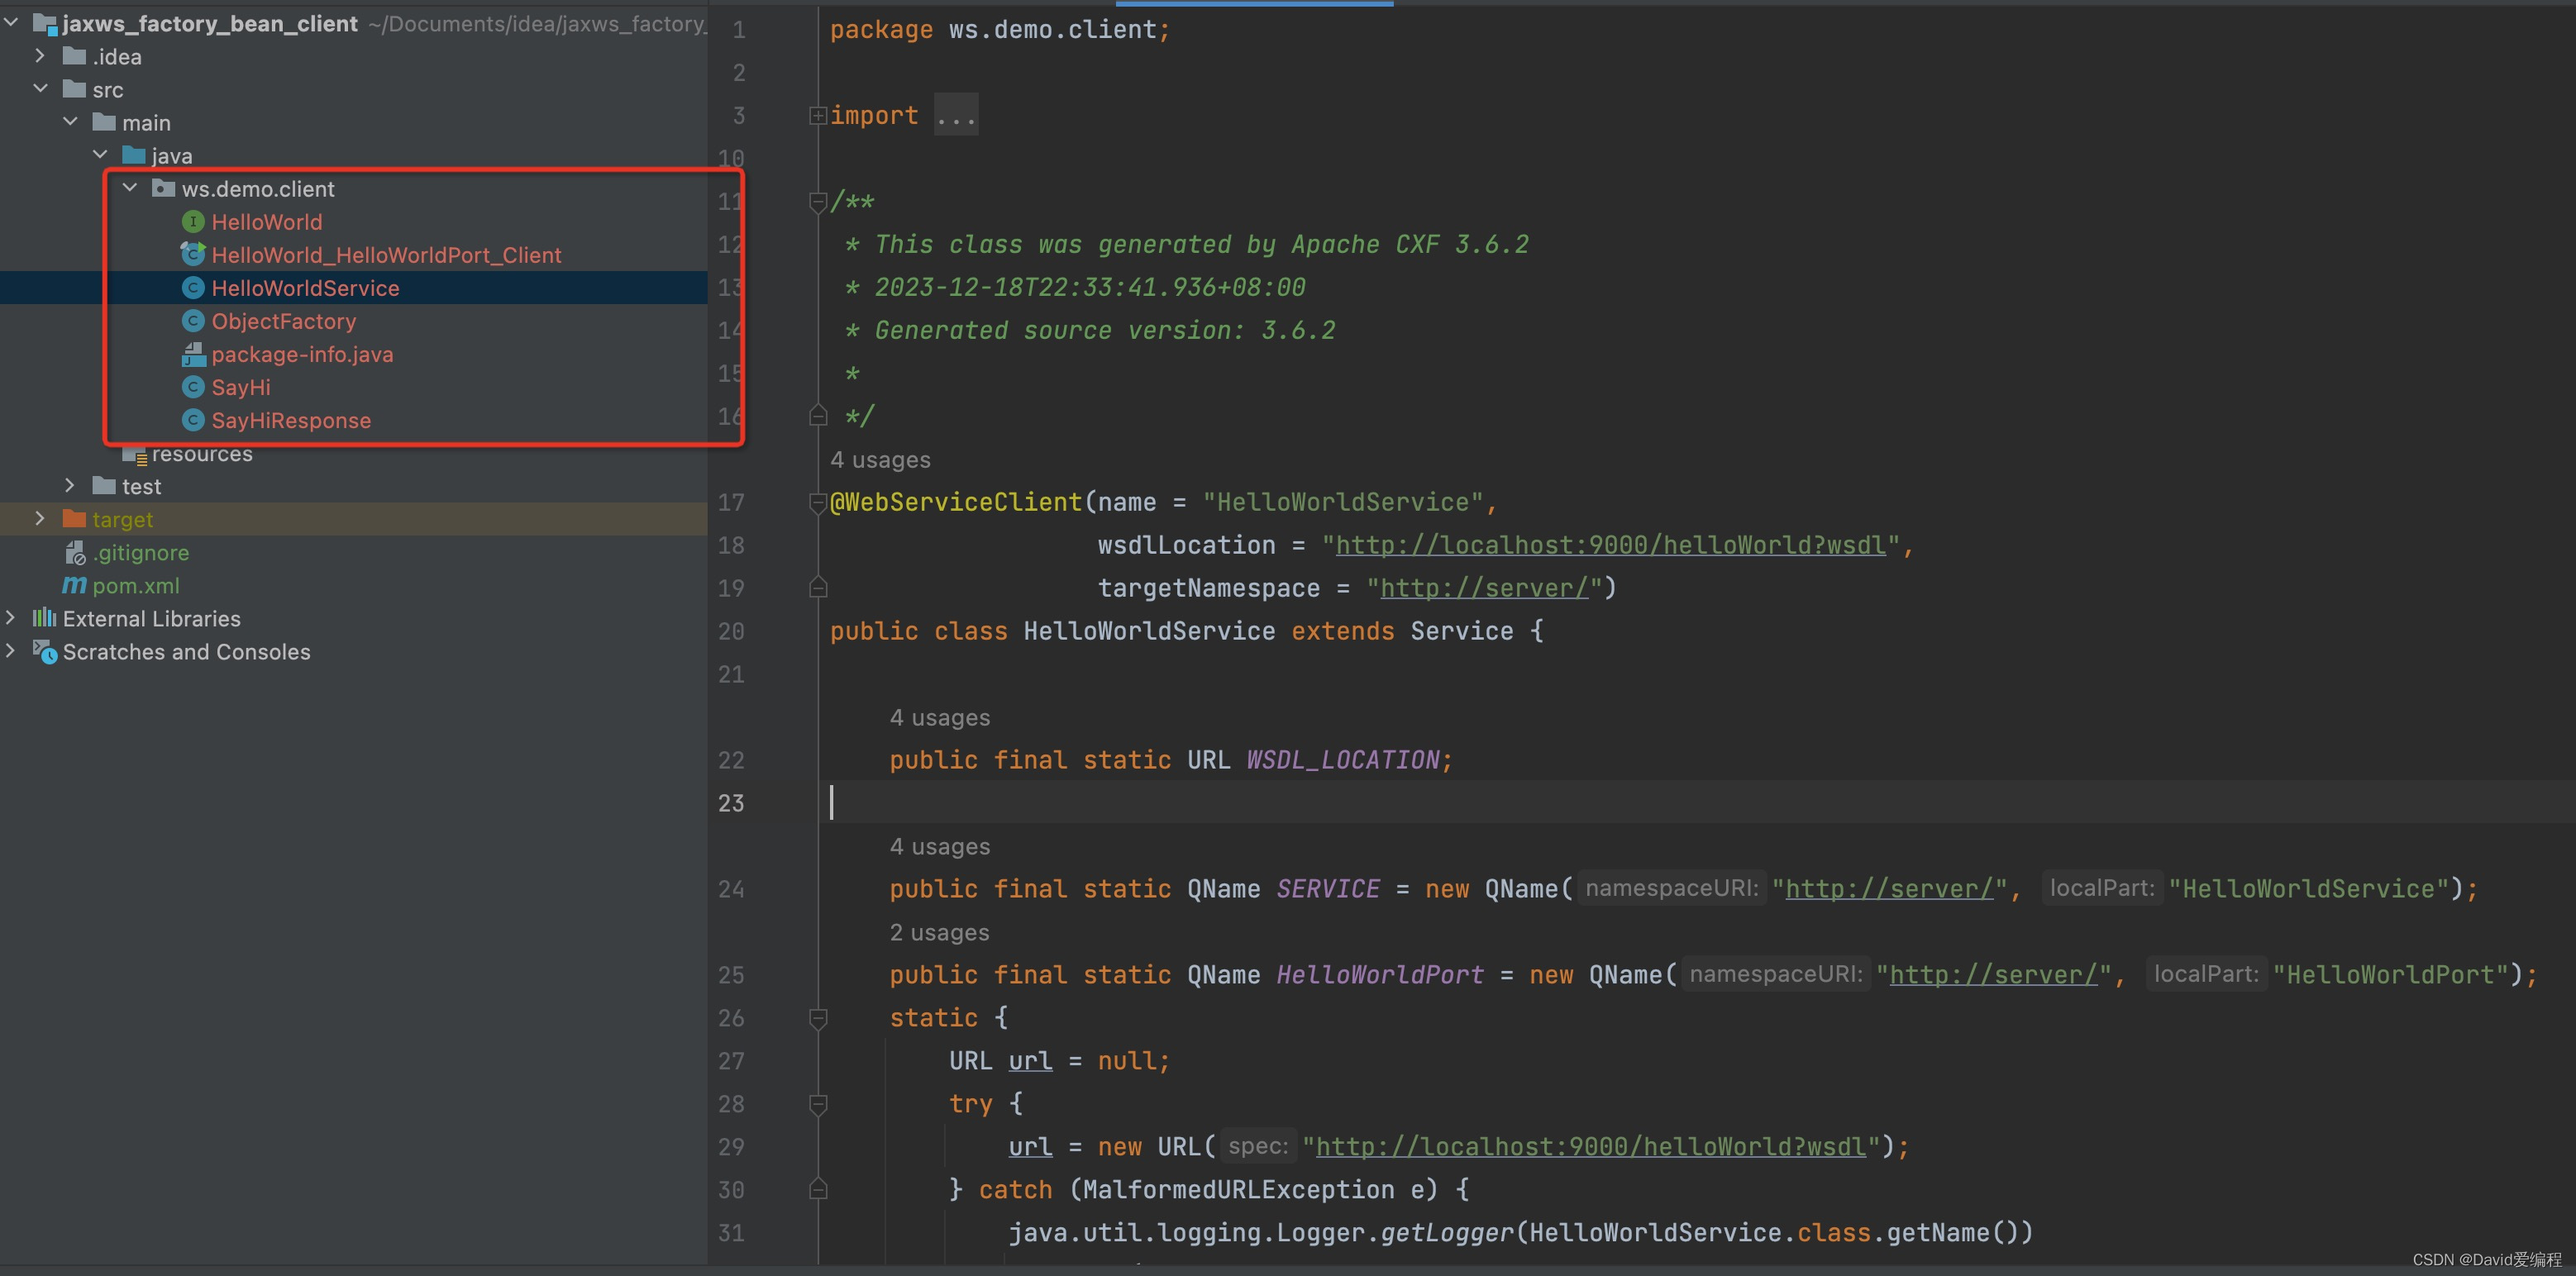
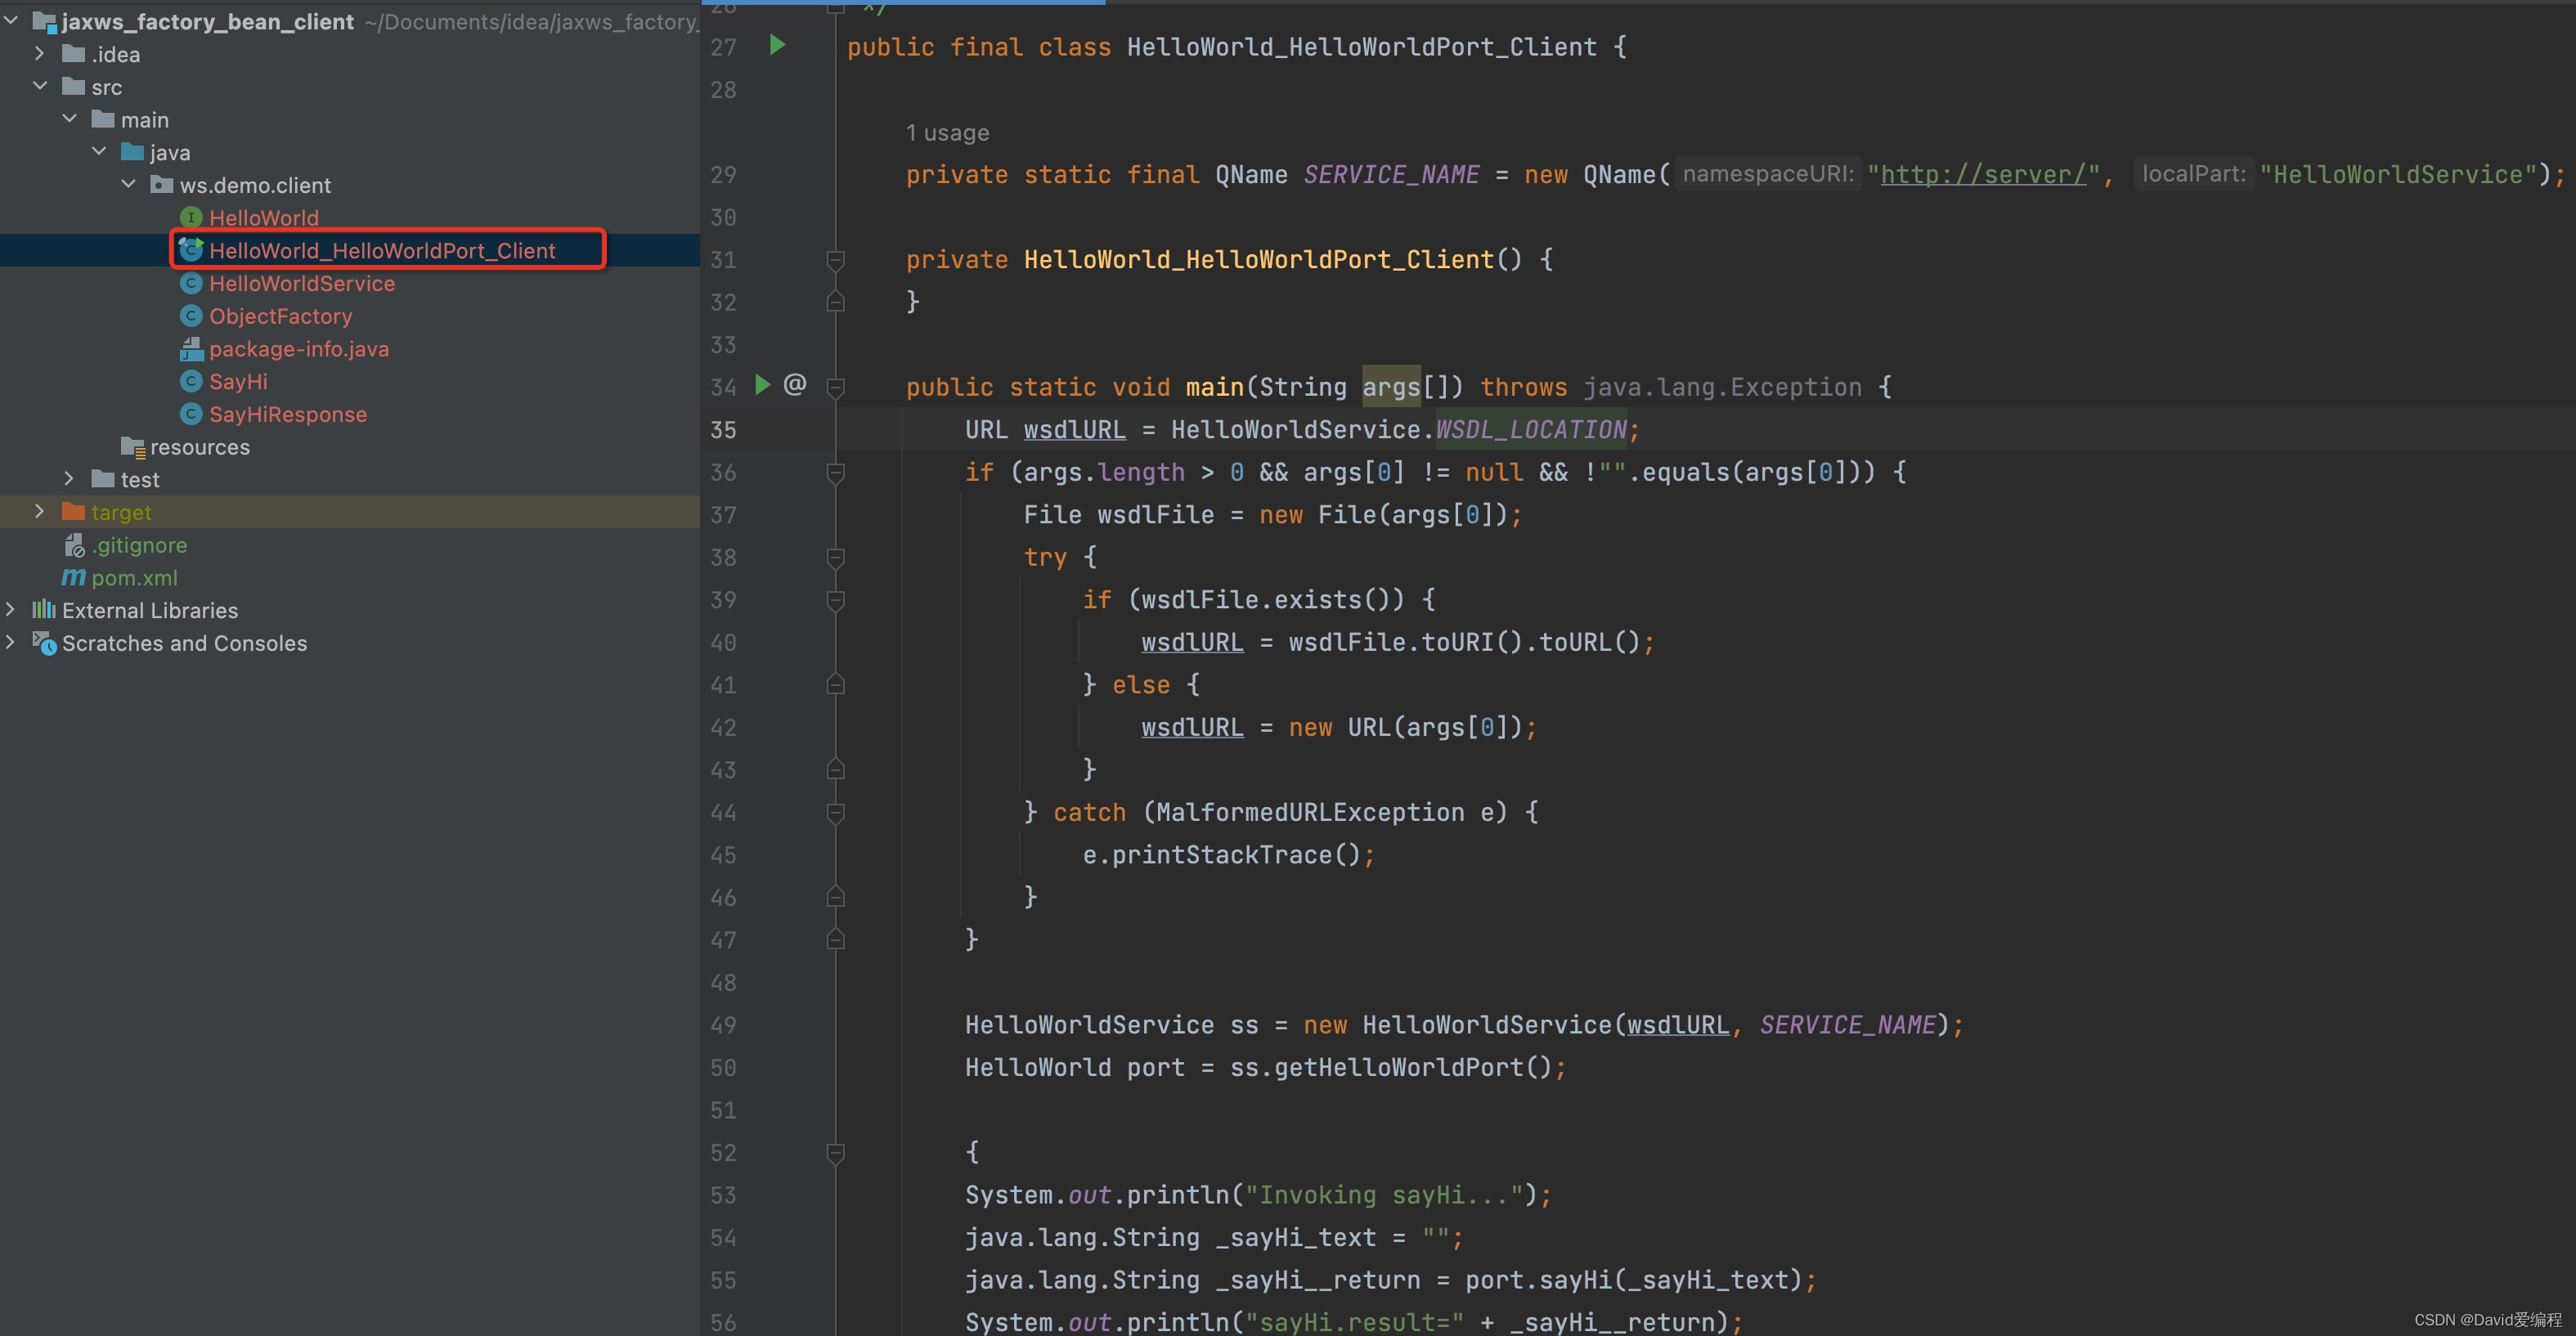
4.2.4 直接执行HelloWorld_HelloWorldPort_Client即可调用webservice服务端
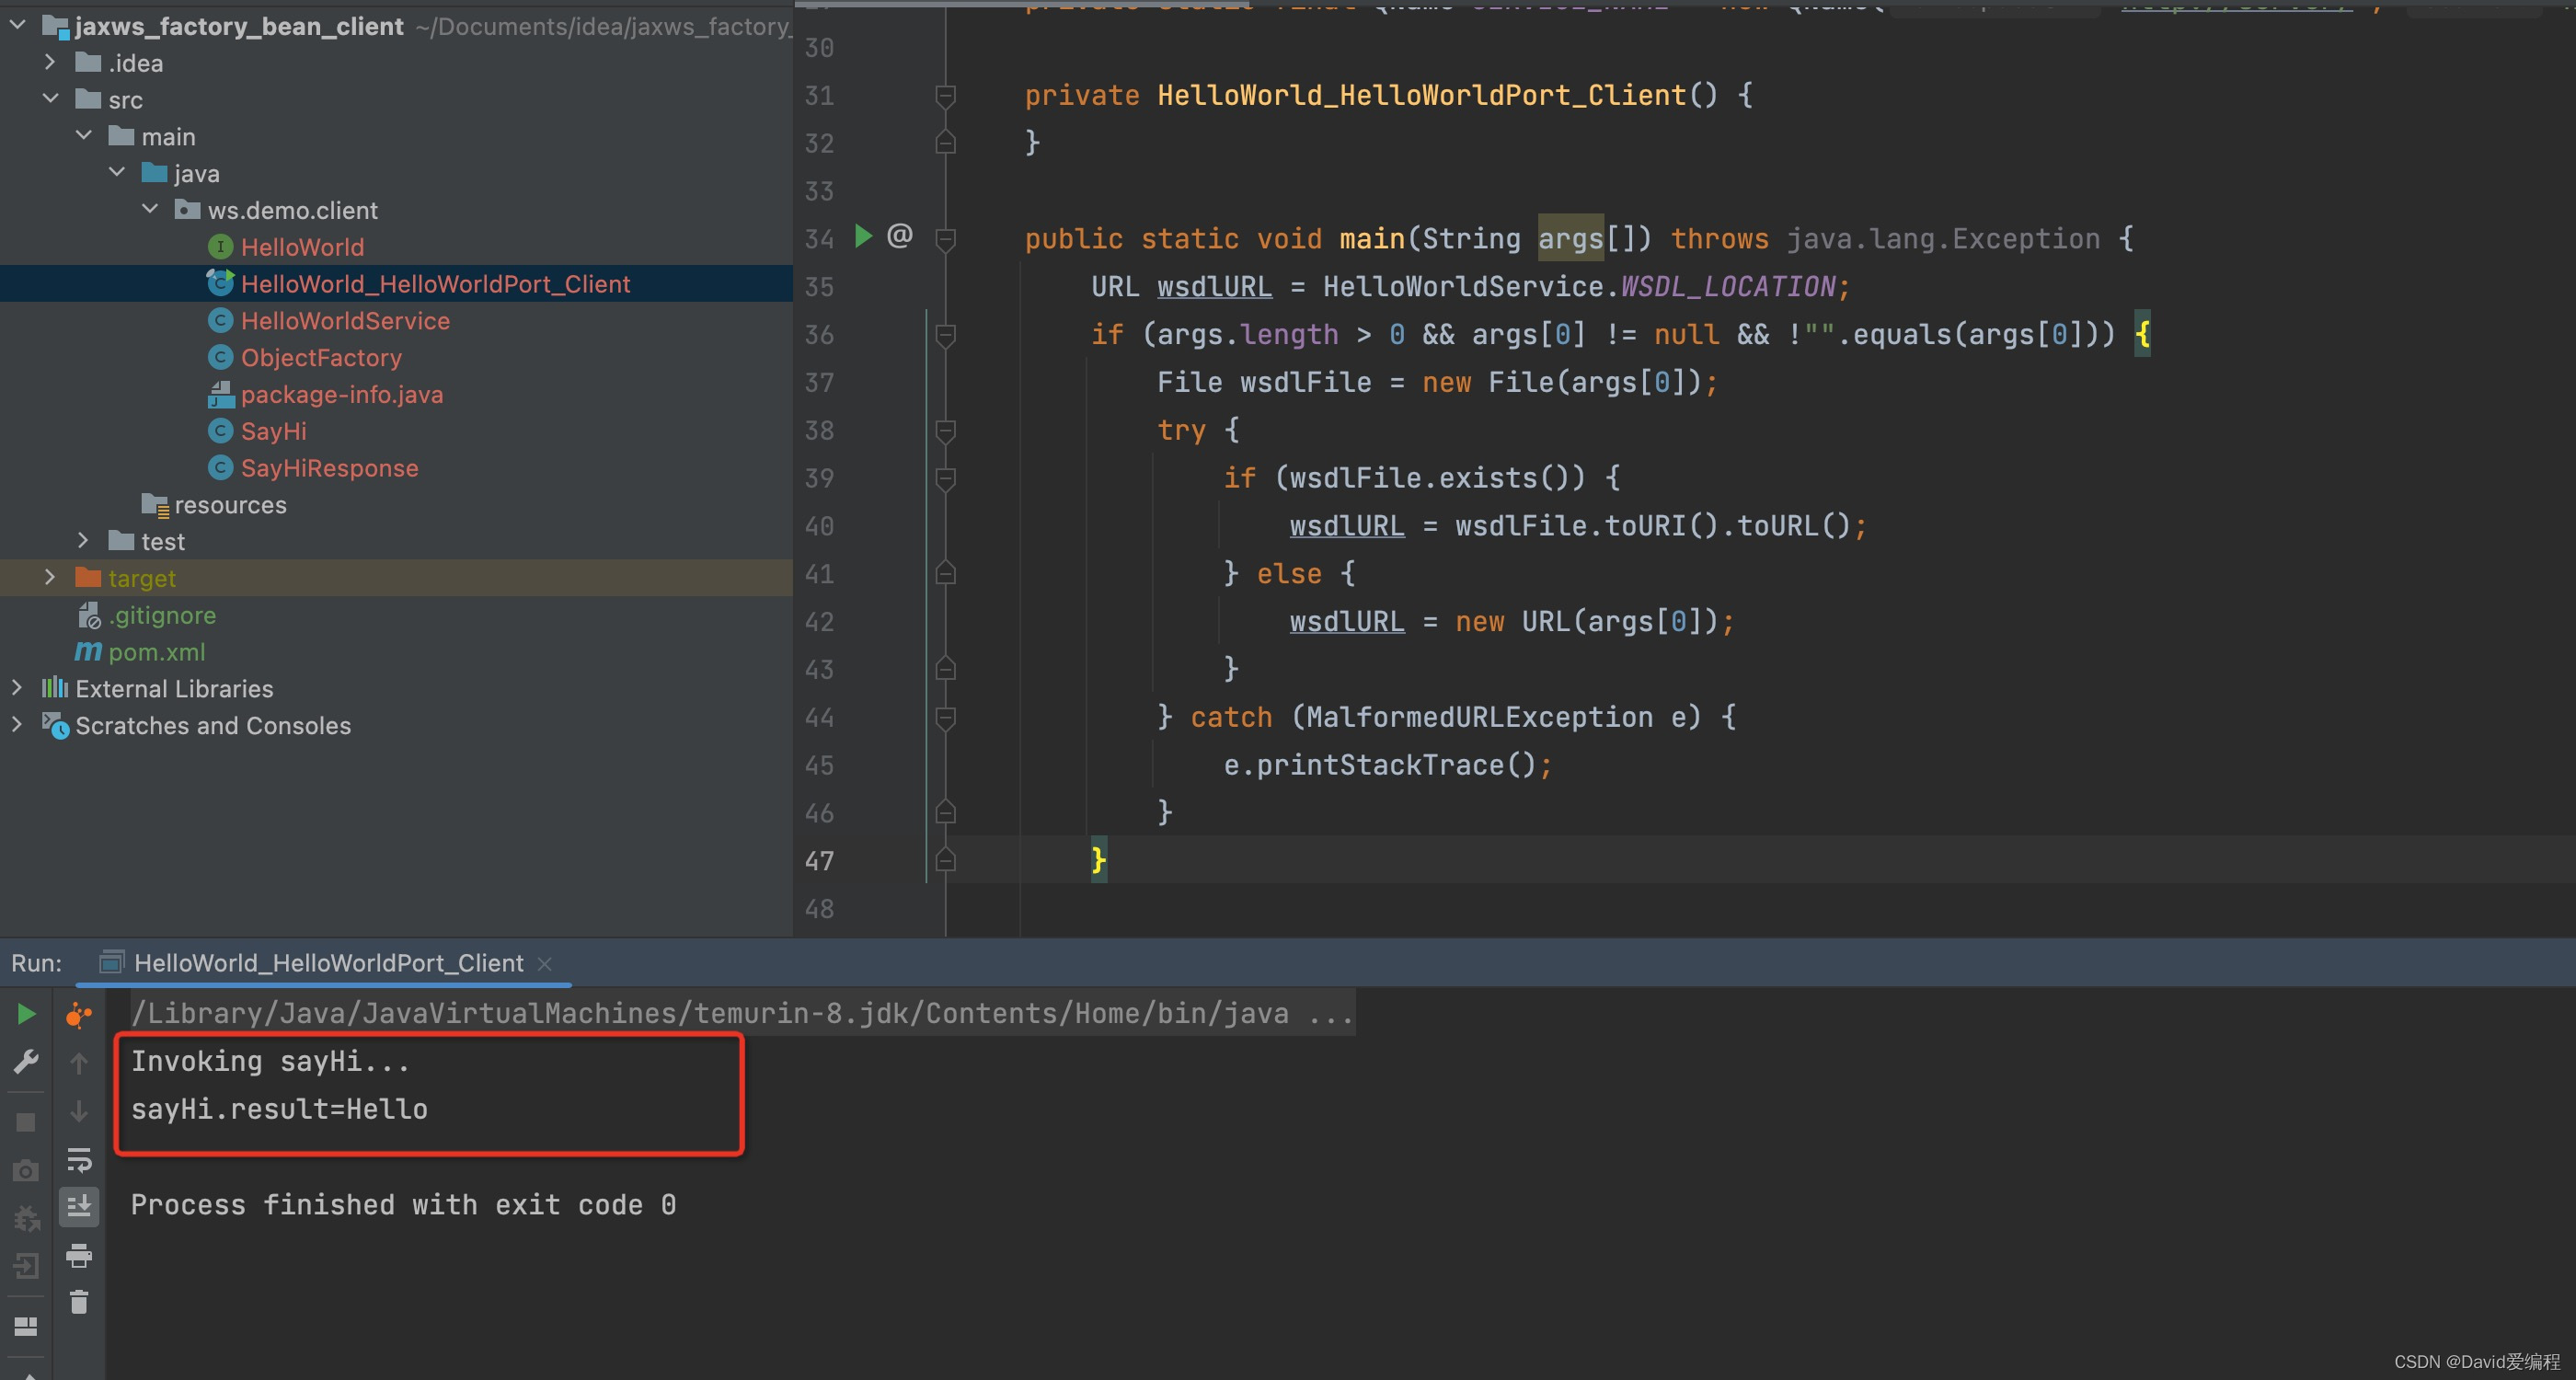
4.2.5 分析一下cxf生成的代码的结构
HelloWorld为webservice服务端定义的webservice服务接口
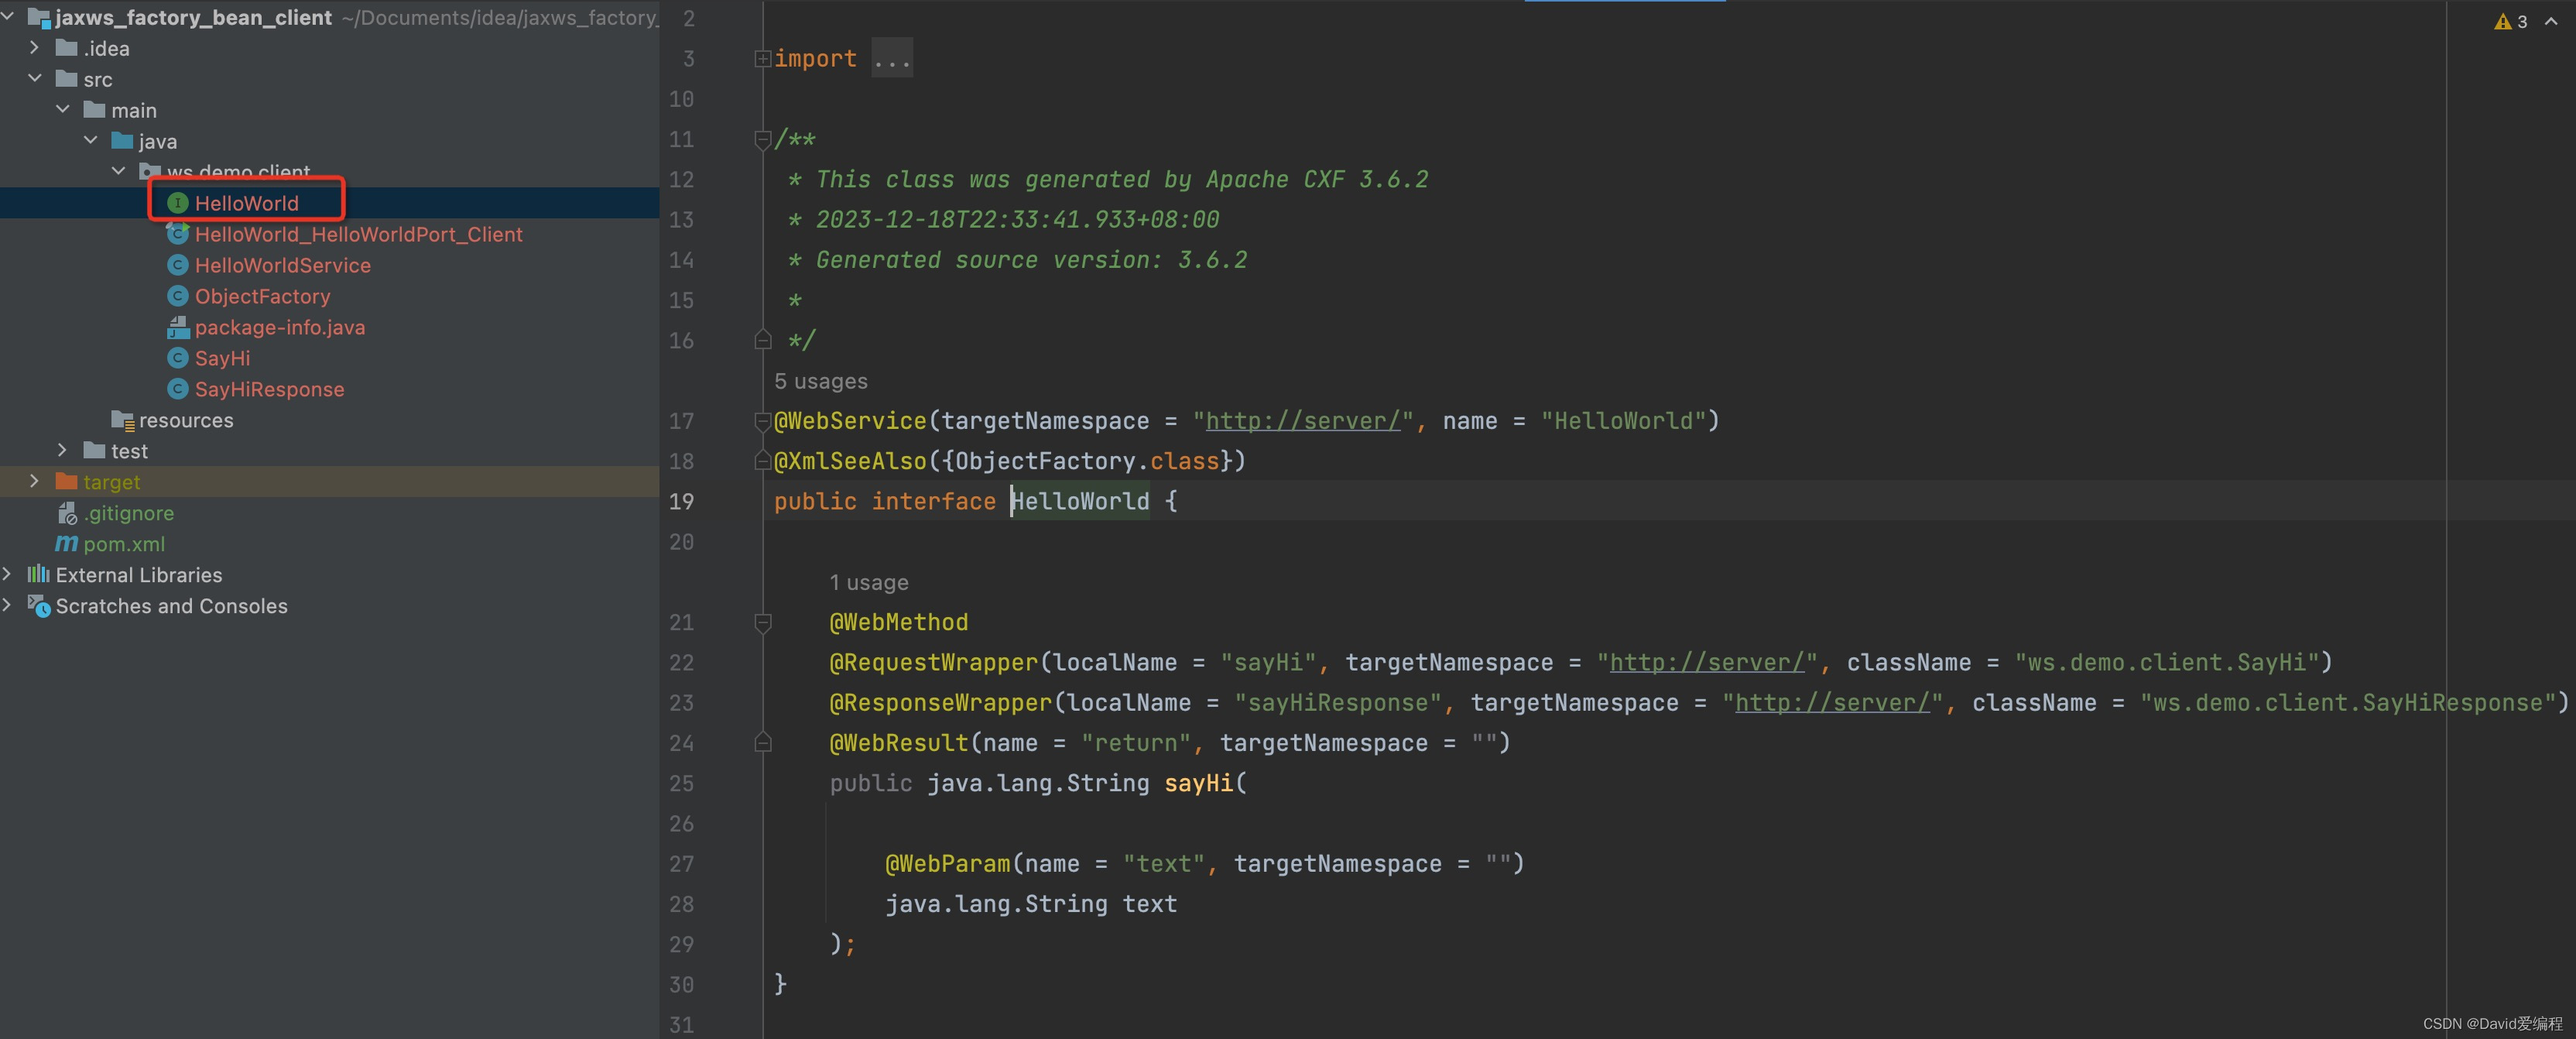
HelloWorld_HelloWorldPort_Client为调用webservice客户端,可以直接运行调用webservice服务端
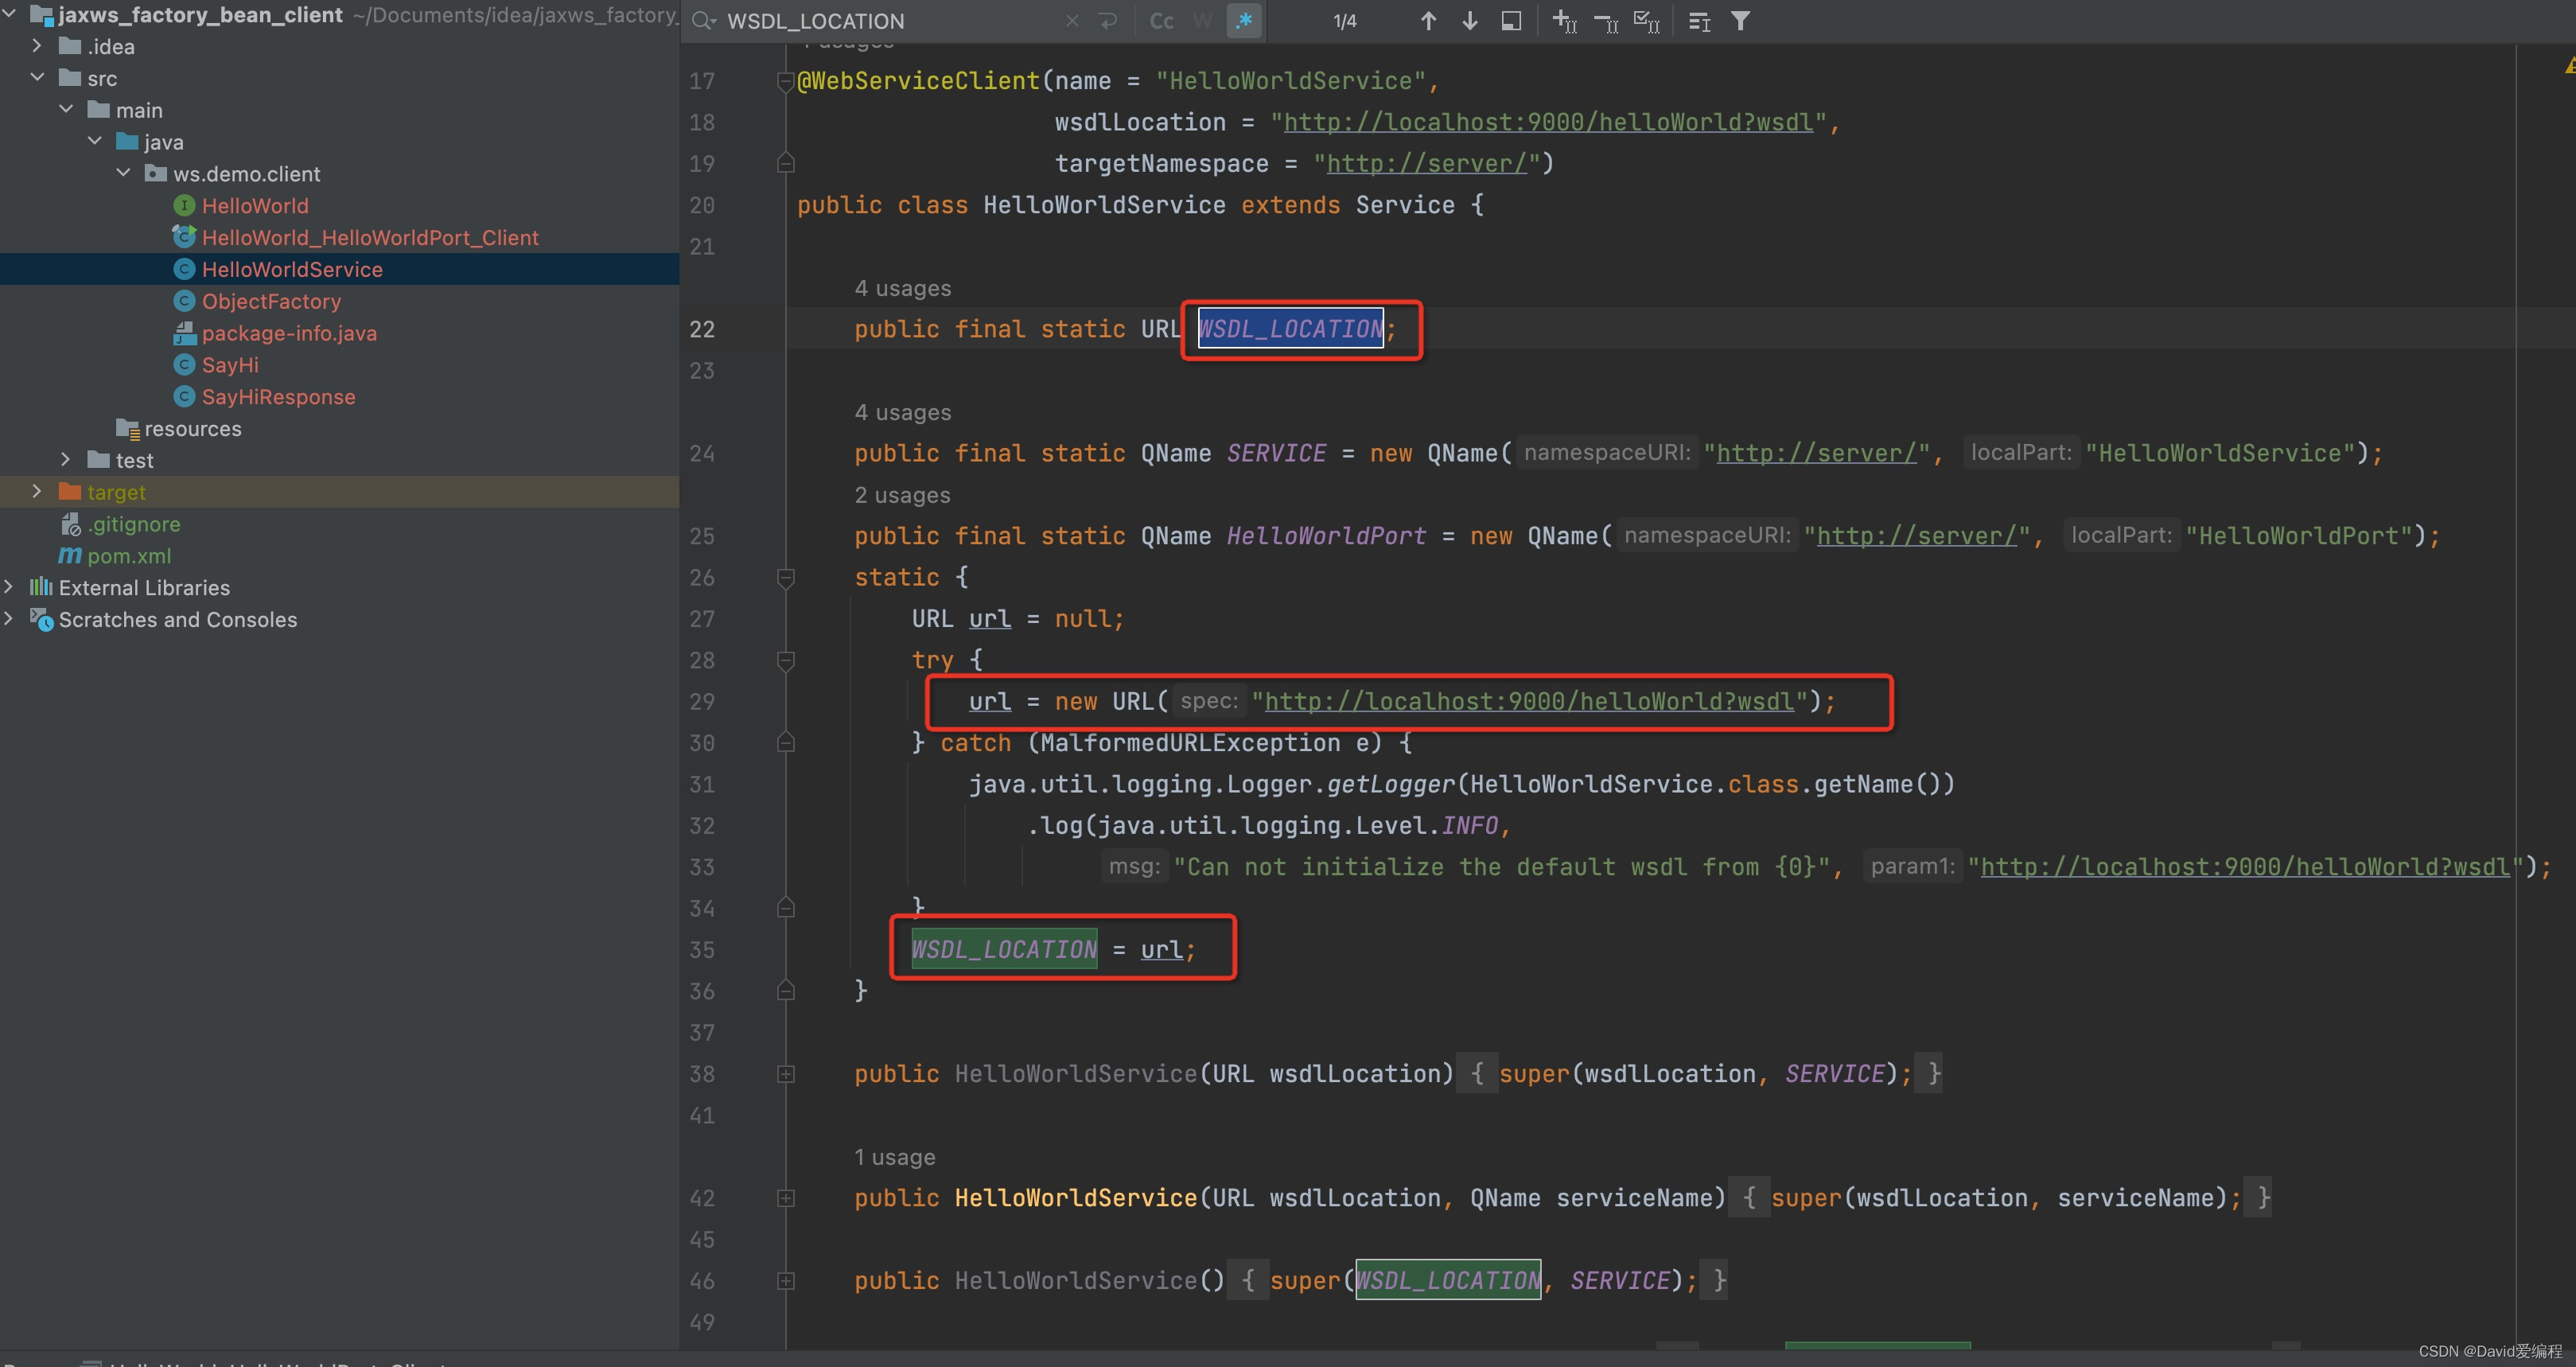
如果调用的wsdl地址有变动,可以修改HelloWorldService中的WSDL_LOCATION值为新的wsdl地址
文章来源:https://blog.csdn.net/wcwmsj/article/details/135706971
本文来自互联网用户投稿,该文观点仅代表作者本人,不代表本站立场。本站仅提供信息存储空间服务,不拥有所有权,不承担相关法律责任。 如若内容造成侵权/违法违规/事实不符,请联系我的编程经验分享网邮箱:chenni525@qq.com进行投诉反馈,一经查实,立即删除!
本文来自互联网用户投稿,该文观点仅代表作者本人,不代表本站立场。本站仅提供信息存储空间服务,不拥有所有权,不承担相关法律责任。 如若内容造成侵权/违法违规/事实不符,请联系我的编程经验分享网邮箱:chenni525@qq.com进行投诉反馈,一经查实,立即删除!
最新文章
- Python教程
- 深入理解 MySQL 中的 HAVING 关键字和聚合函数
- Qt之QChar编码(1)
- MyBatis入门基础篇
- 用Python脚本实现FFmpeg批量转换
- esp ble app_register注册报错“Register with GATT stack failed”的问题解决
- Mybatis-Plus 常用注解总结
- 代码随想录刷题题Day38
- json转换(json与对象互转、json与list互转、JSONObject与Map互转)
- 【一文详解】Java多线程和并发知识点详细总结【万字总结】
- K8S 中对 Windows 节点的利用
- 自己动手写编译器:语法解析的基本原理
- C语言中结构体在实战中的高级用法
- SpringBoot里MyBatis - SQL执行过程
- Go语言常用类型互转方法归纳
